manuals.online logo
Brands
  1. Home
  2. •
  3. Brands
  4. •
  5. Lorex
  6. •
  7. Voice Recorder
  8. •
  9. Lorex L200 Series User manual

Lorex L200 Series User manual

L200 Series Quick Setup Guide - English - R1
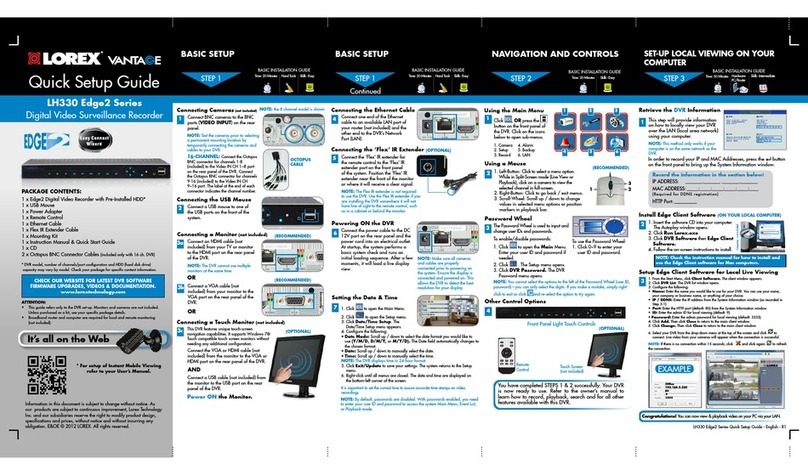
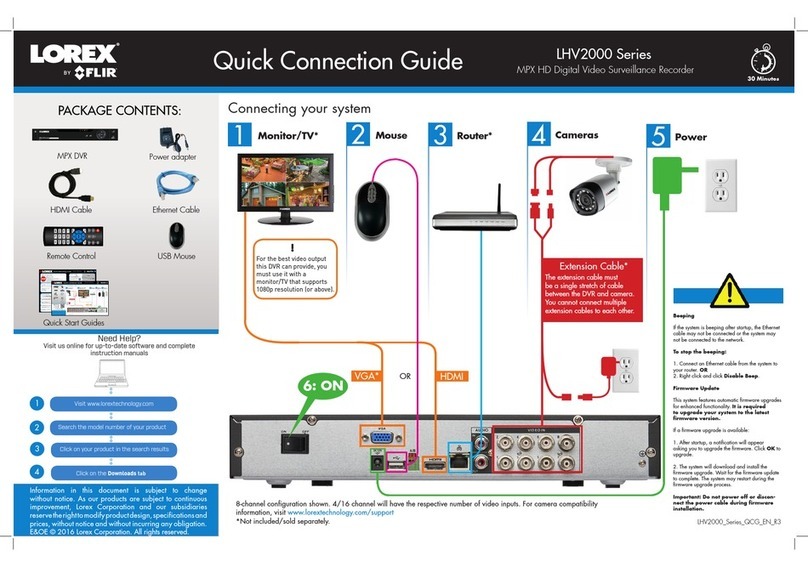
1 x DIGITAL VIDEO RECORDER WITH PRE-INSTALLED HDD*
1 x POWER ADAPTER
1 x REMOTE CONTROL
1 x INSTRUCTION MANUAL
1 x QUICK START GUIDE
1 x SOFTWARE CD
PACKAGE CONTENTS:
Network Ready, Professional Digtial Video Surveillance
Recorder
ATTENTION:
• * Channel/ Port configuration and HDD (hard disk drive) capacity may
vary by model. Check your package for specific content information.
• Monitor and Cameras are not included.
• Broadband Router and Computer are required for local and
remote monitoring (not included).
• For detailed setup and software information, please refer to
your printed User’s manual (included).
Infor mation in th is document is subject t o change without notic e. As our pro ducts ar e subject
to continuou s impr ovement, Lorex Technology I NC. and our subsidiaries reser ve the right to
modify pr oduct design, specification s and pr ices, wi thout notice and without incurr ing any
obligation. E&O E © 2009 LOR EX . All right s res erved.
L200 Series Edge DVR
Quick Setup Guide
SkillLevel
Intermediate
easy advanced
Time
under30 minutesunder15 minutes under60 minutes
HandTools Hardware
Router
HiSpeed
over60 minutes
SkillLevel
Intermediate
easy advanced
Time
under30 minutesunder15 minutes under60 minutes
HandTools Hardware
Router
HiSpeed
over60 minutes
Time: 20 Minutes Hand Tools Skills - Easy
BASIC INSTALLATION GUIDE
BASIC SETUP
STEP 1
OPTIONAL CONNECTIONS &
NAVIGATION CONTROLS (Continued)
STEP 2
SkillLevel
Intermediate
easy advanced
Time
under30 minutesunder15 minutes under60 minutes
HandTools Hardware
Router
HiSpeed
over60 minutes
Time: 20 Minutes Skills - Easy
BASIC INSTALLATION GUIDE
1
2
Connect the first camera (with
BNC connection type. Requires
additional power adaptor) to
the CH1 input. Follow the same
step to connect the additional
cameras.
SET-UP LOCAL VIEWING ON YOUR PC
STEP 3
4
Connecting the Ethernet Cable
Press the MENU button from
the front panel of the DVR (you
may use your remote control or
Mouse (optional) to view the Setup
Menu. On the Setup Menu, scroll
down using the arrow key and
select System Menu and press
Enter. On the System Menu, scroll
down to Time Set and press Enter.
NOTE: Default time is set to Eastern
Standard Time. You should change the
time based on your regional settings.
Scroll down to Time Set menu to
change Date and Time and move
to APPLY to apply the changed
settings. Once you are finished
with the settings, press the Menu
button to access the DVR menus.
Congratulations! You have completed
STEP 1 & 2 successfully. Your DVR is now
ready to use. Refer to the owner’s manual
to learn how to record, playback, use the
search features and all other features
available with this DVR.
This step relates to remote viewing over the LAN (local area network)
by using a pc located on the same network as that of the DVR.
SkillLevel
Intermediate
easy advanced
Time
under30 minutesunder15 minutes under60 minutes
HandTools Hardware
Router
HiSpeed
over60 minutes
SkillLevel
Intermediate
easy advanced
Time
under30 minutesunder15 minutes under60 minutes
HandTools Hardware
Router
HiSpeed
over60 minutes
Time: 20 Minutes Hand Tools Skills - Easy
BASIC INSTALLATION GUIDE
OPTIONAL CONNECTIONS &
NAVIGATION CONTROLS
STEP 2
LOCAL VIEWING INSTALLATION GUIDE
Time: 30 Minutes Skills - IntermediateHardware
PC/Router
SkillLevel
Intermediate
easy advanced
Time
under30 minutesunder15 minutes under60 minutes
HandTools Hardware
Router
HiSpeed
over60 minutes
SkillLevel
Intermediate
easy advanced
Time
under30 minutesunder15 minutes under60 minutes
HandTools Hardware
Router
HiSpeed
over60 minutes
It’s all on the Web
www.lorexcctv.com
For detailed setup
information, please
refer to your included
User’s Manual. For
additional information,
please visit our website
www.lorexcctv.com
5
Navigation Controls/Enter:
Record the IP and MAC Addresses in the section below:
IP ADDRESS : . . .
MAC ADDRESS : : : : : :
(Required for DDNS registration)
Retrieve the DVR Information
1. To retrieve the System
Information, press the REW button
on the Remote Control (ensure
batteries are inserted) (OR) Press the
REW button on the front panel of the
DVR (please check the user’s manual
for MENU steps).
1
2
3
Your DVR must be connected to a Router prior to powering it ON
The Virtual Keyboard control becomes
available when keyboard input is
needed for entering information such
as Names, Network Information, etc.
• Includes a~z, A~Z, 0~9 and Symbols:
!@#$%^&*()_+{}<>?-=[];,./
• Navigate using the arrow keys
 on the Front Panel or
Remote Control.
• Use the ENTER Button to choose the
letters, numbers and symbols
• Press the Menu/Exit button once the
setup is completed
• Press the navigation controls to move
Up, Down, Left and Right in the Main
Menu and Search menus.
• Press the ENTER Button to select and
change the values in a menu.
• Pressing the ENTER Button when
displaying live video will change the on
screen view to 8 Channel View (L208
Series Only).
THE DEFAULT DVR PASSWORD IS 111111
Connect Cameras & Monitor (not included) to the DVR:
NOTE: Test the cameras prior to selecting a permanent
mounting location by temporarily connecting the Cameras
and Cables to your DVR.
Connect one end of the Ethernet
cable (for remote monitoring) to
one of the router’s (not included)
LAN ports and the other end to
the DVR’s Network Port.
3
Connecting the Power Cable
Connect one end of the Power
cable to the DVR, the other end
to an electrical outlet. This unit
powers ON once the MASTER
POWER BUTTON at the back of
the DVR is turned ON.
Setting the Date & Time
1VGA VIDEO OUTPUT (Optional
Connection) - Video Output port
to connect the unit to a Computer
Monitor.
6
Using the Virtual Keyboard:
Optional Connections:
2BNC VIDEO OUTPUT - Video Output
port to connect the unit to another
recording device or monitor
3PS/2 (Optional Connection) - PS/2
port to connect a serial Mouse
to the DVR unit. Used for mouse
navigation of the menus.
4USB PORT - Provides connection
port for USB Flash Drives
(thumbsticks).
11. RECORD
2. Not Used
3. QUAD2 (CH5~8)
4. ENTER
5. Not Used
6. VIEW CH8~CH1
7. REVERSE
8. PLAY / PAUSE
9. STOP
10. PTZ MENU
11. VIEW CH1~CH8
12. MENU / EXIT
13. QUAD1 (CH1~4)
14. SYSTEM SEARCH
15. FAST FORWARD
16. MUTE AUDIO
17. VOLUME UP
18. VOLUME DOWN
Using the Remote Control:
2
Using a Mouse:
A mouse can be used with
this system for playback and
menu controls. With system
OFF, connect a mouse to the
PS/2 port on the rear panel
of the system. Once the unit
has loaded, the mouse will
be recognized by the system.
DVR Setup:
• The Setup window is displayed when
the right mouse button is clicked in
viewing mode.
• When the mouse is moved, the purple
highlight box will switch between
menu options.
• Click the left mouse button to access a
menu selection
• To change a setting, click the left
button of mouse on the or icons
displayed onscreen.
• Once the setting has been changed,
click the right mouse button to exit the
menu.
Left-Button Right-Button
Scroll-Wheel
REW BUTTON – Opens the System
Information window (in live view
mode), and Reverses the playback of
the selected Video (2x,4x,8x).
Insert the Lorex Client Software CD
into your local computer’s CD ROM
drive and proceed with the installation.
Click the Lorex Client Button on the
software CD to save the EXE file to your
computer’s desktop. Double click the
.exe file to run the software.
Confirm that the Lorex Client is
displaying the Viewer screen.
Click on the Connect button located
in the lower left side of the screen.
Connect to the DVR:
Install & Run Software (on your local computer):
Computer - not included
L200 Series Quick Setup Guide - English - R1
SET-UP LOCAL VIEWING ON YOUR PC
STEP 3
CONTINUED
4Enter the IP address (recorded in Step 2-1) and
DVR password information and press the
Connect button to view the Local Live Site.
SET-UP INTERNET REMOTE SECURITY
MONITORING
STEP 4
Port Forward your Router:
1Port forward your router first before proceeding with the set-up.
You must forward Port: 8841
All routers are different. To port forward your router, please
refer to your router’s user manual.
A router configuration guide featuring the most commonly used
routers in the market is available on www.lorexcctv.com/support
in the Consumer’s Guide Section. An example of a port forwarding
screen is shown for illustration purposes.
System
System
8841 8841
80 80
12
12
EXAMPLE
2Open your web browser (Internet Explorer by default) and enter
http://www.lorexddns.net in the address bar.
DDNS (Dynamic Domain Name System) Set-up:
http://www.lorexddns.net
Create Account
3Open your web browser (Internet Explorer by default) and enter
http://www.lorexddns.net in the address bar.
Create Account:
1. FOR PRODUCT LICENSE select the L200 Series option
from the drop down menu.
2. FOR PRODUCT CODE enter the Monitor’s MAC address
(recorded in step 3, section 1).
3. FOR URL REQUEST enter a unique URL name (e.g.
tomsmith). Note: URL name should not be more than 15 characters.
Complete New Account Information:
12
3
4
An automated REGISTRATION CONFIRMATION EMAIL will be
sent to your email. Print and Save this confirmation. You will
need this information to access your System remotely.
Registration Email:
Service Provider: dns1.lorexddns.net
Domain Name: tomsmith.lorexddns.net
User ID: tomsmith
Password: (your password)
5
SET-UP INTERNET REMOTE SECURITY
MONITORING
STEP 4
CONTINUED
Enter DDNS Set-up on your DVR:
6
Once the DDNS settings have been configured online,
the information must be entered on the DVR to allow for
remote connection via the Lorex Client Software:
1. Access the Setup screen by pressing the MENU button
on the front of the DVR. Navigate to the SYSTEM
option, and press the ENTER button to access the
System Setup.
2. Navigate to the NETWORK option, and press the Enter
button to access the Network settings. Select the
DDNS option, and press the ENTER button to enter
the DDNS SETUP.
3. Set the DDNS Enable to YES. Enter the information
received in email using the Virtual Keyboard:
• DDNS ID
• DDNS Password
• Domain Name Select OK to save the settings.
4. Select the Status option to check the connection. A
SUCCESS message will appear if the DVR successfully
connects the DDNS Server on the Internet.
5. Remember to Save and Exit.
SET-UP INTERNET REMOTE SECURITY
MONITORING
STEP 4
CONTINUED
Congratulations! You have completed Step 3 & 4 successfully.
You can now view, playback images on your Local Computer
via LAN (local area network) and Remotely control the system
on your Remote computer over the Internet (Wide Area
Network).
LOCAL VIEWING INSTALLATION GUIDE
Time: 30 Minutes Skills - IntermediateHardware
PC/Router
SkillLevel
Intermediate
easy advanced
Time
under30 minutesunder15 minutes under60 minutes
HandTools Hardware
Router
HiSpeed
over60 minutes
SkillLevel
Intermediate
easy advanced
Time
under30 minutesunder15 minutes under60 minutes
HandTools Hardware
Router
HiSpeed
over60 minutes
SkillLevel
Intermediate
easy advanced
Time
under30 minutesunder15 minutes under60 minutes
HandTools Hardware
Router
HiSpeed
over60 minutes
SkillLevel
Intermediate
easy advanced
Time
under30 minutesunder 15 minutes under60minutes
HandTools Hardware
Router
HiSpeed
over60 minutes
REMOTE VIEWING INSTALLATION GUIDE
Time: 60 Minutes Skills - AdvancedHardware
PC/Router
SkillLevel
Intermediate
easy advanced
Time
under30 minutesunder15 minutes under60 minutes
HandTools Hardware
Router
HiSpeed
over60 minutes
SkillLevel
Intermediate
easy advanced
Time
under30 minutesunder15 minutes under60 minutes
HandTools Hardware
Router
HiSpeed
over60 minutes
SkillLevel
Intermediate
easy advanced
Time
under30 minutesunder 15 minutes under60minutes
HandTools Hardware
Router
HiSpeed
over60 minutes
REMOTE VIEWING INSTALLATION GUIDE
Time: 60 Minutes Skills - AdvancedHardware
PC/Router
SkillLevel
Intermediate
easy advanced
Time
under30 minutesunder15 minutes under60 minutes
HandTools Hardware
Router
HiSpeed
over60 minutes
Enter the DVR Connection Information:
7
8
It’s all on the Web
www.lorexcctv.com
For detailed setup
information, please
refer to your included
User’s Manual. For
additional information,
please visit our website
www.lorexcctv.com
9
ATTENTION: You MUST enter your DDNS information LOCALLY
before attempting remote access.
Local Live Site
Install Software (on your remote computer):
Insert the Lorex Client Software CD
into your remote computer’s CD ROM
drive and proceed with the installation.
Click the Lorex Client Button on the
software CD to save the EXE file to your
computer’s desktop. Double click the
.exe file to run the software.
Computer - not included
Confirm that the Lorex Client is
displaying the Viewer screen.
Click on the Connect button
located in the lower left side of
the screen.
Connect to the DVR:
Enter the DVR Connection Information:
Remote Live Site
1. Enter the DDNS Domain Name from the
Registration Confirmation Email sent to you.
NOTE: Only the first part of the address should
be used (i.e. only use ‘myurl’ from the address
myurl.lorexddns.net).
2. Enter the DVR TCP/IP Port number (8841 by
default).
3. Enter the DVR Password (111111 by default).
4. Press the Connect button to connect to the
Remote Live Site.
SET-UP INTERNET REMOTE SECURITY
MONITORING
STEP 4
CONTINUED
SkillLevel
Intermediate
easy advanced
Time
under30 minutesunder15 minutes under60 minutes
HandTools Hardware
Router
HiSpeed
over60 minutes
SkillLevel
Intermediate
easy advanced
Time
under30 minutesunder 15 minutes under60minutes
HandTools Hardware
Router
HiSpeed
over60 minutes
REMOTE VIEWING INSTALLATION GUIDE
Time: 60 Minutes Skills - AdvancedHardware
PC/Router
SkillLevel
Intermediate
easy advanced
Time
under30 minutesunder15 minutes under60 minutes
HandTools Hardware
Router
HiSpeed
over60 minutes

Other manuals for L200 Series

1

Other Lorex Voice Recorder manuals

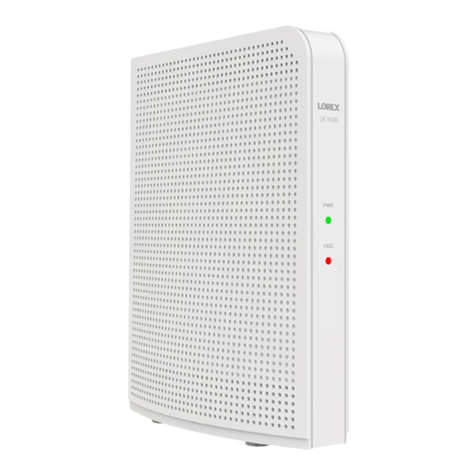
Lorex LNK7000 Series Instruction Manual

Lorex

Lorex LNK7000 Series Instruction Manual

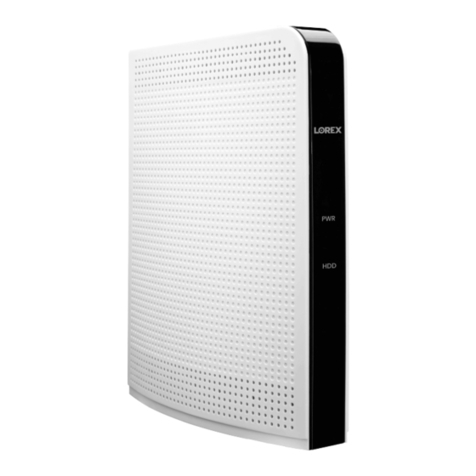
Lorex L4248 Series User manual

Lorex

Lorex L4248 Series User manual

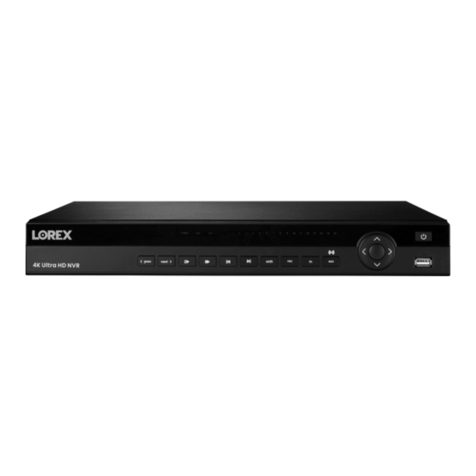
Lorex LH330 Edge2 Series User manual

Lorex

Lorex LH330 Edge2 Series User manual

Lorex LHV2000 series Instruction Manual

Lorex

Lorex LHV2000 series Instruction Manual

Lorex LNR6100 Series Instruction Manual

Lorex

Lorex LNR6100 Series Instruction Manual

Lorex LNR6100 Series Operator's manual

Lorex

Lorex LNR6100 Series Operator's manual

Lorex N882 Series User manual

Lorex

Lorex N882 Series User manual

Lorex L222A8 Series User manual

Lorex

Lorex L222A8 Series User manual

Lorex Vantage LH020 Blackbox 2 User manual

Lorex

Lorex Vantage LH020 Blackbox 2 User manual

Lorex DV700 Series Instruction Manual

Lorex

Lorex DV700 Series Instruction Manual

Popular Voice Recorder manuals by other brands

Acroprint ES1000 user manual

Acroprint

Acroprint ES1000 user manual

Philips VoiceTracer DVT1250 user manual

Philips

Philips VoiceTracer DVT1250 user manual

Philips LFH7177 - SpeechExec Transcription Set Specifications

Philips

Philips LFH7177 - SpeechExec Transcription Set Specifications

Global Specialties GSK-118 Quick start manual

Global Specialties

Global Specialties GSK-118 Quick start manual

Olympus VN-900 instructions

Olympus

Olympus VN-900 instructions

Silent Witness SW2300 user manual

Silent Witness

Silent Witness SW2300 user manual

Panasonic RR830 - Desktop Cassette Transcriber operating instructions

Panasonic

Panasonic RR830 - Desktop Cassette Transcriber operating instructions

thomann Stairville DR-1 user manual

thomann

thomann Stairville DR-1 user manual

IR-Link ZiLog user manual

IR-Link

IR-Link ZiLog user manual

Tascam DA-60MKII Quick tips

Tascam

Tascam DA-60MKII Quick tips

March Networks 9000 Series installation guide

March Networks

March Networks 9000 Series installation guide

Sony TCM-210DV Specifications

Sony

Sony TCM-210DV Specifications

Tascam DR-680 Release notes

Tascam

Tascam DR-680 Release notes

Sytech SY-1709 user manual

Sytech

Sytech SY-1709 user manual

YOKOGAWA SL1400 ScopeCorder LITE user manual

YOKOGAWA

YOKOGAWA SL1400 ScopeCorder LITE user manual

Philips VoiceTracer DVT4110 quick start guide

Philips

Philips VoiceTracer DVT4110 quick start guide

Enforcement Technology Group 33012 operating manual

Enforcement Technology Group

Enforcement Technology Group 33012 operating manual

Show Tec TR-512 user manual

Show Tec

Show Tec TR-512 user manual

manuals.online logo
manuals.online logoBrands
  • About & Mission
  • Contact us
  • Privacy Policy
  • Terms and Conditions

Copyright 2025 Manuals.Online. All Rights Reserved.