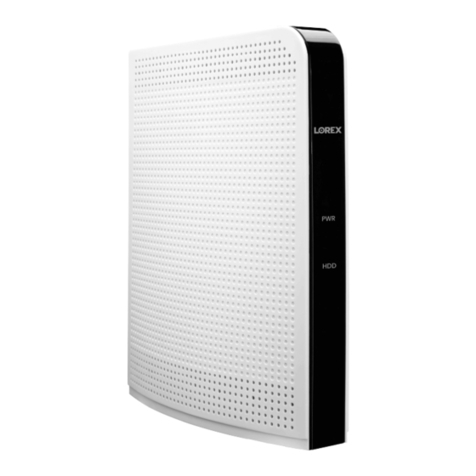
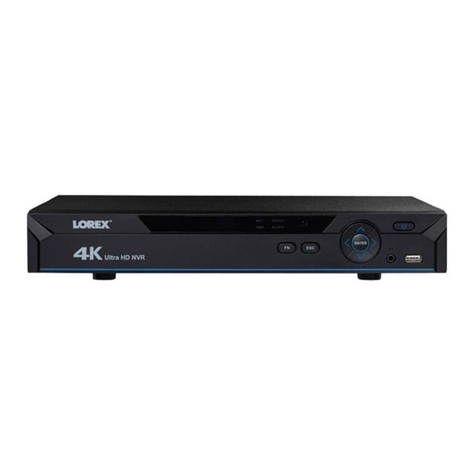
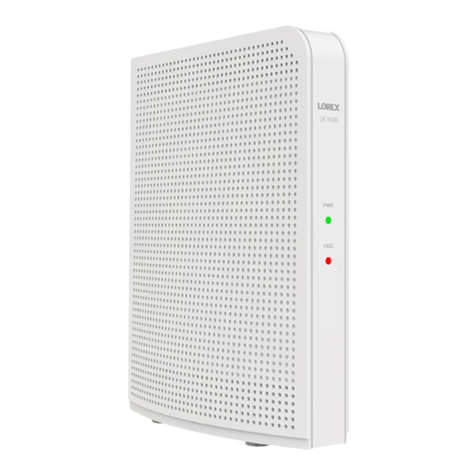
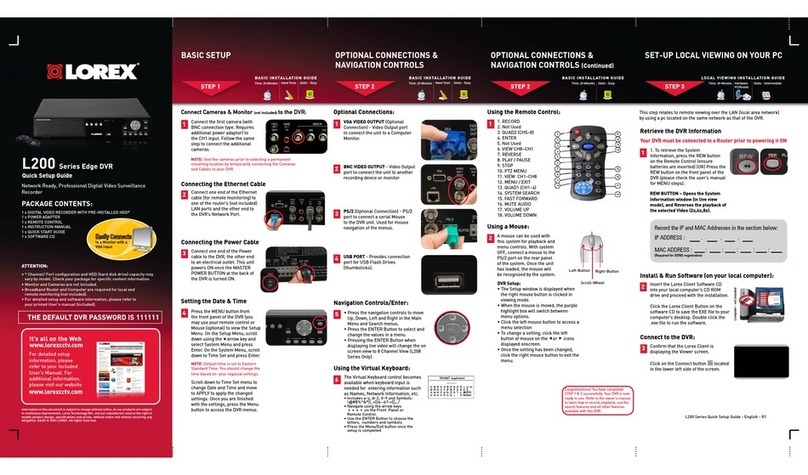
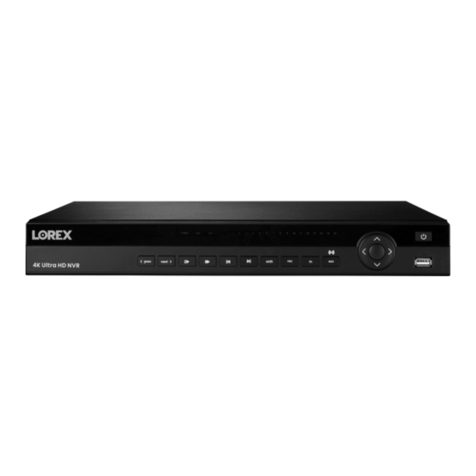
Lorex LH330 Edge2 Series User manual

LH330 Edge2 Series Quick Setup Guide - English - R1
SkillLevel
Intermediate
easy advanced
Time
under30 minutesunder15 minutes under60 minutes
HandTools Hardware
Router
HiSpeed
over60 minutes
SkillLevel
Intermediate
easy advanced
Time
under30 minutesunder15 minutes under60 minutes
HandTools Hardware
Router
HiSpeed
over60 minutes
Time: 20 Minutes Time: 20 Minutes Time: 20 Minutes
Hand Tools Hand ToolsSkills - Easy Skills - Easy Skills - Easy
BASIC INSTALLATION GUIDE BASIC INSTALLATION GUIDE BASIC INSTALLATION GUIDE BASIC INSTALLATION GUIDE
SkillLevel
Intermediate
easy advanced
Time
under30 minutesunder15 minutes under60 minutes
HandTools Hardware
Router
HiSpeed
over60 minutes
SkillLevel
Intermediate
easy advanced
Time
under30 minutesunder15 minutes under60 minutes
HandTools Hardware
Router
HiSpeed
over60 minutes
SkillLevel
Intermediate
easy advanced
Time
under30 minutesunder15 minutes under60 minutes
HandTools Hardware
Router
HiSpeed
over60 minutes
Digital Video Surveillance Recorder
LH330 Edge2 Series
Quick Setup Guide
ATTENTION:
• ThisguiderefersonlytotheDVRset-up.Monitorsandcamerasarenotincluded.
Unlesspurchasedasakit,seeyourspecificpackagedetails.
• Broadbandrouterandcomputerarerequiredforlocalandremotemonitoring
(notincluded).
Informationinthisdocumentissubjecttochangewithoutnotice.As
ourproductsaresubjecttocontinuousimprovement,LorexTechnology
Inc.andoursubsidiariesreservetherighttomodifyproductdesign,
specificationsandprices,withoutnoticeandwithoutincurringany
obligation.E&OE©2012LOREX.Allrightsreserved.
* For setup of Instant Mobile Viewing
refer to your User’s Manual.
It’s all on the Web
Time: 30 Minutes Skills - Intermediate
Hardware:
PC/Router
SkillLevel
Intermediate
easy advanced
Time
under30 minutesunder15 minutes under60 minutes
HandTools Hardware
Router
HiSpeed
over60 minutes
SkillLevel
Intermediate
easy advanced
Time
under30 minutesunder15 minutes under60 minutes
HandTools Hardware
Router
HiSpeed
over60 minutes
Congratulations!Youcannowview&playbackvideoonyourPCviayourLAN.
1xEdge2DigitalVideoRecorderwithPre-InstalledHDD*
1xUSBMouse
1xPowerAdapter
1xRemoteControl
1xEthernetCable
1xFlexIRExtenderCable
1xMountingKit
1xInstructionManual&QuickStartGuide
1xCD
2xOctopusBNCConnectorCables(includedonlywith16ch.DVR)
*DVRmodel,numberofchannels/portconfigurationandHDD(harddiskdrive)
capacitymayvarybymodel.Checkyourpackageforspecificcontentinformation.
PACKAGE CONTENTS:
4
Connecting the Ethernet Cable
ConnectoneendoftheEthernet
cabletoanavailableLANportof
yourrouter(notincluded)andthe
otherendtotheDVR’sNetwork
Port(LAN).
2
Using a Mouse
1.Left-Button:Clicktoselectamenuoption.
WhileinSplit-Screenmode(LiveViewor
Playback),clickonacameratoviewthe
selectedchannelinfull-screen.
2.Right-Button:Clicktogoback/exitmenus.
3.Scroll-Wheel:Scrollup/downtochange
valuesinselectedmenuoptionsorposition
markersinplaybackbar.
1 2
3
YouhavecompletedSTEPS1&2successfully.YourDVR
is now ready to use. Refer to the owner’s manual to
learnhowtorecord,playback,searchandforallother
featuresavailablewiththisDVR.
Using the Main Menu
Click ,ORpressthe
buttononthefrontpanelof
theDVR.Clickontheicons
belowtoopensub-menus.
1
Other Control Options
4
Retrieve the DVR Information
InordertorecordyourIPandMACAddresses,pressthe button
onthefrontpaneltobringuptheSystemInformationwindow.
1Thisstepwillprovideinformation
onhowtolocallyviewyourDVR
overtheLAN(localareanetwork)
usingyourcomputer.
NOTE:Thismethodonlyworksifyour
computerisonthesamenetworkasthe
DVR.
BASIC SETUPBASIC SETUP NAVIGATION AND CONTROLS SET-UP LOCAL VIEWING ON YOUR
COMPUTER
Continued
STEP1 STEP2 STEP3
STEP1
6
Powering ON the DVR
ConnectthepowercabletotheDC
12Vportontherearpanelandthe
powercordintoanelectricaloutlet.
Atstartup,thesystemperformsa
basicsystemcheckandrunsan
initialloadingsequence.Afterafew
moments,itwillloadalivedisplay
view.
NOTE:Makesureallcameras
andcablesareproperly
connectedpriortopoweringon
thesystem.Ensurethedisplayis
connectedandpoweredon.This
allowstheDVRtodetectthebest
resolutionforyourdisplay.
Remote
Control
5
Connecting the ‘Flex’ IR Extender
Connectthe‘Flex’IRextenderfor
theremotecontroltothe‘Flex’IR
extenderportonthefrontpanel
ofthesystem.Positionthe‘Flex’IR
extendernearthefrontofthemonitor
orwhereitwillreceiveaclearsignal.
NOTE: TheFlexIRextenderisnotrequired
tousetheDVR.UsetheFlexIRextenderifyou
areinstallingtheDVRsomewhereitwillnot
havelineofsighttotheremotecontrol,such
asinacabinetorbehindthemonitor.
1.Camera
2.Setup
3.Record
1 2 3
4 5 6
NOTE:Bydefault,passwordsaredisabled.Withpasswordsenabled,youneed
toenteryouruserIDandpasswordtoaccessthesystemMainMenu,EventList,
orPlaybackmode.
Itisimportanttosetthecorrecttimetoassureaccuratetimestampsonvideo
recordings.
Setting the Date & Time
1.Click toopentheMainMenu.
2.Click toopentheSetupmenu.
3.ClickDate/Time Setup.The
Date/TimeSetupmenuappears.
4.Configurethefollowing:
•Date Mode:Scrollup/downtoselectthedateformatyouwouldliketo
use(Y/M/D, D/M/Y, or M/Y/D).TheDatefieldautomaticallychangesto
thechosenformat.
•Date:Scrollup/downtomanuallyselectthedate.
•Time: Scrollup/downtomanuallyselectthetime.
NOTE:TheDVRdisplaystimein24-hourformat.
5.ClickExit/Updatetosaveyoursettings.ThesystemreturnstotheSetup
menu.
6.Right-clickuntilallmenusareclosed.Thedateandtimearedisplayedon
thebottom-leftcornerofthescreen.
7
4.Alarm
5.Backup
6.LAN
Password Wheel
ThePasswordWheelisusedtoinputand
changeuserIDsandpasswords.
TousethePasswordWheel:
1.Click0~9toenteryour
userIDandpassword.
3
(RECOMMENDED)
(OPTIONAL)
IPADDRESS: _______._______ ._______._______
MACADDRESS: _____:_____:_____:_____:_____:____
Record the information in the section below:
(RequiredforDDNSregistration)
HTTPPort:
Setup Edge Client Software for Local Live Viewing
31.FromtheStartMenu,clickClient Software. Theclientwindowappears.
2.ClickDVR List.TheDVRlistwindowopens.
3.Configurethefollowing:
•Name:EnterthenameyouwouldliketouseforyourDVR.Youcanuseyourname,
yourcompanyorbusinessname,oranythingofyourchoice.
•IP / DDNS:EntertheIPaddressfromtheSystemInformationwindow(asrecordedin
Step3-1)
•Port:EntertheHTTPport(default:80)fromtheSystemInformationwindow.
•ID:EntertheadminIDforlocalviewing(default:9).
•Password:Entertheadminpasswordforlocalviewing(default:3333).
4.ClickAdd.ThenclickClosetoreturntothemainclientwindow.
5.ClickChange.ThenclickClosetoreturntothemainclientwindow.
6.SelectyourDVRfromthedrop-downmenuatthetopofthescreenandclick to
connect.Livevideofromyourcameraswillappearwhentheconnectionissuccessful.
NOTE:Ifthereisnoconnectionwithin15seconds,click and click again torefresh
theconnection.
NOTE:YoucannotselecttheoptionstotheleftofthePasswordWheel(userID,
password)—youcanonlyselectthedigits.Ifyoumakeamistake,simplyright-
clicktoexitorclick andre-selecttheoptiontotryagain.
Connecting the USB Mouse
2ConnectaUSBmousetooneof
theUSBportsonthefrontofthe
system.
Connecting Cameras (not included)
1ConnectBNCcamerastotheBNC
ports(VIDEO INPUT)ontherear
panel.
NOTE:Testthecameraspriortoselecting
apermanentmountinglocationby
temporarilyconnectingthecamerasand
cablestoyourDVR.
NOTE:the8channelmodelisshown
16-CHANNEL: ConnecttheOctopus
BNCconnectorforchannels1-8
(included)totheVideoINCH1~8port
ontherearpaneloftheDVR.Connect
theOctopusBNCconnectorforchannels
9-16(included)totheVideoINCH
9~16port.Thelabelattheendofeach
connectorindicatesthechannelnumber.
Connecting a Monitor (not included)
OR
3c
ConnecttheVGAorHDMIcable(not
included)fromthemonitortotheVGAor
HDMIportontherearpaneloftheDVR.
OR
3b ConnectaVGAcable(not
included)fromyourmonitortothe
VGAportontherearpanelofthe
DVR.
3a ConnectanHDMIcable(not
included)fromyourTVormonitor
totheHDMIportontherearpanel
oftheDVR.
NOTE:TheDVRcannotusemultiple
monitorsatthesametime.
Connecting a Touch Monitor (not included)
OCTOPUS
CABLE
Power ON the Monitor.
(RECOMMENDED)
(RECOMMENDED)
(OPTIONAL)
ConnectaUSBcable(notincluded)from
themonitortotheUSBportontherear
paneloftheDVR.
AND
ThisDVRfeaturesuniquetouch-screen
navigationcapabilities.ItsupportsWindows7®
Touchcompatibletouchscreenmonitorswithout
needinganyadditionalconfiguration.
FrontPanelLightTouchControls
TouchScreen
(not included)
(OPTIONAL)
2
Install Edge Client Software (ON YOUR LOCAL COMPUTER)
1.InsertthesoftwareCDintoyourcomputer.
TheAutoplaywindowopens.
2.ClickRun Lorex.exe
3.ClickDVR SoftwarethenEdge Client
Software.
4.Followtheon-screeninstructionstoinstall.
Computer-notincluded
NOTE: Check the instruction manual for how to install and
use the Edge Client software for Mac computers.
CHECK OUR WEBSITE FOR LATEST DVR SOFTWARE
FIRMWARE UPGRADES, VIDEOS & DOCUMENTATION.
www.lorextechnology.com
Toenable/disablepasswords:
1.Click toopentheMain Menu.
EnteryouruserIDandpasswordif
needed.
2.Click .TheSetupmenuopens.
3.ClickDVR Password. TheDVR
Passwordmenuopens.
80
Office
3333
192.168.5.220
9
EXAMPLE
LH330 Edge2 Series Quick Setup Guide - English - R1
INTERNET REMOTE MONITORING
INTERNET REMOTE MONITORING INTERNET REMOTE MONITORING INTERNET REMOTE MONITORING INTERNET REMOTE MONITORING
Congratulations!YouhavecompletedStep4successfully.
Youcannowconnectovertheinternettoview,setup&
backupvideofromyourDVR.
Continued
Continued
Continued Continued
5
Openyourwebbrowser(InternetExplorerbydefault)and
enter http://www.lorexddns.netintheaddressbar.
DDNS (Dynamic Domain Name System) Set-up
http://www.lorexddns.net
8
AnautomatedREGISTRATION CONFIRMATION E-MAIL
willbesenttoyouremail.PrintandSavethisconfirmation.You
willneedthisinformationtoaccessyourSystemremotely.
Registration E-mail
1.InsertthesoftwareCD,andfollowtheinstructionstolaunch
theLorex Auto Port Forwarding Wizardsoftware.
Installation
2
1: Populate the Router Database
3
TheAutoPortForwardingWizard
automaticallypopulatesalistof
currentrouters,anddetectsthe
numberofconnectedrouters.
1.ClickNextafterthesoftware
detectsyourrouterconfiguration.
2.UnderRouter IP,clicktheDetect Router IP button.
Therouter’sIPpopulatesintheblankfield.
3.UnderUsername and Password,entertherouter’s
usernameandpassword.
4.UnderIP,entertheIPaddress
ofyourLorexdeviceas
recordedinStep3-1.
5.UnderPort,entertheport
number(s)thatrequire
forwarding(80).
6.ClickNexttocontinue.
NOTE:ClicktheTry to Auto Detectbuttonifyouhavea
LinksysorNetgearrouter(thisworkswithmostmodels).
2: Enter your Router Settings
80
1.UndertheRouterdrop-downlist,selectthemodelofyour
router OR clicktheSearchbuttontoenterthenameof
yourroutermodel.
NOTE:Ensureyouselectthepropermodelandfirmware
numberoftherouter(asitappearsonthebackoftherouter)
IMPORTANT:Defaultportsthatmustbeportforwardedfor
remoteaccess:
Port80(HTTPPort)
4: Test your Connection
1.ClicktheTest Connection button.Yoursystem’sdefault
browseropensandconnectstoyourLorexdevice.
NOTE:EnsurethatInternetExplorerisyoursystem’sdefault
internetbrowser.
3: Update the Router Settings
1.ClicktheUpdate Router
button.Theprogrambegins
updatingtheroutersettings.
Thismaytake20-30seconds.
2.Closetheupdatewindow
whentheupdatefinishes.
NOTE:Youmayhavetomanually
saveyourroutersettingsafter
thesoftwaremakestherequired
changestoyourrouter.
ForInstantMobileConnectivity
usingaSmartPhone&specific
Macinstructions,refertotheUser’s
Manual.Makesuretocomplete
PortForwardingStep4.
Instant
Mobile
Viewing
1.CompletetheAccount
Informationfields
withyourpersonal
information.Complete
theWarrantyInformation
withyourpurchase
details.
2. CompletetheSystem
Informationfields.
3. Product License (Code):Selectyourproductmodelfrom
theProductLicensedropdownmenu.
4. MAC Address:Thephysicaladdressofyoursystemonyour
network(asrecordedinStep3-1)
5. URL Request:EnterauniqueURLname
(e.g. tomsmith).
NOTE:URLnameshouldnotbemorethan15characters.
6. ClickCreate New Accounttocreateanewaccountand
saveyoursettings.
7. Your Accountinformationwillbesenttoyouattheemail
addressyouprovidedearlier.
Complete New Account Information
7
6Create an Account
Clickthe“Create Account” button.
Create
Account
ToaddanewentrytoyourDVRlistusingtheDDNSaddress:
1.OpentheEdgeClientandclickDVR List.TheDVRList
windowopens.
2.ClickAdd.
3.Configurethefollowing:
•Name:EnterthenameyouwouldliketouseforyourDVR.
Youcanuseyourname,yourcompanyorbusinessname,or
anythingofyourchoice.
•IP/DDNS Address: Enteryourfull DDNS address (if
thefirstpartofthedomainnamesentistomsmith,enter
tomsmith.lorexddns.net).
•Port: EntertheHTTPport(default:80)fromtheSystem
Informationwindow.
•ID:EntertheadminIDforremoteviewing(default:9).
•Password:Entertheadminpasswordforremoteviewing
(default:3333).
4.ClickChange tosaveyoursettings.ThenclickClose to
returntotheclientwindow.
6.SelectyourDVRfromthedrop-downmenuatthetopofthe
screenandclick toconnect.Livevideofromyourcameras
willappearwhentheconnectionissuccessful.
NOTE:Ifthereisnoconnectionwithin15seconds,click
and click again torefreshtheconnection.
Auto Port Forward Wizard
1
TheLorexAutoPortForwardingWizardisasoftwarethat
automatesrouterportforwarding.
NOTE: YoumustbeonthesamenetworkastheDVRwhen
settinguptheDDNS.
Youmusthavethefollowingbeforeyouconfigurethesoftware:
1.Yourrouter’smodel and versionnumbers
2.Yourrouter’suser name and password
3.YourLorexdevice’sIPaddress(recorded in Step 3-1)
4.YourLorexdevice’sportnumbersthatrequireportforwarding
(bydefault:80)
OPTIONAL: Manual Port Forward
4
If you were unable to port-forward your router
automatically using the wizard, you will need to
do so manually.
Allroutersaredifferent.Toportforwardyourrouter,please
refertoyourrouter’susermanual.
Anexampleofaportforwardingscreenisshownfor
illustrationpurposes.
ServiceProvider:dns1.lorexddns.net
DomainName:tomsmith.lorexddns.net
UserID(UserName):tomsmith
Password:(yourpassword)
EXAMPLE
80 80
HTTP
EXAMPLE
12
STEP4 STEP4 STEP4 STEP4 STEP4
REMOTE INSTALLATION GUIDE
Time: 30 Minutes Skills - Intermediate
Hardware:
PC
SkillLevel
Intermediate
easy advanced
Time
under30 minutesunder15 minutes under60 minutes
HandTools Hardware
Router
HiSpeed
over60 minutes
ToenableDDNSonyourDVR:
1.OpenEdgeClientSoftwareandclicktheSetupbutton.
2.OpentheDDNStab.
3.UnderDDNSSelect,selecthttp://www.lorexddns.net
fromthedrop-down.
4.UnderDDNS User Name and DDNS Password,
entertheaccountnameandpasswordfromthe
confirmationemailthatwassentafteryoucreatedyour
DDNSaccount.
5.UnderDDNSDomain Name,enterONLY THE FIRST
PARTofthedomainnamefromtheconfirmationemail
thatwassentafteryoucreatedyourDDNSaccount.For
example,ifthefulldomainsentistomsmith.lorexddns.
net,youonlyneedtoentertomsmithintheEdgeClient
Software.
6.ClickApplytosaveyourchanges.
Enable DDNS on the DVR
NOTE: Pleaseallow10~15minutesfortheDDNSservers
toupdatewithyournewDDNSaddressbeforeattempting
toconnect.
Update Edge Client Software for Remote Viewing
11
10
Install Edge Client Software (ON YOUR REMOTE COMPUTER)
1.InsertthesoftwareCDintoyour
remotecomputer.
TheAutoplaywindowopens.
2.ClickRun Lorex.exe
3.ClickDVR SoftwarethenEdge
Client Software.
4.Followtheon-screeninstructionsto
install.
Computer-notincluded
NOTE: Check the instruction manual for how to install and
use the Edge Client software for Mac computers.
REMOTE LIVE SITE
YOURIP
9
Other manuals for LH330 Edge2 Series
2
Other Lorex Voice Recorder manuals

Lorex
Lorex N882 Series User manual

Lorex
Lorex LHV2000 series Instruction Manual

Lorex
Lorex LNR6100 Series Instruction Manual

Lorex
Lorex L4248 Series User manual

Lorex
Lorex L200 Series User manual

Lorex
Lorex Vantage LH020 Blackbox 2 User manual

Lorex
Lorex LNR6100 Series Operator's manual

Lorex
Lorex DV700 Series Instruction Manual

Lorex
Lorex L222A8 Series User manual

Lorex
Lorex LNK7000 Series Instruction Manual