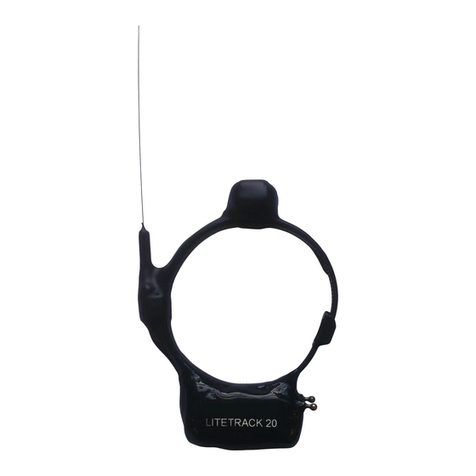
Lotek VHF User manual

USER MANUAL
REVISION 02
18 JUL 2019
#MVHF16
VHF Collars

1
TABLE OF CONTENTS
1. INTRODUCTION...............................................................................................................................................3
1.1. OUT OF THE BOX....................................................................................................................................3
1.1.1. TWO EASY STEPS ..........................................................................................................................3
1.2. BEFORE DEPLOYMENT......................................................................................................................3
1.2.1. ORDER SUMMARY........................................................................................................................4
1.3. WHAT’S INCLUDED...............................................................................................................................4
1.4. OPERATING CONDITIONS................................................................................................................4
1.5. VHF RECEIVERS ..................................................................................................................................... 5
1.6. VHF ANTENNAS ..................................................................................................................................... 5
2. TURNING THE VHF TRANSMITTER ON AND OFF..................................................................... 6
2.1. BEFORE YOU BEGIN ........................................................................................................................... 6
2.2. TO TURN THE VHF TRANSMITTER ON.....................................................................................7
2.2.1. WHAT CAN I DO IF I CAN’T PICK UP A SIGNAL?........................................................7
2.3. TO TURN THE VHF TRANSMITTER OFF.................................................................................. 8
3. FITTING THE COLLAR.................................................................................................................................. 9
3.1. INTRODUCTION...................................................................................................................................... 9
3.2. POWER MANAGEMENT –BEHAVIOURS............................................................................... 9
3.3. FASTENERS............................................................................................................................................. 10
3.4. COLLAR ORIENTATION ...................................................................................................................10
3.5. BEFORE YOU BEGIN ...........................................................................................................................11
3.6. TO FIT A COLLAR THAT HAS NYLOC NUTS AND BOLTS ............................................12
3.7. TO FIT A COLLAR THAT HAS A NYLON NUT AND BOLT.............................................13
3.8. TO FIT A COLLAR THAT HAS A BELT BUCKLE...................................................................14
3.9. TO FIT A CABLE-TIE COLLAR.........................................................................................................15
3.10. REMOVING THE COLLAR ................................................................................................................16
TIME SINCE DEATH ...................................................................................................................................16
3.10.1. TIME COLLAR-RELEASE MECHANISM ..........................................................................16
3.10.2. DISPOSAL..........................................................................................................................................16
3.10.3. REPLACEMENTS...........................................................................................................................16
4. PULSE RATES AND PATTERNS WHEN TRACKING ................................................................17

2
4.1. NOMINAL PULSE RATE ....................................................................................................................17
4.2. OTHER PULSE RATES........................................................................................................................17
4.3. VHF RECEIVERS AND ANTENNAS............................................................................................18
4.4. BEHAVIOURS..........................................................................................................................................18
4.5. MORTALITY PULSE RATE................................................................................................................18
4.5.1. MORTALITY MODES...................................................................................................................19
4.5.2. LATCHING MORTALITY MODE............................................................................................19
4.5.3. NON-LATCHING MORTALITY MODE...............................................................................19
4.6. TIME SINCE DEATH........................................................................................................................... 20
4.6.1. DECIPHERING THE CODE.................................................................................................... 20
4.6.2. TIME COLLAR-RELEASE MECHANISM..........................................................................21
APPENDIX A: TESTING THE VHF TRANSMITTER’S RANGE......................................................22
APPENDIX B: TIPS AND TROUBLESHOOTING..................................................................................24

3
1. Introduction
Congratulations on your purchase of a new VHF collar from Lotek. We have
taken the time to create this guide to get you up and running as quickly as
possible. We trust you will experience many years of easy tracking with your
Lotek VHF collars.
1.1. Out of the Box
When received from Lotek, the VHF collar’s transmitter will be turned off to
preserve the battery’s charge. We recommend that you test the VHF transmitter
within seven days of receiving it from Lotek.
1.1.1. Two Easy Steps
1. Turn the VHF transmitter On and Off (See ‘Turning the VHF Transmitter
On and Off’ later in this guide)
2. (Optional) Test the VHF’s impressive range (See Appendix A –‘Testing
the VHF Transmitter’s Range’)
1.2. Before Deployment
Well before deploying your VHF collar, please read this user guide. If the VHF
collar has been programmed with behaviours, it may have to be turned on
hours or days before deployment. This is to ensure that the VHF transmitter
broadcasts its signal at the required time each day.
For more information, see:
Turning the VHF Transmitter On and Off’ later in this guide
‘Pulse Rates & Patterns when Tracking’ later in this guide; and
The Order Summary form for the VHF collar you are to deploy

4
1.2.1. Order Summary
The order summary contains important information about the configuration of
the collar’s VHF Transmitter. This will include, where relevant, information about:
Pulse rates
Behaviours
Mortality rate and mode
Frequencies, and
Calculated life.
This information may be required:
Prior to fitting the collar to the animal, and
When tracking the animal.
IMPORTANT: Ensure that the people who turn on and fit the collar, have access
to a copy of the order summary.
1.3. What’s Included
For a complete list of the items included in your order, refer to the packing slip
that shipped with your order.
IMPORTANT: Magnets must not be attached to the VHF transmitter. For
information on how the magnet is used to turn the collar on and off, see
‘Turning the VHF Transmitter On & Off’, later in this guide.
1.4. Operating Conditions
Operating temperature: -20° to 60° C (-4° to 140° F)
Storage: Store at room temperature (below 30° C) in a clean and dry area, away
from heat sources and out of direct sunlight. Do not refrigerate nor freeze.

5
IMPORTANT: If storing a VHF collar for a long period of time, turn it on for 12 to
24 hours once every four months. This will exercise the battery and minimize
passivation.
Water resistance: VHF collars are designed for terrestrial mammals. VHF collars
are waterproof and have been tested in water to a depth of two metres for 24
hours.
Durability: VHF collars are designed for normal wear and tear. Normal wear and
tear does not include, for example, being chewed excessively by animals, vehicle
strike and electrocution.
Replacements: Because of the variance in operating conditions, Lotek
recommends that VHF collars be replaced between 80 to 90 percent of their
calculated life. For information about the VHF collar’s calculated life, please refer
to the order summary.
1.5. VHF Receivers
Lotek recommends using dedicated wildlife VHF receivers. Wideband receivers
are not recommended.
1.6. VHF Antennas
Lotek recommends Yagi antennas. Three-element folding Yagi antennas can be
purchased through Lotek.
NOTE: Ensure that your VHF receiver and VHF antenna operate in the same
frequency band as the collar’s VHF transmitter.

6
2. Turning the VHF Transmitter On
and Off
The steps involved in turning a collar’s VHF transmitter on and off may differ
from other VHF transmitters.
IMPORTANT: Unlike some VHF transmitters, the magnet must not be attached to
a VHF collar when not in use.
NOTE: Some Lotek VHF collars are fitted with a time collar-release mechanism.
This mechanism is also turned on and off using a magnet. For more information,
see the user manual that came with the time collar-release mechanism.
2.1. Before You Begin
Before turning a VHF collar on or off:
Ensure that you have a magnet available
Your VHF receiver is turned on and tuned to the VHF frequency, and
If your VHF collar has been programmed with behaviours, refer to your
order summary to determine what time, and if necessary, what day of
the week, the VHF transmitter should be turned on.

7
2.2. To Turn the VHF Transmitter On
Place a magnet on the dimple for one to two seconds.
NOTE: The dimple is a small concave depression and is located on the
front surface (left) or underside of the battery holder.
Result: The VHF transmitter will broadcast a squeal, and then
broadcast five fast pulses followed by regular pulses (nominal pulse
rate).
NOTE: Signal drift can occur over time and because of seasonal
temperature changes. You may have to fine-tune the frequency either
side of the expected frequency.
2.2.1. What can I do if I can’t pick up a signal?
If the VHF receiver could not pick up the VHF signal:
Check the VHF receiver is programmed to the correct frequency
Ensure the VHF transmitter, VHF receiver and antenna all operate in
the same frequency band
Adjust the VHF receiver’s sensitivity (gain)
Fine tune the VHF receiver’s frequency 1 to 3 kHz either side of the
listed frequency
Check the VHF receiver’s batteries and replace if necessary
For more information, see ‘Tips & Troubleshooting’, later in this guide. If the
receiver’s batteries are charged and you have tried another VHF receiver
without success, please contact Lotek for assistance.

8
2.3. To Turn the VHF Transmitter Off
Place a magnet on the dimple for one to two seconds.
Result: The VHF transmitter will broadcast a squeal, then cease
transmission.
IMPORTANT: To preserve the battery’s charge, ensure that the VHF
collar is switched off when not in use and placed away from any
magnetic fields. To avoid a VHF collar being turned on accidentally, take
care not to place the transmitter unit on or near any magnet.
IMPORTANT: Do not store magnets and collars together. A VHF
transmitter can be turned on or off if a magnet comes within 20 mm of
the dimple. Other magnets may switch the VHF transmitter on and off
from a greater distance.
It is important that the user knows (to within one-degree Longitude / Latitude)
where the first location will be attempted, this is best set up in the schedule and
the fix taken before deployment. The downloaded data can be processed later
when you have access to the internet.

9
3. Fitting the Collar
3.1. Introduction
Once you have captured the animal, fitting the collar is a straightforward task.
However, if your VHF collar has been programmed with behaviours to preserve
the battery’s charge, it is important that you understand the implications that
behaviours can have on the success of your tracking efforts.
3.2. Power Management –Behaviours
Some VHF collars are programmed with behaviours. Behaviours determine:
When the VHF transmitter broadcasts a particular pulse pattern,
and/or
The rate at which the pulse is broadcast at any particular time.
IMPORTANT: Behaviours are not calendar or time-zone based.
Behaviours count down from the time the VHF transmitter is switched
on.
If behaviours were specified at time of purchase, then prior to fitting the collar,
you may have to turn the VHF transmitter on, hours or days in advance. For
more information, refer to the order summary form that you received. The
order summary will help you determine what time of day, and if relevant, what
day of the week the VHF transmitter must be turned on.
IMPORTANT: For example, the VHF transmitter may have been programmed to
transmit its nominal pulse rate for only 14 hours out of 24 –five days a week,
and to broadcast nothing for the other 10 hours and the remaining days (two)
each week. If you want to track during daylight hours on Monday to Friday, the
transmitter must be turned on early in the morning, on the Monday prior to
fitting the collar.
NOTE: If programmed with behaviours, turning a VHF transmitter off and on will
reset its behaviours. If the VHF transmitter you are about to fit was turned on at
the required time, e.g., a couple of days ago, turning it off and on now may

10
require you to delay the fitting for another time of day, or another day of the
week.
The VHF transmitter is turned on in advance and it was set in the factory to
latching mortality mode, gently shake the VHF transmitter periodically to avoid
activation of the mortality timeout period.
3.3. Fasteners
Depending on the size of the VHF transmitter that you are fitting, it may have
any one of the following four fasteners:
Nyloc nuts and bolts (Nyloc is a brand of steel nuts and bolts. The Nyloc
nut has a nylon locking thread)
Nylon nut, bolt
Metal buckle
Cable tie
3.4. Collar Orientation
For optimum performance of the VHF transmitter and to maximise durability of
the VHF antenna, the battery housing (which also contains the VHF circuitry)
must be oriented correctly when fitted.
IMPORTANT: When fitting the collar, orient the front of the battery housing to
the front (anterior) of the animal. The dimple on some VHF transmitters is on
the underside of the encased battery; ensure that the VHF frequency label faces
the rear (posterior) of the animal.

11
3.5. Before You Begin
Before fitting the collar, ensure that:
The VHF transmitter is on.
NOTE: To do this, turn on the VHF receiver and tune it to the VHF
transmitter’s frequency.
If the VHF transmitter was programmed with behaviours and turned on
earlier, it may not be broadcasting any pulses at this time.
The VHF transmitter cannot be turned on after the animal has been
released.
You have the relevant fastening tool and a knife that can be used to
trim off any excess collar without causing harm to yourself or the
animal
You have recorded the ideal receiving frequency; and
The animal is adequately restrained and ready to receive the collar

12
3.6. To Fit a Collar that has Nyloc Nuts and Bolts
1. Undo the nuts and remove the cover plate
A fastening tool is supplied by Lotek with each order
2. Fit the collar around the animal’s neck
Ensure that the collar is oriented correctly. For more information, see
the diagram (above).
If you need to punch a new set of holes in the strap, ensure they are
not too close to existing holes or stitching.
3. Place the cover plate and nuts back on the bolts and tighten
Do not over tighten the nut
4. (If relevant) Cut off any excess strap
If the strap is too long for the animal, it may become a hindrance. As a
guide, the length of strap in the photo (right) is sufficient.
The animal is ready to release.

13
3.7. To Fit a Collar that has a Nylon Nut and Bolt
1. Undo the nut
The nylon nut can be loosened with finger and thumb
2. Place the collar around the animal’s neck
Ensure the collar is oriented correctly. For more information, see the
diagram (previous page). If you need to punch a new set of holes in the
strap, ensure they are not too close to existing holes or edges.
3. Place the nut back on the bolt and tighten
Hand tighten with finger and thumb
4. Crimp the excess thread
Use pliers to crimp / deform the thread. Deform the thread sufficiently
to prevent the nut from loosening. Alternatively, a drop of Loctite 401
(supplied) will hold the nut in place
5. (If relevant) Cut off any excess strap
If the strap is too long for the animal, it may become a hindrance. As a
guide, the length of strap in the photo (right) is sufficient.
Do not cut the antenna. Cutting the antenna will reduce its
performance.
The animal is ready to release.

14
3.8. To Fit a Collar that has a Belt Buckle
1. Undo the collar’s buckle
2. Place the collar around the animal’s neck
Ensure the collar is oriented correctly. For more information, see the
diagram (previous page). If you need to punch a new hole in the strap,
ensure they are not too close to existing holes or edges.
3. Do up the buckle, ensuring the strap is securely fastened
4. (If relevant) Cut off any excess strap
If the strap is too long for the animal, it may become a hindrance.
When cutting, ensure sufficient length (at least two centimetres) of
strap beyond the loop when tucked under. Do not cut the antenna.
Cutting the antenna will reduce its performance.
The animal is ready to release.

15
3.9. To Fit a Cable-Tie Collar
IMPORTANT: The following information is intended for single-use transmitters.
For re-useable transmitters such as LiteTrack 20, please follow the Quick Start
Guide provided with the collar.
1. Place the collar around the animal’s neck
Ensure the collar is oriented correctly. For more information, see the
diagram (previous page).
2. Thread the cable tie through the clasp
Do not over-tighten. Cable ties only slide in one direction.
3. (If relevant) Cut off any excess strap
If the strap is too long for the animal, it may become a hindrance. As a
guide, the length of the strap in the photo (right) is sufficient. Do not
cut the antenna. Cutting the antenna will reduce its performance.
The animal is ready to release.

16
3.10. Removing the Collar
Should and when you decide to remove the collar, keep in mind VHF collars are
not designed to be refurbished. However, you can reuse VHF collars on another
animal if they are in good working order and you expect the batteries to last.
Lotek recommends that VHF collars be replaced between 80 to 90 percent of
their calculated life.
Time Since Death
If the VHF transmitter is in mortality mode and broadcasting a time since death
code, record the time since death before turning the VHF transmitter off. Failure
to record the time since death before turning the transmitter off will result in
the time since death information being permanently lost.
3.10.1. Time Collar-Release Mechanism
Some VHF collars are fitted with a time collar-release mechanism. After a
programmed period of time, this mechanism will release the collar from the
animal and the collar will fall to the ground. For more information, see the user
guide that came with the time collar-release mechanism.
3.10.2. Disposal
Please dispose of your VHF collars in an environmentally friendly manner. VHF
collars are not designed to be refurbished. The batteries cannot be replaced.
3.10.3. Replacements
Lotek VHF collars have been designed and engineered to the highest standards
to optimise transmission range and battery charge at significantly reduced
weights. Replacement collars from Lotek are the quickest, easiest and most
reliable manner in which to continue any study. Please contact Lotek via our
website, phone or email, and a telemetry consultant will be happy to assist with
purchasing replacement collars.

17
4. Pulse Rates and Patterns when
Tracking
4.1. Nominal Pulse Rate
The nominal pulse rate is the pulse pattern that was broadcast soon after the
VHF transmitter was turned on. It is the pulse rate that is used to track the
animal most of the time.
4.2. Other Pulse Rates
Depending on the features that were ordered, your VHF transmitter may at
some stage broadcast:
A slower than nominal pulse rate or no pulse at all,
(this is to conserve the battery’s charge - for more information, see
‘Behaviours’ below)
A different pulse rate indicating that the host animal may be dead; or
(For more information, see ‘Mortality Pulse Rate’ later in this topic)
A different pulse pattern indicating how much time has elapsed since
death
(For more information, see ‘Time Since Death’ later in this topic)
IMPORTANT: The order summary form for each VHF collar contains
information that will assist you in recognising and understanding the
VHF transmitter’s pulse rate and patterns. Ensure that you are familiar
with the pulse rates and patterns that are programmed into the VHF
transmitter you are tracking.
Pulse rates are expressed as pulses per minute (PPM).

18
4.3. VHF Receivers and Antennas
Refer to the user guides that came with your VHF receiver and antenna to
ensure that you understand:
How to optimise sensitivity (gain)
The direction the antenna is polarised; and
The implications of polarisation to tracking
4.4. Behaviours
Some VHF transmitters are programmed with behaviours. Behaviours can be
used to conserve the battery’s charge, for example, by transmitting a slower
pulse rate (or no pulse) during daylight, e.g., when a nocturnal animal is safe in
its burrow.
Behaviours determine:
When the VHF transmitter broadcasts a particular pulse pattern; and
The rate at which the pulse is broadcast
For example, your VHF transmitter may have been programmed to transmit its
nominal pulse rate for 12 hours a day, five days each week (to conserve battery
charge) and for the remaining time, broadcast nothing.
NOTE: Behaviours count down from the time the VHF transmitter is switched on.
4.5. Mortality Pulse Rate
Some VHF transmitters are fitted with a motion sensor and are programmed to
broadcast a mortality pulse rate. The VHF transmitter will broadcast the
mortality pulse rate when the host animal remains motionless for a specified
period of time (mortality timeout period). This mortality timeout period is
factory-set and cannot be changed.

19
4.5.1. Mortality Modes
If the mortality feature was ordered, it will have been set to one of two modes.
These modes are:
Latching Mortality Mode
Non-Matching Mortality Mode
4.5.2. Latching Mortality Mode
If set to latching mortality mode and the mortality pulse rate is activated, the
VHF transmitter will continue to broadcast its mortality pulse rate regardless of
subsequent movement, e.g., after being dragged off by a predator or scavenger.
NOTE: To stop the mortality pulse pattern from being broadcast, retrieve the
host animal and turn the VHF transmitter off. On turning the VHF transmitter on,
the VHF transmitter’s mortality feature will be reset and the VHF transmitter will
begin broadcasting its nominal pulse pattern.
4.5.3. Non-Latching Mortality Mode
If set to non-latching mortality mode and the mortality pulse pattern is activated,
the VHF transmitter will cease to broadcast its mortality pulse pattern when
moved, e.g., after being dragged off by a predator or scavenger.
For more information, refer to the VHF transmitter’s order summary. The order
summary will tell you the VHF transmitter’s mortality timeout period, mortality
pulse rate and the mortality mode it was programmed to use.
Table of contents
Other Lotek Pet Care Product manuals
Popular Pet Care Product manuals by other brands

Garmin
Garmin T5 mini Quick start manual

Polar Electro
Polar Electro Equine user manual

Digital Aquatics
Digital Aquatics ReefKeeper user guide

mimsafe
mimsafe MULTICAGE single Assembly instructions

OverEZ Chicken Coop
OverEZ Chicken Coop 46OEZCKCP instruction manual

Albert Kerbl
Albert Kerbl 81677 quick start guide