7
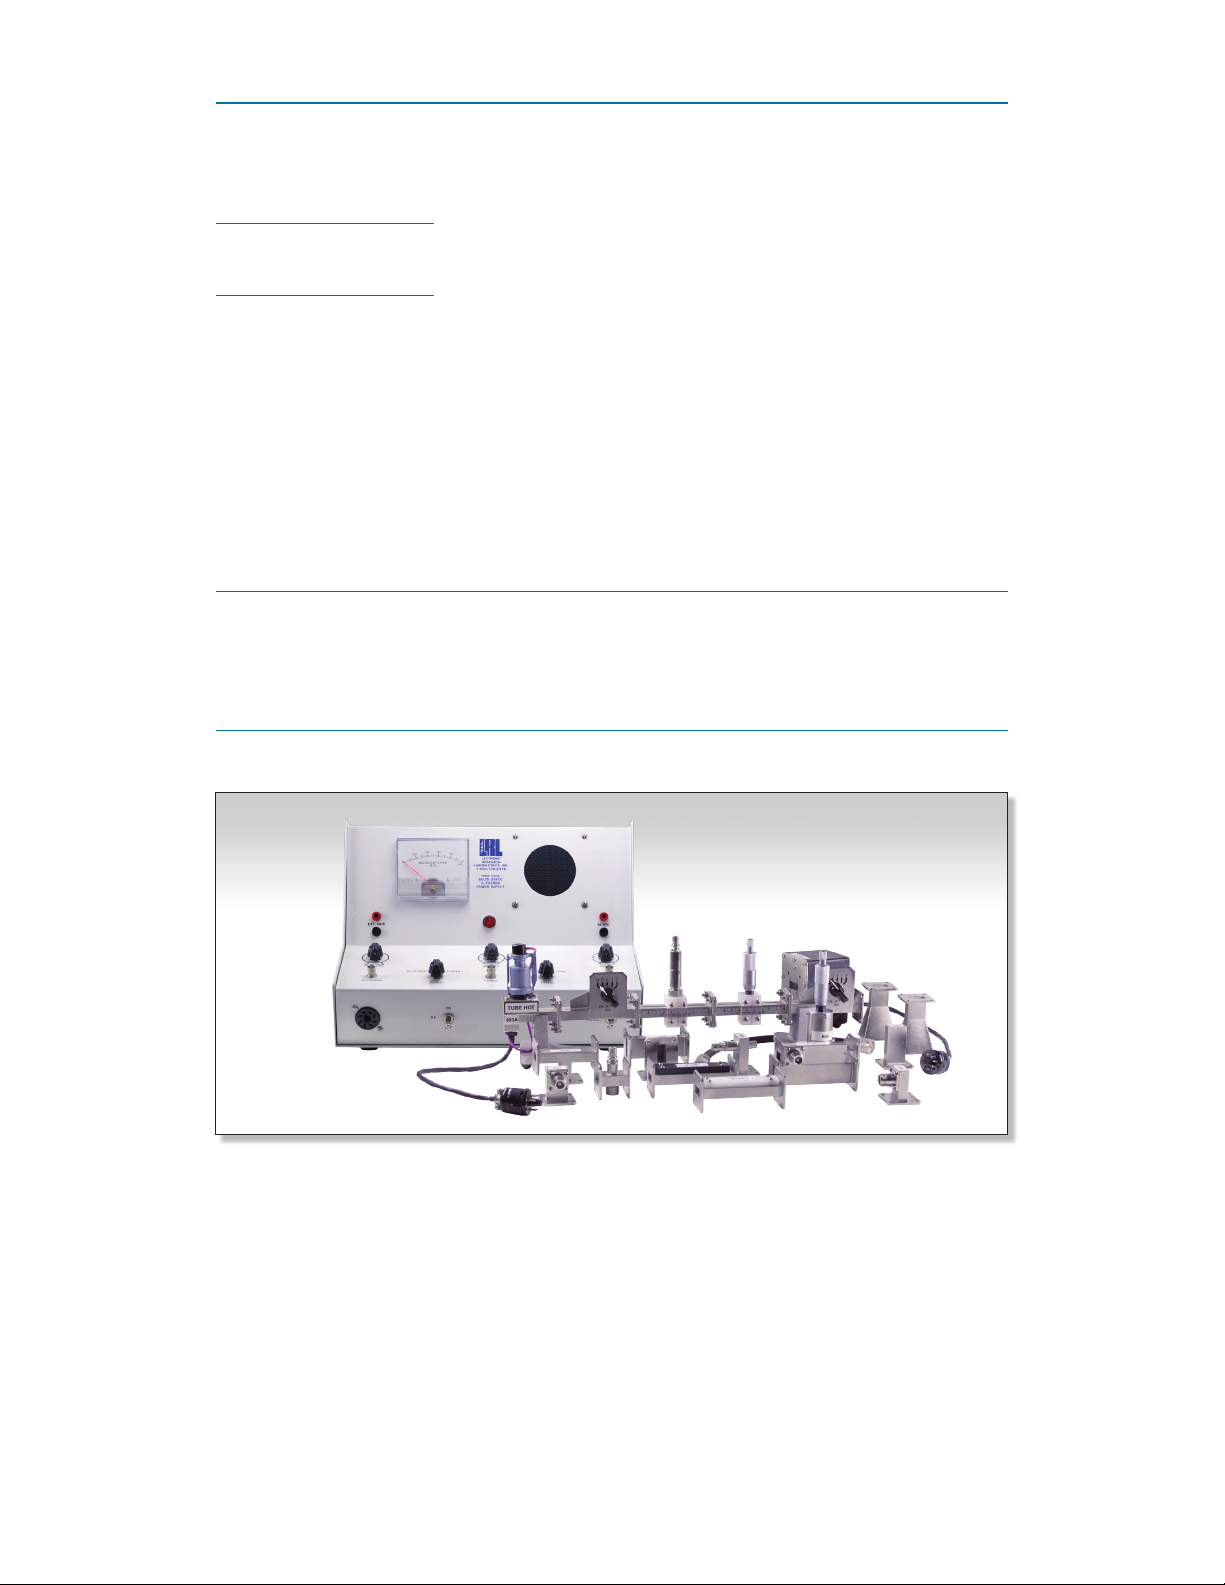
Microwaves for Everyone | LRL 550B Microwave Training Kit
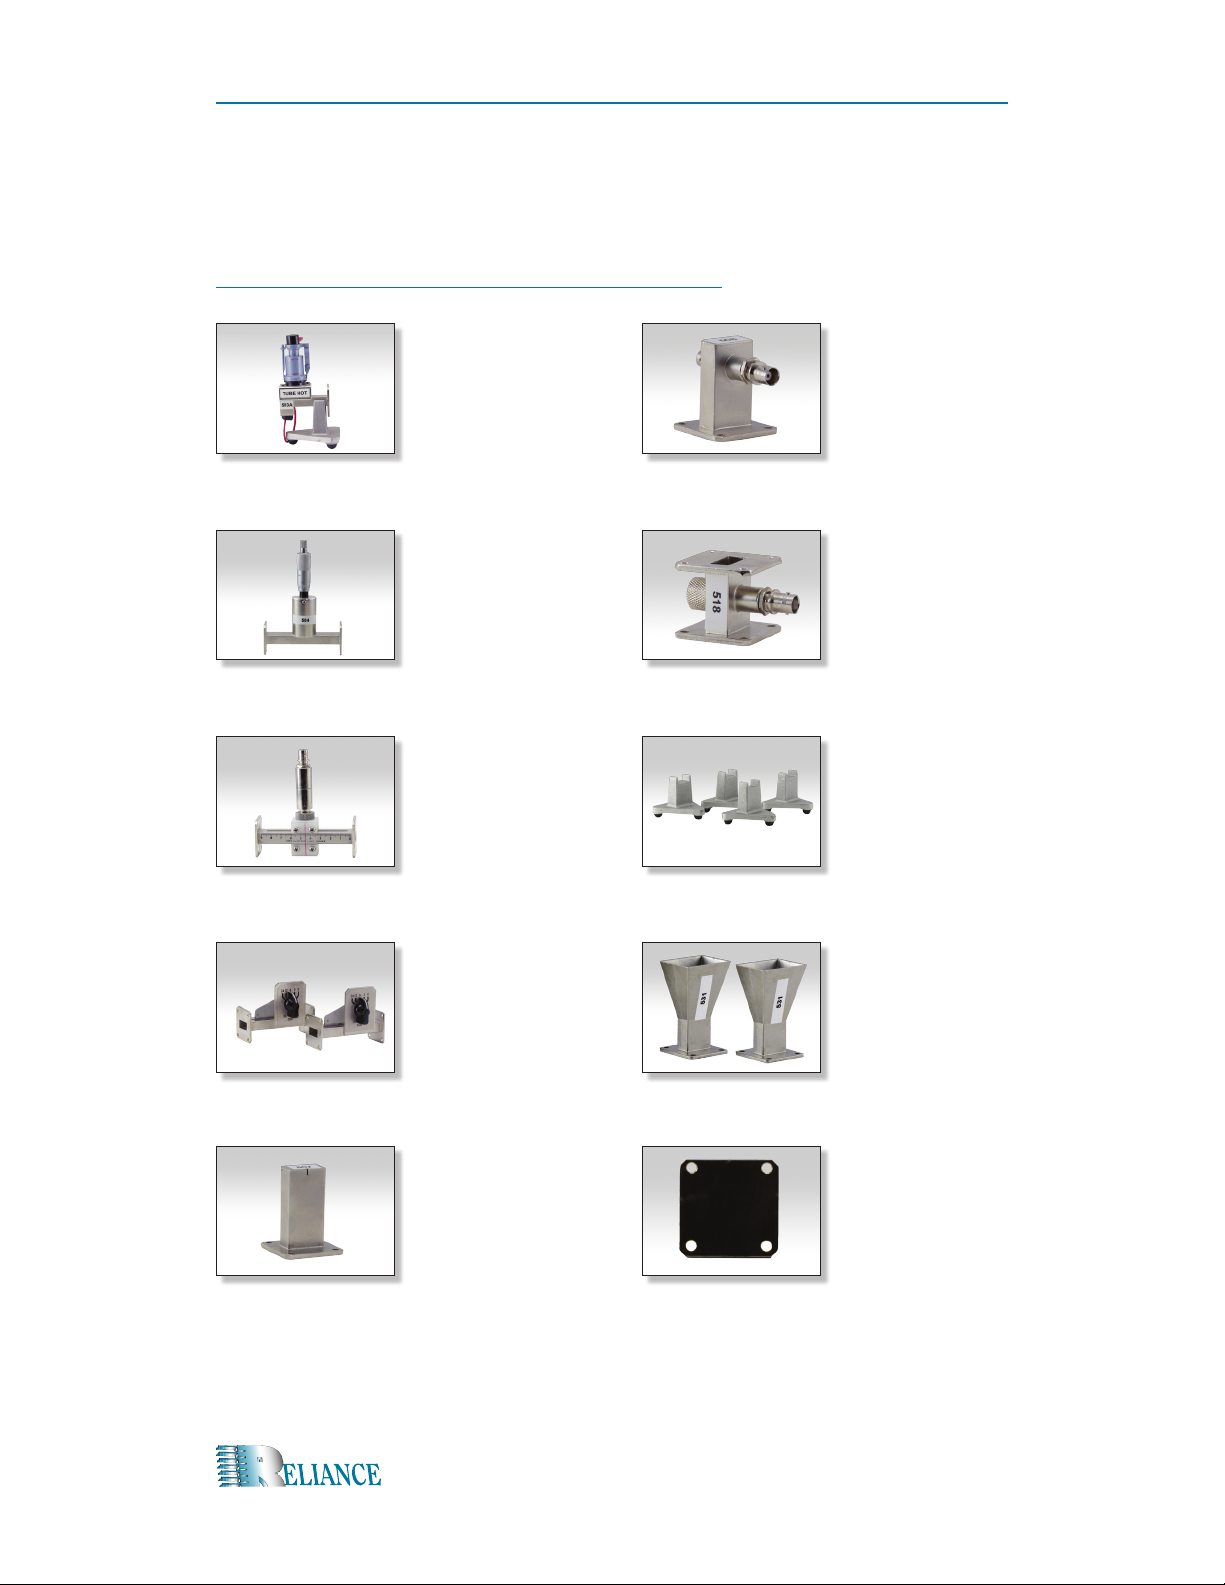
6. Insert 8-Prong Plug from 503A Klystron Mount into socket located on left side of
510A Power Supply.
7. Place a 523 Waveguide Stand under each side of Test Assembly, and adjust each
stand until the assembly is elevated in a stable position.
Part 3 • Operation and Checkout
1. Turn AC POWER switch ON.
2. Turn 506 Flap Attenuator to 24dB.
3. Observe meter and adjust POWER BALANCE knob to obtain a zero meter
reading. Turning knob clockwise increases meter reading; counter-clockwise
deceases reading.
4. Allow 3-5 minutes warm-up at this time.
5. Readjust POWER BALANCE knob to compensate for drift if necessary.
NOTE: The meter reading must be at zero to progress further.
6. Set Variable Flap Attenuator to 0dB.
7. Slowly turn KLYSTRON REPELLER knob clockwise and stop when you get a peak
reading on the meter. (Normally about 2 o’clock). NOTE: Adjust Variable Flap
Attenuator as needed to keep meter level between 70% and 100%.
8. Turn METER knob to VSWR position.
9. Fine tune KLYSTRON REPELLER knob as needed to obtain a stable, peak meter
reading. NOTE: This reading should be between 50% and 100% and must be stable. If not,
adjust VSWR OUTPUT knob on right side of 510A Power Supply.
10. Turn METER knob to KLYSTRON position.
11. Remove BNC Cable from VSWR Input Connector at right side of 510A Power
Supply and reconnect cable to KLYSTRON connector on left side of 510A Power
Supply.
12. Adjust Variable Flap Attenuator as needed to attain a peak meter reading. DO NOT
exceed a 100% reading on the meter.
13. Record meter reading and Variable Flap Attenuator level as your Klystron life
reading. NOTE: You can compare this reading to current readings anytime in the future to
determine the condition of the Klystron tube.
14. You have now successfully operated and checked out your Microwave Trainer. It is
important that you turn off the Trainer properly as described below.
Part 4 • Shut Down Procedure
1. Turn off AC POWER switch located on right side of 510A Power Supply.
2. Unplug 510A Power Supply from 115AC Power Source.
3. Wait for Klystron Tube to cool down (minimum of 10 minutes).
4. Disconnect all cables and disassemble waveguide components.