Lucci fini CLIMATE III User manual

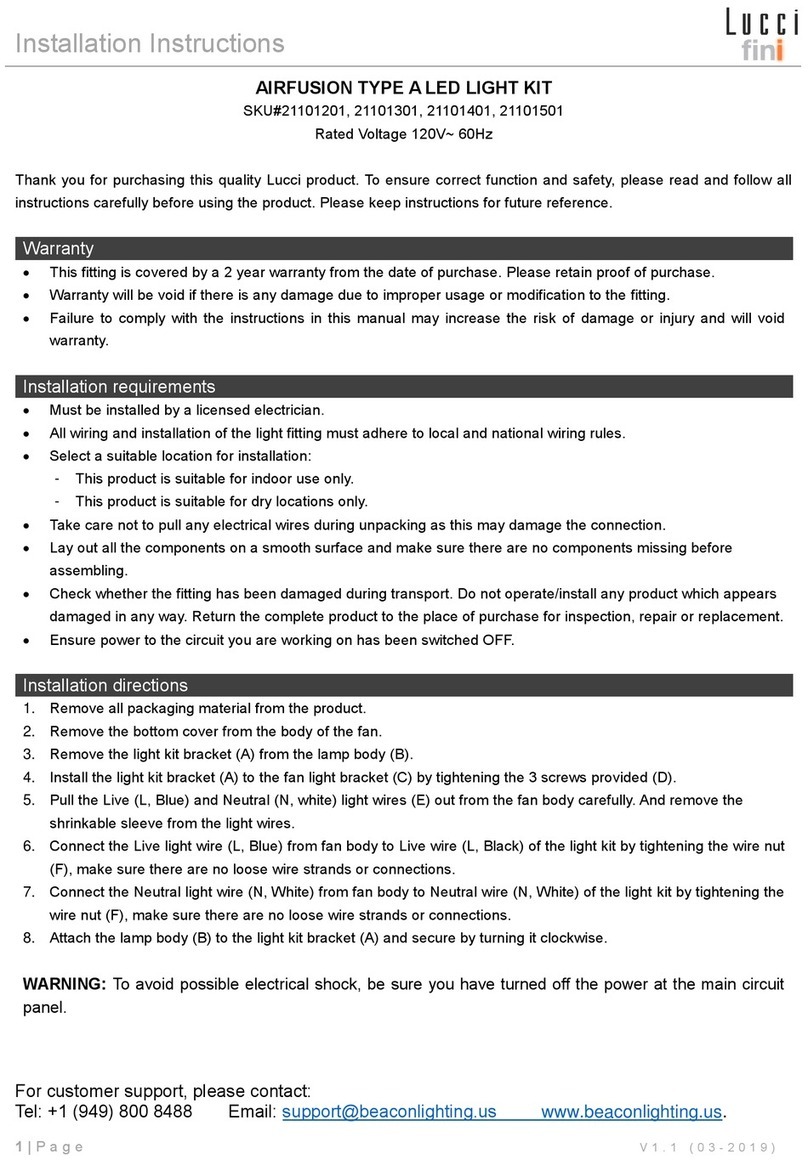
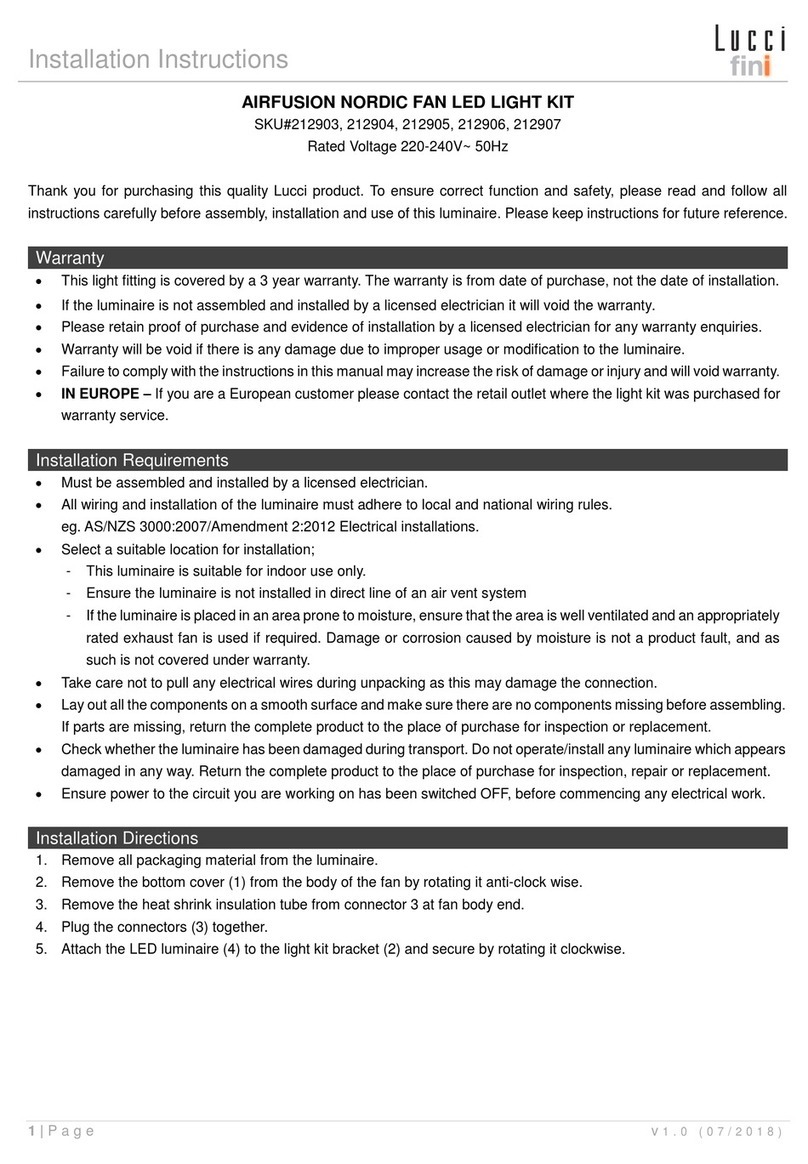
Installation Instructions
1 | P a g e V 1 . 0 p u b l i c a t i o n o n 0 9 . 2 0 1 9 ( A U & E U )
LUCCI CLIMATE III FAN LIGHT KIT
SKU# 210643, 210644, 210645
Rated Voltage 220-240V~ 50Hz
Thank you for purchasing this quality Lucci product. To ensure correct function and safety, please read and follow all
instructions carefully before assembly, installation and use of the product. Please keep the instructions for future
reference.
Warranty
•This product is covered by a 12 month warranty. Please retain proof of purchase.
•Warranty will be void if there is any damage due to improper usage or modification to the product.
•Failure to comply with the instructions in this manual may increase the risk of damage or injury and will void
warranty.
•IN EUROPE – If you are a European customer please contact the retail outlet where the light kit was purchased
for warranty service.
Installation requirements
•NOTE: This light kit must only be installed onto the Lucci Climate III Fan – SKU# 210640, 210641,
210642. It must NOT be used for any other purpose.
•Must be installed by a licensed electrician.
•All wiring and installation of the light fitting must adhere to local and national wiring rules.
eg. AS/NZS 3000 Electrical installations in Australia.
•Do not exceed the maximum wattage rating.
•Select a suitable location for installation;
- This product is suitable for indoor use only.
- Ensure the fitting is not installed next to any air vents and is not in any moist or damp areas.
•Take care not to pull any electrical wires during unpacking as this may damage the connection.
•Lay out all the components on a smooth surface and make sure there are no components missing before
assembling. If parts are missing, return the complete product to the place of purchase for inspection or
replacement.
•Check whether the luminaire has been damaged during transport. Do not operate/install any product which
appears damaged in any way. Return the complete product to the place of purchase for inspection, repair or
replacement.
•Ensure power to the circuit you are working on has been switched OFF before commencing any electrical work.
Installation directions
Remove all packaging material from the product and be careful not to throw away accessories that may be
hidden within the packaging material.
1. Remove the bottom cover of the fan by turning anti-clockwise. (Fig. 1)
2. Connect the wires of the light kit to the motor via the quick connector. (Fig. 2)
3. Install the light kit on the fan motor part then secure it by turning clockwise. (Fig. 2)
4. Install the GX53 lamp (not included) to the light kit. Do not exceed the maximum power rating. (Fig. 3)

Installation Instructions
2 | P a g e V 1 . 0 p u b l i c a t i o n o n 0 9 . 2 0 1 9 ( A U & E U )
Safety tips
•Always ensure the power is OFF and the luminaire has cooled down before performing any maintenance,
cleaning, or making any adjustment to the luminaire.
•To avoid injury or damage to the luminaire, ensure that power leads and screws are secure before connecting the
power.
•Select a suitable location according to the installation requirements.
•Ensure that the luminaire does not come in contact with corrosive chemicals etc.
•To clean, wipe with a damp clean cloth. Do NOT soak or immerse the product in water or other liquids.
•The light source of this luminaire is not replaceable; when the light source reaches its end of life the whole
luminaire shall be replaced.
Specifications
SKU #
210643
210644
210645
Model #
LD-210643
LD-210644
LD-210645
Color
Oil Rub Bronze
Black
White
Rated Voltage
220-240V~ 50Hz
Rated Wattage
Max.12W LED globe (Not included)
Lamp Holder
GX53
Weight
0.3kg
Dimensions
H:45mm Dia:175mm
Fig. 1
Fig. 2
Fig. 3

Installation Instructions
3 | P a g e V 1 . 0 p u b l i c a t i o n o n 0 9 . 2 0 1 9 ( A U & E U )
BELEUCHTUNGSKIT FÜR VENTILATOR LUCCI CLIMATE III
ARTIKELNR. 210643, 210644, 210645
Nennspannung 220-240 V~ 50 Hz
Vielen Dank, dass Sie sich für dieses Qualitätsprodukt von Lucci entschieden haben. Lesen und befolgen Sie bitte
sorgfältig alle Anleitungen, bevor Sie das Produkt benutzen, um eine einwandfreie Funktion und Sicherheit bei Montage,
Installation und Gebrauch zu gewährleisten. Bitte bewahren Sie die Anleitungen zum Nachlesen auf.
Garantie
•Auf dieses Produkt wird eine Garantie von 12 Jahren gewährt. Bitte bewahren Sie den Kaufbeleg auf.
•Die Garantie verliert ihre Gültigkeit, wenn Beschädigungen aufgrund unsachgemäßer Benutzung oder
Änderungen am Produkt verursacht werden.
•Die Nichtbeachtung der Anweisungen in diesem Handbuch kann das Risiko von Schäden oder Verletzungen
erhöhen und führt zum Erlöschen der Garantie.
•IN EUROPA – Wenn Sie ein europäischer Kunde sind, wenden Sie sich bitte an das Geschäft, indem das
Lampenset gekauft wurde, um Garantieleistungen in Anspruch zu nehmen.
Installationsanforderungen
•HINWEIS: Dieser Beleuchtungssatz darf nur am Lucci Climate III Ventilator – Artikelnummer 210640,
210641, 210642 – installiert werden. Er darf NICHT für andere Zwecke verwendet werden.
•Das Produkt muss von einem lizenzierten Elektriker installiert werden.
•Die Verdrahtung und Installation des Beleuchtungskörpers muss unter Einhaltung der regionalen und nationalen
Verdrahtungsvorschriften erfolgen.
z. B. AS/NZS 3000 für elektrische Installationen in Australien.
•Die maximale Nennleistung darf nicht überschritten werden.
•Wählen Sie einen geeigneten Installationsort aus:
- Dieses Produkt ist nur für den Gebrauch in Innenbereichen geeignet.
- Stellen Sie sicher, dass die Armatur nicht in der Nähe von Lüftungsöffnungen und nicht in feuchten
Räumen installiert wird.
•Achten Sie darauf, beim Auspacken nicht an den elektrischen Kabeln zu ziehen, da dies die Verbindungen
beschädigen könnte.
•Breiten Sie alle Komponenten auf einer glatten Fläche aus und vergewissern Sie sich vor der Montage, dass
keine Komponenten fehlen. Falls Teile fehlen, bringen Sie das komplette Produkt zwecks Überprüfung oder
Austausch zum Einkaufsort zurück.
•Prüfen Sie, ob der Beleuchtungskörper während des Transports beschädigt wurde. Benutzen/Installieren Sie
kein Produkt, das in irgendeiner Weise beschädigt zu sein scheint. Bringen Sie das komplette Produkt zwecks
Überprüfung, Reparatur oder Austausch zum Einkaufsort zurück.
•Stellen Sie sicher, dass die Stromversorgung des Stromkreises, an dem Sie arbeiten, ausgeschaltet wurde,
bevor Sie mit Elektroarbeiten beginnen.
Installationsanleitung
Entfernen Sie das gesamte Verpackungsmaterial aus dem Produkt und achten Sie darauf, dass Sie keine
Zubehörteile wegwerfen, die im Verpackungsmaterial verborgen sein könnten.

Installation Instructions
4 | P a g e V 1 . 0 p u b l i c a t i o n o n 0 9 . 2 0 1 9 ( A U & E U )
1. Entfernen Sie die untere Abdeckung entgegen dem Uhrzeigersinn vom Ventilator. (Abb. 1)
2. Schließen Sie die Kabel des Beleuchtungssatzes über den Schnellanschluss an den Motor an. (Abb. 2)
3. Montieren Sie den Beleuchtungssatz auf dem Teil des Lüftermotors und sichern Sie ihn durch Drehen im
Uhrzeigersinn. (Abb. 2)
4. Installieren Sie die GX53-Lampe (nicht im Lieferumfang enthalten) am Beleuchtungsset. Die maximale
Nennleistung darf nicht überschritten werden. (Abb. 3)
Sicherheitshinweise
•Stellen Sie immer sicher, dass der Strom ABGESCHALTET ist und der Beleuchtungskörper sich abgekühlt hat,
bevor Sie Wartungs- oder Reinigungsarbeiten durchführen oder Einstellungen am Beleuchtungskörper
vornehmen.
•Stellen Sie sicher, dass Stromkabel und Schrauben fixiert sind, bevor Sie das Produkt an die Stromversorgung
anschließen, um Verletzungen oder Beschädigungen am Beleuchtungskörper zu vermeiden.
•Wählen Sie gemäß den Installationsanforderungen einen geeigneten Installationsort aus:
•Achten Sie darauf, dass der Beleuchtungskörper nicht mit ätzenden Chemikalien usw. in Berührung kommt.
•Wischen Sie das Produkt mit einem feuchten, sauberen Tuch ab, um es zu reinigen. Tauchen Sie das Produkt
NICHT in Wasser oder andere Flüssigkeiten ein.
•Die Lichtquelle dieser Leuchte ist nicht austauschbar; wenn die Lichtquelle ihr Lebensende erreicht hat, muss
die gesamte Leuchte ausgetauscht werden.
Technische Daten
Artikelnr.
210643
210644
210645
Modellnummer
LD-210643
LD-210644
LD-210645
Farbe
Öl-Bronze
Schwarz
Weiß
Nennspannung
220-240 V~ 50 Hz
Nennleistung
Max. 12 W LED-Globelampe (nicht enthalten)
Lampenhalter
GX53
Abb. 1
Abb. 2
Abb. 3
GX53 Lampe
Beleuchtungsset
Untere Abdeckung

Installation Instructions
5 | P a g e V 1 . 0 p u b l i c a t i o n o n 0 9 . 2 0 1 9 ( A U & E U )
Gewicht
0,3 kg
Maße
H: 45 mm Durchmesser: 175 mm

Installation Instructions
6 | P a g e V 1 . 0 p u b l i c a t i o n o n 0 9 . 2 0 1 9 ( A U & E U )
KIT D’ÉCLAIRAGE POUR VENTILATEUR LUCCI CLIMATE III
No UGS 210643, 210644, 210645
Tension nominale 220-240 V~ 50 Hz
Merci d’avoir acheté ce produit de qualité Lucci. Afin de garantir un fonctionnement correct et sûr, veuillez lire
attentivement et respecter toutes les consignes avant d’assembler, d'installer et d'utiliser le produit. Veuillez conserver
ces consignes pour pouvoir les consulter ultérieurement.
Garantie
•Ce produit est couvert par une garantie de 12 mois. Veillez conserver la preuve d’achat.
•La garantie sera annulée en cas de dommages causés par une utilisation incorrecte ou une modification du
produit.
•Le non-respect des consignes de cette notice peut augmenter le risque de dommage ou de blessure et annulera
la garantie.
•EN EUROPE – Si vous êtes un client européen, veuillez contacter le magasin où le kit d’éclairage a été acheté
afin de faire valoir la garantie.
Exigences d’installation
•REMARQUE : Ce kit d’éclairage ne doit être installé que sur un ventilateur Lucci Climate III – No UGS
210640, 210641, 210642. Il ne doit pas être utilisé à d’autres fins.
•Ce produit doit être installé par un électricien agréé.
•Tous les branchements électriques ainsi que l’installation du luminaire doivent être conformes aux codes
électriques locaux et nationaux.
p. ex. : les règles d'installation électrique AS/NZS 3000 applicables en Australie.
•Ne dépassez pas la puissance nominale maximale.
•Choisissez un emplacement adapté pour l’installation du luminaire.
- Ce produit ne convient que pour une utilisation intérieure.
- Assurez-vous que le luminaire n’est pas installé à proximité d’un système de ventilation et qu’il ne se
trouve pas dans une zone humide.
•Faites attention à ne pas tirer sur les câbles électriques lors du déballage sous peine d’endommager les
branchements.
•Étalez toutes les pièces sur une surface lisse et vérifiez qu'il n’en manque aucune avant de commencer le
montage. Si des pièces sont manquantes, ramenez le produit dans son intégralité au point de vente afin qu'il
soit inspecté ou remplacé.
•Vérifiez que le luminaire n'a pas été endommagé pendant le transport. N’utilisez/n’installez pas un produit
présentant des dommages de quelque nature que ce soit. Ramenez le produit dans son intégralité au point de
vente afin qu'il soit inspecté, réparé ou remplacé.
•Assurez-vous d'avoir coupé le courant du circuit électrique concerné avant de démarrer tous travaux
électriques.
Consignes d’installation
Retirez tous les éléments d'emballage du produit et veillez à ne pas jeter d'accessoires qui pourraient être
dissimulés dans l'emballage.

Installation Instructions
7 | P a g e V 1 . 0 p u b l i c a t i o n o n 0 9 . 2 0 1 9 ( A U & E U )
1. Retirez le couvercle inférieur du ventilateur en tournant dans le sens inverse des aiguilles d’une montre. (Fig. 1)
2. Branchez les fils du kit d’éclairage au moteur via le connecteur rapide. (Fig. 2)
3. Installez le kit d’éclairage de la partie moteur du ventilateur, puis fixez-le en le tournant dans le sens des
aiguilles d’une montre. (Fig. 2)
4. Installez l’ampoule GX53 (non incluse) sur le kit d’éclairage. Ne dépassez pas la puissance nominale
maximale. (Fig. 3)
Conseils de sécurité
•Veillez à toujours couper le courant et à laisser refroidir le luminaire avant d'effectuer une opération d'entretien,
de nettoyage ou de réglage sur le luminaire.
•Afin d’éviter tout risque de blessures corporelles ou d'endommagement du luminaire, assurez-vous que les fils
électriques et les vis sont bien fixés avant de mettre le courant.
•Choisissez un emplacement adapté selon les besoins de l’installation.
•Assurez-vous que le luminaire n’entre pas en contact avec des produits chimiques corrosifs, etc.
•Nettoyez le luminaire à l'aide d'un chiffon humide propre. Ne trempez et ne plongez PAS le produit dans l’eau
ou d'autres liquides.
•La source lumineuse de ce luminaire n’est pas remplaçable ; en fin de vie, le luminaire tout entier doit être
remplacé.
Spécifications
No UGS
210643
210644
210645
N° du modèle
LD-210643
LD-210644
LD-210645
Couleur
Bronze huilé
Noir
Blanc
Tension
nominale
220-240 V~ 50Hz
Puissance
nominale
Globe LED 12 W max. (non fourni)
Fig. 1
Fig. 2
Fig. 3
Ampoule GX53
Kit d'éclairage
Couvercle
inférieur

Installation Instructions
8 | P a g e V 1 . 0 p u b l i c a t i o n o n 0 9 . 2 0 1 9 ( A U & E U )
Support
d’ampoule
GX53
Poids
0,3 kg
Dimensions
H:45 mm Dia :175 mm

Installation Instructions
9 | P a g e V 1 . 0 p u b l i c a t i o n o n 0 9 . 2 0 1 9 ( A U & E U )
KIT DE ILUMINACIÓN PARA VENTILADOR LUCCI CLIMATE III
SKU# 210643, 210644, 210645
Tensión nominal: 220-240V~ 50Hz
Gracias por adquirir este producto Lucci de calidad. Para garantizar un funcionamiento correcto y seguro, lea y siga
todas las instrucciones detenidamente antes de montar, instalar y usar este producto. Por favor, guarde estas
instrucciones para futuras consultas.
Garantía
•El aparato está cubierto por una garantía de 12 meses. Por favor, conserve la prueba de compra.
•La garantía quedará invalidada si se produce algún daño como consecuencia de un uso indebido o
modificaciones en el producto.
•El incumplimiento de las instrucciones contenidas en este manual pueden aumentar el riesgo de daños o lesiones
y anularán la garantía.
•EN EUROPA – Si es un cliente europeo, contacte con la tienda distribuidora donde adquirió el kit de iluminación
para los servicios de garantía.
Requisitos de instalación
•NOTA: Este kit de iluminación solo debe instalarse en el ventilador Lucci Climate III – SKU# 210640,
210641, 210642. NO se debe usar para ningún otro propósito.
•Debe ser instalada por un electricista acreditado.
•Tanto el cableado como la instalación de la luz deben cumplir con los reglamentos locales y nacionales sobre
instalaciones eléctricas.
P. ej.: AS/NZS 3000 Electrical installations en Australia.
•No exceda la potencia nominal máxima admitida.
•Seleccione una ubicación apropiada para la instalación.
- Este producto ha sido diseñado solamente para uso en interiores.
- Procure no instalar el aparato cerca de algún conducto de ventilación ni en lugares húmedos o mojados.
•Procure no tirar de ninguno de los cables cuando desembale el producto, ya que podría dañar las conexiones.
•Deposite todos los componentes sobre una superficie lisa y asegúrese de que no falte ninguno antes de
comenzar el montaje. Si falta alguna pieza, devuelva el producto completo al lugar donde realizó la compra para
que lo examinen o reemplacen.
•Compruebe que la luminaria no haya sufrido daño alguno durante el transporte. Nunca utilice o instale un
producto que parezca sufrir algún daño. Devuelva el producto completo al lugar donde realizó la compra para
que lo examinen, reparen o reemplacen.
•Asegúrese de que el circuito eléctrico en el que esté trabajando esté desconectado de la corriente antes de
iniciar cualquier trabajo eléctrico.
Instrucciones de instalación
Retire todo el material de embalaje del producto, con cuidado de no desechar con él algún accesorio oculto.
1. Retire la cubierta inferior del ventilador girándola en sentido antihorario. (Imagen 1)
2. Conecte los cables del aparato de iluminación al motor mediante un conector rápido. (Imagen 2)
3. Instale el kit de iluminación al motor del ventilador y gírelo en sentido horario para asegurarlo. (Imagen 2)

Installation Instructions
10 | P a g e V 1 . 0 p u b l i c a t i o n o n 0 9 . 2 0 1 9 ( A U & E U )
4. Instale la lámpara GX53 (no incluida) al kit de iluminación. No exceda la potencia nominal máxima. (Imagen 3)
Consejos sobre seguridad
•Asegúrese siempre de que la luminaria esté apagada y se haya enfriado antes de realizar tareas de
mantenimiento o limpieza, o al llevar a cabo algún ajuste de la luminaria.
•Para evitar lesiones, o daños en la luminaria, asegúrese de que los cables de corriente y los tornillos estén bien
asegurados antes de conectar la corriente.
•Escoja un lugar que cumpla con los requisitos de instalación.
•Asegúrese de que la luminaria no pueda entrar en contacto con químicos corrosivos, etc.
•Utilice un paño limpio y humedecido para limpiarla. NO remoje o sumerja el producto en el agua u otros
líquidos.
•La fuente de luz de este aparato de iluminación no es reemplazable. La luminaria debe ser desechada cuando la
fuente de luz llegue al final de su vida útil.
Especificaciones
SKU #
210643
210644
210645
Modelo #
LD-210643
LD-210644
LD-210645
Color
Bronce ennegrecido
Negro
Blanco
Tensión
nominal
220-240 V~ 50 Hz
Potencia
nominal
Globo led 12 W máx. (no incluido)
Portalámparas
GX53
Peso
0,3kg
Dimensiones
Al.: 45 mm; Ø: 175 mm
Imagen
1
Imagen
2
Imagen 3
Lámpara GX53
Kit de
iluminación
Cubierta inferior

Installation Instructions
11 | P a g e V 1 . 0 p u b l i c a t i o n o n 0 9 . 2 0 1 9 ( A U & E U )
KIT LUCE PER VENTILATORE LUCCI CLIMATE III
SKU# 210643, 210644, 210645
Tensione nominale 220-240 V~ 50 Hz
Grazie per aver acquistato questo prodotto Lucci di alta qualità. Per assicurare un funzionamento corretto e sicuro,
leggere e seguire attentamente tutte le istruzioni prima di assemblare, installare e usare il prodotto. Conservare le
istruzioni per consultazioni future.
Garanzia
•Questo prodotto è coperto da una garanzia di 12 mesi. Conservare la prova d’acquisto.
•La garanzia non copre eventuali danni causati da un uso scorretto o modifiche al prodotto.
•Il mancato rispetto delle istruzioni riportate in questo manuale può aumentare il rischio di danni o lesioni e
annullerà la garanzia.
•IN EUROPA: gli acquirenti europei possono contattare il punto vendita per eventuali richieste di intervento in
garanzia.
Requisiti di installazione
•NOTA: Questo kit luce deve essere installato unicamente sul ventilatore Lucci Climate III – SKU#
210640, 210641, 210642. NON deve essere utilizzato per nessun altro scopo.
•Il prodotto deve essere installato da un elettricista professionista.
•I collegamenti elettrici e l'installazione della lampada devono essere conformi alle normative elettriche locali e
nazionali.
Ad esempio, la normativa AS/NZS 3000 sugli impianti elettrici in Australia.
•Non superare la potenza nominale massima.
•Selezionare una posizione di installazione adatta;
- Questo prodotto è destinato al solo uso in interni.
- Assicurarsi che l’accessorio non sia installato in prossimità di bocchette di ventilazione e che non sia in
aree umide.
•Prestare attenzione a non tirare i cavi elettrici durante il disimballaggio per evitare di danneggiarli.
•Disporre tutti i componenti su una superficie piana e assicurarsi che non manchi nessun componente prima
dell'assemblaggio. In caso di parti mancanti, riportare il prodotto completo presso il rivenditore affinché venga
ispezionato o sostituito.
•Verificare che la lampada non abbia subito danni durante il trasporto. Non usare/installare il prodotto se
presenta danni di qualsiasi tipo. Riportare il prodotto completo presso il rivenditore affinché venga ispezionato,
riparato o sostituito.
•Assicurarsi che il circuito elettrico a cui verrà collegata lampada sia disattivato prima di iniziare qualsiasi lavoro
elettrico.
Istruzioni di installazione
Rimuovere tutti i materiali di imballaggio dal prodotto e prestare attenzione a non gettare accessori che possono
essere nascosti dai materiali di imballaggio.
1. Rimuovere la copertura inferiore sul ventilatore ruotandolo in senso antiorario. (Fig. 1)
2. Collegare i cavi del kit luce al motore attraverso il connettore rapido. (Fig. 2)

Installation Instructions
12 | P a g e V 1 . 0 p u b l i c a t i o n o n 0 9 . 2 0 1 9 ( A U & E U )
3. Installare il kit luce sul motore del ventilatore, quindi fissarlo girando in senso orario. (Fig. 2)
4. Installare la lampada GX53 (non inclusa) sul kit luce. Non superare la potenza nominale massima. (Fig. 3)
Norme di sicurezza
•Assicurarsi che l'alimentazione elettrica sia disattivata e che la lampada si sia raffreddata prima di effettuare
qualsiasi operazione di manutenzione, pulizia o regolazione sulla lampada.
•Per evitare il rischio di lesioni o danni alla lampada, assicurarsi che i cavi elettrici e le viti siano saldi prima di
attivare l'alimentazione elettrica.
•Selezionare una posizione adeguata secondo i requisiti di installazione.
•Assicurarsi che la lampada non entri in contatto con sostanze chimiche corrosive ecc.
•Per la pulizia, usare un panno umido. NON immergere il prodotto in acqua o altri liquidi.
•La sorgente luminosa di questa lampada non è sostituibile; quando la sorgente luminosa raggiunge la fine della
propria vita utile, dovrà essere sostituita.
Specifiche tecniche
SKU #
210643
210644
210645
N. modello
LD-210643
LD-210644
LD-210645
Colore
Bronzo oliato
Nero
Bianco
Tensione
nominale
220-240 V~ 50 Hz
Potenza
nominale
Lampada sferica LED max.12 W (non inclusa)
Portalampada
GX53
Peso
0,3 kg
Dimensioni
H: 45 mm Dia: 175 mm
Fig. 1
Fig. 2
Fig. 3
Lampada GX53
Kit luce
Copertura
inferiore

Installation Instructions
13 | P a g e V 1 . 0 p u b l i c a t i o n o n 0 9 . 2 0 1 9 ( A U & E U )
LUCCI CLIMATE III VENTILATORLICHTSET
SKU# 210643, 210644, 210645
Nominale spanning 220-240 V ~ 50 Hz
Bedankt voor de aankoop van dit Lucci-kwaliteitsproduct. Om een correcte werking en veiligheid te garanderen, dient u
alle instructies zorgvuldig te lezen en op te volgen voordat u het product monteert, installeert en gebruikt. Bewaar de
instructies voor toekomstig gebruik.
Garantie
•Op dit product is 12 maanden garantie van toepassing. Bewaar het aankoopbewijs.
•De garantie komt te vervallen als er schade ontstaat door onjuist gebruik of wijziging van het product.
•Het niet opvolgen van de instructies in deze handleiding kan het risico op schade of letsel verhogen en de garantie
ongeldig maken.
•IN EUROPA - Als u een Europese klant bent, neem dan contact op met het verkooppunt waar de lichtset is
gekocht voor garantieservice.
Installatie-eisen
•OPMERKING: Deze lichtset mag alleen worden geïnstalleerd op de Lucci Climate III ventilator - SKU#
210640, 210641, 210642. Het mag NIET voor andere doeleinden worden gebruikt.
•De set moet worden gemonteerd door een erkend elektricien.
•Bij de bedrading en installatie van het armatuur moeten de lokale en nationale bedradingsvoorschriften in acht
worden genomen.
bijvoorbeeld. AS/NZS 3000 Elektrische installaties in Australië.
•Zorg dat u het maximale vermogen niet overschrijdt.
•Kies een geschikte locatie voor de installatie;
- Het product is uitsluitend bestemd voor gebruik binnenshuis.
- Zorg ervoor dat de armatuur niet in de buurt van ventilatieroosters wordt geïnstalleerd en niet in een
vochtige of natte ruimte.
•Zorg ervoor dat er tijdens het uitpakken niet aan de elektrische draden wordt getrokken, omdat dit de verbinding
kan beschadigen.
•Leg alle onderdelen op een vlakke ondergrond en zorg ervoor dat er geen onderdelen ontbreken voor de
montage. Als er onderdelen ontbreken, stuurt u het volledige product terug naar de plaats van aankoop voor
inspectie of vervanging.
•Controleer of de verlichting tijdens het transport is beschadigd. Bedien/installeer geen product dat op welke
wijze dan ook beschadigd lijkt te zijn. Stuur het beschadigde product terug naar de plaats van aankoop voor
inspectie of vervanging.
•Controleer of de stroomtoevoer naar het circuit waaraan u werkt is uitgeschakeld voordat u met elektrische
werkzaamheden begint.
Installatie-instructies
Verwijder al het verpakkingsmateriaal van het product en zorg ervoor dat u geen accessoires weggooit die in het
verpakkingsmateriaal verborgen kunnen zijn.
1. Verwijder de onderplaat van de ventilator door deze tegen de klok in te draaien. (afb. 1)

Installation Instructions
14 | P a g e V 1 . 0 p u b l i c a t i o n o n 0 9 . 2 0 1 9 ( A U & E U )
2. Sluit de draden van de lichtset via de snelkoppeling aan op het motorgedeelte. (afb. 2)
3. Bevestig de lichtset op het motorgedeelte en zet deze vervolgens vast door deze met de klok mee te draaien.
(afb. 2)
4. Installeer de GX53-lamp (niet meegeleverd) in de lichtset. Zorg dat u het maximale vermogen niet overschrijdt.
(afb. 3)
Veiligheidstips
•Zorg er altijd voor dat de stroom is uitgeschakeld en de verlichting is afgekoeld voordat u onderhoud, reiniging
of aanpassingen aan de verlichting uitvoert.
•Om letsel of schade aan de verlichting te voorkomen, moet u ervoor zorgen dat de voedingskabels en schroeven
goed vastzitten voordat u de stroom aansluit.
•Kies een geschikte plaats overeenkomstig de installatievereisten.
•Zorg ervoor dat de verlichting niet in contact komt met corrosieve chemicaliën e.d.
•Om te reinigen, veegt u het af met een iets vochtige, schone doek. Laat het product niet weken of
onderdompelen in water of andere vloeistoffen.
•De lichtbron is niet vervangbaar; wanneer de lichtbron het einde van haar levensduur heeft bereikt, moet de
gehele armatuur worden vervangen.
Specificaties
SKU #
210643
210644
210645
Model #
LD-210643
LD-210644
LD-210645
Kleur
Oil Rub Bronze
Zwart
Wit
Nominale
spanning
220-240 V~ 50Hz
Nominaal
Max.12 W led-globe (niet inbegrepen)
Afb. 1
Afb. 2
Afb. 3
GX53-lamp
Lichtset
Onderplaat

Installation Instructions
15 | P a g e V 1 . 0 p u b l i c a t i o n o n 0 9 . 2 0 1 9 ( A U & E U )
vermogen
Lamphouder
GX53
Gewicht
0,3kg
Afmetingen
H:45 mm Dia:175 mm

Installation Instructions
16 | P a g e V 1 . 0 p u b l i c a t i o n o n 0 9 . 2 0 1 9 ( A U & E U )
ΣΕΤ ΦΩΤΙΣΜΟΥ ΑΝΕΜΙΣΤΗΡΑ LUCCI CLIMATE III
ΑΡ. SKU 210643, 210644, 210645
Ονομαστική τάση 220-240V~ 50Hz
Ευχαριστούμε που αγοράσατε αυτό το προϊόν υψηλής ποιότητας της Lucci. Για να διασφαλιστεί ότι το προϊόν θα
λειτουργεί σωστά και με ασφάλεια, διαβάστε και φυλάξτε όλες τις οδηγίες πριν συναρμολογήσετε, εγκαταστήσετε και
χρησιμοποιήσετε αυτό το προϊόν. Φυλάξτε τις οδηγίες για μελλοντική αναφορά.
Εγγύηση
•Το προϊόν καλύπτεται με εγγύηση 12 μηνών. Παρακαλούμε να φυλάξετε την απόδειξη αγοράς.
•Η εγγύηση δεν ισχύει αν υπάρχουν ζημιές λόγω ακατάλληλης χρήσης ή λόγω τροποποίησης του προϊόντος.
•Αν δεν τηρηθούν οι οδηγίες που περιλαμβάνονται στο παρόν εγχειρίδιο, ενδέχεται να αυξηθεί ο κίνδυνος ζημιάς
ή τραυματισμού και παύει να ισχύει η εγγύηση.
•ΣΤΗΝ ΕΥΡΩΠΗ – Αν είστε πελάτης από την Ευρώπη, απευθυνθείτε στο κατάστημα λιανικής απ' όπου αγοράσατε
το σετ φωτισμού, για σέρβις στο πλαίσιο της εγγύησης.
Απαιτήσεις εγκατάστασης
•ΣΗΜΕΙΩΣΗ: Το παρόν σετ φωτισμού πρέπει να εγκαθίσταται μόνο επάνω στον ανεμιστήρα Lucci
Climate III – Αρ. SKU 210640, 210641, 210642. ΔΕΝ πρέπει να χρησιμοποιείται για άλλους σκοπούς.
•Η εγκατάσταση πρέπει να πραγματοποιηθεί από πιστοποιημένο ηλεκτρολόγο.
•Όλες οι καλωδιώσεις και η εγκατάσταση του εξαρτήματος φωτισμού θα πρέπει να πληρούν τους τοπικούς και
εθνικούς κανονισμούς για τις ηλεκτρικές καλωδιώσεις,
π.χ., πρότυπο AS/NZS 3000 για τις ηλεκτρολογικές εγκαταστάσεις στην Αυστραλία.
•Δεν επιτρέπεται να υπερβαίνεται η μέγιστη τιμή ισχύος σε watt.
•Επιλέξτε κατάλληλη θέση για εγκατάσταση.
- Το προϊόν είναι κατάλληλο μόνο για χρήση σε εσωτερικό χώρο.
- Εξασφαλίζετε ότι το εξάρτημα δεν θα τοποθετηθεί δίπλα σε ανοίγματα αερισμού και ότι δεν θα βρίσκεται
σε τομείς με υγρασία.
•Προσέξτε να μην τραβήξετε τα ηλεκτρικά καλώδια κατά την αποσυσκευασία, γιατί μπορεί να υποστεί ζημιά η
σύνδεση.
•Τακτοποιήστε όλα τα εξαρτήματα σε ομαλή επιφάνεια και βεβαιωθείτε ότι δεν λείπει κανένα εξάρτημα, πριν
ξεκινήσετε τη συναρμολόγηση. Αν λείπουν εξαρτήματα, επιστρέψετε ολόκληρο το προϊόν στο κατάστημα αγοράς
για έλεγχο ή αντικατάσταση.
•Ελέγξτε μήπως το είδος φωτισμού έχει υποστεί ζημιά κατά τη μεταφορά. Αν φαίνεται να υπάρχει οποιαδήποτε
ζημιά, μη θέσετε σε λειτουργία / μην εγκαταστήσετε το προϊόν. Επιστρέψετε ολόκληρο το προϊόν στο κατάστημα
αγοράς για επισκευή ή αντικατάσταση.
•Εξασφαλίστε ότι το κύκλωμα με το οποίο εργάζεστε έχει απενεργοποιηθεί προτού ξεκινήσετε με ηλεκτρολογικές
εργασίες.
Οδηγίες εγκατάστασης
Αφαιρέστε όλα τα υλικά συσκευασίας από το προϊόν και προσέξτε να μην πετάξετε εξαρτήματα που μπορεί να
είναι κρυμμένα μέσα στα υλικά συσκευασίας.
1. Απομακρύνετε το κάτω κάλυμμα στον ανεμιστήρα, περιστρέφοντάς αριστερόστροφα. (Εικ. 1)

Installation Instructions
17 | P a g e V 1 . 0 p u b l i c a t i o n o n 0 9 . 2 0 1 9 ( A U & E U )
2. Συνδέστε τα καλώδια του σετ φωτισμού στο μοτέρ μέσω του ταχυσυνδέσμου. (Εικ. 2)
3. Εγκαταστήστε το σετ φωτισμού επάνω στο τμήμα μοτέρ ανεμιστήρα, στη συνέχεια ασφαλίστε το
περιστρέφοντας δεξιόστροφα. (Εικ. 2)
4. Εγκαταστήστε τη λυχνία GX53 (δεν περιλαμβάνεται) στο κιτ φωτισμού. Δεν επιτρέπεται να υπερβαίνεται η
μέγιστη τιμή ισχύος. (Εικ. 3)
Συμβουλές ασφαλείας
•Να ΑΠΕΝΕΡΓΟΠΟΙΕΙΤΕ πάντα το προϊόν και να περιμένετε να κρυώνει το φωτιστικό, πριν πραγματοποιήσετε
συντήρηση, καθαρισμό ή ρυθμίσεις στο φωτιστικό.
•Προς αποφυγή τραυματισμού ή ζημιάς στο φωτιστικό, εξασφαλίζετε ότι οι αγωγοί ρεύματος και οι βίδες είναι
ασφαλή προτού συνδέσετε στο ρεύμα.
•Επιλέξτε μια κατάλληλη τοποθεσία σύμφωνα με τις απαιτήσεις εγκατάστασης.
•Εξασφαλίζετε ότι το φωτιστικό δεν θα έρθει σε επαφή με διαβρωτικά χημικά κ.λπ.
•Για τον καθαρισμό, σκουπίζετε με ένα νωπό καθαρό πανί. ΜΗΝ εμποτίζετε και μη βυθίζετε το προϊόν σε νερό
και άλλα υγρά.
•Η λυχνία αυτού του φωτιστικού δεν αντικαθίσταται. Όταν η λυχνία φτάσει στο τέλος της διάρκειας ζωής, πρέπει να
αντικατασταθεί όλο το φωτιστικό μαζί.
Τεχνικά χαρακτηριστικά
Αρ. SKU
210643
210644
210645
Αρ. μοντέλου
LD-210643
LD-210644
LD-210645
Χρώμα
Oil Rub Bronze
Μαύρο
Λευκό
Ονομαστική
τάση
220-240V~ 50Hz
Ονομαστική
τιμή ισχύος
watt
Μέγ. λυχνία 12W LED (δεν περιλαμβάνεται)
Εικ. 1
Εικ. 2
Εικ. 3
Λυχνία GX53
Σετ φωτιστικού
Κάτω κάλυμμα

Installation Instructions
18 | P a g e V 1 . 0 p u b l i c a t i o n o n 0 9 . 2 0 1 9 ( A U & E U )
Υποδοχή
λάμπας
GX53
Βάρος
0,3 κιλά
Διαστάσεις
Υ: 45 χιλ., Διάμ.: 175 χιλ.
This manual suits for next models
3
Table of contents
Languages:
Other Lucci fini Fan manuals