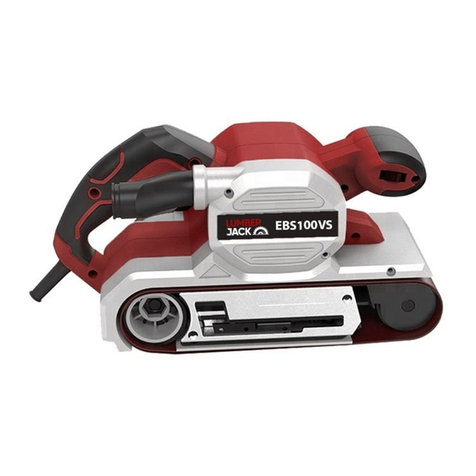
Lumberjack EBS100 User manual

EBS100

Conformity……………………………………………..
Table of Contents
MachineDetails..………….................................................. 01
GeneralPowerToolSafetyWarnings............................... 02
UsinganExtensionCable................................................. 07
Assembly.………………………................................................ 08
Operation.…………………….................................................. 09
MaintenanceandService................................................. 11
LumberjackGuarantee….................................................. 12
Declarationof 15
PartsList……………………….................................................. 16
PartsDiagram……………….................................................. 18

1
WelcometoLumberjack!
ThankyouforpurchasingthisLumberjack
product,wehopeyouenjoymanyyearsof
creativeandproductiveuse.
Pleasereadthismanualthoroughlyandkeep
foryourreference.
MachineDetails
Specifications:
MainsVoltage‐ 230V(50Hz)
PowerConsumption‐ 1200W
NoLoadSpeed‐480m/min
BeltSize‐ 100x610mm
GrossWeight‐ 6.8kg
NettWeight‐ 6.4kg
PackageContents:
DustBag
3xSandingBelts
IntendedUse
Themachinehasbeendesignedfortheuse
ofsandingwood,plastics,metalandpainted
surfaces.
ProductFeatures
1. Front/RearHandle
2. SwitchLockonButton
3. On/OffSwitch
4. DustOutlet
5. BeltCentralisationKnob
6. DustBag
7. SandingBeltLever
8. DrivingBeltCover

2
Danger!‐Readtheoperatinginstructionsto
reducetheriskofinjury
Caution!Weareardefenders.Theimpactofnoise
cancausedamagetohearing.
Caution!Wearadustmask.
Caution!Wearsafetygoggles.
Caution!Riskofinjury!Donotreachintothe
runningsawblade.
GeneralPowerToolSafetyWarnings
Readallsafetywarningsandallinstructions
–Failuretofollowthewarningsand
instructionsmayresultinelectricshock,fire
and/orseriousinjury.
Saveallwarningsandinstructionsforfuture
reference.
Theterm“powertool”inthewarningsrefers
toyourmainsoperatedorbatteryoperated
powertool.
1.WorkAreaSafety
1.1Keepworkareacleanandwelllit.
Clutteredordarkareasinviteaccidents.
1.2Donotoperatethepowertoolin
explosiveatmospheres,suchasinthe
presenceofflammableliquids,gasesordust.
Powertoolscreatesparkswhichmayignite
thedustorfumes.
1.3Keepchildrenandbystandersaway
whileoperatingapowertool.Distractions
cancauseyoutolosecontrolofthepower
tool.
2.ElectricalSafety
2.1Powertoolplugsmustmatchtheoutlet.
Nevermodifythepluginanyway.Donot
useanyadaptorplugswithearthed

3
(grounded)powertools.Unmodifiedplugs
andmatchingoutletswillreduceriskof
electricshock.
2.2Avoidbodycontactwithearthedor
groundedsurfaces,suchaspipes,radiators,
rangesandrefrigerators.Thereisan
increasedriskofelectricshockifyourbodyis
earthedorgrounded
2.3Donotexposepowertoolstorainor
wetconditions.Waterenteringapowertool
willincreasetheriskofelectricshock.
2.4Donotabusethecord.Neverusethe
cordforcarrying,pullingorunpluggingthe
powertool.Keepcordawayfromheat,oil,
sharpedgesandmovingparts.Damagedor
entangledcordsincreasetheriskofelectric
shock.
2.5Whenoperatingapowertooloutdoors,
useanextensioncordsuitableforoutdoor
use.Usingacordsuitableforoutdooruse
reducestheriskofelectricshock.
2.6Ifoperatingapowertoolinadamp
locationisunavoidable,usearesidual
currentdevice(RCD)protectedsupply.Use
ofanRCDreducestheriskofelectricshock.
3.PersonalSafety
3.1Stayalert,watchwhatyouaredoingand
usecommonsensewhenoperatingapower
tool.Donotuseapowertoolwhileyouare
tiredorundertheinfluenceofdrugs,
alcoholormedication.Amomentof
inattentionwhilstoperatingpowertoolsmay
resultinseriouspersonalinjury.
3.2Usepersonalprotectiveequipment
(PPE).Alwaysweareyeprotection.
Protectiveequipmentsuchasdustmasks,
non‐skidshoes,hardhats,orhearing
protectionusedforappropriateconditions
willreducetheriskofpersonalinjuries.
3.3Preventunintentionalstarting.Ensure
theswitchisintheoffpositionbefore
connectingtopowersourceand/orbattery
pack,pickinguporcarryingtool.Carrying
powertoolswithyourfingerontheswitchor
energisingpowertoolsthathavetheswitch
oninvitesaccidents.
3.4Removeanyadjustingkeyorwrench
beforeturningthepowertoolon.Awrench
orakeyleftattachedtoarotatingpartofthe
powertoolmayresultinpersonalinjury.
3.5Donotoverreach.Keepproperfooting
andbalanceatalltimes.Thisenablesbetter
4
controlofthepowertoolinunexpected
situations.
3.6Dressproperly.Donotwearloose
clothingorjewellery.Keepyourhair,
clothingandglovesawayfrommovingparts.
Looseclothes,jewelleryorlonghaircanbe
caughtinmovingparts.
3.7Ifdevicesareprovidedforthe
connectionofdustextractionandcollection
facilities,ensuretheseareconnectedand
properlyused.Useofdustcollectioncan
reducedust‐relatedhazards.
4.PowerToolUseandCare
4.1Donotforcethepowertool.Usethe
correctpowertoolforyourapplication.The
correctpowertoolwilldothejobbetterand
saferattherateforwhichitwasdesigned.
4.2Donotusethepowertooliftheswitch
doesnotturnitonandoff.Anypowertool
thatcannotbecontrolledwiththeswitchis
dangerousandmustberepaired.
4.3Disconnecttheplugfromthepower
sourceand/orbatterypackfromthepower
toolbeforemakinganyadjustments,
changingaccessories,orstoringpowertools.
Suchpreventivesafetymeasuresreducethe
riskofstartingthepowertoolaccidentally.
4.4Storeidlepowertoolsoutofthereach
ofchildrenanddonotallowpersons
unfamiliarwiththepowertoolorthese
instructionstooperatethepowertool.
Powertoolsaredangerousinthehandsof
untrainedusers.
4.5Maintainpowertools.Checkfor
misalignedorbindingofmovingparts,
breakagesofpartsandanyothercondition
thatmayaffectthepowertool’soperation.
Ifdamaged,havethepowertoolrepaired
beforeuse.Manyaccidentsarecausedby
poorlymaintainedpowertools.
4.6Keepcuttingtoolscleanandsharp.
Properlymaintainedcuttingtoolswithsharp
cuttingedgesarelesslikelytobindandare
easiertocontrol.
4.7Usethepowertool,accessoriesandtool
bitsetc.inaccordancewiththese
instructions,takingintoaccountthe
workingconditionsandtheworkperformed.
Useofthepowertoolforoperations
differentfromthoseintendedcouldresultin
ahazardoussituation.

5
5.BatteryToolUseandCare.
5.1Rechargeonlywiththechargerspecified
bythemanufacturer.Achargerthatis
suitableforonetypeofbatterypackmay
createariskoffirewhenusedwithanother
batterypack.
5.2Usepowertoolsonlywithspecifically
designatedbatterypacks.Useofanyother
batterypacksmaycreateariskofinjuryor
fire.
5.3Whenbatterypackisnotinuse,keepit
awayfromothermetalobjects,likepaper
clips,coins,keys,nails,screwsorother
smallmetalobjectthatcanmakea
connectionfromoneterminaltoanother.
Shortingthebatteryterminalstogethermay
causeburnsorafire.
5.4Underabusiveconditions,liquidmaybe
ejectedfromthebattery;Avoidcontact.If
contactaccidentallyoccurs,flushwith
copiousamountsofwater.Ifliquidcontacts
eyes,seekmedicalhelpimmediately.Liquid
ejectedfromthebatterymaycauseirritation
orburns.
6.Service
6.1Haveyourpowertoolsservicedbya
qualifiedrepairpersonusingonlyidentical
replacementparts.Thiswillensurethat
thesafetyofthepowertoolismaintained.
7.AdditionalSafetyandWorking
Instructions
7.1Dustsfrommaterialssuchas
lead‐containingcoatings,somewoodtypes,
mineralsandmetalscanbeharmfultoone’s
healthandcauseallergicreactions,leading
torespiratoryinfectionsand/orcancer.
Materialscontainingasbestosmayonlybe
workedbyspecialists.Observetherelevant
regulationsinyourcountryforthematerials
tobeworked.
7.2Preventdustaccumulationatthe
workplace.Dustscaneasilyignite.
8AdditionalWarningsforSanders
8.1Harmful/toxicdustswillarisefrom
sandinge.g.leadpaintedsurfaces,woods
andmetals.Contactwithorinhalationof
thesedustscanendangerthehealthof
operatorandbystanders.Alwaysuseeye
glassesanddustmask.

6
8.2Hearingprotectionshouldbeworn
whenusingthesander.
8.3Alwayswearsafetyglassesoreye
shieldswhenusingthesander.Everyday
eyeglasseshaveonlyimpact‐resistantlenses;
theyarenotsafetyglasses.Followingthis
rulewillreducetheriskofseriouspersonal
injury.
8.4Removetheplugfromthesocketbefore
carryingoutanyadjustment,servicing
ormaintenance.
8.5Fullyunwindcabledrumextensionsto
avoidpotentialoverheating.
8.6Whenanextensioncableisrequiredyou
mustensureithasthecorrectampererating
foryourpowertoolandisinasafeelectrical
condition.
8.7Ensureyourmainssupplyvoltageis
sameasindicatedontheratingplate.
8.8Yourtoolisdoubleinsulatedfor
additionalprotectionagainstapossible
electricalinsulationfailurewithinthetool.
8.9Alwayscheckwalls,floorsandceilingsto
avoidhiddenpowercablesandpipes.
8.10.Afterlongworkingperiod’sexternal
metalpartsandaccessoriescouldbehot.
8.11Ifpossible,ensurethework‐pieceis
firmlyclampedtopreventmovement.
8.12Yoursanderisahandheldtool,donot
clampyoursander.
8.13Beforesanding,checktheareaisfree
ofnails,screws,etc.
8.14Neverstopthesanderbyapplyinga
forcetothebaseplate.
8.15Onlyusepaperingoodcondition.Do
notusetornorwornpaper.
8.16Donotsandmaterialcontaining
asbestosduetoahealthrisk.
8.17Donotsandleadbasedpaintdueto
theriskofleadpoisoning.
8.18Donoteatordrinkintheworkingarea
ofthesander.
8.19Donotallowpeopletoenterthe
workingareawithoutwearingadustmask.
8.20Wherepossible,sealofftheworking
areatocontainthedustforlaterremoval.
8.21Yourtoolisdesignedfordrysanding
only,notwetsanding.
8.22Yourtoolisdesignedforgeneral
purposelightpolishingofwoodandmetals.
8.23Donotsandmagnesiummaterialdue
totheriskoffire.

7
UsinganExtensionCable
–Ifanextensioncableisrequired,usean
approvedtriplecoreextensioncablesuitable
forthepowerinputofthetool.
–Groundedtoolsalwaysrequireathreewire
extensioncable.
–Asthedistancefromthesupplyoutlet
increaseyoumustuseaheaviergauge
extensioncable.Usingextensioncables
withinadequatelysizedwirecausesaserious
dropinvoltage,resultinginlossofpowerand
possibletooldamage.
–Thesmallerthegaugenumberofthewire
thegreaterthecapacityofthecord.
–Whenusingacablereel,alwaysunwindthe
cablecompletely.
CableRatingChart
Amperes 7.5m 15m25m30m45m60m
0–2.0666666
2.1–3.4666666
3.5–5.066661015
5.1–7.1101010101515
7.1–
12.0
151515152020
12.1–
20.0
2020202025‐

8
Assembly
Avoidunintentionalstartingofthemachine.
Duringassemblyandforallworkonthe
machine,thepowerplugmustnotbe
connectedtothemainssupply.
Carefullyremoveallpartsincludedinthe
deliveryfromtheirpackaging.
Removeallpackagingmaterialfromthe
machineandtheaccessoriesprovided.
Beforestartingtheoperationofthemachine
forthefirsttime,checkifallpartslistedin
theboxcontentsectionhavebeensupplied
Note:Checkthepowertoolforpossible
damage.Beforefurtheruseofthemachine,
checkthatallprotectivedevicesarefully
functional.Anylightlydamagedpartsmust
becarefullycheckedtoensureflawless
operationofthetool.Allpartsmustbe
properlymountedandallconditionsfulfilled
thatensurefaultlessoperation.
Damagedprotectivedevicesandpartsmust
beimmediatelyreplacedbyanauthorised
servicecentre.
DustBag
Werecommendthatdustextractionisused
atalltimeswhenusingthisproduct.
Tofitthedustbag(supplied)pushitontothe
extractionportasshownbelow.
CentralizingtheBelt
Alwaysmakesurethatthebeltisrunning
centrallybeforethemachineisused.
Centralizingthebeltisessentialtostopit
fromrunningofftherollersduringuse.
‐Withthebeltfacingtheoperatorandthe
machineonitsside,pullthetriggerand
observehowthebeltisrunning.Ifthisbelt
runstowardeitheredgeitwillneed
adjusting.
‐Turnthecentralizingknobtoadjustthebelt
tothecentreoftherollers.

9
Operation
UsingtheBeltSander
‐Holdthemachinewithbothhandsand
assumeabalancedposture.
‐PresstheOn/Offtriggerswitchandallow
themotortoreachfullspeed.
‐Holdthemachineparalleltotheworkpiece.
Gentlybringbeltcontactwiththework
piece.
Caution!Thesandermayinitiallysnatch
forwards.Resisttheforwardsmotionand
allowthesandertomoveforwardsata
gradualpace.Donotuseexcessive,
downwardpressure;thismaycausethebelt
tosnap.
‐Keepthesandermovingforwardsataneven
pace.Failuretodothiswillresultinan
unevenfinish.
‐Whentheoperationfinished,liftthesander
clearoftheworkpieceandreleasethe
On/Offtriggerswitch.Waituntilthebelthas
stoppedrotatingbeforeputtingthesander
downonworkbench.Failuretodothiswill
resultinthemachinerunningforwards.

10
ReplacingtheSandingBelts
‐Locatethebelttensionleverandpull
outwards.Takecareasthe isunder
tensionandmayspringbacktotheclosed
position.Continuepullingtheleveroutwards
untilitlocksintoposition.
‐Manoeuvrethesandingbeltofftherollers.
NOTE:TheSandingbelthasdirectional
arrowsprintedontheinsideofthebelt.
‐Sandingbeltscomeindifferentgrades
i.e.roughthroughtosmooth.Selectthe
gradeaccordingtothematerialbeing
operatedon.
‐Locatethesandingbeltontherollers.Make
surethesandingbeltdoesnottouchthe
sidesofthecasingandthatthearrows,
printedontheinsideofthesandingbelt
pointinthedirectionoftravel.
‐Closethetensionlever.
NOTE:Cautionisrequiredastheleveris
underspringtension.Makesurethelever
closesfully.Withthenewsandingbeltfitted
itmustbecheckedtoensurethatitis
runningcentrallyontherollers(seesection
CentralizingtheSandingBelt).
lever

cloth.
11
MaintenanceandService
Beforeanyworkonthemachineitself,pull
themainsplug.
Ifthemachineshouldfaildespitethecare
takeninmanufacturingandtesting
procedures,repairshouldbecarriedoutby
anapproveservicecentre.
‐Regularlychecktoseeifanydustorforeign
matterhasenteredthegrillsnearthemotor
andaroundthetriggerswitch.Useasoft
brushtoremoveanyaccumulateddust.
Wearsafetyglassestoprotectyoureyes
whilstcleaning.
‐Re‐lubricateallmovingpartsatregular
intervals.
‐Ifthebodyofthesanderneedscleaning,
wipeitwithasoftdamp mild
detergentcanbeusedbutnothinglike
alcohol,petrolorotherabrasivecleaning
agents.Neverusecausticagentstoclean
plasticparts.
CAUTION!Watermustnevercomeinto
contactwiththesander.
ReplacingtheBrushes
‐Duringuse,thecarbonbrusheswillwear
downandwillbeindicatedbyapossibleloss
ofpowerandexcessivesparkingseen
throughtheventilationslots.Whenthe
carbonbrusheshaveworndownto
approximately4‐5mm,theywillrequire
replacing.
‐Caution!Makesurethatthesanderis
isolatedfromthemainspowersupplybefore
fittingaccessories,maintenanceand
adjustmentifindoubtconsultaqualified
electrician.
‐Placethesanderonaworkbenchand
usingascrewdriverremovethecarbonbrush
housingcover.
‐Removethecarbonbrushfromthebrush
housingandreplaceitwithanewone.Slide
thenewcarbonbrushintothebrushhousing.
Repeatthisprocedurefortheothercarbon
brush.Thenreplacethecarbonbrush
housingcover.
Note:Carbonbrushesmustbereplacedin
pairs.
A

12
DriveBeltReplacement
Warning:Removethemainplugfrom
thesocketbeforecarryingoutadrive
beltreplacement.Donotattemptto
removethedrivebeltuntilthebelt
wheelhascooleddown.
‐Removethescrewandthebeltcover.
Carefullycutthedrivebeltifnotalready
brokenandremovefromyourbeltsander.
Fityournewdrivebeltaroundthelarge
pulley.Theninstallontothesmallpulleyby
rotatingclockwiseandpushingthedrivebelt
shownaroundthesmallpulleyatthesame
time.Thedrivebeltwillbeatightfit.Fitthe
beltcoverandthescrews.
LumberjackGuarantee
1.Guarantee
1.1Lumberjackguaranteesthatforaperiod
of12monthsfromthedateofpurchasethe
componentsofqualifyingproducts(see
clauses1.2.1to1.2.8)willbefreefrom
defectscausedbyfaultyconstructionor
manufacture.
1.2.Duringthisperiod,Lumberjack,will
repairorreplacefreeofchargeanyparts
whichareprovedtobefaultyinaccordance
withparagraph1.1providingthat:
1.2.1Youfollowtheclaimsproceduresetout
inclause2
1.2.2LumberjackanditsAuthorisedDealers
aregivenreasonableopportunityafter
receivingnoticeoftheclaimtoexaminethe
product
1.2.3IfaskedtodosobyLumberjackorits
AuthorisedDealer,youreturntheproductat
yourowncosttoLumberjack’sorsupplying
AuthorisedDealer’spremises,forthe
examinationtotakeplaceclearlystatingthe

13
ReturnsMaterialAuthorisationnumber
given.
1.2.4Thefaultinquestionisnotcausedby
industrialuse,accidentaldamage,fairwear
andtear,wilfuldamage,neglect,incorrect
electricalconnection,misuse,alterationor
repairoftheproductwithoutapproval.
1.2.5Theproducthasbeenusedina
domesticenvironmentonly.
1.2.6Thefaultdoesnotrelatetoconsumable
itemssuchasblades,bearings,drivebeltsor
otherwearingpartswhichcanreasonablybe
expectedtowearatdifferentrates
dependingonusage.
1.2.7Theproducthasnotbeenusedforhire
purposes.
1.2.8Theproducthasbeenpurchasedbyyou,
astheguaranteeisnottransferablefroma
privatesale.
2.ClaimsProcedure
2.1Inthefirstinstancepleasecontactthe
AuthorisedDealerwhosuppliedtheproduct
toyou.Inourexperiencemanyinitial
problemswithmachinesthatarethoughtto
befaultyduetofaultypartsareactually
solvedbycorrectsettinguporadjustmentof
themachine.AgoodAuthorisedDealer
shouldbeabletoresolvethemajorityof
theseissuesmuchmorequicklythan
processingaclaimundertheguarantee.Ifa
returnisrequestedbytheAuthorisedDealer
orLumberjack,youwillbeprovidedwitha
ReturnsMaterialAuthorisationnumber
whichmustbeclearlystatedonthereturned
package,andanyaccompanying
correspondence.FailuretoprovideaReturns
MaterialAuthorisationnumbermayresultin
itembeingrefuseddelivery.
2.2Anyissueswiththeproductresultingina
potentialclaimundertheguaranteemustbe
reportedtotheAuthorisedDealerfrom
whichitwaspurchasedwithin48hoursof
receipt.
2.3IftheAuthorisedDealerwhosuppliedthe
producttoyouhasbeenunabletosatisfy
yourquery,anyclaimsmadeunderthis
Guaranteeshouldbemadedirectlyto
Lumberjack.Theclaimitselfshouldbe
madeinalettersettingoutthedateand
placeofpurchase,givingabriefexplanation

14
oftheproblemwhichhasledtotheclaim.
Thislettershouldbethensentwithproofof
purchasetoLumberjack.Ifyouincludea
contactnumberwiththisitwillspeedup
yourclaim.
2.4Pleasenotethatitisessentialthatthe
letterofclaimreachesLumberjackonthelast
dayofthisGuaranteeatthelatest.Late
claimswillnotbeconsidered.
3.LimitationofLiability
3.1Weonlysupplyproductsfordomestic
andprivateuse.Youagreenottousethe
productforanycommercial,businessor
resalepurposesandwehavenoliabilityto
youforanylossofprofit,lossofbusiness,
businessinterruptionorlossofbusiness
opportunity.
3.2ThisGuaranteedoesnotconferanyrights
otherthantheseexpresslysetoutaboveand
doesnotcoveranyclaimsforconsequential
lossordamage.ThisGuaranteeisofferedas
anextrabenefitanddoesnotaffectyour
statutoryrightsasaconsumer.
4.Notice
ThisGuaranteeappliestoallproduct
purchasedfromanAuthorisedDealerof
LumberjackwithintheUnitedKingdom.
TermsofGuaranteemayvaryinother
countries.

15
CEDECLARATIONOFCONFORMITY
TOOLSAVE
Unit9&12AlbionBusinessPark
SpringRoad,Smethwick,
WestMidlands,B661LYENGLAND.
Tel:01215250222
Declaresthatthe4”BeltSander(EBS100)
IsincompliancewiththeregulationsincludedintheDirectives:2006/42/EC
ECDECLARATIONOFCONFORMITY
CertificateforEC‐typeexaminationdeliveredbyInterkTestingServicesHangzhou16
No.1Ave.,XiashaEconomicDevelopmentDistrict,Hangzhou310018,China
(VerificationNo.:151000179HZH‐V1)
Person who declares: Bill Evans
01.05.2016
TheDirector

16
PartsList
No. Description No. Description
1 M4x40 Screw 27 Capacitance
2 Main label 28 Inductance
3 ST4x18 Screw 29 Decorative cover
4 Side cover 30 Housing
5 ST4x40 31 ¢16 X¢10 Plain washer
6 O Type circle 32 Small belt wheel
7 Dust outlet adpator 33 Plastic piece
8 Dust protection 34 Belt cover
9 M5x12 Screw 35 M4x16 Screw
10 Dust fan 36 Carbon brush
11 Middle cover 37 Carbon brush holder
12 6000 Bearing 38 Carbon brush cap
13 Rotor 39 Belt
14 Wind protection 40 M10 nut
15 Insulation washer 41 Big gear
16 ST5x45 42 Gear box cover
17 Stator 43 6001 Bearing
18 Stator terminals 44 Small gear
19 Carble pressure board 45 Needle bearing BK0810
20 ST4 x16 Screw 46 ¢12 Snap spring
21 Rubber coated handle 47 Big gear
22 Handle cover 48 Semi circular key 3x10
23 Cable 49 Rear axis
24 Copper tube 50 Needle bearing HK1514
25 Cable cover 51 Alu base
26 Switch 52 6200 Bearing

17
No. Description No. Description
53 Ceramic 64 Front wheel
54 M12 Nut 65 Needle bearing HK121812
55 Front wheel frame 66 Baffle
56 Big spring 67 Pin
57 Small spring 68 Bottom plate
58 Front cover 69 Rubber plate
59 M4x10 Screw 70 Adjustable knob spring
60 Sanding paper 71 Adjustable knob
61 Front axis 72 Rating label
62 Bowl type washer 73 Front handle base
63 Bowl type washer 74 Front handle cover

18
PartsDiagram
Table of contents
Other Lumberjack Sander manuals

Lumberjack
Lumberjack EBS100VS Installation manual

Lumberjack
Lumberjack OS125 Installation manual

Lumberjack
Lumberjack XP Series Operation instructions

Lumberjack
Lumberjack BD370 User manual

Lumberjack
Lumberjack DS305 Installation manual

Lumberjack
Lumberjack OSS500 Installation manual

Lumberjack
Lumberjack DS460VS Installation manual

Lumberjack
Lumberjack BD370 Installation manual

Lumberjack
Lumberjack BD370 Installation manual

Lumberjack
Lumberjack OBS500 Installation manual