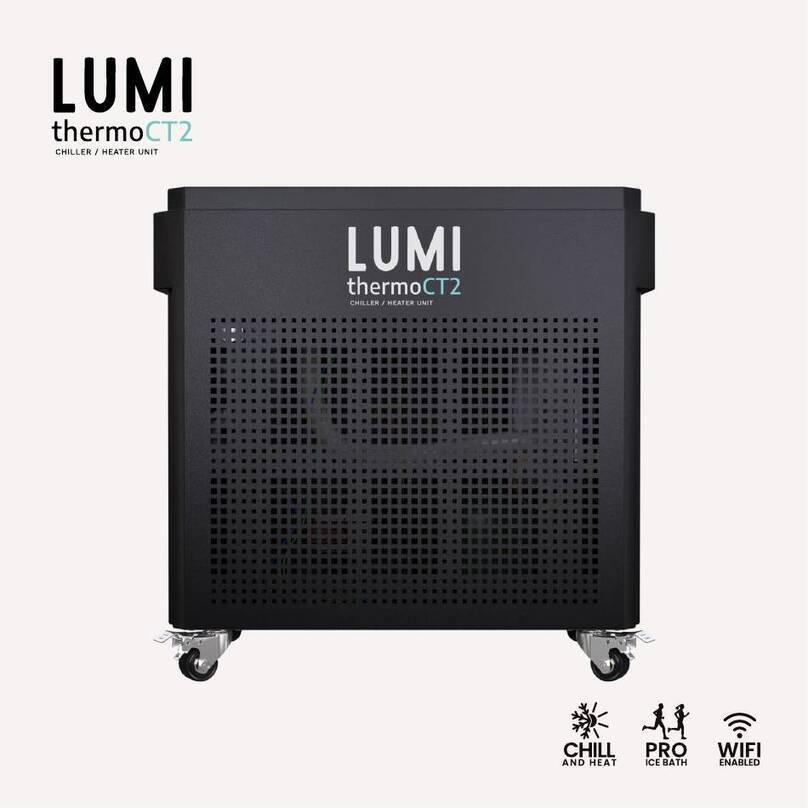
Lumi thermoCT1 User manual

PRO
ICE BATH
WIFI
ENABLED
CHILL
AND HEAT

We always end up
right where we are
supposed to be, right
when we are meant
to be there.
Sometimes we just
need a little time to
recover.
TRUST THE PROCESS
#lumitherapy

CUSTOMER SUPPORT 24/7
If you have any questions about setting up or using your Lumi product, please visit our website for
further information, faqs, troubleshooting and customer support.
●1 x Lumi Thermo-CT1 External Chiller / Heater Unit
●1 x Washable high-density particle water lter
●2 x External Pipes
●1 x Fittings and Accessories Pack
1. Read carefully through this user manual before using the Lumi Thermo-CT1.
2. Go to our website to register and activate your Lumi warranty.
3. Complete the steps in the QUICK START GUIDE to assemble your LUMI Thermo-CT1.
2
Follow this QR Code for our
product guides and videos
YOUR JOURNEY BEGINS!

1. During and after transportation, the Thermo-CT1 Unit must stay upright on a stable
surface at all times.
2. After transportation, and before use, the chiller must be left for 24hrs for the
refrigeration gas to settle.
3. Make sure there are no water leaks from the Thermo-CT1 Unit, or inlet and outlet
pipes when connected to the Recovery Pod-PRO.
4. Make sure the Thermo-CT1 Unit is plugged into an AC socket or extension cable that
is suitable for use, properly grounded, has a built in surge protector and preferably is
IP65 rated.
5. Ensure the Thermo-CT1 Unit is kept dry at all times, do not immerse, splash or spray
the unit with water. If the unit does get wet, unplug it immediately and do not use.
6. Never leave the Thermo-CT1 Unit switched on when using the Recovery Pro-PRO,
always ensure the unit is switched o during your cold water therapy session.
7. If the Thermo-CT1 Unit stops working or doesn't work when switched on, unplug it
immediately and do not use.
8. We accept no responsibility for misuse or failure to use this equipment safely as
instructed.
3
WARNING!

1. Ensure you have assembled your Recovery Pod-PRO rst before continuing.
2. Place the Thermo-CT1 Unit on a stable surface at least 1 meter from the Lumi Recovery PRO
(or Lumi Recovery PRO Barrel).
3. Connect both the Inlet and Outlet pipes and ensure the valves are hand tight.
4. You can now ll your Lumi Recovery PRO with 'cold water' using a hose until the water is
roughly 15 cm (6 inches) below the underside of the top ring (not more than ⅔ full).
5. Plug in and switch on the Thermo-CT1 Unit, the unit will self-prime until its ready to use.
6. Once the chiller has nished its priming cycle it will start to chill and lter the water within a
few minutes.
7. It can take up to 3-4hrs to chill the water from 18°C down to a frosty 3°C.
8. Once the desired temperature is reached, switch o the External Chiller Unit before starting
your cold water therapy session.
You can use the Tuya Smart mobile app to control
your Thermo-CT1 Unit, download the app from the
respective app store for your device. Use the QR
Code to start now.
As this is a 3rd party app, we accept no responsibility for incompatibility or
issues when using this with your Thermo-CT1 unit.
4
TUYA SMART
WIFI
ENABLED

5
INSULATED BODY
The insulated housing keeps the chiller
working consistently regardless of the
outside temperature.
PLUG & PLAY
Quality built hoses easily connect between the chiller and the
Lumi Recovery PRO bath, circulating fresh, clean, cold water.
WIFI ENABLED
Your can control the temperature of the
Lumi Thermo CT1 unit via the WIFI
enabled mobile app for ease of use.

6
PRO
ICE BATH
CHILL
AND HEAT
WIFI
ENABLED
HIGH END BUILD
The Lumi Thermo CT1 unit is the
industry's best chiller/heater and lter
combination, low maintenance, made to
last, with insulated housing and quality
built components.
SUPER COOLING & HEATING
The Lumi Thermo CT1 unit keeps the
water as cool as 3°C (37°F), and can
warm the water up to 42°C (107.6°F).


8
Cold water therapy works best with the right combination of time and temperature. For example, if
you are in water with a temperature of 10°C, we would recommend you stay for no more than 10mins.
1°C = 1 minute submersion
2°C = 2 minutes submersion
3°C = 3 minutes submersion
5°C = 5 minutes submersion
10°C = 10 minutes submersion
15°C = 15 minutes submersion
Follow this to access
our quick breathing guide to help
you get started with your cold
water therapy experience

●Before using your Thermo-CT1 unit, please read this instruction manual carefully.
●Never clean your Thermo-CT1 unit with strong bleach-based detergents.
●To empty your Thermo-CT1 unit, use the drain tap located near the bottom of the unit. Take care
with the drain tap, don't force it and make sure it is fully closed after use.
●Though not essential, to ensure a long service life and for hygiene purposes, we recommend draining,
cleaning and drying your Thermo-CT1 unit every two to three weeks.
9

10
1
17
11
10
9
7 16
2 3 4 5 6

11
Press for 1 second to power on/o.
The software version number o1.X. (x represents numbers 1-9) will be displayed when the
machine starts.
(used mode key with the setup key together)
Press for 3 seconds to convert temperature units between Celsius and Fahrenheit.
Press Mode key and Set key for 3 seconds to release the FL and ICE warnings.
a. Press for 1 second to enter the setting temperature value, the setting bit ashes, click or
long press the up and down keys (ie 5 and 6 keys) to adjust the temperature setting
value. Click save and exit.
b. Click 3 and then click 4, the setting bit display O3, then click or long press the up or
down keys (both 5 and 6) to adjust the ozone switch interval.
Press for 5 seconds to re-match WIFI
After entering the temperature setting, increase the set value.
After entering the temperature setting, lower the setting value
Press key 5 and 6 at the same time: Child lock on/o

WIFI display normal Machine is connected Temperature and other parameters can be adjusted
on the APP
WIFI ashing The machine is in
network conguration
Turn on the Tuya APP and the Bluetooth function of
the mobile phone, and automatically prompt the
connection
WIFI is o The machine is not
connected to the
Internet
Press the No 4 button for 5 seconds to re-match the
WIFI connection
Cool & Heat.
On--the machine is defrosting, O--the machine is not defrosting.
Default (default mode): temperature setting range (3-42 degrees), the target temperature of
machine = set temperature. The upper and lower deviation value is 1 degree.
If there is no ow device installed, it will display 0.
12. The is displayed synchronously with T2 means hot water.
13. The is displayed synchronously with T1 means cold water.
At present, Tuya can only support 2.4G
WIFI signal. Therefore, before connecting the
phone to the machine, please conrm that the
WIFI used by your phone is in the 2.4G frequency
band. If it is in the 5G frequency band, it will not
be able to connect to the machine.
WIFI
ENABLED
TUYA SMART
12

If a fault occurs then an error code will be shown; A serious fault which stops the operation
of the unit will be accompanied by an alarm sound, along with an error code.
IN Bad panel
connection
Re-plug both ends of the cable Can not work
HH The water
temperature is
higher than the
upper limit
temperature
If there is a dierence between the low water
temperature and the displayed water
temperature, the water temperature sensor is
faulty.
Can not work
FL No water ow
or low water
ow
1. No water ow: the water pump is broken or
stuck, and the waterway is blocked 2. Low
water ow: There may be a tube folded in the
waterway, the water ow is not smooth, or the
waterway is not cleaned for too long, and the
scale is blocked, ush it with an air gun. 3. The
water ow protection switch is broken: replace
the water ow switch.
Press and hold the
mode button + setting
button for 5 seconds
to force the alarm to
be dismissed, and the
machine will work
normally.
CH1 Bad sensor
(green)
Replace the NTC1 temperature sensor, restart
the machine after replacement
Can not work
HEA Heating failure The machine can only do the cooling function Normal work
ICE Water
temperature
below freezing
point
Turn o the machine, pour hot water into the
bucket and heat it for 20 minutes, then turn it
on again. If the antifreeze solution is used, you
can press the MODE + SET button at the same
time to force the alarm and the machine will
resume normal operation.
Press 2+key 3 at the
same time for 3
seconds to forcibly
cancel the alarm, and
the machine returns
to normal work
NO
NO
YES
YES
YES
YES
Normal workReplacing the NTC3 temperature sensorSensor failure
(red)
PA
AA NO
NO
Temperature
Sensor Failure
Replacing the NTC4 temperature sensor Normal work
13

14
0V Negative electrode P12 220V water pump
P1 / P4 /
P4 Electronic expansion valve P11 Fan
P5 24V water pump LIN Solenoid valve power input:220V/24V
P14 24V vacuum pump P3A Compressor power input
0V 24V negative electrode P3B Compressor
24V 24V Positive ON Protection output normally open pin
T1 Water temperature 1 sensor COM Protection output common pin
T2 Water temperature 2 sensor NC Protection output normally closed pin
(leave empty)
T3 Exhaust sensor 3P socket Panel line
T4 Ambient temperature 5P socket Electronic expansion valve
P6 Water ow o signal (water pump signal
yellow line)
P13 0-24V input, control the water pump
switch
P15 Water ow monitoring (water pump signal
red line)
/ /

15
1. Scan the QR code to download and
install the app.
2. Follow the prompts to register an
account (recommended to register
with a mobile phone number).
3. Turn on Bluetooth & WIFI on your
mobile device and sure you are
connecting via 2.4 GHz WIFI signal.
4. Make sure the Thermo-CT1 unit is
located within WIFI range.
5. Log in to the Tuya Smart app.
6. Press the WIFI matching button
(button 4) on the chiller for 5
seconds, until you hear a 'beep' and
the WIFI icon ashes.
7. Within the Tuya Smart mobile app,
click 'Add a device'.
8. Once the Thermo-CT1 has been
discovered, click add and enter your
WIFI password.
9. Next, wait for the app to connect to
the Thermo-CT1 unit.
10. Click to nish once the app is
successfully connected.
TUYA SMART
WIFI
ENABLED

16
1. Start by renaming your connected
Thermo-CT1 with the edit button.
2. Temperature setting dial, drag the
cursor point to adjust the set
value.
3. When the water 'ow rate' is
abnormal, it will display red, and
when the water 'ow rate' is
normal, it will display green.
4. Display real-time water ow.
5. User sets parameters, click to
enter interface 2.
6. Operating mode.
7. Channel 2 real-time temperature.
8. System monitoring data.
that is, the machine will start immediately after power-on, otherwise it will
start by pressing the switch key.
Fahrenheit or Celsius
Exhaust temperature/current opening value: system parameters are not adjustable
After setting the switch, the machine can be eectively turned on/o
only when the machine is powered on.
When the water temperature reaches the alarm value, the chiller
will issue a warning, and the machine will not be cooling/heating.

30kg weight
48(W) x 29(D) x 43(H)cm
220-240V AC input
1450W cooling
1550W heating
R410A refrigerant
Safety shuto
Portable 'all-in-one' contained unit
WiFi-enabled remote control system (mobile app)
Self-priming circulation pump
Washable high-density particle water lter
Cools water down to 3°C (37°F)
Heats the water up to 42°C (107.6°F)
Minimum working temperature -10°C (14°F)
Made in China
17

Access our library of free personal training videos
and guides on our website to learn how to get
the most out of your LUMI product and achieve
the results you want.
THERE
ARE NO
LIMITS
lumitherapy.co.uk @lumi.therapy @Lumitherapyuk
Other manuals for thermoCT1
1
Table of contents
Other Lumi Chiller manuals
Popular Chiller manuals by other brands

Advantage
Advantage BG-N4 Series instruction manual

Polar Refrigeration
Polar Refrigeration CD984 instruction manual

CIAT
CIAT AQUACIAT POWER IL CLASSIC RHE instruction manual

Elkay
Elkay ECH8 1J Series Installation, care & use manual

Trane
Trane CGCN Installation operation & maintenance

Ferroli
Ferroli RCA Series Installation, maintenance and user manual