Lumina U009R User manual

After Sales Support
Telephone: 1300 886 649
Email: [email protected]
INSTRUCTION MANUAL
Model Number U009R
Rechargeable Vacuum
N13275

After Sales Support
Telephone: 1300 886 649
Email: [email protected]
After Sales Support
Telephone: 1300 886 649
Email: [email protected]
1 2
Contents
Rechargeable Vacuum
Warranty Details
The product is guaranteed to be free from defects in workmanship and
parts for a period of 12 months from the date of purchase. Defects that
occur within this warranty period, under normal use and care, will be
replaced or refunded at our discretion, solely at our option with no charge
for parts and labour. The benefits conferred by this warranty are in
addition to all rights and remedies in respect of the product that the
consumer has under the Competition and Consumer Act 2010 and
similar state and territory laws.
02 Warranty Details
03 Welcome
04 General Safety Instructions
06 Parts List
07 Getting Started
08 Instructions
09 Other Useful Information

After Sales Support
Telephone: 1300 886 649
Email: [email protected]
After Sales Support
Telephone: 1300 886 649
Email: [email protected]
3 4
Welcome
Congratulations on choosing to buy a Lumina®product.
All products brought to you by Lumina®are manufactured to the highest
standards of performance and safety and, as part of our philosophy of customer
service and satisfaction, are backed by our comprehensive 1Year Warranty. We
hope you will enjoy using your purchase for many years to come.
General Safety Instructions
Read this manual thoroughly before first use, even if you are familiar with the
product. The safety precautions enclosed herein reduce the risk of fire, electric
shock and injury when correctly adhered to.
Keep the manual in a safe place for future reference, along with the completed
warranty card, purchase receipt and carton. If applicable, pass these instructions
on to the next owner of the appliance.
Always follow basic safety precautions when using an electrical appliance,
including the following:
Usage conditions and restrictions
• This appliance is intended for indoor household use only. It is not suitable
for commercial or industrial use. Do not use it outdoors. Do not use it for
anything other than its intended purpose, and only use it as described in this
manual.
• Only use the device with the accessories supplied.
• Check the device and connections regularly for visible damage. Do not use
the device if the housing or any other part is damaged.
• This appliance is not intended for use by persons (including children) with
reduced physical, sensory or mental capabilities, or lack of experience
and knowledge unless they have been given supervision or instructions
concerning use of the appliance by a person responsible for their safety.
• Young children should be supervised to ensure they do not play with the
appliance. Close supervision is necessary when any appliance is used by or
near children.
• Improper installation may result in the risk of fire, electric shock and/or injury
to persons. We assume no liability for any eventual damages caused by
improper use or incorrect handling.
Electrical safety (charging)
• Use only the original battery charger supplied with this appliance.
• Before connecting the battery charger to the charging station and the power
supply, ensure that the electrical voltage and circuit frequency correspond to
those indicated on the charger rating label.
• Do not kink or damage the battery charger's power supply cord. If it is
damaged, it must be replaced by the manufacturer or its service agent or a
similarly qualified person in order to avoid a hazard. Contact the after sales
support line for advice.

After Sales Support
Telephone: 1300 886 649
Email: [email protected]
After Sales Support
Telephone: 1300 886 649
Email: [email protected]
5 6
General Safety Instructions (Cont.) Parts List
1a
1b
3
45
2
6
7
8
9
13
• When charging the appliance, place the charger base:
• on a flat surface to avoid overturning,
• close to a power point so no one trips over the cord,
• away from heated surfaces, such as a stove or heater surface.
• Do not touch the battery charger or the power cord with wet hands.
• Do not leave the appliance unsupervised while the charger is connected.
Safe usage
• Only use the vacuum cleaner on dry surfaces.
• Do not point the vacuum cleaner at people or animals when in use.
• Take extra care when vacuuming on stairs.
• Do not put any objects into openings. Keep all openings free of dust, lint,
hair or anything that may reduce the airflow. Do not use the product with any
openings blocked or restricted airflow.
• Do not use the vacuum cleaner to pick up:
• flammable or combustible fluids (such as fuel or solvent), burning
substances (such ash, cigarettes or hot coals) or use it in the presence of
explosive liquids or vapours,
• hard or sharp objects such as shards of glass, nails, coins,
• harmful or toxic materials (such as chlorine bleach, ammonia, drain
cleaner).
Cleaning and care
• Before cleaning, servicing or moving the vacuum cleaner, make sure it
is disconnected from the charging station and the charging station is
disconnected from the power socket.
• The appliance has no user-serviceable parts contained within. Do not
attempt to repair, disassemble or modify it.
• Never attempt to open the device or the battery charger yourself, or to
replace the power cord. Only have the appliance repaired by an authorised
technician, or contact the after sales support line for advice.
1 a) On/Off switch (on the upper handle)
b) On/Off switch (on the handheld unit)
2 Upper handle
3 Release button (for the handle)
4 Release button (for the handheld unit)
5 Foldable handle axis
6 Main body frame
7 Filter assembly (inside the handheld unit)
8 Handheld vacuum cleaner
9 Turbo brush
10 Charging station
11 Charger socket
12 Battery charger
13 Rotating brush assembly
10
11 12
After Sales Support
Telephone: 1300 886 649
Email: [email protected]
After Sales Support
Telephone: 1300 886 649
Email: [email protected]
7 8
Instructions
→→
Assembly
Remove all packaging materials from the appliance and dispose of them
responsibly. Plastic wrapping can be a suffocation hazard for babies and young
children, so ensure all packaging materials are out of their reach.
Make sure all parts listed on page 6 are inside the box. If anything is missing,
contact the after sales support line.
Familiarise yourself with the parts and then follow the instructions below.
All parts and connections are named and illustrated on page 6.
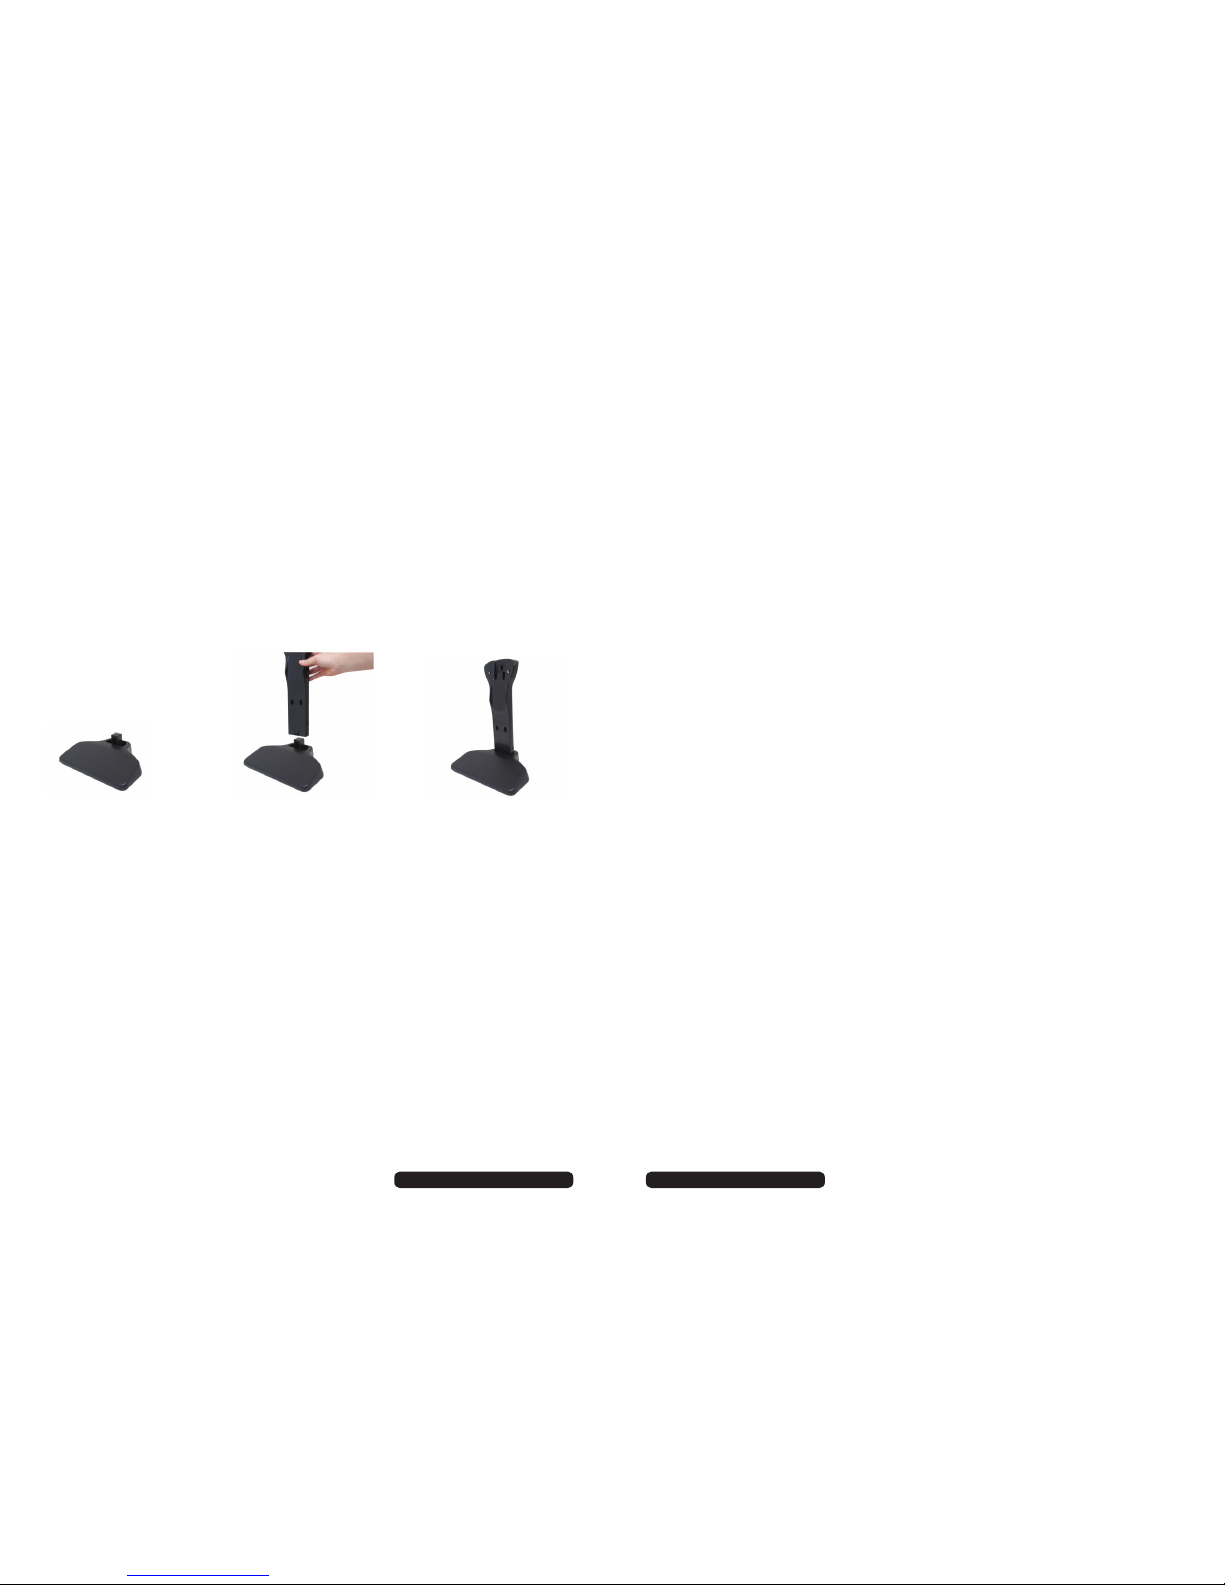
• To assemble the charging station, follow the illustrations below:
• To fit the turbo brush, insert it carefully into the bottom end of the main body.
• Position the charging station close to a mains socket, well away from heat
sources and excessive moisture.
• Insert the battery charger jack into the charger socket and connect the
battery charger to the mains power supply.
Charging
• Make sure the vacuum cleaner is switched off before you place it on the
charging station. The charging light will flash to indicate the vacuum cleaner
has made contact with the charging station and is charging.
• It takes 10-12 hours to fully charge the batteries before the first use. When
the device is completely empty, approximately 8-10 hours charging is
required for the battery to regain full capacity. The charging light will flash
while charging and glow steadily once charged.
• In order to ensure that it is always ready for use, we recommend you leave
the appliance on the charger when not in use. The charger may become
warm during charging, this is normal.
Getting Started
Upright vacuuming
The handheld vacuum cleaner fits securely into the main body of the vacuum
cleaner. Before you use the vacuum cleaner in an upright position to vacuum
carpets or floors, make sure the handheld unit is properly fitted into the frame.
• Make sure the unit is sufficiently charged (see page 7).
• Insert the handheld vacuum cleaner securely into the main body until it clicks
into place.
• Start the vacuum cleaner by pushing the On/Off switch on the upper handle
to the On position.
NOTE: When vacuuming hard floors with the vacuum cleaner in upright
position, check regularly that the brush assembly and rollers are clean in
order to avoid scratching sensitive floors.
Handheld vacuuming
Use the handheld unit for convenient vacuuming of furniture, car seats, stairs or
any areas that are more difficult to access with an upright vacuum cleaner.
• Make sure the unit is sufficiently charged.
• Remove the handheld vacuum cleaner from the main body by pressing
the round release button and lifting the handheld unit out of the main body
frame.
• Start the vacuum cleaner by pushing the On/Off switch on top of the unit to
the On position.
• You may fit the crevice nozzle to the front of the unit to reach into less
accessible places.

Emptying and cleaning the dust canister
After using the vacuum cleaner, take off the dust canister, empty it and clean the
filters so the unit is ready for your next use.
1. To remove the dust canister, push the release button at the back of the unit
forward and twist the dust canister off the motor unit, as illustrated below:
2. Pull out the filters as illustrated below. Empty the contents of the dust
canister into a waste bin or bag. You can shake out the filters until they are
clean or wash and rinse them in warm water, if necessary.
3. Make sure all parts are dry before re-assembly.
Reassembling the components
1. To reassemble the unit, put the cloth
filter inside the plastic frame with the
mesh filter.
2. Push the filter assembly back into the
dust canister.
3. Twist the dust canister back onto the
motor unit until it clicks into place.
After Sales Support
Telephone: 1300 886 649
Email: [email protected]
After Sales Support
Telephone: 1300 886 649
Email: [email protected]
9 10
Other Useful Information (Cont.)Other Useful Information
Responsible disposal
At the end of its working life, do not throw this appliance out with your household
rubbish. Electrical and electronic products contain substances that can have
a detrimental effect on the environment and human health if disposed of
inappropriately. Observe any local regulations regarding the disposal of electrical
consumer goods and dispose of it appropriately for recycling. Contact your local
authorities for advice on recycling facilities in your area.
Cleaning the rotating brush assembly
If the rotating brush assembly (part 13 on page 6) becomes blocked or jammed
for any reason, the effective power will be lowered and the rotating brush may
need to be cleaned.
1. Turn off the device and carefully remove any items such as threads that may
have become entangled.
2. If the rotating brush needs to be lifted out, unscrew the hatch cover with a
Phillips head screwdriver, take the hatch off and gently lift the rotating brush
off the belt and out of the housing.
3. Clean the rotating brush.
4. Replace the rotating brush, making sure it fits into its guiding tracks, with the
belt around the corrugated end so it can spin freely.
5. Screw the hatch cover back into place.
Cleaning the wheel axles
6. If a wheel is jammed by threads or dirt that you cannot remove without
removing the wheel:
7. Carefully prise the wheels loose with a screwdriver inserted into the cavity.
8. Remove threads or any other objects that may have become jammed in the
wheel axles.
9. Reassemble the wheels by pressing them tightly together back into their
position.

After Sales Support
Telephone: 1300 886 649
Email: [email protected]
After Sales Support
Telephone: 1300 886 649
Table of contents
Other Lumina Vacuum Cleaner manuals


