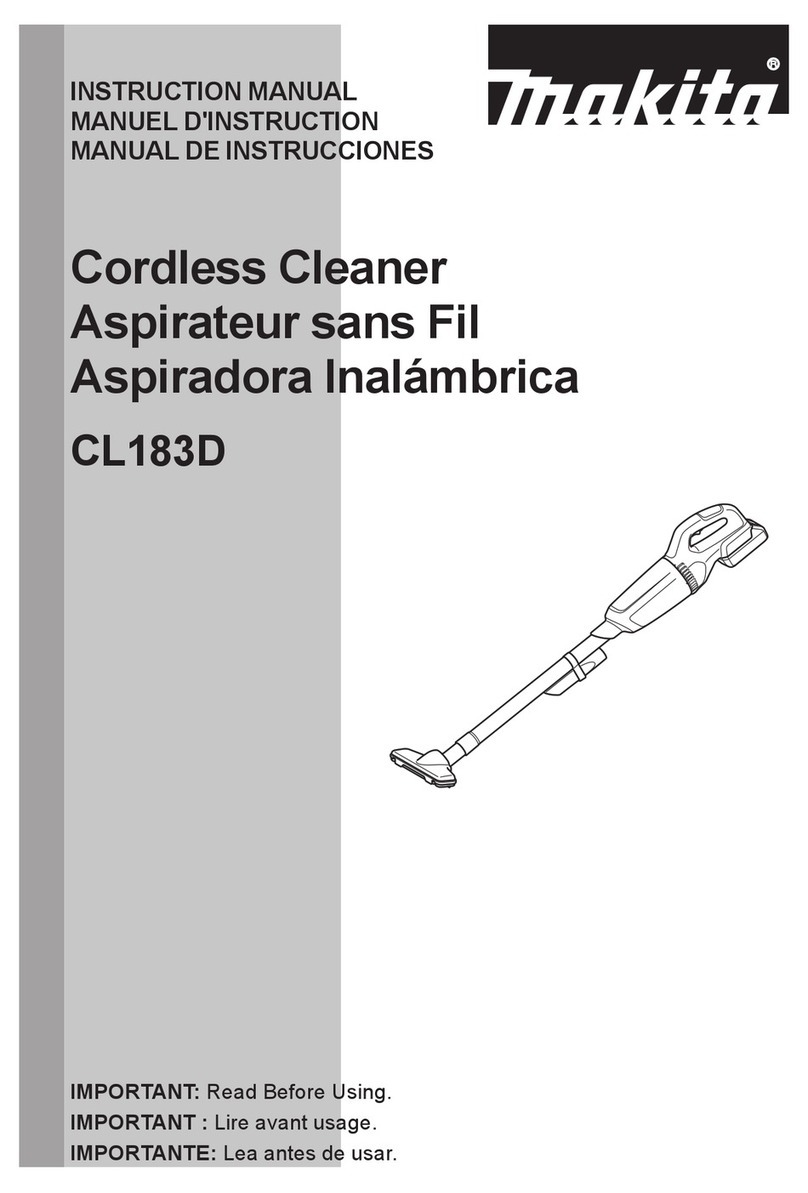
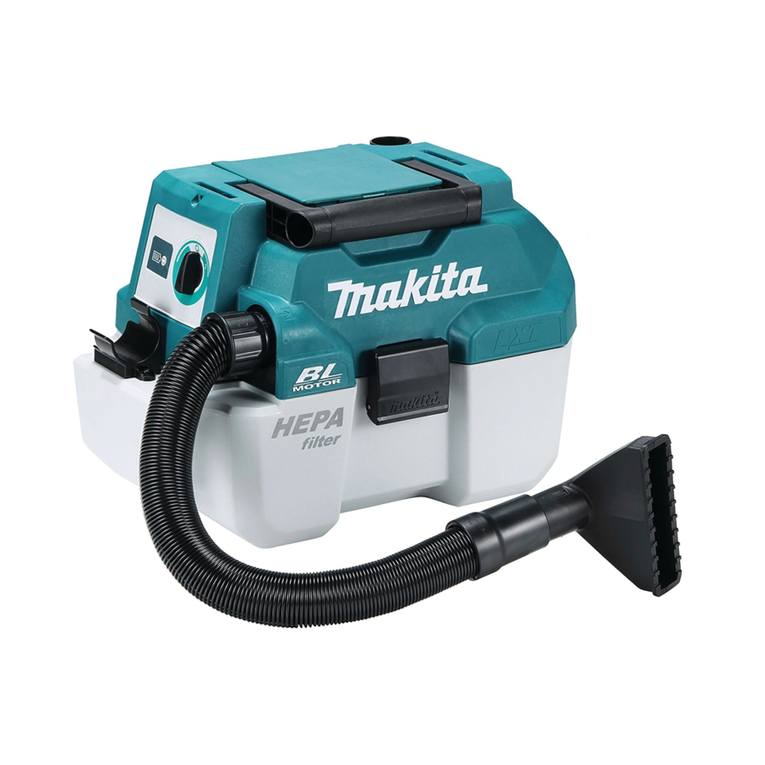
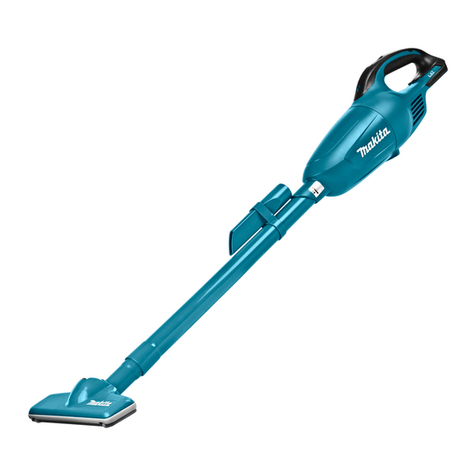
Makita DCL180F User manual

DCL140
DCL180
DCL180F
EN Cordless Cleaner INSTRUCTION MANUAL 9
UK Бездротовий очищувач ІНСТРУКЦІЯ З
ЕКСПЛУАТАЦІЇ 16
PL Odkurzacz Akumulatorowy INSTRUKCJA OBSŁUGI 24
RO Aspirator cu acumulator MANUAL DE INSTRUCŢIUNI 32
DE Akku-Staubsauger BEDIENUNGSANLEITUNG 40
HU Akkumulátoros porszívó HASZNÁLATI KÉZIKÖNYV 48
SK Bezdrôtový čistič NÁVOD NA OBSLUHU 56
CS Akumulátorový vysavač NÁVOD K OBSLUZE 64

1
2
3
1
1
1
1
2
123
2
1
Fig.1
Fig.2
Fig.3
Fig.4
Fig.5
Fig.6
Fig.7
Fig.8
2

1
2
1
2
1
2
1
2
1
2
2
1
1
1
Fig.9
Fig.10
Fig.11
Fig.12
Fig.13
Fig.14
Fig.15
Fig.16
3

1
1
1
1
2
1
1
1
Fig.17
Fig.18
Fig.19
Fig.20
Fig.21
Fig.22
Fig.23
Fig.24
4

1
2
3
12
1
1
2
1
12
1
1
Fig.25
Fig.26
Fig.27
Fig.28
Fig.29
Fig.30
Fig.31
Fig.32
5

1
23
12
123
1
2
Fig.39
Fig.33
Fig.34
Fig.35
Fig.36
Fig.37
Fig.38
6

1
1
2
3
Fig.41
2
3
1
4
2
1
1
2
1
2
Fig.45
Fig.40
Fig.42
Fig.43
Fig.44
7

2
1
3
Fig.46
8

9ENGLISH
ENGLISH (Original instructions)
WARNING
This appliance can be used by children aged from 8 years and
above and persons with reduced physical, sensory or mental capa-
bilities or lack of experience and knowledge if they have been given
supervision or instruction concerning use of the appliance in a safe
way and understand the hazards involved. Children shall not play
with the appliance. Cleaning and user maintenance shall not be
made by children without supervision.
SPECIFICATIONS
Model DCL140 DCL180 DCL180F
Capacity 650 mL
Continuous use Approx. 20 min
Overall length 981 mm 999 mm
Net weight 1.2 - 1.4 kg 1.2 - 1.5 kg 1.3 - 1.6 kg
Rated voltage D.C. 14.4 V D.C. 18 V
•
Due to our continuing program of research and development, the specications herein are subject to change without notice.
• Specications may dier from country to country.
• The weight does not include accessories but battery cartridge(s). The lightest and heaviest combination weight
of the appliance and battery cartridge(s) are shown in the table.
Applicable battery cartridge and charger
Battery cartridge D.C.14.4 V Model BL1415N / BL1430 / BL1430B / BL1440 / BL1450 / BL1460B
D.C.18 V Model BL1815N / BL1820 / BL1820B / BL1830 / BL1830B / BL1840 /
BL1840B / BL1850 / BL1850B / BL1860B
Charger DC18RC / DC18RD / DC18RE / DC18SD / DC18SE / DC18SF /
DC18SH
•
Some of the battery cartridges and chargers listed above may not be available depending on your region of residence.
WARNING: Only use the battery cartridges and chargers listed above. Use of any other battery cartridges
and chargers may cause injury and/or re.
Symbols
The followings show the symbols which may be used
for the equipment. Be sure that you understand their
meaning before use.
Read instruction manual.
Ni-MH
Li-ion
Only for EU countries
Do not dispose of electric equipment or
battery pack together with household
waste material! In observance of the
European Directives, on Waste Electric
and Electronic Equipment and Batteries
and Accumulators and Waste Batteries and
Accumulators and their implementation
in accordance with national laws, electric
equipment and batteries and battery
pack(s) that have reached the end of
their life must be collected separately and
returned to an environmentally compatible
recycling facility.
Intended use
The tool is intended for collecting dry dust.

10 ENGLISH
Cordless cleaner safety warnings
WARNING: IMPORTANT! READ CAREFULLY
all safety warnings and all instructions BEFORE
USE . Failure to follow the warnings and instructions
may result in electric shock, re and/or serious injury.
1. Do not expose to rain. Store indoors.
2. Do not allow to be used as a toy. Close
attention is necessary when used by or near
children.
3. Use only as described in this manual. Use only
manufacturer's recommended attachments.
4. Do not use with damaged battery. If appliance
is not working as it should, has been dropped,
damaged, left outdoors, or dropped into water,
return it to a service center.
5. Do not handle appliance with wet hands.
6.
Do not put any object into openings. Do not use
with any opening blocked; keep free of dust,
lint, hair, and anything that may reduce air ow.
7. Keep hair, loose clothing, ngers, and all parts
of body away from openings and moving parts.
8.
Turn o all controls before removing the battery.
9. Use extra care when cleaning on stairs.
10. Do not use to pick up ammable or combusti-
ble liquids, such as gasoline, or use in areas
where they may be present.
11. Use only the charger supplied by the manufac-
turer to recharge.
12.
Do not pick up anything that is burning or smok-
ing, such as cigarettes, matches, or hot ashes.
13.
Do not use without dust bag and/or lters in place.
14. Do not charge the battery outdoors.
15. Recharge only with the charger specied by
the manufacturer. A charger that is suitable for
one type of battery pack may create a risk of re
when used with another battery pack.
16. Use power tools only with specically desig-
nated battery packs. Use of any other battery
packs may create a risk of injury and re.
17. When (the) battery pack is not in use, keep
it away from other metal objects, like paper
clips, coins, keys, nails, screws or other small
metal objects, that can make a connection
from one terminal to another.
18. Under abusive conditions, liquid may be
ejected from the battery; avoid contact. If con-
tact accidentally occurs, ush with water.
19. Do not use a battery pack or tool that is dam-
aged or modied. Damaged or modied batteries
may exhibit unpredictable behaviour resulting in
re, explosion or risk of injury.
20. Do not expose a battery pack or tool to re or
excessive temperature. Exposure to re or tem-
perature above 130 °C may cause explosion.
21. Follow all charging instructions and do not
charge the battery pack or tool outside the
temperature range specied in the instruc-
tions. Charging improperly or at temperatures
outside the specied range may damage the
battery and increase the risk of re.
SAVE THESE INSTRUCTIONS.
ADDITIONAL SAFETY RULES
This appliance is intended for household use.
1. Read this instruction manual and the charger
instruction manual carefully before use.
2. Do not pick up the following materials:
— Hot materials such as lit cigarettes or
spark/metal dust generated by grinding/
cutting metal
— Flammable materials such as gasoline,
thinner, benzine, kerosene or paint
— Explosive materials like nitroglycerin
— Ignitable materials such as Aluminum,
zinc, magnesium, titanium, phosphorus
or celluloid
— Wet dirt, water, oil or the like
— Hard pieces with sharp edges, such as
wood chips, metals, stones, glasses,
nails, pins or razors
— Powder to clot such as cement or toner
— Conductive dust such as metal or carbon
— Fine particle like concrete dust
Such action may cause re, injury and/or prop-
erty damage.
3. Stop operation immediately if you notice any-
thing abnormal.
4. If you drop or strike the cleaner, check it care-
fully for cracks or damage before operation.
5. Do not bring close to stoves or other heat
sources.
6. Do not block the intake hole or vent holes.
SAVE THESE INSTRUCTIONS.
Important safety instructions for
battery cartridge
1.
Before using battery cartridge, read all instruc-
tions and cautionary markings on (1) battery char-
ger, (2) battery, and (3) product using battery.
2. Do not disassemble battery cartridge.
3. If operating time has become excessively
shorter, stop operating immediately. It may
result in a risk of overheating, possible burns
and even an explosion.
4. If electrolyte gets into your eyes, rinse them
out with clear water and seek medical atten-
tion right away. It may result in loss of your
eyesight.
5. Do not short the battery cartridge:
(1) Do not touch the terminals with any con-
ductive material.
(2) Avoid storing battery cartridge in a con-
tainer with other metal objects such as
nails, coins, etc.
(3) Do not expose battery cartridge to water
or rain.
A battery short can cause a large current
ow, overheating, possible burns and even a
breakdown.
6. Do not store the tool and battery cartridge in
locations where the temperature may reach or
exceed 50 °C (122 °F).

11 ENGLISH
7. Do not incinerate the battery cartridge even if
it is severely damaged or is completely worn
out. The battery cartridge can explode in a re.
8. Be careful not to drop or strike battery.
9. Do not use a damaged battery.
10. The contained lithium-ion batteries are subject
to the Dangerous Goods Legislation require-
ments.
For commercial transports e.g. by third parties,
forwarding agents, special requirement on pack-
aging and labeling must be observed.
For preparation of the item being shipped, consult-
ing an expert for hazardous material is required.
Please also observe possibly more detailed
national regulations.
Tape or mask o open contacts and pack up the
battery in such a manner that it cannot move
around in the packaging.
11. When disposing the battery cartridge, remove
it from the tool and dispose of it in a safe
place. Follow your local regulations relating to
disposal of battery.
12. Use the batteries only with the products
specied by Makita. Installing the batteries to
non-compliant products may result in a re, exces-
sive heat, explosion, or leak of electrolyte.
13. If the tool is not used for a long period of time,
the battery must be removed from the tool.
SAVE THESE INSTRUCTIONS.
CAUTION: Only use genuine Makita batteries.
Use of non-genuine Makita batteries, or batteries that
have been altered, may result in the battery bursting
causing res, personal injury and damage. It will
also void the Makita warranty for the Makita tool and
charger.
Tips for maintaining maximum
battery life
1. Charge the battery cartridge before completely
discharged. Always stop tool operation and
charge the battery cartridge when you notice
less tool power.
2. Never recharge a fully charged battery car-
tridge. Overcharging shortens the battery
service life.
3. Charge the battery cartridge with room tem-
perature at 10 °C - 40 °C (50 °F - 104 °F). Let
a hot battery cartridge cool down before
charging it.
4. Charge the battery cartridge if you do not use
it for a long period (more than six months).
FUNCTIONAL DESCRIPTION
CAUTION:
• Always be sure that the tool is switched o and
the battery cartridge is removed before adjust-
ing or checking function on the tool.
• Take care not to trap nger(s) between cleaner
and battery as shown in diagram when loading
battery. Trapping nger(s) may cause injury.
► Fig.1
Installing or removing battery cartridge
► Fig.2: 1. Red indicator 2. Button 3. Battery cartridge
CAUTION:
• Always switch o the tool before installing or
removing of the battery cartridge.
• Hold the tool and the battery cartridge rmly
when installing or removing battery car-
tridge. Failure to hold the tool and the battery
cartridge rmly may cause them to slip o your
hands and result in damage to the tool and
battery cartridge and a personal injury.
To remove the battery cartridge, slide it from the tool
while sliding the button on the front of the cartridge.
To install the battery cartridge, align the tongue on the
battery cartridge with the groove in the housing and slip
it into place. Insert it all the way until it locks in place
with a little click. If you can see the red indicator on the
upper side of the button, it is not locked completely.
CAUTION:
•
Always install the battery cartridge fully until the red indi-
cator cannot be seen. If not, it may accidentally fall out of
the tool, causing injury to you or someone around you.
•
Do not install the battery cartridge forcibly. If the cartridge
does not slide in easily, it is not being inserted correctly.
Battery protection system (Lithium-
ion battery with star marking)
► Fig.3: 1. Star marking
Lithium-ion batteries with a star marking are equipped
with a protection system. This system automatically
cuts o power to the tool to extend battery life.
The tool will automatically stop during operation if the tool and/
or battery are placed under one of the following conditions:
• Overloaded:
The tool is operated in a manner that causes
it to draw an abnormally high current.
In this situation, release the trigger switch on
the tool and stop the application that caused
the tool to become overloaded. Then pull the
trigger switch again to restart.
If the tool does not start, the battery is over-
heated. In this situation, let the battery cool
before pulling the trigger switch again.
• Low battery voltage:
The remaining battery capacity is too low
and the tool will not operate. In this situation,
remove and recharge the battery.

12 ENGLISH
Switch action
► Fig.4: 1. Switch trigger
CAUTION:
• Before inserting the battery cartridge into the
tool, always check to see that the switch trigger
actuates properly and returns to the "OFF"
position when released.
To start the tool, simply pull the switch trigger. Release
the switch trigger to stop.
Lighting the lamp
For Model DCL180F only
CAUTION:
• Never look into the light directly. Direct light
causes damage to your eyes.
► Fig.5: 1. Lamp
Pull the switch trigger to light up the lamp. Release the
switch trigger to turn o.
Indicating the remaining battery
capacity
Only for battery cartridges with the indicator
► Fig.6: 1. Indicator lamps 2. Check button
Press the check button on the battery cartridge to indi-
cate the remaining battery capacity. The indicator lamps
light up for a few seconds.
Indicator lamps Remaining
capacity
Lighted O Blinking
75% to 100%
50% to 75%
25% to 50%
0% to 25%
Charge the
battery.
The battery
may have
malfunctioned.
NOTE: Depending on the conditions of use and the
ambient temperature, the indication may dier slightly
from the actual capacity.
ASSEMBLY
CAUTION:
• Always be sure that the tool is switched o and
the battery cartridge is removed before carrying
out any work on the tool.
Type of lter
Normal lter
► Fig.7: 1. Capsule 2. Prelter 3. Filter
High performance lter
► Fig.8: 1. Capsule 2. High performance lter
Disposing of dust
CAUTION:
• Empty the cleaner before it becomes too full, or
the suction force weakens.
• Be sure to empty out the dust inside the cleaner
itself. Failure to do so may cause the lter to be
clogged or the motor to be damaged.
Disposing of dust for normal lter
In order to drop dust sticking on the lter in the capsule,
tap the capsule 4 or 5 times with your hand.
Now point suction inlet downwards, turn capsule in direction of
arrow in diagram, and disconnect capsule slowly and straight.
► Fig.9: 1. Capsule 2. Suction inlet
NOTE:
• Dust may spill out when capsule is opened, so
be sure to set a garbage bag beneath capsule.
Remove accumulated dust from inside of capsule and
o of prelter.
► Fig.10: 1. Prelter 2. Capsule
Twist prelter in direction of arrow to unfasten securing
lip from cleaner unit and then pull o prelter.
► Fig.11: 1. Prelter 2. Securing lip
Clean out ne dust from prelter. Next, remove lter,
and lightly tap to dislodge dust.
► Fig.12: 1. Prelter 2. Filter
Disposing of dust for high performance lter
In order to drop dust sticking on the lter in the capsule,
tap the capsule 4 or 5 times with your hand.
Now point suction inlet downwards, turn capsule in
direction of arrow in diagram, and disconnect capsule
slowly and straight.
► Fig.13: 1. Capsule 2. Suction inlet
NOTE:
• Dust may spill out when capsule is opened, so
be sure to set a garbage bag beneath capsule.
Remove accumulated dust from inside of capsule and
o of high performance lter.
► Fig.14: 1. Capsule 2. High performance lter

13 ENGLISH
Twist high performance lter in direction of arrow to unfas-
ten securing lip from cleaner unit and then pull o the lter.
► Fig.15: 1. Securing lip
Clean out the ne dust and lightly tap to dislodge dust
from high performance lter.
Reassembly
Reassembly for normal lter
Put on lter until it is fully in position on the cleaner unit.
► Fig.16: 1. Filter
NOTE:
• Make sure lter is put on straight without being
peeled back. If lter is put on incorrectly as
shown in diagram, dust will get into motor hous-
ing, and cause motor failure.
► Fig.17: 1. Filter
Connect prelter. At this time, make sure to twist prel-
ter so that securing lip is rmly locked into cleaner unit.
► Fig.18: 1. Prelter
► Fig.19
Connect capsule. Align O symbol on capsule with O symbol on handle
and then rmly twist capsule in direction of arrow until it is secured.
► Fig.20: 1. O Mark
► Fig.21: 1. Handle 2. Capsule
NOTE:
• Always remove dust ahead of time, as suction
power will be reduced if there is too much dust
in cleaner.
• Always be sure to check that both lter and pre-
lter are loaded correctly prior to using cleaner.
If they are not loaded correctly, dust will get into
the motor housing, and cause motor failure.
If the following examples occur, lter and prel-
ter are not loaded correctly. Reload them cor-
rectly to rectify problem.
Problem Examples
Example 1: Only prelter has been loaded (no lter)
► Fig.22: 1. Prelter
Example 2: Only lter has been loaded (no prelter)
► Fig.23: 1. Filter
Example 3: Filter has been loaded in a peeled back state
► Fig.24: 1. Filter
Example 4: Prelter's securing lip is not rmly locked
into groove of cleaner housing
► Fig.25: 1. Groove of cleaner housing 2. Prelter
3. Securing lip
Reassembly for high performance lter
Connect high performance lter. At this time, make sure to twist high
performance lter so that securing lip is rmly locked into cleaner unit.
► Fig.26: 1. High performance lter 2. Securing lip
► Fig.27: 1. Securing lip
Connect capsule. Align O symbol on capsule with O symbol on handle
and then rmly twist capsule in direction of arrow until it is secured.
► Fig.28: 1. O Mark
► Fig.29: 1. Handle 2. Capsule
NOTE:
• Always remove dust ahead of time, as suction
power will be reduced if there is too much dust
in cleaner.
• Always be sure to check that high performance
lter is loaded correctly prior to using cleaner. If
they are not loaded correctly, dust will get into
the motor housing, and cause motor failure.
If the following examples occur, high perfor-
mance lter is not loaded correctly. Reload them
correctly to rectify problem.
Problem Examples
Securing lip of high performance lter is not rmly
locked into groove of cleaner housing.
► Fig.30: 1. Securing lip 2. Groove of cleaner housing
OPERATION
CAUTION:
• To connect attachments, such as nozzle,
twist-insert attachment in direction of arrow to
ensure secure connection during use. To dis-
connect attachment, twist-extract also in direc-
tion of arrow.
If attachment is twisted in the opposite direction,
when being connected or disconnected, capsule
may become loose.
► Fig.31: 1. Capsule
Cleaning (Suction)
Nozzle
Attach the nozzle to clean o tables, desks, furniture,
etc. Nozzle slips on easily.
► Fig.32: 1. Nozzle
Nozzle + Extension wand (Straight pipe)
The extension wand ts in between the nozzle and the
cleaner itself. This arrangement is convenient for clean-
ing a oor while standing erect.
► Fig.33: 1. Cleaner body 2. Extension wand
3. Nozzle
Corner nozzle
Fit on the corner nozzle for cleaning corners and crev-
ices of a car or furniture.
► Fig.34: 1. Corner nozzle 2. Cleaner body
Corner nozzle +Extension wand
(Straight pipe)
In tight quarters where the cleaner itself cannot
squeeze in, or in high places hard to reach, use this
arrangement.
► Fig.35: 1. Corner nozzle 2. Extension wand
3. Cleaner body

14 ENGLISH
Cleaning without nozzle
You can pick up powder and dust without nozzle.
► Fig.36
MAINTENANCE
CAUTION:
• Always be sure that the tool is switched o
before attempting to perform inspection or
maintenance.
Cleaning
NOTICE: Never use gasoline, benzine, thinner,
alcohol or the like. Discoloration, deformation or
cracks may result.
NOTICE: Do not blow dust sticking on the
cleaner and lters by air duster. It brings dust into
the housing and causes failure.
NOTICE: After washing lters, dry them thor-
oughly before use. Insuciently dried lters may
cause poor suction and shorten the service life of the
motor.
NOTICE: After cleaning lters and sponge lter,
be sure to re-install them before use. If you use the
cleaner without lters and sponge lter, dust comes
into the motor housing and cause malfunction.
Cleaner body
From time to time wipe o the outside (cleaner body) of
the cleaner using a cloth dampened in soapy water.
Clean out also the suction opening and lter mounting
area.
► Fig.37
Filter
Wash the lter in soapy water when it is clogged with
dust and the cleaner power becomes weak. Dry it out
thoroughly before use.
► Fig.38
Sponge lter
When the sponge lter becomes dirty, clean it as
follows.
1. Remove the lter.
2. Pull out the sponge lter from between the pillars.
3. Clean the sponge lter by tapping or washing. If
you wash it, dry it out thoroughly before use.
4. Insert the sponge lter from between the pillars
and set it in the original position. Make sure that each
bottom edge of the pillar holds down the sponge lter,
and there is no gap between the sponge lter and suc-
tion opening.
► Fig.39: 1. Sponge lter 2. Bottom edge of pillar
Wall mount for cordless cleaner
Optional accessory
NOTE: The screw to mount the holder is not included.
Prepare a screw which ts with the material to screw
into.
Attach the wall mount for cordless cleaner to a hard
wooden wall, beam or column, where the wall mount
for cordless cleaner can be rmly secured. Always be
sure that the wall mount for cordless cleaner is securely
attached before hanging the cleaner.
► Fig.40: 1. Wall mount for cordless cleaner
CAUTION: Do not hang the cleaner to the wall
mount violently or hang other appliances than the
cleaner.
Things to Check Before Asking for Repairs
Symptom Area to be investigated Fixing method
Weak suction power
Not working
Is capsule full of dust?
Is filter clogged?
Is battery exhausted?
Empty dust from capsule.
Dust down or wash filter.
Recharge battery.
Recharge battery.
NOTE:
• Do not attempt to repair cleaner by yourself.
To maintain product SAFETY and RELIABILITY, repairs, any other maintenance or adjustment should be performed
by Makita Authorized Service Centers, always using Makita replacement parts.

15 ENGLISH
OPTIONAL
ACCESSORIES
CAUTION:
• These accessories or attachments are recom-
mended for use with your Makita tool specied
in this manual. The use of any other accessories
or attachments might present a risk of injury to
persons. Only use accessory or attachment for
its stated purpose.
If you need any assistance for more details regard-
ing these accessories, ask your local Makita Service
Center.
• Extension wand (Straight pipe)
• Nozzle
• Nozzle for carpet
• Shelf brush
• Corner nozzle
• Round brush
• Flexible hose
• Filter
• Prelter
• High performance lter
• Wall mount for cordless cleaner
• Cyclone attachment
• Makita genuine battery and charger
NOTE:
• Some items in the list may be included in the
tool package as standard accessories. They
may dier from country to country.
Cyclone attachment
► Fig.41: 1. Straight pipe 2. Cyclone attachment
3. Suction inlet
About the cyclone attachment
Using the cleaner with the cyclone attachment installed
reduces the amount of dust that enters the capsule,
which helps to prevent the suction force from weaken-
ing. In addition, cleaning after use is also simple.
CAUTION: Always be sure that the tool is
switched o and the battery cartridge is removed
before carrying out any work on the tool. If the
battery cartridge is left inserted, the cleaner may start
unexpectedly and result in injury.
CAUTION: Clean the mesh lter of the
cyclone attachment and the lters of the cleaner
unit when they become clogged. Continued use in
the clogged condition may result in heating or smoke.
NOTICE: When the cyclone attachment is
attached, do not use the cleaner in the horizontal
or upward facing condition. Doing so may cause
the mesh lter to become clogged.
NOTICE: Always use the cleaner with the lters
installed, even when using the cyclone attach-
ment. Using the cleaner without the lters installed
may result in a motor malfunction.
NOTE: Check that the cyclone attachment, cleaner,
and straight pipe are locked properly before use.
NOTE: Empty the dust case of the cyclone attach-
ment and the capsule of the cleaner when dust has
accumulated. Continued use will result in weakened
suction force.
Disposing of dust
When dust has accumulated up to the full line of the
dust case, follow the procedure below and dispose of
the dust.
1. Hold the dust case rmly, press and hold the two
buttons, and remove the dust case.
► Fig.42: 1. Full line 2. Dust case 3. Button (two
locations) 4. Mesh lter
2. Dispose of the dust inside the dust case and
remove any dust and powder adhered to the surface of
the mesh lter.
3. Insert the dust case all the way until the two but-
tons lock with a click.
► Fig.43: 1. Dust case 2. Button (two locations)
NOTE: Check that the cyclone attachment, cleaner,
and straight pipe are all rmly connected before
restarting operation.
NOTE: If the suction force does not recover even
after disposing of the dust and cleaning the mesh
lter, check whether dust has accumulated in the
capsule of the cleaner or clogging has occurred.
Cleaning
When the dust case becomes dirty or the mesh lter is
clogged, remove and wash them with water. (Refer to
“Disposing of dust” for the removal procedure.)
Dry the parts thoroughly before reinstallation and use.
► Fig.44: 1. Dust case 2. Mesh lter
When the mesh lter gets dirty badly, clean it in the
following procedures.
1. Turn the mesh lter counterclockwise and remove
it while the hooks are unlocked.
► Fig.45: 1. Mesh lter 2. Hook
2. Remove the dust on the mesh lter and then wash
it with water. After that, dry it thoroughly.
3. Insert the mesh lter into the base while the hooks
are aligned with the port. Turn the mesh lter clockwise
until the hooks are locked with a click. Make sure that
the mesh lter is installed securely.
► Fig.46: 1. Mesh lter 2. Hook 3. Port

16 УКРАЇНСЬКА
УКРАЇНСЬКА (Оригінальні вказівки)
ПОПЕРЕДЖЕННЯ
Цей прилад дозволяється використовувати дітям віком від 8
років або старше, а також особам з обмеженими фізичними,
сенсорними або розумовими здібностями та особам з недостат-
нім досвідом і знаннями, якщо за ними встановлений нагляд
або їм були надані інструкції стосовно безпечного використання
цього приладу та вони усвідомлюють потенційну небезпеку від
його використання. Дітям не дозволяється грати з цим прила-
дом. Дітям не дозволяється виконувати чищення або проводити
технічне обслуговування приладу без нагляду дорослих.
ТЕХНІЧНІ ХАРАКТЕРИСТИКИ
Модель DCL140 DCL180 DCL180F
Потужність 650 мл
Безперервне використання Прибл. 20 хв
Загальна довжина 981 мм 999 мм
Чиста вага 1,2 - 1,4 кг 1,2 - 1,5 кг 1,3 - 1,6 кг
Номінальна напруга 14,4 В пост. струму 18 В пост. струму
• Оскільки наша програма наукових досліджень і розробок триває безперервно, наведені тут технічні
характеристики можуть бути змінені без попередження.
• У різних країнах технічні характеристики можуть бути різними.
• Вага не включає жодних додаткових приладів, окрім касети (касет) з акумулятором. Найменша або най-
більша комбінація ваги пристрою та касети (касет) з акумулятором наведені в таблиці.
Застосовна касета з акумулятором і зарядний пристрій
Касета з акумулятором Модель 14,4 В пост. тока BL1415N / BL1430 / BL1430B / BL1440 / BL1450 / BL1460B
Модель 18 В пост. тока BL1815N / BL1820 / BL1820B / BL1830 / BL1830B / BL1840 /
BL1840B / BL1850 / BL1850B / BL1860B
Зарядний пристрій DC18RC / DC18RD / DC18RE / DC18SD / DC18SE / DC18SF /
DC18SH
• Деякі касети з акумулятором і зарядні пристрої, які вказано вище, можуть бути недоступними залежно
від вашого регіону або місця перебування.
ПОПЕРЕДЖЕННЯ:
Використовуйте лише касети з акумулятором і зарядні пристрої, перелічені вище.
Використання будь-яких інших касет з акумулятором і зарядних пристроїв може призвести до травмування й/або пожежі.
Символи
Далі наведено символи, які можуть застосовуватися
для позначення обладнання. Перед користуванням
переконайтеся, що ви розумієте їхнє значення.
Читайте посібник з експлуатації.
Ni-MH
Li-ion
Тільки для країн ЄС
Не викидайте електроприлади або акуму-
ляторні батареї разом із побутовим сміттям!
Згідно з європейськими директивами про
утилізацію електричного та електронного
обладнання та про утилізацію батарей і аку-
муляторів, а також батарей та акумуляторів,
термін служби яких закінчився, та їх викорис-
танням із дотриманням національних законів,
електричне обладнання, батареї та акумуля-
тори, термін служби яких закінчився, потрібно
збирати окремо та відправляти на екологічно
чисті підприємства з їхньої переробки.

17 УКРАЇНСЬКА
Призначення
Інструмент призначено для збирання сухого пилу.
Попередження про необхідну
обережність під час роботи з
бездротовим пилососом
ПОПЕРЕДЖЕННЯ: ВАЖЛИВО!
ПРОЧИТАЙТЕ УВАЖНО всі попередження
про необхідну обережність під час роботи
та всі інструкції ПЕРЕД ВИКОРИСТАННЯМ.
Недотримання попереджень та інструкцій може
призвести до ураження електричним струмом, до
виникнення пожежі та/або до отримання серйоз-
них травм.
1. Не залишайте інструмент під дощем.
Зберігайте у приміщенні.
2. Не допускайте, щоб з цим приладом гралися
діти. Потрібно бути пильним, якщо інстру-
мент використовується дітьми або поблизу
від них.
3. Використовуйте лише у відповідності з
цією інструкцією. Використовуйте лише
допоміжне обладнання, яке рекомендоване
виробником.
4. Не використовуйте, якщо акумулятор
пошкоджений. Якщо прилад не працює
належним чином, його впустили, пошко-
дили, залишили під дощем або зронили у
воду, його слід відправити до сервісного
центру.
5. Не торкайтеся приладу мокрими руками.
6. Не встромляйте жодних предметів у отвори.
Не використовуйте прилад із заблокова-
ними отворами; не допускайте їх блоку-
вання пилом, пухом, волоссям або будь-
чим, що може послабити потік повітря.
7. Слідкуйте, щоб волосся, просторий одяг, а
також пальці та інші частини тіла не потра-
пили до отворів та рухомих частин приладу.
8. Перед зніманням акумулятора вимикайте
всі елементи керування.
9. Будьте особливо обережні під час приби-
рання на сходах.
10. Уникайте потрапляння на прилад займис-
тих або пальних рідин, наприклад бензину,
та не використовуйте прилад в місцях їх
застосування.
11. Для перезаряджання акумулятора вико-
ристовуйте тільки зарядний пристрій, що
постачається виробником.
12. Уникайте контакту приладу з будь-якими
речовинами та предметами, що горять або
димлять, наприклад цигарками, сірниками
або гарячим попелом.
13. Не використовуйте без мішка для пилу і
(або) встановлених фільтрів.
14. Перезаряджайте акумулятор тільки в
приміщенні.
15. Перезаряджайте акумулятор лише за
допомогою зарядного пристрою, вказа-
ного виробником. Зарядний пристрій, який
підходить для одного типу акумуляторів, може
призвести до пожежі при використанні з акуму-
лятором іншого типу.
16. Використовуйте електроінструменти лише
з акумуляторами того типу, який призна-
чений саме для цих електроінструментів.
Використання акумуляторів інших типів може
призвести до отримання травм і виникнення
пожежі.
17. Коли акумулятор не використовується,
тримайте його подалі від таких металевих
предметів, що можуть закоротити клеми аку-
мулятора, наприклад скріпок, монет, ключів,
цвяхів, гвинтів тощо.
18. За неналежних умов зберігання з акумуля-
тора може витекти рідина, контакту з якою
слід уникати. У разі випадкового потра-
пляння рідини на тіло уражену частину
необхідно промити водою.
19. Не користуйтесь акумулятором або інстру-
ментом, які було змінено чи пошкоджено.
Експлуатація акумуляторів, що їх було пошко-
джено або до конструкції яких було внесено
зміни, може бути небезпечною й може спричи-
нити пожежу, вибух або травму.
20. Не піддавайте акумулятор або інструмент
впливу вогню чи надмірної температури.
Вплив вогню або температури вище 130° C
може спричинити вибух.
21. Дотримуйтесь усіх вказівок із заряджання й
не заряджайте акумулятор або інструмент
за температури за межами зазначеного в
інструкції діапазону. Неправильне заряд-
жання або заряджання за межами вказаного
температурного діапазону може призвести до
пошкодження акумулятора й підвищити небез-
пеку займання.
ЗБЕРІГАЙТЕ ЦІ ВКАЗІВКИ.
ДОДАТКОВІ ПРАВИЛА
БЕЗПЕКИ
Цей прилад призначений тільки для побутового
використання.
1. Перед використанням уважно прочитайте
цю інструкцію, а також інструкцію до заряд-
ного пристрою.
2. Уникайте таких речовин та предметів, як:
— гарячі речовини та предмети, напри-
клад запалені цигарки або іскри й мета-
левий пил, що утворюються під час
шліфування або різання металу
— пальні речовини, наприклад газолін,
розчинники, бензин, гас або фарби
— вибухові речовини, наприклад
нітрогліцерин
— займисті речовини, наприклад алюмі-
ній, цинк, магній, титан, фосфор або
целулоїд
— вологий бруд, вода, мастило та подібні
речовини

18 УКРАЇНСЬКА
— тверді предмети з гострими кутами,
наприклад тріска, метали, каміння,
скло, цвяхи, шпильки або бритви
— порошок або грудки, наприклад цемент
або тонер
— електропровідний пил, наприклад
металевий або вугільний
— дрібні частки, наприклад бетонний пил.
У протилежному випадку це може призвести
до пожежі, травми та (або) пошкодження
майна.
3. Негайно зупиніть інструмент, якщо помітите
відхилення в його роботі.
4. Якщо ви впустили або вдарили пилосос,
перед подальшим використанням його слід
ретельно оглянути на наявність тріщин або
пошкоджень.
5. Заборонено підносити інструмент близько
до кухонних плит або інших джерел тепла.
6. Заборонено блокувати забірний або венти-
ляційні отвори.
ЗБЕРІГАЙТЕ ЦІ ВКАЗІВКИ.
Важливі інструкції з безпеки для
касети з акумулятором
1. Перед тим як користуватися касетою з аку-
мулятором, слід прочитати всі інструкції та
застережні знаки щодо (1) зарядного при-
строю акумулятора, (2) акумулятора та (3)
виробів, що працюють від акумулятора.
2. Не слід розбирати касету з акумулятором.
3. Якщо період роботи дуже покоротшав, слід
негайно припинити користування. Це може
призвести до виникнення ризику перегріву,
опіку та навіть вибуху.
4. У разі потрапляння електроліту в очі слід
промити їх чистою водою та негайно звер-
нутися до лікаря. Це може призвести до
втрати зору.
5. Не закоротіть касету з акумулятором.
(1) Не слід торкатися клем будь яким стру-
мопровідним матеріалом.
(2) Не слід зберігати касету з акумулято-
ром у ємності з іншими металевими
предметами, такими як цвяхи, монети
тощо.
(3) Не залишайте касету з акумулятором
під дощем, запобігайте контакту з
водою.
Коротке замикання може призвести до
появи значного струму, перегріву, можливих
опіків та навіть виходу з ладу.
6. Не слід зберігати інструмент та касету з аку-
мулятором в місцях, де температура може
сягнути чи перевищити 50°C (122°F).
7. Не слід спалювати касету з акумулятором,
навіть якщо вона була неодноразово пошко-
джена або повністю спрацьована. Касета з
акумулятором може вибухнути у вогні.
8. Не слід кидати або ударяти акумулятор.
9. Не слід використовувати пошкоджений
акумулятор.
10. Літій-іонні акумулятори, що містяться в
інструменті, мають відповідати вимогам
законів про небезпечні товари.
Під час транспортування за допомогою комер-
ційних перевезень, наприклад із залучанням
третьої сторони та експедиторів, необхідно
дотримуватись особливих вимог, вказаних на
пакуванні й у маркуванні.
Під час підготування позиції до відправлення
необхідно проконсультуватись зі спеціалістом
з небезпечних матеріалів. Крім того, слід вико-
нувати більш докладні національні настанови,
якщо такі є.
Заклейте відкриті контакти стрічкою або захо-
вайте їх і запакуйте акумулятор таким чином,
щоб він не міг рухатися в пакуванні.
11. Для утилізації касети з акумулятором
витягніть її з інструмента та утилізуйте
безпечним способом. Дотримуйтеся норм
місцевого законодавства щодо утилізації
акумуляторів.
12. Використовуйте акумулятори лише з
виробами, указаними компанією Makita.
Установлення акумуляторів у невідповідні
вироби може призвести до пожежі, надмірного
нагрівання, вибуху чи витоку електроліту.
13. Якщо інструментом не користуватимуться
протягом тривалого періоду часу, вийміть
акумулятор з інструмента.
ЗБЕРІГАЙТЕ ЦІ ВКАЗІВКИ.
ОБЕРЕЖНО: Використовуйте тільки акуму-
лятори Makita. Використання акумуляторів, інших
ніж оригінальні акумулятори Makita, або акумуля-
торів, конструкцію яких було змінено, може призве-
сти до вибуху акумулятора і спричинити пожежу,
травму або пошкодження. У зв'язку з цим також
буде анульовано гарантію Makita на інструмент
Makita і на зарядний пристрій.
Поради з забезпечення макси-
мального строку експлуатації
акумулятора
1. Касету з акумулятором слід заряджати до
того, як він розрядиться повністю. Завжди
слід зупиняти роботу інструмента та заря-
дити акумулятор, якщо ви помітили змен-
шення потужності інструмента.
2. Ніколи не слід заряджати повторно пов-
ністю заряджену касету з акумулятором.
Перезарядження скорочує строк експлуата-
ції акумулятора.
3. Заряджайте касету з акумулятором при кім-
натній температурі 10°C - 40°C (50°F - 104°F).
Перед тим як заряджати касету з акумулято-
ром, слід зачекати, доки вона охолоне.
4. Якщо касета з акумулятором не використо-
вувалася тривалий час (понад шість міся-
ців), її слід зарядити.

19 УКРАЇНСЬКА
ІНСТРУКЦІЯ З
ВИКОРИСТАННЯ
ОБЕРЕЖНО:
• Завжди перевіряйте, щоб прилад був вимкне-
ний, а касета з акумулятором була знята,
перед регулюванням або перевіркою функці-
онування інструмента.
• Заряджаючи акумулятор, будьте обережні,
щоб між очищувачем та акумулятором не
потрапив(ли) палець(ці), як показано на
малюнку. Защемлення пальця(ів) може при-
звести до травм.
► Рис.1
Встановлення та зняття касети з
акумулятором
► Рис.2: 1. Червоний індикатор 2. Кнопка 3. Касета
з акумулятором
ОБЕРЕЖНО:
• Завжди вимикайте інструмент перед
встановленням або зніманням касети з
акумулятором.
• Під час встановлення або зняття касети з
акумулятором надійно утримуйте інстру-
мент і касету з акумулятором. Інакше
інструмент або касета з акумулятором
можуть вислизнути з рук, що може призвести
до травм або пошкодження інструмента й
касети з акумулятором.
Щоб зняти касету з акумулятором, слід витягнути її з інстру-
мента, натиснувши на кнопку в передній частині касети.
Щоб установити касету з акумулятором, слід сумістити
шпонку касети з акумулятором із пазом у корпусі та
вставити касету на місце. Уставляйте її, доки не почуєте
клацання. Якщо на верхній частині кнопки видно червоний
індикатор, це означає, що вона заблокована не повністю.
ОБЕРЕЖНО:
•
Завжди уставляйте касету повністю, аж поки червоний
індикатор стане невидимим. Якщо цього не зробити,
касета може випадково випасти з інструмента та
завдати травми вам або людям, що знаходяться поруч.
•
Не встановлюйте касету з акумулятором із
зусиллям. Якщо касета не вставляється легко,
то це означає, що Ви її невірно вставляєте.
Система захисту акумулятора
(літій-іонний акумулятор з
маркувальною зірочкою)
► Рис.3: 1. Маркувальна зірочка
Літій-іонні акумулятори з маркувальною зірочкою
оснащені системою захисту. Ця система автома-
тично вимикає живлення інструмента з метою збіль-
шення робочого часу акумулятора.
Інструмент буде автоматично вимкнений під час
роботи, якщо він та/або акумулятор знаходити-
муться в таких умовах:
• Перенавантаження:
Інструмент споживає струм занадто висо-
кої потужності під час роботи.
У такому разі відпустіть курковий перемикач інстру-
мента та зупиніть роботу, яка призвела до перена-
вантаження інструмента. Потім натисніть на курко-
вий перемикач, щоб знову запустити інструмент.
Якщо інструмент неможливо запустити, це
означає, що акумулятор перегрівся. У такому
разі дайте акумулятору охолонути, перш ніж
знову натиснути на курковий перемикач.
• Низька напруга акумулятора:
Залишковий заряд акумулятора занадто
низький, тому інструмент не буде працювати.
У такому разі зніміть та зарядіть акумулятор.
Дія вимикача
► Рис.4: 1. Курковий вмикач
ОБЕРЕЖНО:
•
Перед тим, як вставляти касету з акумулятором
в інструмент, слід перевірити належну роботу
курка вмикача, тобто щоб він повертався у
положення "ВИМК.", коли його відпускають.
Для того, щоб запустити інструмент, слід просто натиснути на
курок вмикача. Для зупинення роботи курок слід відпустити.
Увімкнення лампи
Тільки для моделі DCL180F
ОБЕРЕЖНО:
• Ніколи не дивіться прямо на світло. Пряме
світло завдає шкоди очам.
► Рис.5: 1. Ліхтар
Потягніть за курок вмикача, щоб увімкнути лампу.
Щоб вимкнути, відпустіть курок вмикача.
Відображення залишкового
заряду акумулятора
Тільки для касет з акумулятором, які мають індикатори
► Рис.6: 1. Індикаторні лампи 2. Кнопка перевірки
Натисніть кнопку перевірки на касеті з акумулятором
для відображення залишкового ресурсу акумуля-
тора. Індикаторні лампи загоряться на кілька секунд.
Індикаторні лампи Залишковий
ресурс
Горить Вимк. Блимає
від 75 до
100%
від 50 до
75%
від 25 до
50%
від 0 до 25%
Зарядіть
акумулятор.

20 УКРАЇНСЬКА
Індикаторні лампи Залишковий
ресурс
Горить Вимк. Блимає
Можливо,
акумулятор
вийшов з
ладу.
ПРИМІТКА: Залежно від умов використання та
температури оточуючого середовища показання
можуть незначним чином відрізнятися від дійсного
ресурсу.
КОМПЛЕКТУВАННЯ
ОБЕРЕЖНО:
• Завжди перевіряйте, щоб прилад був вимкне-
ний, а касета з акумулятором була знята,
перед тим, як проводити будь-які роботи на
інструменті.
Тип фільтра
Звичайний фільтр
► Рис.7: 1. Контейнер 2. Первинний фільтр
3. Фільтр
Фільтр підвищеної ефективності
► Рис.8: 1. Контейнер 2. Фільтр підвищеної
ефективності
Видалення пилу
ОБЕРЕЖНО:
• Пилосос слід спорожнювати до повного
заповнення, інакше силу всмоктування буде
послаблено.
• Обов'язково видаляйте пил безпосеред-
ньо зсередини пилососа. Невиконання цієї
вимоги може призвести до засмічення філь-
тра або пошкодження двигуна.
Видалення пилу зі звичайного
фільтра
Для видалення пилу, налиплого на фільтрі в контей-
нері, постукайте рукою по контейнеру 4—5 разів.
Тепер поверніть отвір усмоктування вниз, повер-
ніть контейнер у напрямку, показаному стрілкою на
малюнку, та повільно від'єднайте контейнер, трима-
ючи його прямо.
► Рис.9: 1. Контейнер 2. Отвір усмоктування
ПРИМІТКА:
• Під час відкривання контейнера пил може
висипатися, тому під ним обов'язково вста-
новлюйте мішок для сміття.
Видаліть накопичений пил із контейнера й первин-
ного фільтра.
► Рис.10: 1. Первинний фільтр 2. Контейнер
Поверніть первинний фільтр у напрямку, показаному
стрілкою, щоб відстібнути кріпильний фланець від кор-
пусу пилососа, після чого витягніть первинний фільтр.
► Рис.11:
1. Первинний фільтр 2. Кріпильний фланець
Вичистіть дрібний пил із первинного фільтра. Потім зніміть
фільтр і злегка постукайте по ньому, щоб вибити пил.
► Рис.12: 1. Первинний фільтр 2. Фільтр
Видалення пилу з фільтра
підвищеної ефективності
Для видалення пилу, налиплого на фільтрі в контей-
нері, постукайте рукою по контейнеру 4—5 разів.
Тепер поверніть отвір усмоктування вниз, поверніть кон-
тейнер у напрямку, показаному стрілкою на малюнку, та
повільно від'єднайте контейнер, тримаючи його прямо.
► Рис.13: 1. Контейнер 2. Отвір усмоктування
ПРИМІТКА:
• Під час відкривання контейнера пил може
висипатися, тому під ним обов'язково вста-
новлюйте мішок для сміття.
Видаліть накопичений пил із контейнера й фільтра
підвищеної ефективності.
► Рис.14: 1. Контейнер 2. Фільтр підвищеної
ефективності
Поверніть фільтр підвищеної ефективності в
напрямку, показаному стрілкою, щоб відстібнути крі-
пильний фланець від корпусу пилососа, після чого
витягніть фільтр підвищеної ефективності.
► Рис.15: 1. Кріпильний фланець
Вичистіть дрібний пил і злегка постукайте по фільтру
підвищеної ефективності, щоб вибити пил.
Складання
Складання зі звичайним фільтром
Встановіть фільтр до кінця в корпус пилососа.
► Рис.16: 1. Фільтр
ПРИМІТКА:
• Переконайтеся, що фільтр встановлено
прямо й не відігнуто назад. Якщо фільтр вста-
новлено неправильно (див. малюнок), пил
потраплятиме в корпус двигуна, що призведе
до пошкодження двигуна.
► Рис.17: 1. Фільтр
Приєднайте первинний фільтр. Одночасно пере-
конайтеся, що первинний фільтр повернуто таким
чином, щоб кріпильний фланець було щільно зафік-
совано в корпусі пилососа.
► Рис.18: 1. Первинний фільтр
► Рис.19
Приєднайте контейнер. Сумістіть позначку «O» на
контейнері з позначкою «O» на ручці, потім щільно
поверніть контейнер у напрямку, показаному стріл-
кою, до його повної фіксації.
► Рис.20: 1. Позначка «O»
► Рис.21: 1. Ручка 2. Контейнер
This manual suits for next models
4
Table of contents
Languages:
Other Makita Vacuum Cleaner manuals

Makita
Makita VC3211HX1 User manual

Makita
Makita VC008G User manual

Makita
Makita XCV18 User manual

Makita
Makita DVC340 User manual

Makita
Makita DCL142 User manual

Makita
Makita DVC261 User manual

Makita
Makita CL111D User manual

Makita
Makita DRC200 Operating instructions

Makita
Makita LC01ZX User manual

Makita
Makita DVC660 User manual

Makita
Makita XCV21 User manual

Makita
Makita VC2510L User manual

Makita
Makita VC008G User manual

Makita
Makita VC1310L User manual

Makita
Makita XSV10 User manual

Makita
Makita DVC750L User manual

Makita
Makita 447 L User manual

Makita
Makita XLC09 User manual

Makita
Makita VC006GM User manual

Makita
Makita DVC866L User manual