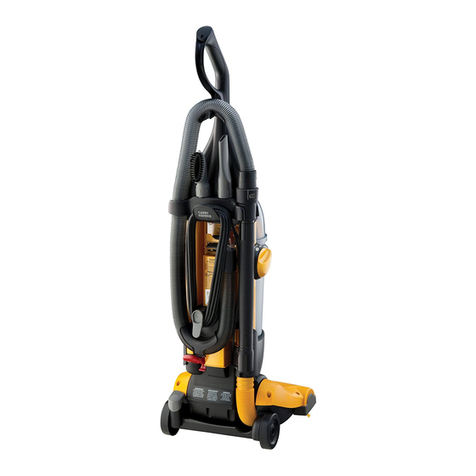
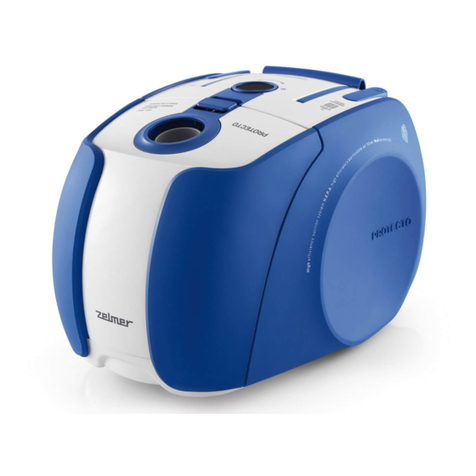
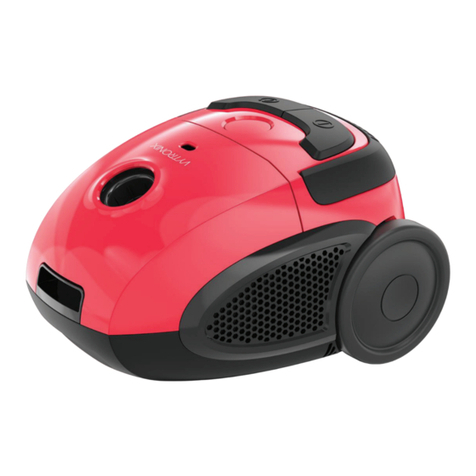
Lumina CBS 2012 User manual

N5455
INSTRUCTION MANUAL
Multi Cyclonic Vacuum Cleaner
Model Number CBS 2012

2
After Sales Support
Telephone: 1300 366 144
Internet: [email protected]
Contents
03 Warranty Details
04 Welcome Section
05 General Information and Safety Instructions
05 Instruction manual
05 Explanation of symbols
05 Approved use
06 General Safety Information
07 Appliance based safety advice
09 Assembly and Parts List
10 Before using for the rst time
10 Assembly
11 Getting Started / Features
11 Using the correct Nozzle
12 Instructions
12 Starting up the appliance
12 Using the appliance
13 Other Useful Information
13 FAQ
13 Problem und Solution
14 Maintenance, cleaning and care
15 Cleaning the appliance
15 Cleaning the oor nozzle
15 Emptying the dust container
16 Cleaning the rough dust lter
16 Cleaning the motor protection lter
17 Cleaning the exhaust lter
18 Technical data
18 Disposal
19 Index

3
After Sales Support
Telephone: 1300 366 144
Internet: warrantyhelp@awa.com.au
The product is guaranteed to be free from defects in workmanship and parts for a period of 36
months (dependant on product) from the date of purchase. Defects that occur within this warranty
period, under normal use and care, will be repaired, replaced or refunded at our discretion. The
benefits conferred by this warranty are in addition to all rights and remedies in respect of the pro-
duct that the consumer has under the Competition and Consumer Act 2010 and similar state and
territory laws.
Our goods come with guarantees that cannot be excluded under the Australian Consumer Law.
You are entitled to a replacement or refund for a major failure and for compensation for any other
reasonably foreseeable loss or damage. You are also entitled to have the goods repaired or re-
placed if the goods fail to be of acceptable quality and the failure does not amount to a major
failure.
Multi Cyclonic Vacuum Cleaner
After Sales Support
Telephone: 1300 366 144
Internet: [email protected]

4
After Sales Support
Telephone: 1300 366 144
Internet: [email protected]
Welcome Section
Congratulations on choosing to buy a Lumina®product.
All products brought to you by Lumina®are manufactured to the highest standards of performance and safety,
and, as part of our philosophy of customer service and satisfaction, are backed by our comprehensive 3 Year
Warranty.
We hope you will enjoy using your purchase for many years to come.

5
After Sales Support
Telephone: 1300 366 144
Internet: [email protected]
General Information and
Safety Instructiones
Instruction manual
Please read this instruction manual thoroughly before switching on the appliance. You will find a number of im-
portant and useful tips in these instructions. Keep the instructions in a safe place and be sure to enclose them
with the appliance if you sell it.
Note: In the event of problems, we would kindly ask you to contact our customer service hotline directly
and not bring it back to the place where you bought it. Problems can often be solved over the phone.
If it should still be necessary to have the appliance repaired or replaced, our customer service will also
deal with that.
Explanation of symbols
This symbol marks important safety instructions.
Danger - relates to personal injury
Caution - relates to property damage
This symbol indicates important safety information.
Double insulation
Approved use
This appliance must be used exclusively to vacuum up dry materials in dry areas. Furthermore, the appliance is
not designed for commercial use, but exclusively for domestic use in private homes. Any other use or alteration
to the appliance is not approved, and is expressly forbidden. No liability can be accepted for damage occurring
as a result of non-approved use or misuse of the appliance.
The appliance is not suitable for vacuuming
– Toner, plaster, cement, stone dust, drilling dust, explosive or poisonous items
- glowing embers, burning cigarettes or matches,
- sharp-edged items like glass splinters,
- liquids!

6
After Sales Support
Telephone: 1300 366 144
Internet: [email protected]
General safety information
This appliance may be used by children aged 8 and older and by individuals with impaired physical,
sensory or mental abilities or with limited experience and/or knowledge, provided they are supervised
or have been instructed in the safe use of the appliance and understand the risks resulting therefrom.
Children are not allowed to play with the appliance. Children must not be allowed to clean or carry out
user maintenance on the appliance unless they are supervised.
To avoid risk of harm, injury, accident or damage to the appliance, the mains lead, if damaged, should
only be replaced by a professional repair shop recommended by the manufacturer. Please contact after
sales support.
• Always remove the plug from the mains if there are any operating problems, whenever you clean the appli-
ance or if it is not in use. Never pull on the mains lead. Risk of electric shock!
• Never put the appliance in water or use outside, as it should not be exposed to rain or any other kind of
damp. Risk of electric shock!
• If the appliance does fall in the water, rst remove the plug from the socket, and then remove the appliance.
Do not turn the appliance on again, but have it checked first at an approved service point. The same ap-
plies if the mains lead or appliance is damaged, or if the appliance has fallen on the floor. Risk of electric
shock!
• Take care never to put the mains lead or the appliance on a hot surface or near a heat source. Put the mains
lead where it will not be in contact with hot or sharp-edged objects. Risk of electric shock!
• Never fold the mains lead or wind it round the appliance, as this could cause it to break. Risk of electric
shock!
• Do not use the appliance if you are on a damp surface, or if your hands or the appliance are wet. Risk of
electric shock!
• Never open up the appliance yourself, and do not try to probe inside it with a metal object for any reason.
Risk of electric shock!
• Keep packaging materials out of the reach of children - Risk of suffocation!
• Electrical appliances are not toys. For this reason, please use and keep the appliance out of the reach of
children. Children are not aware of the dangers of handling electrical appliances. Do not allow the mains
lead to hang down to prevent anyone from pulling on it.
• Repairs must only be carried out by approved specialist workshops. Appliances that have been repaired
incorrectly represent a danger to the user.
• Connect the appliance only to an approved socket with an identication plate proving suitability for mains
voltage.
• To avoid accidents, do not leave the appliance unsupervised while it is in operation.
• To prevent accidents, never use the same socket for several household appliances.

7
After Sales Support
Telephone: 1300 366 144
Internet: [email protected]
Appliance based safety advice
• Do not vacuum up glowing embers, burning cigarettes or matches nor sharp items, glass splinters, water or
other liquids. You may damage the vacuum cleaner and endanger your safety. Glowing ashes, burning ci-
garettes etc. may set fire to the filter, moisture can cause a short circuit, sharp objects will damage the filter.
• Do not use the appliance if the casing shows signs of damage, if the mains lead is faulty or if there is any
suspicion of some inner damage (e.g. if the appliance has been dropped).
• When the appliance is being cleaned and serviced, when parts are being replaced or it is being switched over
to another function, it must be switched off. The mains plug must also pulled out of the socket to ensure that
the appliance is not switched on accidentally.
• To avoid accidents, never use the appliance to vacuum up anything that may present a risk to health, i.e.
damp, wet, explosive or poisonous items, large glass splinters, solvents, gases or glowing embers.
• To avoid accidents, do not vacuum up any living creatures. Do not vacuum up any items of clothing to be
worn against the skin. The ends of nozzles, pipes and hoses must never be brought close to eyes or ears.
• Be careful when winding up the cord. The powerful cord rewinding action can cause the cord to “whip” back
and forth uncontrollably.
• Never sit or stand on the vacuum cleaner.
• Do not use the vacuum cleaner unless all lters and the dust container are properly in place. Filter and/or dust
containers must not be damaged!
• Only use original accessories. If used with parts or accessories not original to the appliance, danger of acci-
dents may be increased. In the event of an accident or damage involving non-original accessories, no liability
can be accepted. The use of non-original parts or accessories and any consequential damage invalidates all
warranties.
• Do not expose the appliance to the effects of weather, dampness or sources of heat. Do not vacuum up any
liquids with the appliance.
• If you intend to use the vacuum cleaner on a recently shampooed carpet, wait until the detergent has com-
pletely dried.
• The appliance has a motor safety function. On overheating (e.g. if the nozzles are blocked or the dust contai-
ner is full) the cyclonic vacuum cleaner cuts out automatically. Clean the filters and empty the dust container
regularly to ensure that this safety function is not triggered!
• Use original lters only. These are available from our customer service department. Using third-party lters
can have a detrimental effect on the performance of the appliance. Do not use any faulty accessories.
• Always make sure that enough cord is extended (we recommend extending about 2/3 of the cord to prevent
heat from building up). Do not pull the cord out of the appliance beyond the yellow mark.
• Make sure that the mains cord is not likely to trip anyone.

8
After Sales Support
Telephone: 1300 366 144
Internet: [email protected]
• Never continue pulling on the cord if you have reached the red mark.
• Do not cover the appliance while it is in operation.
• The exhaust air outlets in the protective cover must never be covered or blocked. Always ensure that there is
sufficient free space and clean the ventilation slits regularly; remove dirt to prevent the outlets from becoming
clogged.
• Never use sharp or abrasive cleaning materials or sharp-edged objects for cleaning.
• Allow the appliance and all accessories to cool down to room temperature before cleaning.
• To avoid risks, always unplug the appliance from the safety socket when not in use.
• Do not place a cover of the appliance and make sure that the exhaust air outlets are not blocked with dirt,
hair etc..

9
After Sales Support
Telephone: 1300 366 144
Internet: [email protected]
A) Dust container
B) Coarse dust lter
C) Dust container flap
D) Release button for the dust container ap
(also see fig. on p.15)
E) Handle
F) Release button for
dust container
G) On/off switch
H) Switch for cord storage
I) Recessed holder
J) Mains lead and plug
K) Exhaust lter
(behind safety cover)
L) Opening for suction hose (see fig. on p. 10)
M) Suction hose with handle
N) Supplementary air valve
O) Holder for nozzles
P) adjustable telescopic tube
Q) Floor nozzle
R) Foot-operated switch
S) Upholstery nozzle with
brush attachment
T) Crevice nozzle
N
M
O
Assembly and parts list
R
S
T
Q
P
A
L
G
EF
BC
D
HI JK

10
After Sales Support
Telephone: 1300 366 144
Internet: [email protected]
Before using for the rst time
After unpacking, ensure that the contents are complete and check for any transit damage in order
to avoid any danger. Do not use it if in any doubt, but contact our customer service. You will nd
the service address in our warranty conditions and on the warranty card.
In order to protect against damage during transit, your appliance is packaged.
• Carefully remove appliance from its sales packaging.
• Remove all packaging elements.
• Clean the appliance and all accessories to remove any packaging dust, following the instructions given in the
section on “CLEANING AND CARE”.
Assembly
• Insert the suction hose (M) in opening (L) so that the two “lugs” on the
connecting piece of the suction hose slide into the grooves provided for
them on the perimeter of the opening (L) and turn the connecting piece
clockwise until you feel it snap into place. Make sure that the connection
is secure, as shown in image 01.
• Depending on what you want to use the vacuum cleaner for, you can now place the nar-
row end of the telescopic tube (P) on the end of the detachable handle provided for this
purpose on the suction hose (M). If you do not want to use the telescopic tube (P), you
can also attach one of the other nozzles to the handle directly, as shown in image 02.
• Adjust the telescopic tube (P) according to your height and what you in-
tend to use it for: press the cursor in the direction of the arrow and keep
it pressed down. Pull the telescopic tube (P) out or slide it in until it has
reached the desired length. Release the cursor again so that it engages in
place and the length is locked, as shown in image 03.
L
Image 01
Image 02
Image 03

11
After Sales Support
Telephone: 1300 366 144
Internet: [email protected]
Using the correct Nozzle
Floor nozzle (Q)
This is the nozzle you will use most of the time, since it is suitable for large, flat surfaces. For best vacuuming
results, use the foot-operated switch (R) to adapt the appliance to the surface it is on:
• On shortpiled or smooth oors such as PVC, parquet or tiles, the brush and rubber
lip on the underside of the floor nozzle (Q) must be extended, i.e., press the ribbed
side of the foot-operated switch (R) down until you feel and hear it snap into place,
as shown in image 04.
• On longpiled carpets, the bruch and rubber lip should be retracted, i.e, press the
smooth side of the foot-operated switch (R) down. The foot-operated switch (R) can
also be changed over during operation, as shown in image 04.
Upholstery nozzle (S) (with brush attachment)
• This nozzle is suitable for gentle cleaning of picture doorframes, books, display
guards, lampshades etc.
• Simply by sliding back the brush attachment (in the direction of the arrow as
shown in image 05.) the upholstery nozzle (S) is ideal for vacuuming upholstery,
mattresses, etc..
Crevice nozzle (T)
• This nozzle is most suitable for vacuuming folds in fabric, joints, corners or alcoves.
R
Image 04
Image 05
Getting Started / Features

12
After Sales Support
Telephone: 1300 366 144
Internet: [email protected]
Starting up the appliance
Do not vacuum up: Toner, plaster, cement, stone dust, drilling dust, explosive or poisonous items, glow-
ing embers, burning cigarettes or matches, sharp-edged items like glass splinters, liquids!
Do not use the vacuum cleaner unless all filters and the dust container are properly in place.
Never cover the ventilation slots which can lead to the appliance overheating. Keep it at an adequate
distance from walls or other objects.
A holder for the upholstery nozzle and the crevice nozzle are included with the vacuum cleaner; you can
place the nozzles in the holder when they are not in use. The holder can be attached to the telescopic
tube.
• Place the appliance near a socket (with a rating plate showing mains voltage) and make sure that there is free
access to the socket.
• Ensure that the appliance in the holder stands on a level, dry and non-slip surface.
Using the appliance
• First take the nozzle you want to use and attach it as described above to the handle of the suction hose (M)
or the telescopic tube (P).
• Pull out the mains lead to the desired length (no further than the yellow mark).
• Connect the appliance to an approved socket, installed according to the regulations.
• Use the ON/OFF switch (G) to switch the appliance on with your foot. The motor will start
up and the appliance will begin vacuuming.
• Push and pull the respective nozzle carefully over the surface you want to clean, into cor-
ners as well if necessary.
• Adjust the suction power with the aid of the supplementary air valve (N), as shown in image
06.
The appliance must be switched off and disconnected from the mains by unplugging it from the mains
socket before it is used and before any accessories are removed or attached. Allow the appliance to
cool down to room temperature before cleaning it or putting it away.
• Switch the appliance off by pressing the On/Off switch (G).
• Remove the plug from the socket. When doing so, always take hold of the plug, never
the cord.
• To wind up the cord, press the button for cord storage (H). Caution, the powerful rewin-
ding action can cause the cord to “whip” uncontrollably. If necessary, hold the cord rmly.
• If you have used the oor nozzle (Q) with the telescopic tube (P), you can slide its retai-
ning lug into the recessed holder (I), as shown in image 07.
CAUTION: If you want to use the recessed holder (I), bear in mind that the telescopic tube (P) must always be
completely retracted for this. Hold the telescopic tube (P) with the attached oor nozzle (Q) perfectly vertical
while you insert the retaining lug in thethe recessed holder (I). Slide the retaining lug on the oor nozzle (Q) into
the recessed holder (I) as far as it will go.
Instructions
Image 06
Image 07

13
After Sales Support
Telephone: 1300 366 144
Internet: [email protected]
Problem and Solution
Problem: Cause: Solution:
The appliance does not function. The mains lead is not connected to
the socket.
The appliance is not switched on.
Insert the plug into the socket.
Press the on/off button in order to
switch on the appliance.
The appliance has switched off
during operation.
Poor suction strength.
Filters are blocked and the over-
heating protection on the appliance
has switched it off.
Dust container is not inseated cor-
rectly.
Dust container is full.
Nozzle is not attached correctly.
Filter is not inserted correctly or is
dirty.
Press the On/Off button to switch
the appliance off and disconnect the
cord from the socket. Allow the ap-
pliance to cool to room temperature
(at least 30 min.) and clean the filter.
Insert dust container correctly.
Empty the dust container
Attach nozzle correctly.
Insert lter correctly and/or clean it.
Power cord does not rewind. The cord has been pulled out past
the red mark and the drum has been
damaged.
Do not use the appliance.
Contact our service department.
In the event of faults not listed here, please contact our customer service hotline. Our customer advisors will
be glad to offer you further assistance. You will find the phone number in our warranty conditions and on the
warranty card. You can also request a copy of the operating instructions from our customer service department.
FAQ
• Question: How can I reduce the suction power while I am vacuuming?
Answer: Use the supplementary air valve to adjust the suction power.
• Question: How far out can I pull the cord?
Answer: Until you see the yellow mark.
• Question: The lters are no longer effective, can I get new lters?
Answer: Please contact our customer service department.
• Question: Who should I contact if I need to have the appliance repaired or replaced?
Answer: Please call our customer service hotline, they will be glad to assist you.
Other Useful Information

14
After Sales Support
Telephone: 1300 366 144
Internet: [email protected]
Always remove the plug from the mains before cleaning and allow the appliance to cool down
completely before cleaning it or putting it away! Risk of electric shock!
Take care that no liquids get into the interior of the appliance. Never immerse the appliance in
water. Risk of electric shock!
Never use sharp or abrasive cleaning materials or sharp-edged objects for cleaning.
Never clean a filter in a dishwasher.
Do not use warm water, detergents or brushes to clean the filter.
Make sure that all lters are completely dry before you use the appliance again. Always allow lters to
air-dry, never use any other heating devices. A damp or wet exhaust air filter can impair the suction po-
wer of the appliance or even cause damage to the electronics.
Clean the exhaust air openings and the lter regularly. If you notice that the appliance has lost power,
this is usually an indication that the filters or the exhaust air outlets should be cleaned.
Over time, the white materials in the exhaust air filter and the fine dust filter can become discoloured;
this is not a defect and initially it will not impair performance. Bear in mind that even a lter of the highest
quality must at some time reach the end of its service life and need to be replaced. Micro-particles of
dust block up the pores and can no longer be removed from the filter, even through intensive cleaning.
This reduces suction strength. If this should occur, contact our customer service department to obtain
the required replacement filters.
Maintenance, Cleaning
and Care

15
After Sales Support
Telephone: 1300 366 144
Internet: [email protected]
Cleaning the Appliance
• To clean the outside of the appliance, the lter compartments, the telescopic tube (P), the crevice nozzle (T)
and upholstery nozzle (S) as well as the dust container (A) use a dry, or at best damp, well wrung-out cloth.
• Then rub well until dry.
• Clean the exhaust air openings (in the protection cover) with s soft brush from time to time.
The handle on the suction hose can be removed to make cleaning easier. To do this, press the catches at the
top and bottom of the handle and pull the handle off of the suction hose.
Cleaning the oor nozzle
From time to time, use the crevice nozzle (T) to vacuum the underside of the floor nozzle (Q) .
Emptying the dust container
We recommend that you empty the dust container (A) after every use, but at least when the dust reaches the
“MAX” mark. Otherwise suction power will be lost.
• Press and hold release button (F).
• Pull the dust container (A) upwards at an angle and out of the appliance by the handle (E).
• Hold the dust container (A) over a dustbin.
• Press release button (D) on the dust container (A), as shown in image 08. The dust con-
tainer flap (C) of the dust container will fold down and the dust will come out.
• Tap carefully to remove any remaining dust residue.
• If you do not want to clean the lters for the dust container (A), you can now return the
dust container (A) to its place. To do this, proceed as follows:
• Close the dust container ap (C) and make sure that the dust container (A) has been as-
sembled correctly (see "Cleaning the coarse dust filter" on page 16).
• Hold the dust container (A) so that the lter opening is facing towards the appliance, as
shown in image 09.
• First push the dust container (A) downwards and then towards the appliance until you
hear and feel it snap into place.
D
Image 08
Image 09

16
After Sales Support
Telephone: 1300 366 144
Internet: [email protected]
Cleaning the coarse dust lter
Never immerse coarse dust lter in water.
Do not use any detergents.
Do not reinsert the coarse dust lter until it is completely dry.
The coard dust lter (B) inside the dust container (A) should be cleaned regularly.
To remove the coarse dust lter (B), proceed as follows:
• First take out the dust container (A) and empty it as described above.
• Hold the dust container (A) rmly and turn it anticlockwise by the handle (E) until the
arrow on the cover points towards the “Open lock” symbol on the dust container (A).
• Pull the cover with the coarse dust lter (B) up and out of the dust container (A), as
shown in image 10.
• Knock dust residue off over a dustbin.
• Particles that are stuck more rmly can be cleaned off with a soft brush or a damp cloth.
• Allow the coarse dust lter (B) to dry completely.
• The insert the coarse dust lter (B) back in the dust container (A) so that the arrow on the cover is aligned with
the “Open lock” symbol on the dust container (A). The dust container ap (C) should be open.
• Now turn the cover anticlockwise as far as it will go. The arrow on the cover will now be aligned with the
“Closed lock” symbol on the dust container (A).
• Close dust container ap (C) again.
Handle
Coarse dust lter
Cleaning the motor protection lter
Do not clean the motor protection filter in the dishwasher. Do not use warm water, detergents or brushes.
The motor protection filter consists of foam and a fine dust filter that is attached firmly to the filter holder
and should be cleaned regularly, but at least when the suction power starts to diminish. The motor pro-
tection filter can be accessed while the dust container has been taken out.
• First take off the lter cover. This is located under the dust container. To do this, use
two fingers to raise the catches that are attached to the underside of the filter cover
and take off the filter cover towards the front of the appliance.
• Now take out the lter holder in which the foam lter is seated. To do this, reach into
the recess at bottom right and gently press the filter holder upwards, then pull it out
towards the front of the appliance.
• Take the foam lter out of the lter holder, as shown in image 11.
Image 10
Image 11

17
After Sales Support
Telephone: 1300 366 144
Internet: [email protected]
To clean the lter, proceed as follows:
• Remove the respective lter as described above.
• Tap the lter above a dustbin to empty it.
• If it is very dirty, clean the lter thoroughly with water (water should not be more than lukewarm) and then
allow to dry completely.
• After cleaning and drying the foam lter and the ne dust lter, t to the foam lter precisely back in the lter
holder (with the fine dust filter).
• Place the lter holder back in the appliance by rst pushing it up into the recess provided for it and then
pressing it until it snaps into place.
• Now put the lter cover back in by rst guiding the pins on the top of the lter compartment into the ope-
nings provided for them and then pressing towards the appliance on the underside until you hear and feel
the catches snap into place.
Cleaning the exhaust lter
Do not clean the exhaust air filter in the dishwasher. Do not use warm water, detergents or brushes.
You should clean the exhaust air lter (K) regularly, depending on the nature and frequency of use. It is located
behind the protective cover for the rear left wheel (appliance viewed from behind).
• Turn the protective cover anticlockwise as far as it will go and remove the cover.
• Pull the exhaust air lter (K) out by the strap provided for this purpose, as shown in
image 12.
• Tap the exhaust air lter (K) out carefully over a dustbin, as shown in image 12.
• If the exhaust air lter very dirty (K) wash it thoroughly with water (water should not
be more than lukewarm) and then allow it to dry completely.
• Allow the exhaust air lter (K) to dry completely at room temperature before you put
it back in the appliance.
• Put the completely dry exahust air lter (K) back in the machine, as shown in image
12.
• Push the protective cover as far as it will go into the appliance so that the “lugs” on the protective cover en-
gage in the recesses provided for them. Make sure that the “lugs” and the recesses are of the same width.
• Then turn the protective cover clockwise as far as it will go until you hear and feel it click into placeCheck
that it is seated correctly. Make sure that the connection is secure.
Image 12

18
After Sales Support
Telephone: 1300 366 144
Internet: [email protected]
Disponal
The product packaging consists of recyclable materials. The packaging material can be disposed
of at public collection depots for recycling.
Old appliances do not belong in household waste! At the end of its useful life, this appliance must be
disposed of properly according to statutory provisions. In this way, any valuable material contained in
the old appliances can be recycled and the environment protected. Responsible local authorities or their
waste disposal operators can provide further information.
Technical Data
Nominal voltage: 220 – 240 V~
Rated frequency: 50 Hz
Rated power: 1300 W
Protection class: II

19
After Sales Support
Telephone: 1300 366 144
Internet: [email protected]
Index
A
Approved Use................................................05
Assembly.......................................................09
B
Before using the rst time .............................10
Brush attachment....................................09, 11
C
Cleaning and Care...................... 14, 15, 16, 17
D
Disposal.........................................................18
Dust Container ........................................09, 15
Dust Filter ................................................09, 16
E
Exhaust Filter...........................................09, 17
F
FAQ................................................................13
Features.........................................................11
Filter...................................................09, 16, 17
Floor Nozzle ......................................09, 11, 15
G
Getting started ..............................................11
I
Instructions....................................................12
Instruction Manual.........................................05
M
Maintenance..................................................14
Motor protection lter....................................16
N
Nozzle................................................09, 11, 15
P
Parts list.........................................................09
S
Symbols ........................................................05
Safety ..........................................05, 06, 07, 08
T
Technical data ..............................................18
U
Upholstery nozzle....................................09, 11
W
Warranty ........................................................03

Table of contents
Other Lumina Vacuum Cleaner manuals
