LUV Systems the halo 5RM User manual

5RM_DOC_IG www.luvsystems.com V0.94
Model 5RM Installation Guide

Model 5RM Installation Guide | 2
Incorrect or improper installation, or maintenance, including, but not limited to, any of the following
actions by the customer or agent of the customer will constitute a breach of and will void all
warranties:
•Failure to follow the requisite installation procedures specified in this Installation Guide
•Failure to follow all relevant codes and ordinances, including, but not limited to applicable
national and local electrical codes, and state and local building codes
•Failure to follow electrical engineering industry standards regarding the approved method
of installing electrical equipment
•Failure to follow structural engineering industry standards regarding the method of
installing overhead equipment such as the halo
•Removing or modifying any components provided with the halō
•WARNING: This installation guide does not cover instructions for the ceiling fan. Refer to
separate instructions and manuals for the supplied ceiling fan. To reduce the risk of fire,
electric shock, and injury to persons, the halō™ Model 5R/M must be installed with a
Minka-Aire Dyno XL 60 in. fan (Model #: F1001). Other ceiling fans cannot be substituted.
•WARNING: Disconnect power to the installation locations before installing the halō
•WARNING: Only connect power to the halō after all cowling pieces are securely and
correctly installed with no light gaps
•WARNING: Installation work and electrical wiring must be done by qualified person(s) in
accordance with all applicable codes and standards, including fire-rated construction.
•WARNING: Incorrect assembly can cause electric shock, fire, injury to persons, damage to
property, and/or damage to the halō
•WARNING: Installation must be in accordance with the requirements set forth by the
National Electrical Code (NEC), ANSI/NFPA 70, and all national and local code
•WARNING: the halō should not be installed unless the structure on which it is to be
mounted has been verified to be of secure/stable construction and verified to be capable
of supporting he load of the halō. A certified structural engineer should verify the structure
and installation location is adequate prior to installation. Verifying the stability and
suitability of the mounting structure is the sole responsibility of the customer and/or end
READ THOROUGHLY AND SAVE THESE
INSTRUCTIONS FOR FUTURE REFERENCE
WARNING
Please read and observe the following warnings and cautions to
reduce the risk of fire, electric shock, or injury to persons and property:

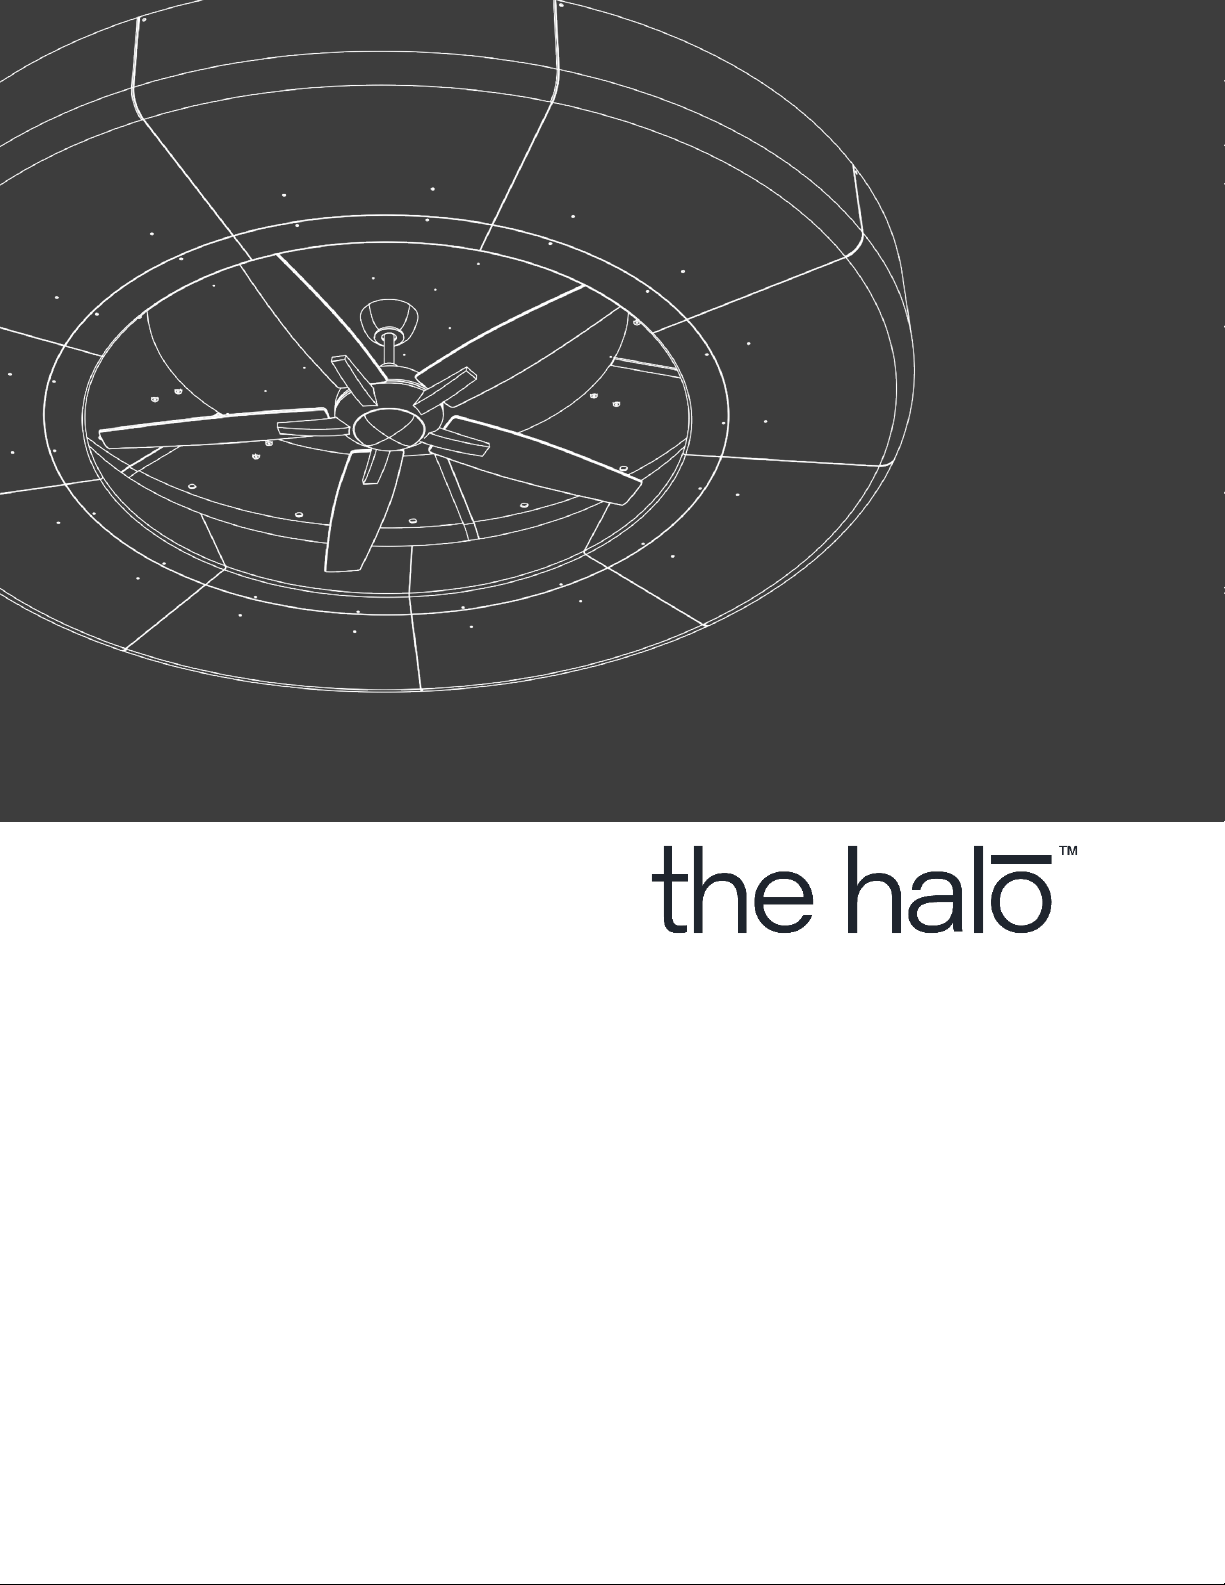
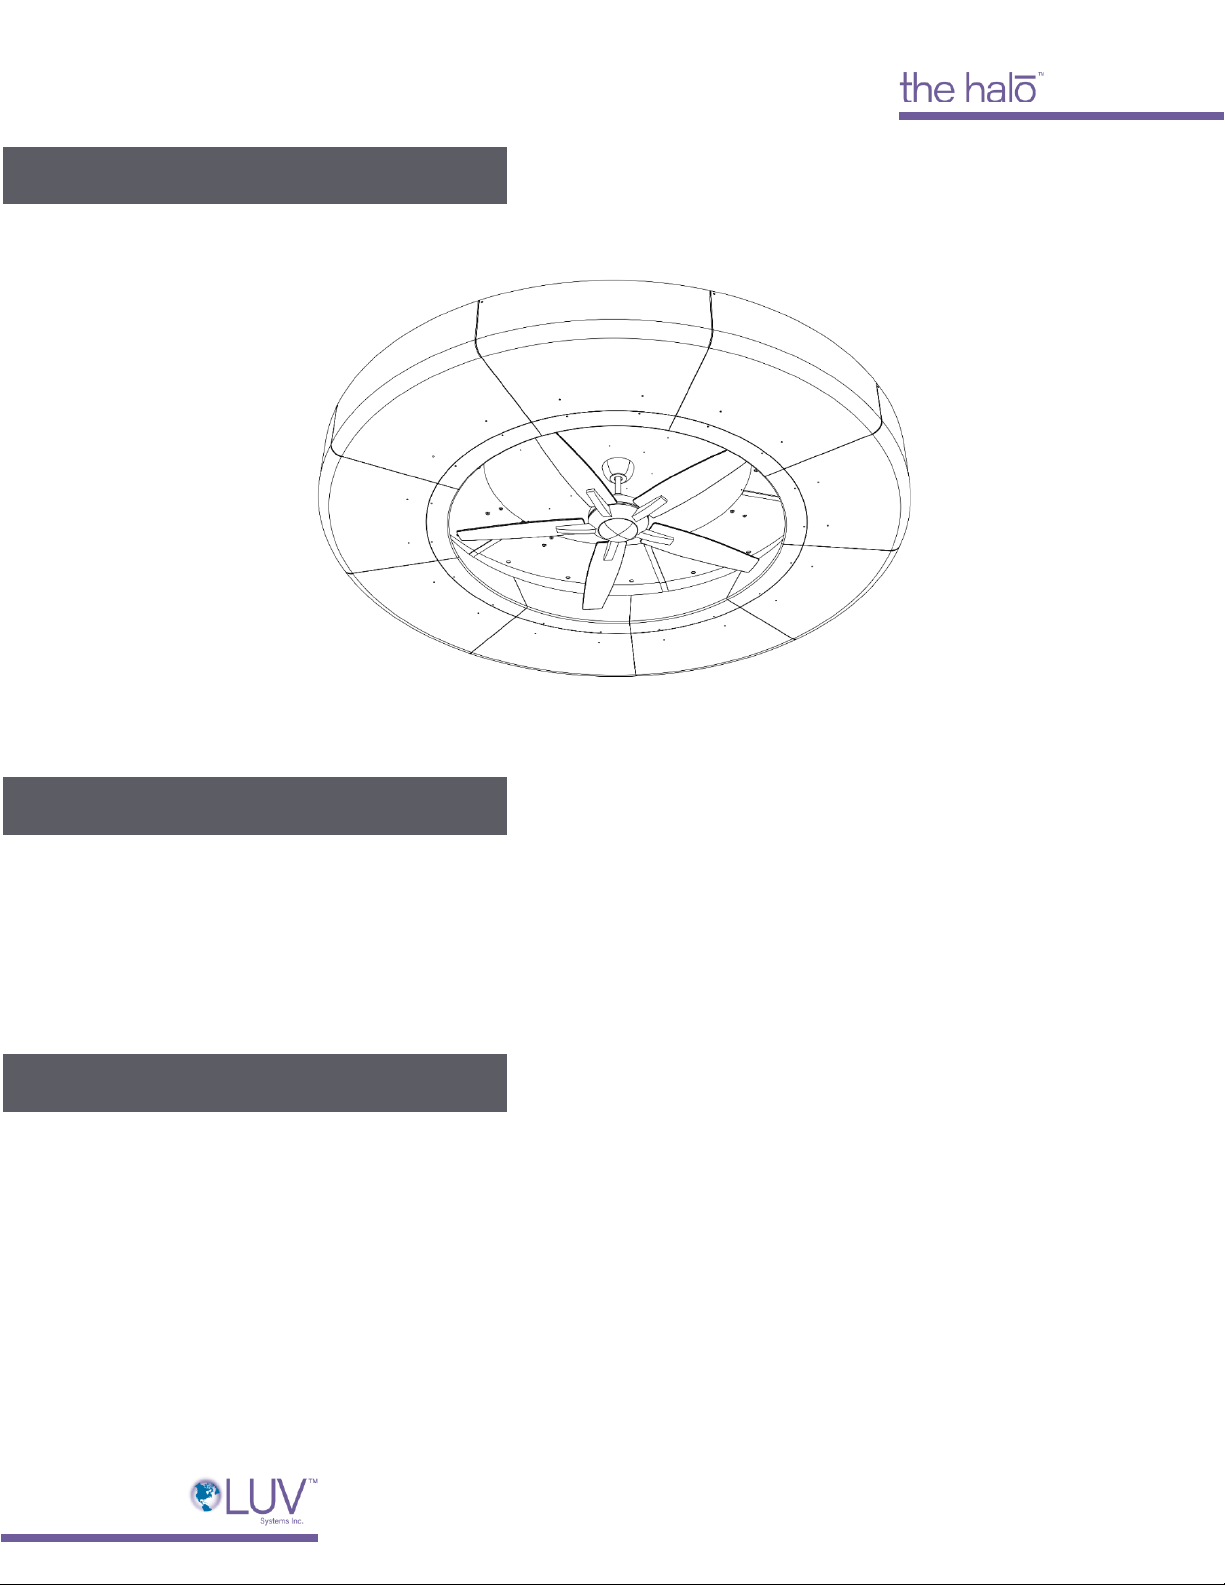
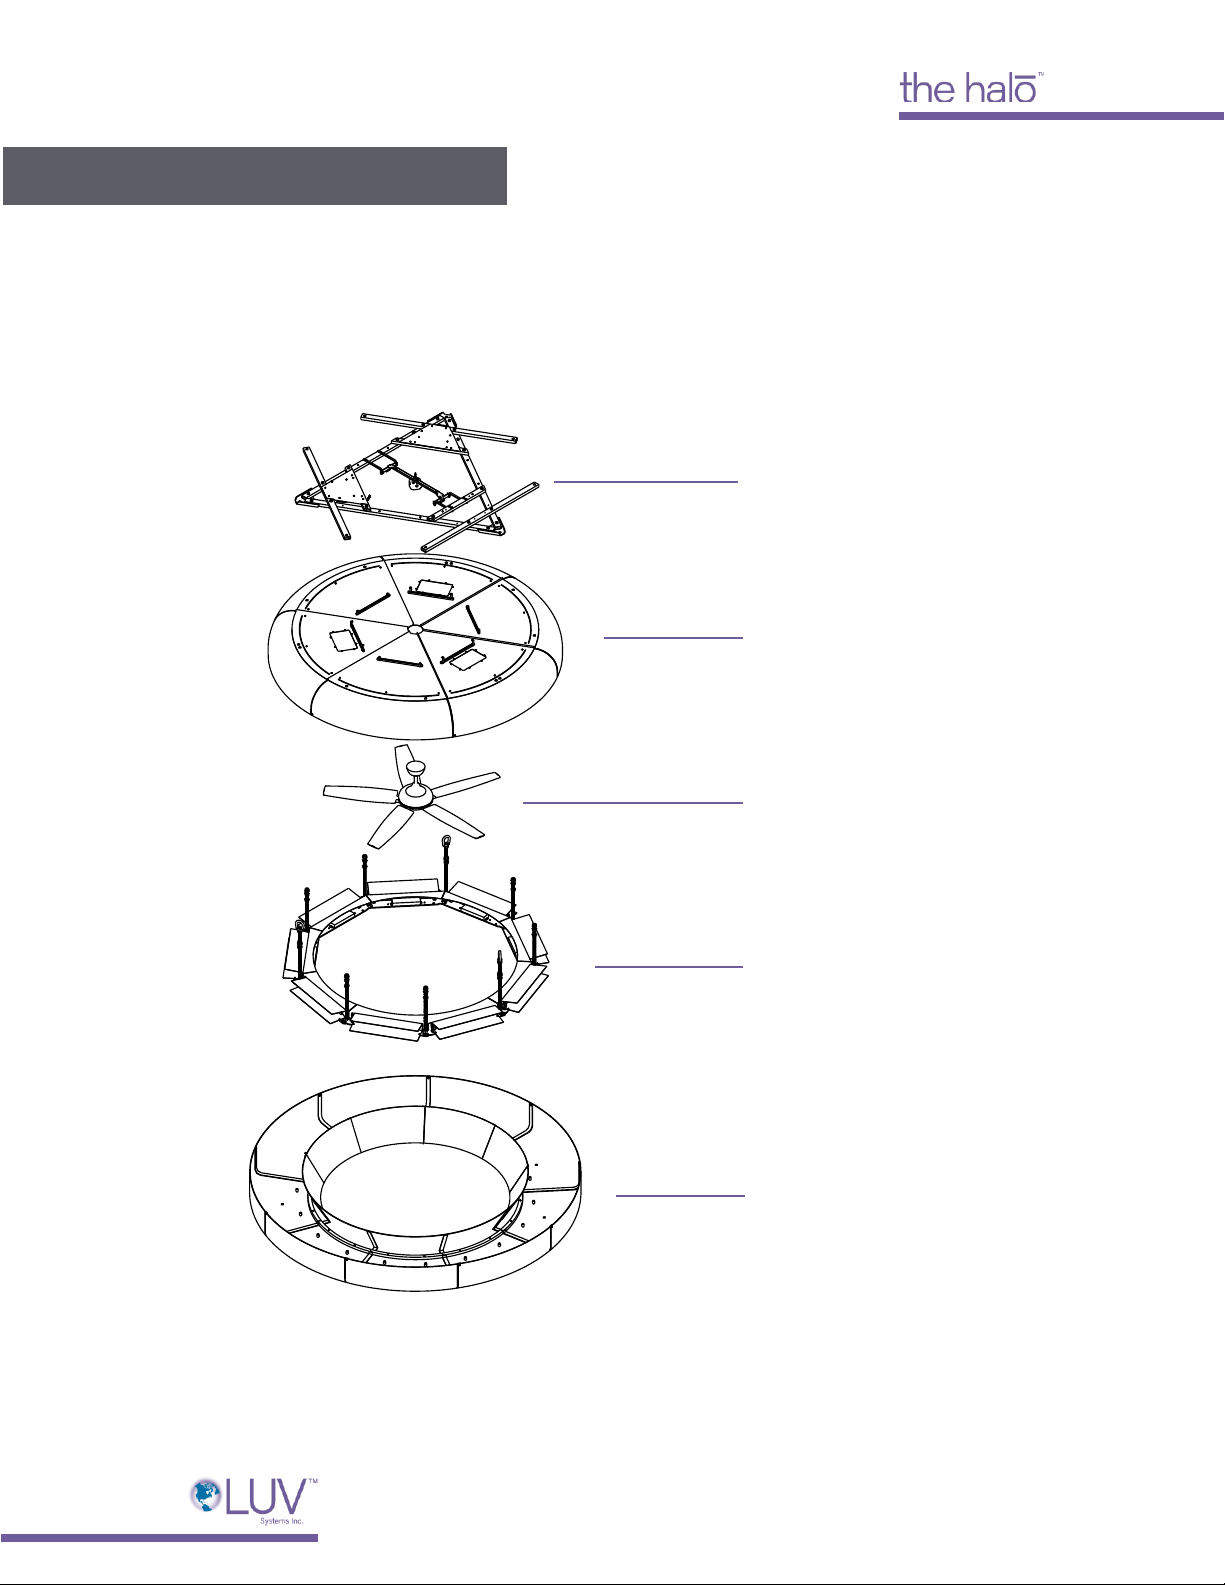
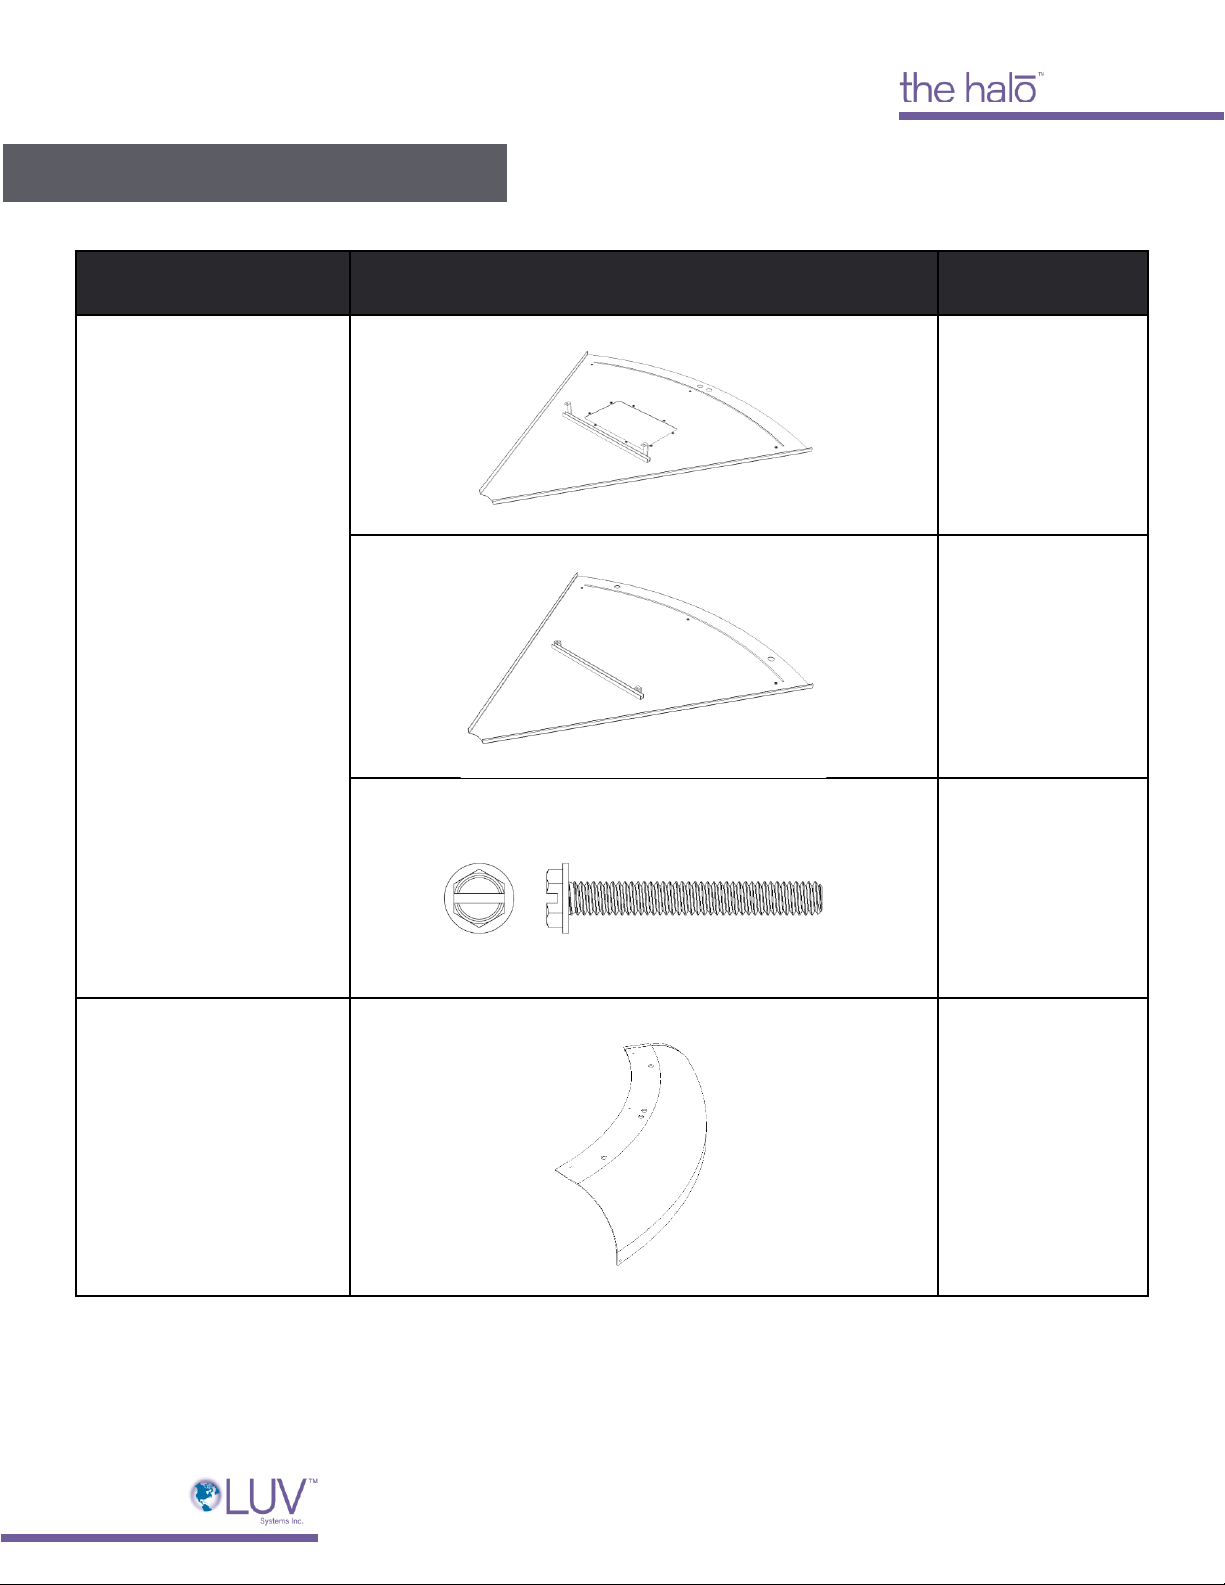
Model 5RM Installation Guide | 3
user. LUV Systems, Inc. hereby expressly disclaims any liability arising therefrom, or arising
from the use of any materials or hardware other than those provided with the halō
•WARNING: Do not substitute parts provided with the halō with any others unless
provided by LUV Systems
•WARNING: Do not add additional components to the halō not specified in this Installation
Guide
•WARNING: Do not remove or modify any of the components provided with the halō unless
instructed to do so by this Installation Guide
•WARNING: Ensure there are no persons below the halō during installation
•WARNING: the halō must be installed per the following National Fire Protection
Association (NFPA) guidelines
•WARNING: Check for and avoid affecting hidden utilities such as but not limited to
electrical wiring, gas lines before drilling into, cutting or modifying the wall or ceiling during
the installation of the halō
•WARNING: Caution must be employed with lifting or raising the halō due to its weight.
A suitable means for lifting the weight of the halō such as a scissor lift, and at least two
installation personnel will be required
•WARNING: The installation of the halō requires the use of tools not supplied with the unit.
Follow the safety procedures found in the owner’s manual for each of these tools and do
not use them for purposes other than those intended by LUV Systems
•WARNING: If unusual mechanical oscillations and/or audible noise are observed,
immediately stop using the halō and contact LUV Systems, the certified service agent, or
suitably qualified persons.
•WARNING: Do not use broken, torn or otherwise damaged components with the halō.
Return to an authorized service facility for examination and/or repair all damaged
components
•WARNING: There is a risk of fire, electric shock, or injury to persons during cleaning and
user maintenance. Disconnect the unit from the power supply before servicing or cleaning
the halō
•WARNING: Before servicing or cleaning the unit, switch power off at the service panel and
lock the service disconnecting means to prevent power from being switched on
accidentally. When the service disconnecting means cannot be locked, securely fasten a
prominent warning device, such as a tag, to the service panel
•WARNING: When service or maintenance of the halō requires the removal or
disconnection of components including safety-related ones, the components are to be
reinstalled or remounted as previously installed before the power is reinstated to the halō
•WARNING: Use this unit only in the manner intended by the manufacturer. If you have
questions, contact LUV Systems

Model 5RM Installation Guide | 4
•WARNING: The information contained in this document is merely a guide for proper
installation. LUV Systems cannot assume responsibility for the compliance or non-
compliance to any code, national, local, or otherwise for the proper installation of the halō
•WARNING: The length of the external earth conductor should be such that should failure
of the suspension system occur, the current-carrying conductors are taut before the
protective earth conductor. Should failure of the suspension system occur, the support of
the halō must not rely on the protective earth conductor
•WARNING: The halō suspension system shall be examined at regular intervals, at least
once every three months

Model 5RM Installation Guide | 5
•
Quarter view of the halo
Input power: 110-125 V, 50/60 Hz, 1 Ф, 15 A breaker
Wiring: Single Phase (L N PE) from breaker to halo Junction Box via wall switch
Full Load Amps (RMS): 5.4
Assembled Weight: 350 lbs
Outer Diameter: 9 ft.
Minimum distance from floor to superstructure: 8.6 ft.
Isometric View
Electrical Specifications
Mechanical Specifications

Model 5RM Installation Guide | 6
•An open space approximately 10 x 10 ft, ideally beneath the installation area.
•Alignment laser
•Level
Tools Required

Model 5RM Installation Guide | 7
the halo consists of five major assembly sections shown below.
Assembly
Support Triangle
(5RM_ST)
Upper Cowling
(5RM_UC)
DC fan
(5RM_F)
Light Ring
(5RM_LR)
Lower Cowling
(5RM_LC)

Model 5RM Installation Guide | 8
A separate kit is used to lift and attach the halo to the superstructure. The following
lifting kits are available.
Superstructure Type
Attachment kit
Concrete
5RM_SS1
Steel Framing
5RM_SS2
Wood Joists
5RM_SS3
Please see the Structural Calculations for the halo –Model 5R/M and consult a
Structural Engineer for recommended methods of attaching the halo to these
superstructure types.

Model 5RM Installation Guide | 9
adfad
Part
Image
Quantity
Disc
(5RM_UC_SD_KIT)
5RM_UC_SD_A
3
5RM_UC_SD_B
3
5RM_ST_H4 (8-32 1¼” Flanged Hex Head)
12
Upper Cowling
Kit
(5RM_UC_S_KIT)
5RM_UC_S
6
Included Parts

Model 5RM Installation Guide | 10
0.19”
0.41”
0.25”
0.34”
1.22”
0.16”
5RM_UC_S_H1 (8-32, ¼” Phillips Screw)
24
5RM_UC_S_H2 (10-32, 9/32” Screw Mount Nut)
6
5RM_UC_S_H3 (10-32, ¼” Button Head Screw)
6
Lower Cowling
S1 KIT
(5RM_LC_S1_KIT)
5RM_LC_S1
9
5RM_LC_S1_H1 (8-32, 1¼” Phillips Screw)
18

Model 5RM Installation Guide | 11
0.34”
1.22”
0.16”
0.41”
0.25”
0.19”
Lower Cowling
S2 KIT
(5RM_LC_S2_KIT)
5RM_LC_S2
9
5RM_LC_S2_H1 (8-32, 1¼” Phillips Screw)
18
5RM_LC_S2_H2 (10-32, 9/32” Screw Mount Nut)
9
5RM_LC_S2_H3 (10-32, ¼” Button Head Screw)
9
Light Ring
Segment Assembly
(5RM_LR_SA_KIT)
5RM_LR_SA_ASM
9

Model 5RM Installation Guide | 12
0.31”
0.31”
0.19”
7/16”
5/16”
0.25”
5RM_LR_SA_H2 (10-32 Socket Head Screw)
54
5RM_LR_SA_H7
1
5RM_LR_SA_H8 ( ¼”-20, 5/16” Hex Head Screw)
1
Light Ring UV
Shield KIT
(5RM_LR_SA_US_KIT)
5RM_LR_SA_US
9
5RM_LR_SA_H1 (6-32, ¼” Hex Head Screw)
18

Model 5RM Installation Guide | 13
0.26”
0.14”
0.26”
Light Ring UV
Reflector Kit
(5RM_LR_SA_LF_UR_KIT)
5RM_LR_SA_LF_R1_ASM
9
5RM_LR_SA_LF_R2
9
5RM_LR_SA_LF_LC
9
5RM_LR_SA_H1 (6-32, ¼” Hex Head Screw)
36
5RM_LR_SA_LF_H2 (6-32 Lock Nut)
9

Model 5RM Installation Guide | 14
0.23”
3/16”
0.138”
5RM_LR_SA_LF_H3 (6-32, 3/16” Socket Head Screw)
9
5RM_LR_SA_LF_H4 (Zip Tie Strap)
9
Light Ring End Cap
Kit
(5RM_LR_SA_LF_EC_KIT)
5RM_LR_SA_LF_EC_ASM
9
5RM_LR_SA_H1 (6-32, ¼” Hex Head Screw)
18
Light Ring Lamp
Kit
(5RM_LR_SA_LF_UL_KIT)
5RM_LR_SA_LF_UL
10

Model 5RM Installation Guide | 15
1.50”
0.66”
1.30”
1.30”
0.64”
1.30”
Light Ring Lifting
Assembly Kit
(5RM_LR_LA_KIT)
5RM_LR_LA_ASM
3
5RM_LR_LA_H1
3
5RM_LR_LA_H3 (¾”-10 Flange Nut)
9
5RM_LR_LA_H4 (¾”-10 Lock Nut)
3
Light Ring
Positioning
Assembly Kit
(5RM_LR_LA_KIT)
5RM_LR_PA_ASM
6

Model 5RM Installation Guide | 16
1.50”
0.66”
1.30”
23/32”
¼”
7/32”
5RM_LR_PA_H2 (¾”-10 Flange Nut)
18
Support Triangle
Fan Bracket KIT
(5RM_ST_FB_KIT)
5RM_ST_FB_ASM
2
5RM_ST_H4 (8-32, 1¼” Hex Head Screw)
8
5RM_ST_H1 (8-32, ¼” Screw Mount Nut)
8
Support Triangle
Corner Bracket Kit
(5RM_ST_CB_KIT)
5RM_ST_CB
3

Model 5RM Installation Guide | 17
13/16”
1”
3/8”
1¼”
3/4”
15/32”
5RM_ST_H2 ( 3/8”-16, 1” Hex Head Screw)
6
5RM_ST_H6 (3/8"-16, 3/4" Screw Mount nut)
6
Support Triangle T1
Kit
(5RM_ST_T1_KIT)
5RM_ST_T1_ASM
2
Support Triangle T2
Kit
(5RM_ST_T2_KIT)
5RM_ST_T2_ASM
1
Support Triangle T3
Kit
(5RM_ST_T3_KIT)
5RM_ST_T3_ASM
3

Model 5RM Installation Guide | 18
13/16”
2”
3/8”
1¼”
¾”
15/32”
13/16
”
2”
3/8”
5RM_ST_EC
6
5RM_ST_H3 (3/8"-16, 2" Hex Head Screw)
6
5RM_ST_H6 (3/8”-16, ¾” Screw Mount Nut)
6
Support Triangle T4
Kit
(5RM_ST_T4_KIT)
5RM_ST_T4_ASM
3
5RM_ST_H3 (3/8"-16, 2" Hex Head Screw)
6

Model 5RM Installation Guide | 19
1¼”
¾”
15/32
”
1/4” Hex
1”
0.164”
5RM_ST_H6 (3/8”-16, ¾” Screw Mount Nut)
6
Support Triangle
Junction Plate Kit
(5RM_ST_JP_KIT)
5RM_ST_JP_ASM
1
5RM_ST_H4 (8-32, 1¼” Hex Head Screw)
2
5RM_ST_H10 (8-32, 1” Hex Head Screw)
4
5RM_ST_H8
1

Model 5RM Installation Guide | 20
1/4” Hex
1”
0.164”
5RM_ST_H9
1
5RM_CS_JBX_ASM
1
Support Triangle
Control Plate Kit
(5RM_ST_CP_KIT)
5RM_ST_CP_ASM
1
5RM_ST_H10 (8-32, 1” Hex Head Screw)
4
5RM_CS_CBX_ASM
1
Table of contents
Popular Fan manuals by other brands

minkaAire
minkaAire GEORGE KOVACS ARTEMIS Instruction manual warranty certificate

Minka Group
Minka Group Minka Aire Sabot Instruction manual warranty certificate

Craftmade
Craftmade Journey JOU64 installation guide

Nuaire Group
Nuaire Group XS6WA Installation and Maintenance

cocoweb
cocoweb ZAMBRANOCF-A-ZA Installation and operation instruction

Broan
Broan NuTone RDF1 installation guide