Lydsto H4 User manual

品番:VC25005010020
品名:VC0201 手持吸尘器
工艺:105克哑粉,骑马钉
尺寸:150x180mm
颜色:80%K
制图: 审核:

Thank you for purchasing Lydsto product! Please read the instructions
carefully when using this product for the first time. It will guide you to use the product
correctly and remind you of relevant precautions.
The picture is for reference only, the product shall prevail in kind.
Lydsto H� Self-Dust collecting Handheld
Vacuum Cleaner User Manual


Product Instruction

Power on/off
Vacuum Button:Press to switch, long press the vacuum button to vacuum, release
to stop vacuuming; In lock mode, a single press to vacuum constantly, press again to
stop vacuuming.
Gear Button: slide Switch Low gear - > middle gear - > high gear cycle switch.
Lock Button: Tap the button and click the lock button to lock the working state without
continuously pressing the vacuuming button. Click the button again to exit the lock mode
and switch gear in the lock mode.When it is in Motor stop state, light will be off,
standby mode is on.
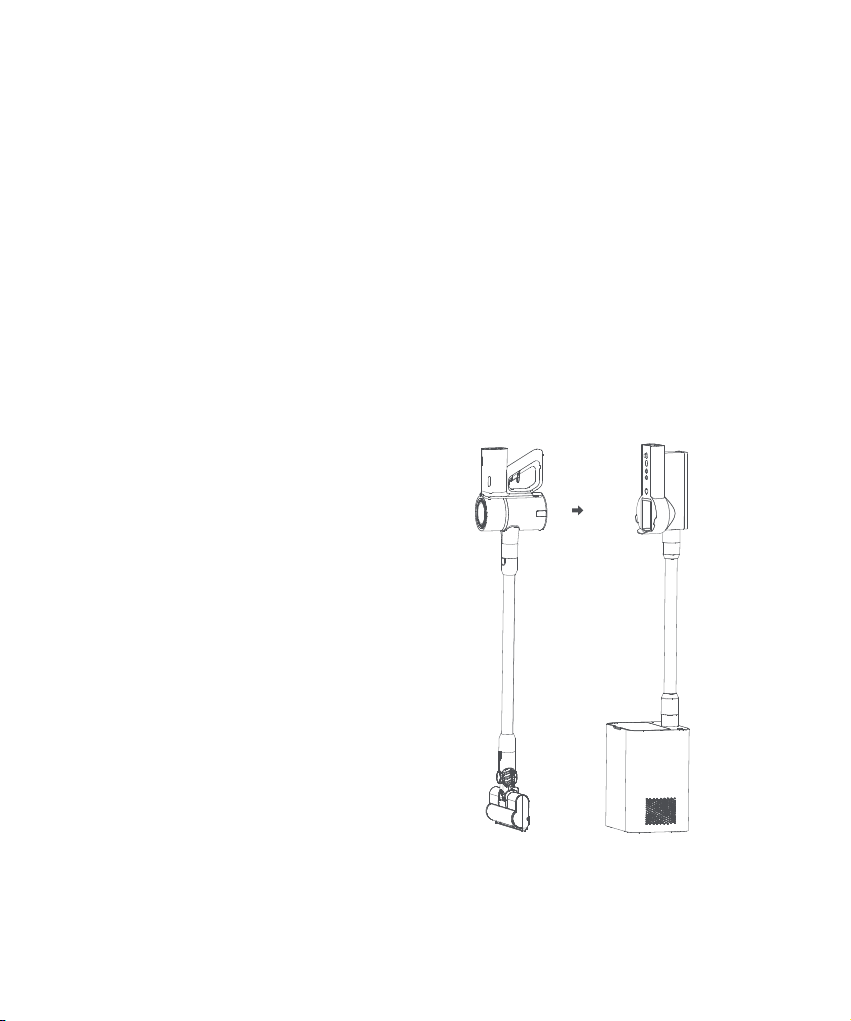
Dust Collecting and Charging
After the charging bracket is fixed on the wall, put Main Machine into the charging bracket,
the equipment is charging automatically and starts collecting dust.
Dust collecting: After Main Machine is put back to bracket after use, the product will
vacuum dust automatically. Pressing the dust collection button to start manual dust
collection. Automatic dust collection shall start working when the the Main Machine
is back to the bracket and the time intervals is longer than 1 minute.
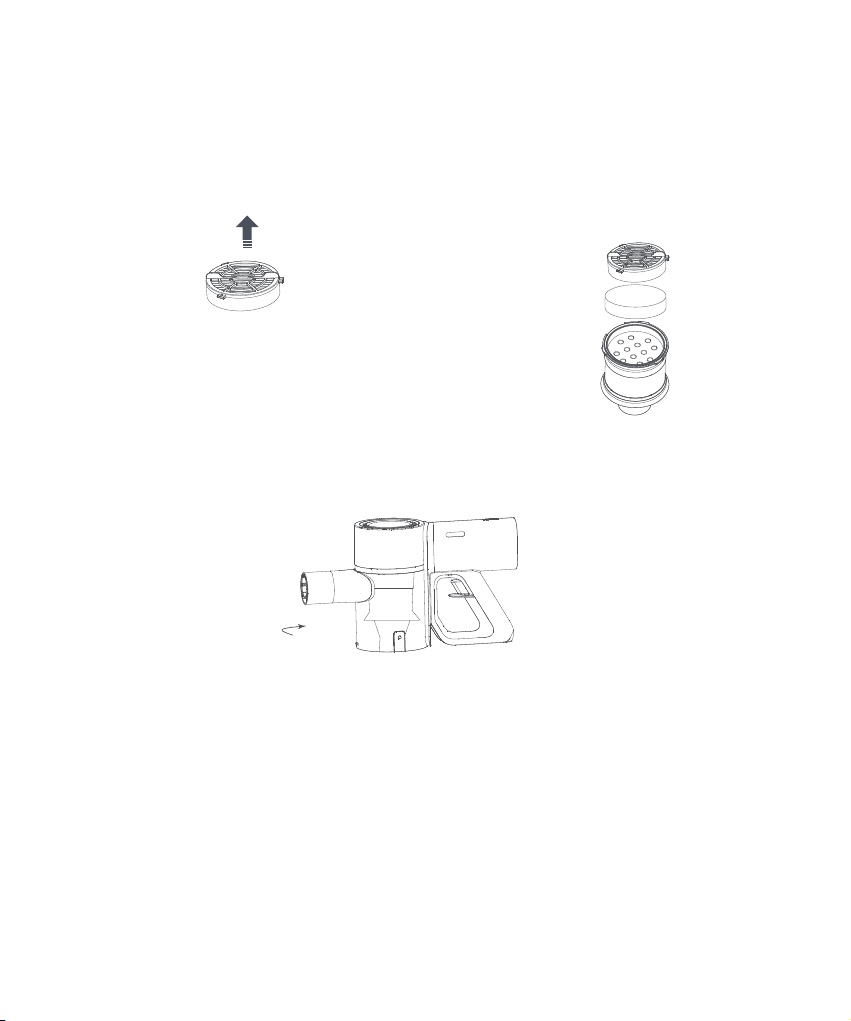
Dust full: Intelligent sensing ,dust bag is full,LED screen on
dust collection base will indicate dust full.When the dust
collection base is powered on, the white light is dim, and the
white light is bright in the dust collecting process. A Blinking
right light indicates problems such as not properly installed
dust bag or blocked Air duct ect. The red light is always on,
which indicates the dust bag is not properly installed.
Charging:intelligent induction.When the Main Machine is
back to the charging bracket, it starts charging and will
power off automatically when it is fully charged.
Power indicator:
three white lights on: 65% < power
Two white lights on: 30% < power < 65%
Single white light on: 10% < power < 30%
Single white light flashing: power < 10%
Three white lights are blinking: the device is underpowered

1.Flat Nozzle
Usage Scenario
Suitable for cleaning gap between
doors and windows, stairs ect.
2.2-in-1 flat nozzle
For cleaning sofa , seat, etc.
3.Electric Mite Removal Brush
Suitable for bed surface, curtain
andother textile material surface
dust and mite cleaning.
Tip:
2-in-1 flat nozzle assembly can be used alone to clean the dust of the Main Machine, electric brush
and other parts.
4.Floor Brush
Suitable for cleaning floor tiles,
floors and other scenes.

Installing the Charging Bracket Assembly
1.Install the bracket in a cool and dry place with power supply nearby, and ensure that the
walls of the installation area are free of wires or pipes and other facilities.
2.The hole height in the wall is 108/116.5cm in the vertical direction.
3.Select suitable mounting position and mark drilling position.
4.Drill holes with an 8mm drill bit at a depth greater than 45mm, and insert an expansion
tube into the holes.
5.Wall with skirting line installation:
First, tie the wall pad with the charging bracket,
and paste 3M adhesive wall stickers behind the
wall pad. Align the screwholes of the charging
bracket with the drill holes on the wall. Fix the
charging bracket on the wall with self-tapping
screws. Finally,plug the screw holes of the
charging rack
6.Wall without skirting line installation:
No need to install wall mat, paste 3M adhesive wall sticker after charging
rack, the rest can be fixed according to the installation method in (5).
3M adhesive
wall sticker Wall Pad
Tip:
This product must be fixed with wall nails, wall stickers as auxiliary fixing
accessories, long-term use of wall stickers may lead to wall paint peeling,
please use with caution. (Non-painted walls have no impact).
108
116.5

Maintenance
Product maintenance
1.Be sure to use the original parts, otherwise you may not be able to enjoy the warranty
service.
2.If the filter and suction head are blocked, the motor will work intermittently for several
times and pause, please clean the filter grid and suction head in time.
3.If the product is not used for a long time, please unplug the power and place it in a cool
and dry place after being fully charged. Do not place it in direct sunlight or in damp.Charge
the battery at least every 3 months to avoid over-discharge.
Cleaning the Main Machine
1.Before cleaning the Main Machine, please
turn off the power and keep the handheld
vacuum cleaner off. Once the dust reaches
the "Max" mark of the dust cup, it is not
suggested to use it continuously,because
which will affect the vacuuming effect,
please clean it as soon as possible.
2.To clean the dust cup, please put the
Main Machine back into the bracket first;
The dust collection base collects dust
automatically and vacuums dust into the
dust collection base.

3.Clean HEPA , sponges and steel filter
mesh under running water. When
cleaning, turn the filter mesh to ensure
that all gaps in the filter mesh have
been cleaned. Tap the mesh several
times over the sink to remove the
internal sewage.
4.Dry the HEPA filter and steel filter
components for at least 24 hours
to ensure thorough drying,then put
them back into the steel filter
components
24
Note: Do not put the filter into the dishwasher
or washing machine for cleaning, or put it into
the rotary dryer, oven, microwave oven, or dry
it with hot air or open flame.
Cleaning Filter HEPA
1.Press the dust cup button to open
the dust cup and rotate counterclockwise
to remove the steel filter component.
2.Remove the HEPA and sponge
from the steel filter component.
HEPA Component
Dust cup
button
Steel filter component
sponge

1.Turn the HEPA filter face up. 2.Place the sponge and HEPA
components clockwise into the
slot of the steel filter.
3 Align the air filter component with the Main Machine according to the position shown in
the figure, and install the air filter in place by rotating it clockwise.
.
Installing the Steel Filter Component
Cleaning the Floor Brush Roller
Please follow the instructions below to check and clean periodically to keep its
performance. Before removing the roller, make sure that the brush head is separated
from the main machine to avoid personal injury caused by Accidentally starting the
machine.
Attention:
Roller brush must be removed and cleaned separately. Do not wash with water,
except that electric parts are contained in the fuselage of the brush and ground
brush and bearings are contained in the roller of the brush.

Cleaning Floor Brush
Roller
Roller
Lock batch
2.Rotate the end cover to the
opening position and gently slide
the roller from the suction head.
1.Place the floor brush facing you in
the direction shown in the figure.
End cover
3.Clean the tangled hair of the roller
and end cover separately.
4.Reinstall the roller according to
the steps shown. When the roller
is installed properly, rotate the
end cover to the lock position.
locked

24
Cleaning Electric Mite Removal Brush
1.Put the side lock of the vacuum head
in front of you, and rotate the lock
counterclockwise with a coin until the
lock falls off and is removed.
2.After removing the lock, remove the
roller from the mite removal brush.
3.Rinse and clean the roller.
4.Place the roller vertically and
leave it for less than 24 hours to
dry thoroughly.
Lock
Take up

Lock
5.Ensure that the roller is completely
dry, and then reinstall the roller.
6. Put the side lock of the vacuum head
in front of you and rotate the lock
clockwise to the lock position with a
coin to ensure that the roller is
installed in place.
Put it back into
the roller
Basic Parameter
Vacuum cleaner
Dust Collection Base
Model
Product Size
Lithium Battery
Net Weight
Rated Power
Working Voltage
Motor Power
Parameter
YM-H4-W03、YM-H4-G03
1197*248*323mm
DC25.2V INR 18650 2500mAh
About 7.5kg (Including parts and dust
collection base)
25.2V
400W
Charging Time ≤3H
1000W
Working Noise
Capacity of Dust Bag 2.5L
≤85dB

Precautions for Use

Troubleshooting
Safety Instructions


Table of contents
Other Lydsto Vacuum Cleaner manuals