USER MANUAL
AUTOMATIC SOAP DISPENSER 090312
This machine adopted the high-class electrical touchless control technology, by
using Power Supplies & DC to DC Converters double
choices multi-fuctional, automatic soap dispenser &spray
disinfection machine & bubble dispenser, with plate design which can
fixed on the wall. This product have many advantages like working
safely, good sensitive etc. Auto soap dispenser avoid hand touch,
and mutual infection. Lower energy comsumption circuit board
design, battery long life-time using, which is the best choice for hotels,
restaurants, hospitalschoolsand buildings.
PRODUCT FEATURES
1: Selecting raw material and the whole Industrial manufacturing processes is
absolutely In accordance with the international standards.
There is no any Toxic, Contaminated Radioactive material, which is thereal green
energy saving product.
2: Through a special manufacturing process, the pumps gaint the international
paitent, which can make sure the 300 thousand times pressing, perfect mould
will never leak.
3: With key special design makes the body and back stick together.
Public places using is more convenient, the cover Isolated the air and from water,
will not produce Mildew during the long-term storage of liquid.
4: The products is combined with man different separated parts, it is easy to
Disassembling, you can any broken parts.
5: Three functions: soap, foam, and spray. You should use the Corresponding
pumps if you need the different liquid, (For instance: if you want the soap, you
just change the foam pump).
6: The product is designed with drop-like cover, you can put it on the table or
mount it on the wall.
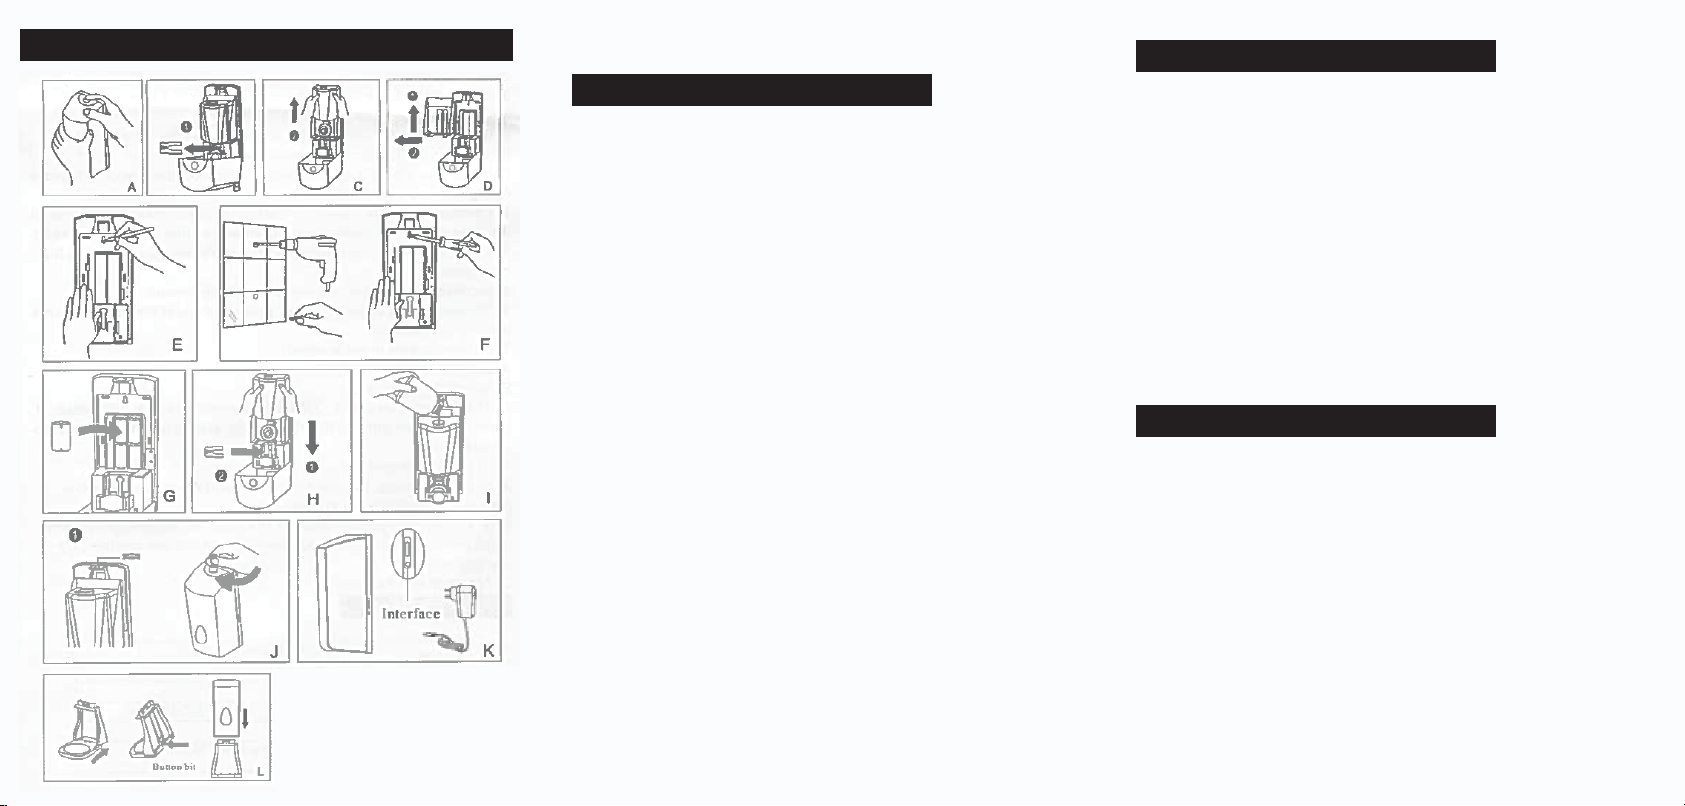
USING METHOD
1: The product is suitable for home usage, when installing the dispenser, PLease
make sure the distance under the dispenser is at least 40 cm.
2: Choose a suitable place for instalation, make sure it is not in a moisture
environment.
3: Don´t put the dispenser on the opposite side of a mirror, or unter the water.
4: Don´t put it unter strong light, it will damage the Infrared sensor.
5: Can´t use the High concentrations of liquid chemicals.
6: Please use the right concentrations of liquid, otherwise, it can cause no liquid
come out or little.
7: The dispenser use 4 pcs 1.5V battery (suggest the Alkaline battery), the
product has low power warning, when you find the LED light keep flashing, that
means the battery is almost use up, please change the new battery.
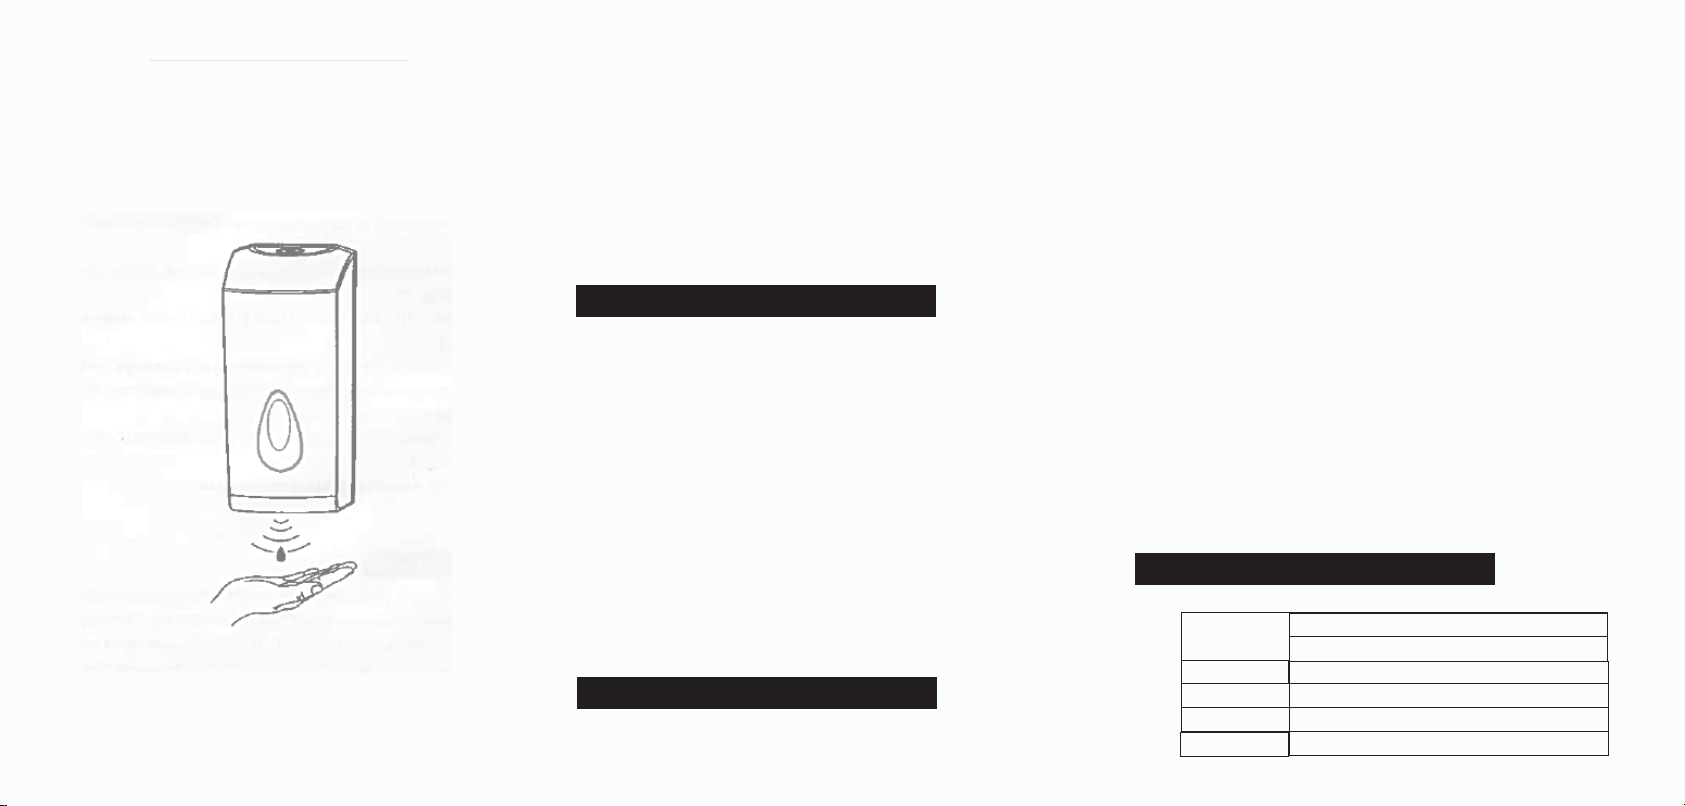
8: No obstacles around 14 cm area unter the sensor.
9: The machine is sensor, just put your hand unter the pump no more than 10
cm distance.
10: If the machine is not working
A: put your hands near the detector,
B: Re-check your battery,
C: The Switch is on or not,
D: Check the unterside of the dispenser, if there are lots of light and Inverted
image, please put the dispenser to a higher place.
11: If no liquid droped
A: If first time using, the liquid doesn´t reach the pump, please try many times
untill theliquid come out.
B: In a lower temperature weather in winter, the liquid might become solid,
please pull some 60 degrees water. Wait a few minutes, try many times.
C: The soap is not enough.
SPECIFICATONS
Size
Volume
Volume/press
Material
Battery
L280.6XW132XH131.6 mm
L445XW145XH140mm (with base part)
1000ml
1.5ML
ABS plastic
4 x size C battery or AC 110/240 adapter