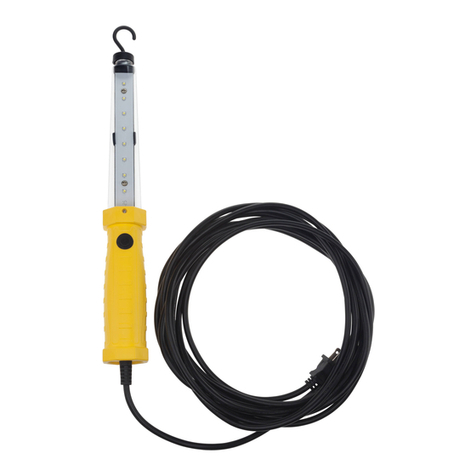
Mäktig 703515 User manual

Please read and save these instructions. Read this carefully before using product. Protect yourself and others by observing all safety
information, warnings, and cautions. Failure to comply with instructions could result in personal injury and/or damage to product or property.
Please retain instructions for future reference. Note that this is a general service instruction sheet. All specifications as detailed in this sheet
may not match your product exactly.
Veuillez lire et conserver ces instructions. Lisez soigneusement ceci avant d’utiliser le produit. Protégez vous et votre entourage en observant
les avertissements, mises en garde et instructions de sécurité; tout manquement pourrait entraîner des blessures et/ou des dommages
matériels. Conservez les instructions pour référence ultérieure. Ceci est un feuillet d’instructions général. Les spécifications détaillées ici
pourraient différer du produit réel.
FEATURES
∙FrontCOBprovides700lumensofbrightlight
∙TopLEDlightoffersanadditionalflashlightfunction
∙Twodual360°hookswithmagnetsforhangingandadheringto
steelsurfaces
∙Tough,impactresistantergonomichousing
∙IP54ratedfordust&waterresistanceforlighthead
∙50’18/2SJTOWcordremainsflexibleincoldweatherandisoil
andgreaseresistant
∙ULlistedadapter.
CARACTÉRISTIQUES
∙COBavantoffre700lumensdelumièrevive
∙DELsurledessusoffreunefonction“lampedepoche”additionnelle
∙Deuxcrochetsdoubles360°avecaimantspoursuspendreoufixersur
dessurfacesmétalliques
∙Boîtierergonomiquerobusteetrésistantauximpacts
∙TêteclasséePI54pourlarésistanceàlapoussièreetàl’eau
∙FilSJTOW18/2de50piquidemeureflexibleaufroidetrésisteàl’huile
etàlagraisse
∙AdaptateurclasséUL.
GENERALSAFETYINFORMATION
Donotattempttoinstall,operate,orservicethisproductbefore
readingallinstructionscarefully.Failuretocomplywiththese
instructionscouldresultinfire,personalinjury,orpropertydamage.
SÉCURITÉGÉNÉRALE
Nepasessayerd’installer,utiliserouentretenirceproduitavantd’avoirlu
lesinstructionssoigneusement.Toutmanquementpourraitcauserdes
incendies,blessuresoudommagesmatériels.
CAUTION
Keeplensawayfromabrasiveandsharpobjectstoprevent
scratching.
WARNING
Donotuseinoraroundtubs,showers,sinkspoolsorhottubs.
Useonlytherecommendedvoltageandfrequency(110‐120VAC,
50‐60Hz).
Keepoutofreachofchildren.
Keeplightawayfromhotobjects.
Notforuseneargas,ignitableorexplosivematerials.
Intensebeamoflight!Donotlookdirectlyintothelightoraim
atsomeoneelse,evenforabriefperiod;thiscanbeharmfulto
theeyes.
MISEENGARDE
Tenirlalentilleéloignéedesabrasifsetobjetspointuspourprévenir
leségratignures.
AVERTISSEMENT
Nepasutiliserdansouprèsdesbaignoires,douches,éviers,piscines
ouspas.
Utiliseruniquementlevoltageetlafréquenceexigés(110‐120VAC,
50‐60Hz).
Tenirhorsdelaportéedesenfants.
Teniréloignédessourcesdechaleur.
Nepasutiliserprèsd’essence,decombustiblesoudematériaux
explosifs.
Faisceaudelumièreintense!Nepasregarderdirectementla
INSTRUCTIONS
700-Lumen COB Work Light – 50’ Reel
Baladeuse à COD 700 Lumens – Dévidoir de 50pi
Model / Modèle 703515

Thisproductcontainschemicalsincludinglead,knowninthe
StateofCaliforniatocausebirthdefectsorotherreproductive
harm.Washhandsafterhandling.
lumièrenilapointerversquelqu’un,mêmepourunbrefinstant;cela
pourraitêtredommageablepourlesyeux.
Ceproduitcontientdeschimiquesincluantleplomb,identifiépar
l’étatdeCaliforniecommepouvantcauserdesmalformations
congénitalesoud’autresproblèmesreproductifs.Laverlesmains
aprèslamanipulation.
OPERATINGINSTRUCTIONS
∙Touse,plugtheunitintoany110‐120VACpowersource,suchas
awallreceptacle.
∙PresstheswitchonceforthetopLED,twiceforthefrontCOB,
andthreetimesforOFF.
FONCTIONNEMENT
∙Pourutiliser,brancheràunesourced’alimentation110‐120VCA
commeparexempleuneprisemurale.
∙AppuyersurleboutonunefoispourlaDELdudessus,deuxfoispourle
COBavant,etunetroisièmefoispouréteindre.
INSTALLATION
InstallationInstructionsforTableorBenchMount
1) Chooseadrylocationwithin2feetofa120voltelectricaloutlet
2) MountbracketdirectlytotableorBench(FigureA)
3) Insertreelintobracket,usecaretolineupthemountingholes
(FigureB)
4) Securereeltothebracketusingthe8”pin(FigureB)
5) Oncepinisfullyinserted,secure8”pinwithacotterpin(Figure
B)
6) AdjustballstopsoT‐Taporlightheadhangsatyourdesired
length(FigureC)
7) Plugpowercordintoyour120voltelectricaloutlet.
InstallationInstructionsforWallMount
1) Chooseadrylocationwithin2feetofa120voltelectricaloutlet
2) Mountbracketdirectlytowallstud(FigureA)leavingaminimum
of24”betweenthereelandtheoutsideedgeofthewallordoor
frame.
DONOTMOUNTREELTODRYWALLORANYUNSUPPORTEDWALL
MATERIALDIRECTLY
1) Insertreelintobracket,usecaretolineupthemountingholes
(FigureB)
2) Securereeltobracketusingthe8”pin(FigureB)
3) Oncepinisfullyinserted,secure8”pinwithcotterpin(FigureB)
4) AdjustballstopsoT‐Taporlightheadhangsatyourdesired
length
5) Plugpowercordintoyour120voltelectricaloutlet.
InstallationInstructionsforCeilingMount
1) Chooseadrylocationwithin2feetofa120voltelectricaloutlet
2) Mountbracketdirectlytoceilingjoist,beamorareinforced
ceiling.(FigureA)
DONOTMOUNTREELTODRYWALLORANYUNSUPPORTEDCEILING
MATERIALDIRECTLY
3) Insertreelintobracket,usecaretolineupthemountingholes
(FigureB)
4) Securereeltobracketusingthe8”pin(FigureB)
5) Oncepinisfullyinserted,secure8”pinwithcotterpin(Figure
B)
6) AdjustballstopsoT‐Taporlightheadhangsatyourdesired
length
7) Plugpowercordintoyour120voltelectricaloutlet.
8) (FiguresA,B&Careforgeneralreferenceonly.Shownisthe
benchmountmethod.)
INSTALLATION
Instructionsd’installationsurtableousurétabli
1) Choisirunendroitsec,àmoinsde2pid’unepriseélectrique120V
2) Installerlafixationdirectementsurlatableoul’établi(figureA)
3) Insérerledévidoirdanslafixation,enalignantbienlestrousde
fixation(figureB)
4) Fixerledévidoiràlafixationaveclatigede8po(figureB)
5) Unefoislatigeentièrementinsérée,lafixeravecuneépingle(figure
B)
6) Ajusterlebloqueurdufilàlabonnehauteur(figureC)
7) Brancherlecordond’alimentationdanslapriseélectriquemurale
120V.
Instructionsd’installationaumur
1) Choisirunendroitsec,àmoinsde2pid’unepriseélectrique120V
2) Installerlafixationdirectementaumontantdumur(figureA)àau
moins24podubordextérieurdumurouducadredeporte.
NEPASINSTALLERLEDÉVIDOIRDANSLEGYPSEOUSURUNMURSANS
SOUTIEN
3) Insérerledévidoirdanslafixation,enalignantbienlestrousde
fixation(figureB)
4) Fixerledévidoiràlafixationaveclatigede8po(figureB)
5) Unefoislatigeentièrementinsérée,lafixeravecuneépingle(figure
B)
6) Ajusterlebloqueurdufilàlabonnehauteur
7) Brancherlecordond’alimentationdanslapriseélectriquemurale
120V.
Instructionsd’installationauplafond
1) Choisirunendroitsec,àmoinsde2pid’unepriseélectrique120V
2) Installerlafixationdirectementsurunepoutreduplafond,ousurun
plafondrenforcé(figureA)
NEPASINSTALLERLEDÉVIDOIRDANSLEGYPSEOUSURUNPLAFOND
SANSSOUTIEN
3) Insérerledévidoirdanslafixation,enalignantbienlestrousde
fixation(figureB)
4) Fixerledévidoiràlafixationaveclatigede8po(figureB)
5) Unefoislatigeentièrementinsérée,lafixeravecuneépingle(figure
B)
6) Ajusterlebloqueurdufilàlabonnehauteur
7) Brancherlecordond’alimentationdanslapriseélectriquemurale
120V.
8) (LesfiguresA,B&Csontàtitreindicatifseulement.Lafixationsur
établiestillustrée.)

REELOPERATINGINSTRUCTIONS
1) Fullyextendandlockthecordinplacebeforeusing.
2) Tolock,pullthecordtodesiredlength.SLOWLYletthecord
retractbackintothereelsome,untilyouhearaclickingsound,
thenstopthecordfromretracting.Cordshouldbenowlockedin
place.Ifnot,repeatpreviousinstructions.
3) Toretractthecord,pullcordoutafewinchesuntilyoufeelthe
reelpullingthecordfromyourhand.DONOTLETGOOFTHE
CORDWHILEITISRETRACTING.Holdontocorduntilitis
completelywoundintothereel.Failuretodosomayresultin
personalinjuryand/ordamagetothereelitself.
4) Tolockmulti‐anglebracketintoplace,pullloopedspringloaded
pinout,setreeltodesiredangleandreleaseloopedspringpinto
engageintooneoftheholestolockit.
FONCTIONNEMENTDUDÉVIDOIR
1) Déroulercomplètementetbloquerlefilenplaceavantl’utilisation.
2) Pourbloquer,tirersurlefilàlalongueurdésirée.LENTEMENTlaisser
lefilseré‐enroulerdansledévidoir,jusqu’àcequevousentendiezun
clic.Retenirlefilaprèsleclic;ildevraitêtrebloquéenplace.Sinon,
répéterlesétapesprécédentes.
3) Pourré‐enroulerlefil,letirerdequelquespoucesjusqu’àsentirune
légèretractionquiindiquequelefilserétracte.NEPASLÂCHERLE
FILPENDANTQU’ILS’ENROULE.Tenirlefiljusqu’àcequ’ilsoitré‐
enroulé,sansquoiilpourraitcauserdesblessuresouendommagerle
dévidoir.
4) Pourbloquerlafixationmulti‐anglesenplace,tirersurlatigeà
boucleduressort,positionnerledévidoiraubonangleetlâcherla
tigepourluipermettredeseréinsérerdanslesorificesdefixation.
CAUTION
DoNOTservicethisreellightwhileitispluggedin.Itmaycause
electricalshock
Openingreelmaycauseinjury.Unithasatightlywoundclock
springforretraction.
MISESENGARDE
NePASfairel’entretiendecettelampependantqu’elleest
branchée.Vouspourriezvousélectrocuter.
NePASouvrirledévidoir.Cetappareilcontientunressorttrèstendu
pourleré‐enroulement.
LIGHTHEADREPLACEMENTINSTRUCTIONS
1) Unscrewthescrewcap(Figure1&2)
2) Unscrewthenut(Figure3&4)
3) Pulloutthewirewithterminalsfromthebottompartofthelight
(Figure5)
4) Splittheterminalstoseparatethelightandcord(Figure6)
5) Connecttheterminalsofthecordtothelight(Figure7)
6) Putthewirewithterminalsintothehandleofthelighthead
(Figure8)
7) Screwonthenut(Figure9)
8) Screwonthescrewcap(Figure10).
INSTRUCTIONSDEREMPLACEMENTPOURLATÊTED’ÉCLAIRAGE
1) Dévisserlecapuchon(figures1&2)
2) Dévisserl’écrou(figures3&4)
3) Sortirlefilavecterminauxdelapoignéedelalampe(figure5)
4) Débrancherlesfilspourséparerlalampeetsoncordon
d’alimentation(figure6)
5) Brancherlesterminauxducordond’alimentationetdelanouvelle
tête(figure7)
6) Réinsérerlefilaveclesterminauxdanslapoignée(figure8)
7) Revisserl’écrou(figure9)
8) Revisserlecapuchon(figure10).
Popular Work Light manuals by other brands
Sennheiser
Sennheiser Work Light Instructions for use

Soundoff Signal
Soundoff Signal PAR 36 EWLB350DBDFOW quick start guide
GEV
GEV PPLC-6b operating instructions

Emos
Emos P4522 manual
Heitronic
Heitronic PUERTO RICO Installation and operating instructions
Saber Compact
Saber Compact ATD-80395 owner's manual
