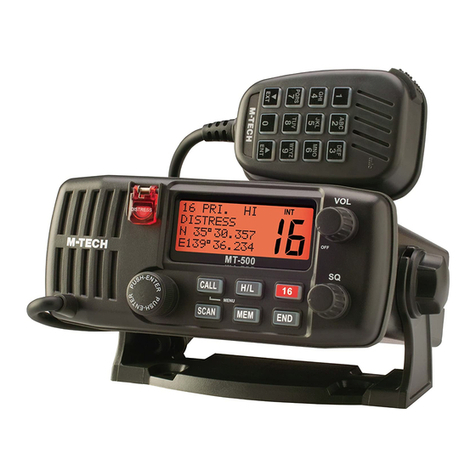
M-tech MT-V82N User manual

User Manual
VHF FM Transceiver


TABLE OF CONTENTS
INTRODUCTION.......................................................................................................................................... 4
1.1 Important ......................................................................................................................................... 4
1.2 Explicit defi nitions............................................................................................................................ 4
1.3 Precautions ...................................................................................................................................... 4
1.4 Safety training information ............................................................................................................ 6
1.5 Included in your package............................................................................................................. 7
QUICK GUIDE............................................................................................................................................. 8
2.1 Preparation ...................................................................................................................................... 8
2.2 Your fi rst contact ........................................................................................................................... 10
2.3 Repeater operation...................................................................................................................... 11
2.4 Programming memory channels................................................................................................ 12
ACCESSORIES .......................................................................................................................................... 13
3.1 Accessory attachment ................................................................................................................ 13
CONTROLS AND PANEL ........................................................................................................................... 14
4.1 Switches, controls, keys and connectors................................................................................... 14
4.2 Function display ............................................................................................................................ 18
BATTERY PACKS ........................................................................................................................................ 21
5.1 Battery pack replacement.......................................................................................................... 21
5.2 Battery caution..............................................................................................................................22
5.3 Charging note ...............................................................................................................................23
5.4 Battery charging ........................................................................................................................... 24
BASIC OPERATION................................................................................................................................... 26
6.1 Power ON .......................................................................................................................................26
6.2 VFO mode selection..................................................................................................................... 26
SECTION 1
SECTION 2
SECTION 3
SECTION 4
SECTION 5
SECTION 6
1

6.3 Setting a frequency ...................................................................................................................... 26
6.4 Setting audio/squelch level.........................................................................................................28
6.5 Receive and transmit ...................................................................................................................28
6.6 Display type (USING INITIAL SET MODE) ..................................................................................... 29
6.7 Key lock function...........................................................................................................................30
REPEATER OPERATION ............................................................................................................................. 31
7.1 G e n e r a l ........................................................................................................................................... 31
7.2 Reversed duplex mode (USING SET MODE) .............................................................................. 31
7.3 Offset frequency (USING SET MODE).......................................................................................... 32
7.4 Subaudible tones (USING SET MODE).........................................................................................33
7.5 Repeater lockout (USING INITIAL SET MODE) ............................................................................34
MEMORY/CALL OPERATION.................................................................................................................... 35
8.1 General description......................................................................................................................35
8.2 Selecting a memory channel .....................................................................................................35
8.3 Selecting the call channel ..........................................................................................................35
8.4 Programming the memory/call channels................................................................................. 36
8.5 Channel name programming .................................................................................................... 37
8.6 Memory transfers ..........................................................................................................................38
8.7 Memory bank selection ............................................................................................................... 39
8.8 Memory bank setting ...................................................................................................................40
8.9 Transferring bank contents .......................................................................................................... 41
DTMF MEMORY......................................................................................................................................... 42
9.1 Programming a DTMF code sequence...................................................................................... 42
9.2 Transmitting a DTMF code sequence.........................................................................................43
9.3 DTMF transmission rate (USING INITIAL SET MODE) ...................................................................44
SECTION 7
SECTION 8
SECTION 9
2

SCAN OPERATION ................................................................................................................................... 45
10.1 Scan types......................................................................................................................................45
10.2 Programmed scan ........................................................................................................................46
10.3 Memory scan................................................................................................................................. 47
10.4 Skip channels................................................................................................................................. 47
10.5 Priority watch .................................................................................................................................48
10.6 Scan resume condition (USING INITIAL SET MODE) .................................................................. 49
SUBAUDIBLE TONES.................................................................................................................................. 50
11.1 Tone squelch..................................................................................................................................50
11.2 Pocket beep operation................................................................................................................ 52
11.3 Tone scan .......................................................................................................................................53
OTHER FUNCTIONS .................................................................................................................................. 55
12.1 SET MODE .......................................................................................................................................55
12.2 INITIAL SET MODE AT POWER ON................................................................................................. 59
12.3 CPU reset AT POWER ON ..............................................................................................................64
12.4 Partial reset AT POWER ON...........................................................................................................64
CLONING.................................................................................................................................................. 65
13.1 Transceiver-to-transceiver cloning AT POWER ON ...................................................................65
13.2 Cloning using a PC ....................................................................................................................... 66
SPECIFICATIONS ...................................................................................................................................... 67
MODE ARRANGEMENT............................................................................................................................ 68
15.1 SET MODE .......................................................................................................................................68
15.2 INITIAL SET MODE........................................................................................................................... 69
SECTION 10
SECTION 11
SECTION 12
SECTION 13
SECTION 14
SECTION 15
3

INTRODUCTION
Thank you for purchasing this M-Tech product.
The MT-V82N VHF Transceivers are designed
and built with M-Tech’s superior technology and
craftsmanship. With proper care, this product should
provide you with years of trouble-free operation.
This document is the operating guide for the
MT-V82N VHF Transceiver.
1.1 Important
READ ALL INSTRUCTIONS carefully and completely
before using the transceiver.
SAVE THIS INSTRUCTION MANUAL - This instruction
manual contains important operating instructions
for the MT-V82N.
1.2 Explicit defi nitions
Word Defi nition
WARNING! Personal injury, fi re hazard or
electric shock may occur.
CAUTION! Equipment damage may occur.
NOTE Recommended for optimum use.
No risk of personal injury, fi re or
electric shock.
1.3 Precautions
WARNING! NEVER hold the transceiver so that
the antenna is very close to, or touching exposed
parts of the body, especially the face or eyes, while
transmitting. The transceiver will perform best if the
microphone is 5 to 10 cm (2 to 4 inches) away from
the lips and the transceiver is vertical.
WARNING! NEVER operate the transceiver with
a headset or other audio accessories at high
volume levels.
4
SECTION 1
SECTION 1

INTRODUCTION
Hearing experts advise against continuous high
volume operation. If you experience a ringing in
your ears, reduce the volume or discontinue use.
NEVER connect the transceiver to a power source
that is DC fused at more than 5 A. Accidental reverse
connection will be protected by this fuse, but higher
fuse values will not give any protection against such
accidents and the transceiver will be ruined.
NEVER attempt to charge alkaline or dry cell
batteries. Be aware that external DC power
connections will charge batteries inside the battery
case. This will damage not only the battery case
but also the transceiver.
DO NOT push the PTT when not actually desiring to
transmit. Place the unit in a secure place to avoid
inadvertent use by children.
DO NOT operate the transceiver near unshielded
electrical blasting caps or in an explosive
atmosphere.
AVOID using or placing the transceiver in direct
sunlight or in areas with temperatures below -10°C
(+14˚F) or above +60°C (+140˚F).
The use of non M-Tech battery packs/chargers may
impair transceiver performance and invalidate the
warranty.
Even when the transceiver power is OFF, a slight
current still fl ows in the circuits. Remove the
battery pack or case from the transceiver when
not using it for a long time. Otherwise, the battery
pack or installed rechargeable batteries will
become exhausted.
For USA only:
Caution: Changes or modifi cations to this
transceiver, not expressly approved by M-Tech
Dynamic Corporation Limited, could void your
authority to operate this transceiver under FCC
regulations.
5
SECTION 1
SECTION 1

INTRODUCTION
1.4 Safety training information
CAUTION
To ensure that your exposure to RF electromagnetic
energy is within the FCC allowable limits, always
adhere to the following guidelines:
• DO NOT operate the radio without a proper
antenna attached, as this may damage the
radio and may also cause you to exceed FCC RF
exposure limits. A proper antenna is the antenna
supplied with this radio by the manufacturer
or an antenna specifi cally authorized by the
manufacturer for use with this radio.
• DO NOT transmit for more than 50% of total radio
use time (“50% duty cycle”). Transmitting more
than 50% of the time can cause FCC RF exposure
compliance requirements to be exceeded.
The radio is transmitting when the “Tx indicator”
appears. You can cause the radio to transmit by
pressing the “PTT” switch.
• ALWAYS use M-Tech authorized accessories
(antennas, batteries, belt clips, speaker/mics, etc.).
Use of unauthorized accessories can cause the
FCC RF exposure compliance requirements to be
exceeded.
• ALWAYS keep the antenna at least 2.5 cm (1 inch)
away from the body when transmitting, and only
use the M-Tech belt-clips which are listed in this
manual when attaching the radio to your belt, etc.
To provide the recipients of your transmission the
best sound quality, hold the transceiver at least 5
cm (2 inches) from your mouth, and turned slightly
to one side. The information listed above provides
the user with the information needed to make him
or her aware of RF exposure, and what to do to
assure that this radio operates within the FCC RF
exposure limits of this radio.
Electromagnetic Interference/Compatibility
During transmissions, your M-Tech radio generates
RF energy that can possibly cause interference
with other devices or systems. To avoid such
6
SECTION 1
SECTION 1

interference, turn off the radio in areas where
signs are posted to do so. DO NOT operate
the transmitter in areas that are sensitive to
electromagnetic radiation such as hospitals,
aircraft, and blasting sites.
1.5 Included in your package
Supplied Accessories
1. Antenna x1
2. Belt clip (with screws) x1
3. AC adapter x1
4. Battery charger x1
5. Battery pack x1
If any of these items are missing or damaged,
immediately contact your place of purchase.
INTRODUCTION
①
④ ⑤
②
③
7
SECTION 1
SECTION 1

QUICK GUIDE
2.1 Preparation
Battery pack replacement
Before replacing the battery pack, push and hold
[PWR] for 1 sec. to turn the power OFF.
• Slide the battery release forward, then pull the
battery pack upward with the transceiver facing
away from you.
Charging with the BC-82S
The BC-82S provides rapid charging battery
pack with or without a transceiver attached. The
following is additionally required:
• An optional AC adapter PA-82E (the adapter/
spacer is supplied with BC-82S).
Check orientation
for correct charging.
(Insert together with
the adapter/spacer.)
Turn power OFF.
BC-82S +
adapter/spacer
A
8
SECTION 2
SECTION 2

Belt clip
Conveniently attaches to your belt.
Attach the belt clip with
the supplied screws
using a phillips
screwdriver.
QUICK GUIDE
About the adapter/spacer
The adapter (Spacer A) only is required for MT-V82N.
When removing the spacer (Spacer B/C), push the
latch carefully with your fi nger to remove the spacer
(Spacer B/C) from the adapter (Spacer A).
Remove the spacer (Spacer B/C)
from the adapter.
CAUTION!
•DO NOT push or force the latch with a screw
driver, etc., to remove it.
•DO NOT bend the latch when the adapter
and spacer are not joined together. This will
cause weakening of the latch plastic.
• Both cases may break the latch and it may
not be able to be reattached.
Antenna
Attach the antenna
to the transceiver as
illustrated at right.
Push the latch
carefully.
9
SECTION 2
SECTION 2

2.2 Your fi rst contact
Now that you have your MT-V82N ready, you are
excited to get on the air. We would like to walk you
through a few basic operational steps to make
your fi rst “On The Air” use an enjoyable experience.
About default setting
The [VOL] control function can be exchanged with
[▲]/[▼] keys function in INITIAL SET MODE. However,
in this QUICK GUIDE, the factory default setting
([VOL] controls audio output level) is used to simplify
instructions.
Basic operation
1. Turning ON the transceiver
Although you have purchased
a brand new transceiver, some
settings may be changed from the
factory defaults because of the
Quality Control process. Resetting
the CPU is necessary to start from
factory default.
➥ While pushing [MONI] and [D•CLR], push and hold
[PWR] for 1 sec. to reset the CPU and turn power
ON.
2. Adjusting audio output level
➥Rotate
[VOL] to set the desired audio level.
3. Adjusting the squelch level
➥ While pushing and holding
[MONI], push [▲] or [▼] to set the
squelch level.
4. Tune the desired frequency
The up/down keys, [▲]/[▼], will
allow you to tune to the frequency
that you want to operate on.
Page 27 will instruct you on
how to adjust the tuning step size.
➥ Push [▲] or [▼] to adjust the
frequency.
QUICK GUIDE
10
SECTION 2
SECTION 2

5. Transmit and receive
➥ Push and hold [PTT] to transmit, then speak into
the microphone; release to receive.
2.3 Repeater operation
1. Setting duplex
➥ Push [A•FUNC], then [4•DUP]
several times to select minus
duplex or plus duplex.
QUICK GUIDE
Direct frequency input from the keypad is also
available.
➥ To enter the desired
frequency, enter 6 digits
starting from the 100 MHz
digit.
• Entering three to fi ve digits
then pushing [✱•ENT ]will
also set the frequency.
• When a digit is mistakenly
input, push [D.CLR] to abort
input.
Push
Example 1 - when entering 145.525 MHz
P.
BEEP
2
DUP
TONE
4
1
SCAN
5
SCAN
5
SCAN
5
Push
Example 2 - when entering 144.800 MHz
DUP
4
DUP
TONE
4
1
OPT
0
SET
8
ENT
Keypad
11
SECTION 2
SECTION 2

2. Repeater tone
➥ Push [A•FUNC], then [1•TONE]
several times until “ ” appears,
if required.
QUICK GUIDE
2.4 Programming memory channels
The MT-V82N has a total of 207 memory channels
(including 6 scan edges and 1 call channel) for
storing often used operating frequency, repeater
settings, etc.
1. Setting frequency
In VFO mode, set the desired operating frequency
with other desired settings, such as repeater and
subaudible tone.
2. Selecting a memory channel
➥ Push [A•FUNC] and [C•MR] then push [▲] or [▼]
several times to select the desired memory
MR
C
FUNC
A
MR
C
FUNC
A
channel.
• “ MR ” indicator and memory
channel number blink.
• Continue to push and hold
[C•MR] for 1 sec. after 3 beeps
are emitted, to increment the
displayed memory channel number.
3. Writing a memory channel
➥ Push [A•FUNC], then push and hold [C•MR] for 1
sec. to program.
• 3 beeps sound.
12
SECTION 2
SECTION 2

ACCESSORIES
3.1 Accessory attachment
Antenna
Attach the antenna
to the transceiver as
illustrated below.
Keep the [SP/MIC] cap (SP/MIC jack cover) attached
when jacks are not in use to keep the contacts
clean.
[SP/MIC] cap
Attach the [SP/MIC] cap.
Belt Clip
Conveniently attaches to your belt.
Attach the belt clip with the supplied screws using
a phillips screwdriver.
Handstrap (Not supplied)
Slide the hand
strap through
the loop on
the top of the
rear panel as
illustrated below.
Facilitates
carrying.
To attach the belt clip
13
SECTION 3
SECTION 3

4.1 Switches, controls, keys and connectors
❶CONTROL DIAL [VOL]
*Rotate to adjust the volume level.
❷PTT SWITCH [PTT]
Push and hold to transmit; release to receive.
❸UP/DOWN KEYS [▲]/[▼]
*Selects the operating frequency.
❹KEYPAD
Used to enter operating frequency, the DTMF
codes, etc.
❺ANTENNA CONNECTOR
Connects the supplied antenna.
❻[SP]/[MIC] JACK
Connect an optional speaker-microphone or
headset, if desired. The internal microphone and
speaker will not function when a connector is
inserted.
❶
❷
❸
❹
❺
❻
❼
❽
❾
❿
CONTROLS AND PANEL
14
SECTION 4
SECTION 4

❼FUNCTION DISPLAY
❽SQUELCH/MONITOR SWITCH [MONI]
Push and hold to force the squelch open, and
set the squelch level, if required.
❾POWER SWITCH [PWR]
Push and hold for 1 sec. to turn the power ON
and OFF.
NOTE:
*The assigned function for [VOL] and [▲]/[▼] can
be exchanged in INITIAL SET MODE (p.27, 61).
CONTROL AND PANEL
NOTE:
*When making the connection between your
transceiver and PC or other device, ensure
that the correct connections are made
otherwise data communications may fail.
to [DATA] jack
RS-232
(DB-9 female)
TxD GND
RxD
∅2.5mm <∅10mm
Pin 2 (RxD)
Pin 3 (TxD)
Pin 5 (GND)
1
9
5
6
❿[DATA] JACK
Connect to a PC or GPS receiver via the RS-232
cable (Dsub 9 pin) for data communication in
the RS-232 format.
15
SECTION 4
SECTION 4

KEYPAD
CONTROL AND PANEL
[A•FUNC]
Access to secondary function.
[B•CALL]
Selects the call channel. (p.35)
[C•MR]
➥ Selects a memory mode. (p.35)
➥ After pushing [A•FUNC], enter into
memory programming/ editing
mode. (p.36-39)
➥ After pushing [A•FUNC], programs/
transfers VFO/memory or call
channel contents into memory
channel/VFO when pushed and
held for 1 sec. (p.36-39)
[D•CLR]
Selects VFO mode, aborts direct
frequency input, or cancels
scanning, etc. (p.26, 46)
[1•TONE ]
➥ Input digit “1” during frequency
input, memory channel selection,
etc. (p.26, 35)
➥ After pushing [A•FUNC], selects
the subaudible tone function.
(p.31, 51)
[2•P.BEEP]
➥ Input digit “2” during frequency
input, memory channel selection,
etc. (p.26, 35)
➥ After pushing [A•FUNC], turns the
pocket beep function ON and
OFF. (p.52)
[3•T.SCAN]
➥ Input digit “3” during frequency
input, memory channel selection,
etc. (p.26, 35)
➥ After pushing [A•FUNC], starts tone
scanning. (p.33, 53)
16
SECTION 4
SECTION 4

CONTROL AND PANEL
[4•DUP]
➥ Input digit “4” during frequency
input, memory channel selection,
etc. (p.26, 35)
➥ After pushing [A•FUNC], selects
duplex function (–duplex,
+duplex, simplex). (p.31)
[5•SCAN]
➥ Input digit “5” during frequency
input, memory channel selection,
etc. (p.26, 35)
➥ After pushing [A•FUNC], starts
scanning. (p.45)
[6•SKIP]
➥ Input digit “6” during frequency
input, memory channel selection,
etc. (p.26, 35)
➥ After pushing [A•FUNC], sets and
cancels skip setting for memory
scan during memory mode.
(p.47)
[7•PRIO]
➥ Input digit “7” during frequency
input, memory channel selection,
etc. (p.26, 35)
➥ After pushing [A•FUNC], starts
priority watch. (p.48)
[8•SET]
➥ Input digit “8” during frequency
input, memory channel selection,
etc. (p.26, 35)
➥ After pushing [A•FUNC], enters into
SET MODE. (p. 55)
[9•H/M/L]
➥ Input digit “9” during frequency
input, memory channel selection,
etc. (p.26, 35)
➥ After pushing [A•FUNC], switches
transmit power between high,
middle and low output power.
(p.28)
17
SECTION 4
SECTION 4

CONTROL AND PANEL
[0•OPT]
➥ Input digit “0” during frequency
input, memory channel selection,
etc. (p.26, 35)
➥ After pushing [A•FUNC], selects an
optional function mode.
[#•BANK]
After pushing [A•FUNC], enters a
memory bank selection. (p.39)
[✱•ENT ]
➥ Sets the frequency even if the full
6 digits of frequency have not
been entered. (p.26)
➥ After pushing [A•FUNC], switches
key lock function ON and OFF
when pushed and held for 1
sec. Lock all keys, except [PWR],
[PTT], [MONI] and audio level
adjustment. (p.30)
4.2 Function display
❶FUNCTION INDICATOR
Appears while a secondary function is being
accessed.
❷KEY LOCK INDICATOR (p.30)
Appears when the key lock function is ON.
❸AUTO POWER OFF INDICATOR (p.60)
Appears while the auto power OFF function is
activated.
❶
⓯
⓮
❷ ❸ ❹ ❺ ❻
❼
❽❾❿⓫⓬⓭
18
SECTION 4
SECTION 4
Table of contents
Other M-tech Transceiver manuals