manuals.online logo
Brands
  1. Home
  2. •
  3. Brands
  4. •
  5. M2 Antenna Systems
  6. •
  7. Antenna
  8. •
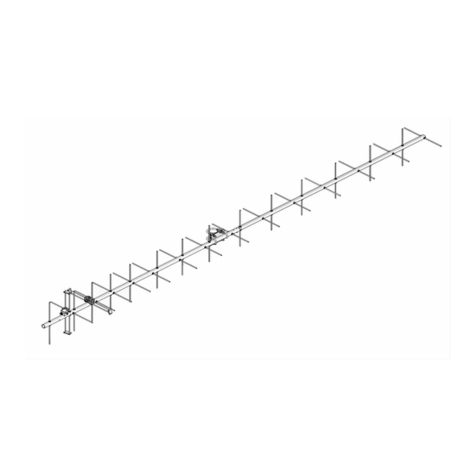
  9. M2 Antenna Systems 2M5WL User manual

M2 Antenna Systems 2M5WL User manual

M2 Antenna Systems, Inc. 4402 N. Selland Ave. Fresno, CA 93722
Tel: (559) 432-8873 Fax: (559) 432-3059 Web: www.m2inc.com
©2015 M2 Antenna Systems Incoporated 03/15/20
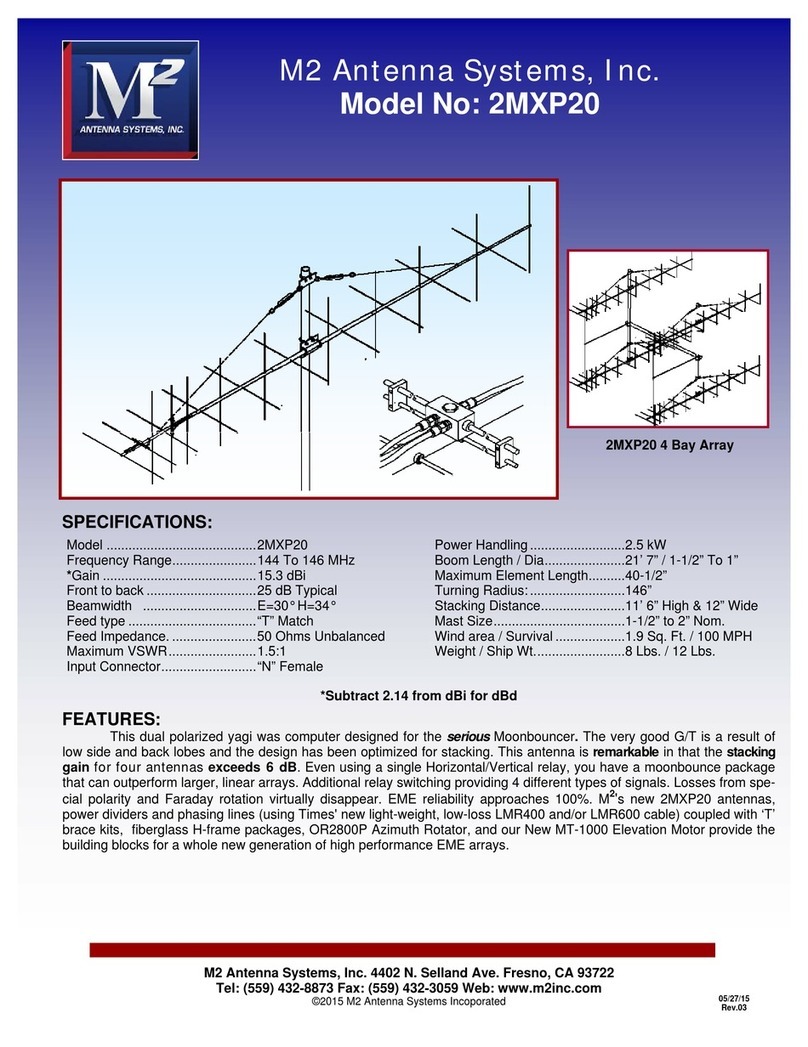
Model .........................................2M5WL
Frequency Range.......................144 To 148 MHz
*Gain ..........................................16.84 dBi
Front to back ..............................22 dB Typical
Beamwidth ...............................E=26° H=29°
Feed type ...................................“T” Match
Feed Impedance. .......................50 Ohms Unbalanced
Maximum VSWR........................1.2:1
Input Connector..........................“N” Female
Power Handling ..........................1.5 kW
Boom Length / Dia......................33’ / 1-1/2” to 3/4”
Maximum Element Length..........40-5/8”
Turning Radius: ..........................18’ 9”
Stacking Distance.......................14’ High & 14’ Wide
Mast Size....................................2” Nom.
Wind area / Survival ...................2.7 Sq. Ft. / 100 MPH
Weight / Ship Wt.........................13 Lbs. / 14 Lbs.
M2 Antenna Systems, Inc.
Model No: 2M5WL
FEATURES:
The 2M5WL is designed with the SERIOUS “Weak Signal” enthusiast in mind. It provides excellent gain for min-
imum weight and wind load yet is strong enough to survive 100+ mph winds. The modified folded dipole driven element is
also unique as it’s center is a CNC machined block of aluminum fitted with 'O' ringed connectors and access cap. After
factory assembly, the block is filled with a space age silicone gel which further seals and increases dielectric breakdown
and arc-over protection. The 3/16” rod elements mount through the boom on UV stabilized button insulators. All hardware
is stainless steel except for U-bolts. A vertical riser and an overhead Dacron cord guy system is supplied for boom sup-
port. This antenna is widely used in EME (W5UN’s 48 2M5WL’s and many others) and large Tropo scatter arrays. Sever-
al optional items are available to provide more gain from your 2M5WL’s. 2 and 4 port power dividers are available for
matching stacks of 2 or 4 antennas. 50 Ohm phasing lines model VHF-50-2M5WL2 and VHF-50-2M5WL4 can be ordered
for phasing 2 or 4 antennas together. ‘H’ frames, OR-2800 and MT-3000 AZ and EL rotators are also available as well as
Rohn and US towers.
SPECIFICATIONS:
*Subtract 2.14 from dBi for dBd
1. Start by laying out the boom sections using the DIMENSION sheet as a guide. Use 8-32 X 1-1/4
screws and locknuts to join 3/4” to 1” sections; 1-1/2” screws for 1” to 1-1/4” sections; 1-3/4”
screws for 1-1/4” to 1-1/2” and 1-1/2" to 1-1/2" sections.
To make assembly easier, support the boom about waist high on bucks, tables, etc. Or, drive a 1-
1/2” to 2” pipe into the ground and temporarily attach boom using boom to mast plate and U-bolts
at balance point.
2. Lay out the elements by length and position as shown the DIMENSION sheet. Start with the
reflector (longest) element. Balance across finger to find center and push on a black button
insulator to about 1/2” from center. Push the element through the holes 1/2" from the rear of the
boom and install the second button, snugging it up into boom. DO NOT BOTHER WITH
ACCURATELY CENTERING the element at this time and DO NOT INSTALL the stainless steel
internal locking shaft retainers yet. This is easier to do after all the elements are installed in the
boom.
3. Install the 3/16” rod DRIVEN ELEMENT as you did the reflector. Then continue with the installation
of the DIRECTORS. Note that the Director Elements do not consistently diminish in length
from rear to front, so pay close attention to length and position.
4. Now begin centering the elements. Use a tape measure to EQUALIZE the amount the element
sticking out on each side of the boom. Once you have all the elements centered, sight down the
element tips from the rear comparing each side. Look for any obvious discrepancies and correct if
found.
5. NOTE: The SHAFT RETAINERS should always be used to secure the elements for permanent
and long term antenna installations. However, for portable or temporary use, or whenever it is
anticipated that the antenna will be disassembled within a short time, the retainers may be left off.
The button insulators, normally a tight fit, will hold the elements quite securely.
To install the stainless steel element SHAFT RETAINERS, start by using thumb and forefinger to
hold the retainer against the end of the PUSH TUBE ( 3/8 x 3” push tube, supplied in the kit),
internal fingers on retainer dished into tube. HOLD THE ELEMENT FIRMLY TO PREVENT IT
FROM SLIDING OFF CENTER and press the retainer onto the element end and continue until
retainer butts on insulator button (Locking pliers, lightly clamped up against opposite button
insulator will help maintain center reference. If you push the first retainer too far, remove element
from boom and push retainer completely off the element). Now repeat for the other side of the
element. Continue installing retainers until all elements are locked in place.
6. Mount the DRIVEN ELEMENT BLOCK ASSEMBLY to the top of the boom using a single 8-32 X 1
-1/4" screw. Orient the block with feed connector facing to center and balun connectors facing to
rear. Block orientation may be reversed if you wish feedline to exit from rear of boom.
7. Before installing the balun, thread a 3/8” SEAL NUT all the way onto each connector, with the
black Neoprene face out. Attach balun to the Block and tighten the connectors gently using a
7/16" end wrench. Once the connectors are tight, back the Seal Nuts out and finger-tighten firmly
up against the face of the connectors (or tighten gently with 1/2” end wrench). A lot of torque is
unnecessary. Form the balun close to the boom and secure to boom with a nylon cable tie. Tie
should be snug but not crushing or kinking the coax.
8. Install the 8-32 x 1/4” set screws (internal Allen head - tool supplied) into the SHORTING BARS.
Slide the bars onto the 3/16” rod driven element tips and then onto the Driven Element Block
Rods. Position the Shorting Bars at the very ends of the 3/16” rod (through the boom). Align the
bars and rods with each other and tighten the set screws.
9. Attach the square 18” RISER TUBE to the boom-to-mast plate using two 8-32 x 1-1/4” screws and
locknuts. The large holes at the top of the riser are slightly off-center and should be oriented away
from the boom-to-mast plate and closer to the centerline of the boom.
2M5WL ASSEMBLY MANUAL
SETSHORTINGBARSAT:
DIMENSIONSHEET
176.25
329.937
396.437
363.188
297.437
9.437
288.0
234.875
265.75
205.0
3.875 231.0
122.313
148.625
97.562
BOOMTOMAST
PLATE
SEESTEP#9
174.0
2.25
8.313
114.0
ELEMENTSPACING
22.50
74.688
36.25
15.75
0.50
17.688
57.0
2M5WL
17.75"
DECIMALTO
FRACTION
CONVERSION
.062=1/16
.125=1/8
.188=3/16
.250=1/4
.313=5/16
.375=3/8
.437=7/16
.500=1/2
.562=9/16
.625=5/8
.688=11/16
.750=3/4
.813=13/16
.875=7/8
.937=15/16
35.625
34.75
34.25
34.25
34.937
DIMSA
M.STAAL
5-25-89
REV9-11-02
35.25
35.062
35.437
36.062
35.75
36.25
ELEMENTLENGTH
37.5
36.562
36.937
37.25
38.0(3/16"rod)
40.625
2M5WL DIMENSION SHEET
10. The boom to mast plate is normally mounted at the balance point, about 13’ 2” from rear of boom.
Use two 1-1/2" U-bolts and the stainless nuts and lock washers provided. DO NOT OVER
TIGHTEN. 2” U-bolts are provided for mounting the antenna to your mast. Since the feed line
represents significant weight it is best to have it attached and fastened along the boom with cable
ties before final mounting the plate.
11. Refer to Boom support drawing. Install the two small “U” shaped rods into the top side of the
boom. Secure with SHAFT RETAINERS.
12. Install the two turnbuckles into the top of the riser with open ends of the hooks “UP”. Adjust
threads until just one or two show inside turnbuckle body. Adjust the boom with supports until the
middle is 4” to 6” LOWER than the ends. Attach one end of the Dacron cord to the rear eye bolt by
taking two wraps through the eye and finishing with two half-hitches or a square knot. Adjust to
leave 2” to 4” of cord after knots. Attach the other end of the cord to the front eye bolt in the same
way. Equalize excess cord at the riser tube and cut. Take rear cord end and make two wraps
through rear turnbuckle eye, then pull line taut and knot as above. Repeat for front cord and
turnbuckle.
13. Now support antenna at the boom-to-mast plate. This tensions the cord and helps the knots to
take a set. If possible, let this process extend overnight. Then adjust turnbuckles so boom ends
bow up slightly (and equally). A few days on the mast should leave the boom straight. Cut excess
lengths from cord, leaving 2” to 4”. To prevent fraying melt ends with heat or flame and tape back
to main line.
THIS COMPLETES THE ANTENNA ASSEMBLY.
INSTALLATION AND STACKING INFORMATION
A. Always use high quality coax and connectors, as old, corroded, or poor quality materials are
common sources of performance degradation and failure.
B. If possible, test the antenna, connectors and feed line BEFORE installing to your mast or tower.
At 6 feet or more the antenna will exhibit VSWR similar to higher mounting heights. Set antenna
on a ladder or temporary mast. Check for continuity and match across the band. It should be 1.5:1
or better from 144 to 146 MHz and then rise to about 2:1 at 148 MHz. Remember, the 2M5WL is
tailored for the lower half of two meters where horizontal polarity and sideband / CW are the
common modes.
C. STACKING REMINDERS:
1. All driven element blocks MUST be oriented to the same side of boom.
2.All boom-to-mast plates MUST be mounted at the same point on the boom.
3.Feed / phasing lines MUST be of equal electrical length or multiples of 1 wavelength in order to
maintain equal phasing in the array. Improper phasing can severely deteriorate performance.
If you are unsure about stacking multiple antennas, please call M2 and let us help you DO IT
RIGHT
CAREFULLY MANUFACTURED BY:
M2 ANTENNA SYSTEMS INC.
4402 N. Selland Ave.
FRESNO, CA 93722
(559) 432-8873 FAX (559) 432-3059 Web:www.m2inc.com Email:[email protected]m
2M5WL ASSEMBLY MANUAL
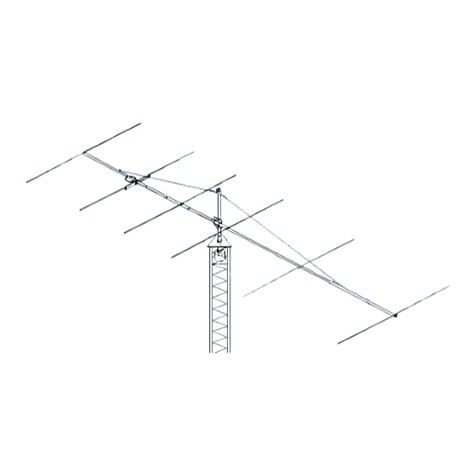
2M5WL D.E. & OVERHEAD DETAIL
REPLACE
WITH
EYE BOLT
DESCRIPTION QTY
BOOM SECTION #1, 1 X .058 X 60” STR ............................ 1
BOOM SECTION #2, 1-1/4 X .058 X 60” SOE...................... 1
BOOM SECTION #3, 1-1/2 X .058 X 60” SOE...................... 1
BOOM SECTION #4, 1-1/2 X .058 X 60” SBE ...................... 1
BOOM SECTION #5, 1-1/4 X .058 X 60” SOE...................... 1
BOOM SECTION #6, 1 X .058 X 60” SOE............................ 1
BOOM SECTION #7, 3/4 X .049 X 55” STR ......................... 1
ELEMENTS, 3/16 ROD x Dimension Sheet.......................... 17
DRIVEN ELEMENT BLOCK ASSEMBLY ............................. 1
BALUN, RG-6 1/2 WAVE ...................................................... 1
BOOM-TO-MAST PLATE, .188 X 6 X 4”............................... 1
VERTICAL RISER, 3/4 X 18” ................................................ 1
TURNBUCKLES, 1/4 X 4’ ..................................................... 2
U-BOLT AND CRADLE, 2’ .................................................... 2
U-BOLT AND CRADLE, 1-1/2” ............................................. 2
DACRON CORD, 3/32” X 25’................................................ 1
ASSEMBLY MANUAL........................................................... 1
IN HARDWARE BAG:
SHORTING BAR................................................................... 2
EYE BOLT X 2.5 ZN ............................................................. 2
BUTTON INSULATORS ....................................................... 34
SHAFT RETAINER, SS ........................................................ 34
NUT, 5/16-18 SS................................................................... 8
LOCKWASHER, 5/16 SS...................................................... 8
NUT, 1/4-20 SS..................................................................... 2
LOCK WASER, 1/4 SS ......................................................... 2
SETSCREW, 8-32 X 1/4, SS ................................................ 4
SCREW, 8-32 X 1-1/4 SS ..................................................... 7
SCREW, 8-32 X 1-1/2 SS ..................................................... 4
SCREW, 8-32 X 1-3/4 SS ..................................................... 4
SCREW, 8-32 X 2 SS ........................................................... 2
LOCKNUT, 8-32 SS .............................................................. 16
CABLE TIE, NYLON ............................................................ 5
ALLEN HEAD WRENCH, 5/64” ............................................ 1
PUSH TUBE, 3/8 X 3” ........................................................... 1
CAREFULLY MANUFACTURED BY:
M2 Antenna Systems, Inc.
4402 N. Selland Ave.
FRESNO, CA 93722
(559) 432-8873 FAX (559) 432-3059
2M5WL PARTS & HARDWARE

Other M2 Antenna Systems Antenna manuals

M2 Antenna Systems 215-470LP16 User manual

M2 Antenna Systems

M2 Antenna Systems 215-470LP16 User manual

M2 Antenna Systems 420-50-11 User manual

M2 Antenna Systems

M2 Antenna Systems 420-50-11 User manual

M2 Antenna Systems 432-15WL Quick start guide

M2 Antenna Systems

M2 Antenna Systems 432-15WL Quick start guide

M2 Antenna Systems 2M4X User manual

M2 Antenna Systems

M2 Antenna Systems 2M4X User manual

M2 Antenna Systems 400CP30A User manual

M2 Antenna Systems

M2 Antenna Systems 400CP30A User manual

M2 Antenna Systems 418CP30 User manual

M2 Antenna Systems

M2 Antenna Systems 418CP30 User manual

M2 Antenna Systems 303CP26 User manual

M2 Antenna Systems

M2 Antenna Systems 303CP26 User manual

M2 Antenna Systems FG170-230-5 User manual

M2 Antenna Systems

M2 Antenna Systems FG170-230-5 User manual

M2 Antenna Systems SYSTEM SAMPLE 3 User manual

M2 Antenna Systems

M2 Antenna Systems SYSTEM SAMPLE 3 User manual

M2 Antenna Systems 40M3FS User manual

M2 Antenna Systems

M2 Antenna Systems 40M3FS User manual

M2 Antenna Systems 235-11 User manual

M2 Antenna Systems

M2 Antenna Systems 235-11 User manual

M2 Antenna Systems 80M2L User manual

M2 Antenna Systems

M2 Antenna Systems 80M2L User manual

M2 Antenna Systems 440-6SX User manual

M2 Antenna Systems

M2 Antenna Systems 440-6SX User manual

M2 Antenna Systems 222 HO LOOP User manual

M2 Antenna Systems

M2 Antenna Systems 222 HO LOOP User manual

M2 Antenna Systems 6.9-4CDD-125 User manual

M2 Antenna Systems

M2 Antenna Systems 6.9-4CDD-125 User manual

M2 Antenna Systems 30M3-125 User manual

M2 Antenna Systems

M2 Antenna Systems 30M3-125 User manual

M2 Antenna Systems 902-5 YAGI User manual

M2 Antenna Systems

M2 Antenna Systems 902-5 YAGI User manual

M2 Antenna Systems 140CP14M User manual

M2 Antenna Systems

M2 Antenna Systems 140CP14M User manual

M2 Antenna Systems 440-18 User manual

M2 Antenna Systems

M2 Antenna Systems 440-18 User manual

M2 Antenna Systems FGSD-3.7DH User manual

M2 Antenna Systems

M2 Antenna Systems FGSD-3.7DH User manual

M2 Antenna Systems 6M-3SS User manual

M2 Antenna Systems

M2 Antenna Systems 6M-3SS User manual

M2 Antenna Systems 2.4-18R User manual

M2 Antenna Systems

M2 Antenna Systems 2.4-18R User manual

M2 Antenna Systems 75-5AS User manual

M2 Antenna Systems

M2 Antenna Systems 75-5AS User manual

M2 Antenna Systems 2MCP8A User manual

M2 Antenna Systems

M2 Antenna Systems 2MCP8A User manual

Popular Antenna manuals by other brands

stellar labs 30-2370 installation guide

stellar labs

stellar labs 30-2370 installation guide

Directive Systems & Engineering DSEDBFEED installation instructions

Directive Systems & Engineering

Directive Systems & Engineering DSEDBFEED installation instructions

Orolia 8230 installation guide

Orolia

Orolia 8230 installation guide

Arbiter Systems 1094B Setup guide

Arbiter Systems

Arbiter Systems 1094B Setup guide

Winegard HD7000R instructions

Winegard

Winegard HD7000R instructions

Televes Ellipse Mix quick start guide

Televes

Televes Ellipse Mix quick start guide

Cabletech ANT0559 owner's manual

Cabletech

Cabletech ANT0559 owner's manual

Antennas Direct ClearStream 2 Assembly instructions

Antennas Direct

Antennas Direct ClearStream 2 Assembly instructions

Ubiquiti airMAX Sector AM-2G16-90 quick start guide

Ubiquiti

Ubiquiti airMAX Sector AM-2G16-90 quick start guide

Laird S24512BPX manual

Laird

Laird S24512BPX manual

Terrestrial Digital XG91 Assembly and installation

Terrestrial Digital

Terrestrial Digital XG91 Assembly and installation

Ultra Beam UB640-VL2.3 manual

Ultra Beam

Ultra Beam UB640-VL2.3 manual

FutureTrak Space scanner user manual

FutureTrak

FutureTrak Space scanner user manual

CSL 20373 user manual

CSL

CSL 20373 user manual

Sea Tel 5009-17 installation manual

Sea Tel

Sea Tel 5009-17 installation manual

CHAMELEON CHA COUNTERPOISE KIT Operator's manual

CHAMELEON

CHAMELEON CHA COUNTERPOISE KIT Operator's manual

Sirio Antenne HP 140-175 installation manual

Sirio Antenne

Sirio Antenne HP 140-175 installation manual

Nera Saturn BM Marine installation manual

Nera

Nera Saturn BM Marine installation manual

manuals.online logo
manuals.online logoBrands
  • About & Mission
  • Contact us
  • Privacy Policy
  • Terms and Conditions

Copyright 2025 Manuals.Online. All Rights Reserved.