manuals.online logo
Brands
  1. Home
  2. •
  3. Brands
  4. •
  5. M2 Antenna Systems
  6. •
  7. Antenna
  8. •
  9. M2 Antenna Systems 400CP30A User manual

M2 Antenna Systems 400CP30A User manual

M2 Antenna Systems, Inc. 4402 N. Selland Ave. Fresno, CA 93722
Tel: (559) 432-8873 Fax: (559) 432-3059 Web: www.m2inc.com
©2016 M2 Antenna Systems Incorporated 11/22/17
Rev.03
Model .........................................400CP30A
Frequency Range.......................395-405 MHz
*Gain ..........................................16.20 dBIc
Front to back ..............................22 dB Typical
Ellipticity .....................................1.5 dB Typical
Beamwidth ...............................30o circular
Feed Impedance. .......................50  , Unbalanced
Maximum VSWR........................1.6:1 Max
Input Connector..........................“N” Female
Power Handling ..........................600W
Boom Length / Dia......................140-3/4” / 1" Dia
Parasitic Elements......................28, 3/16" Rod
Stacking Distance.......................55”
Mast Size....................................1-1/2- 2 Inch
Wind area / Survival ...................1 sq ft.
Weight / Ship Wt.........................5 lbs / 7 lbs UPS
M2 Antenna Systems, Inc.
Model No: 400CP30A
FEATURES:
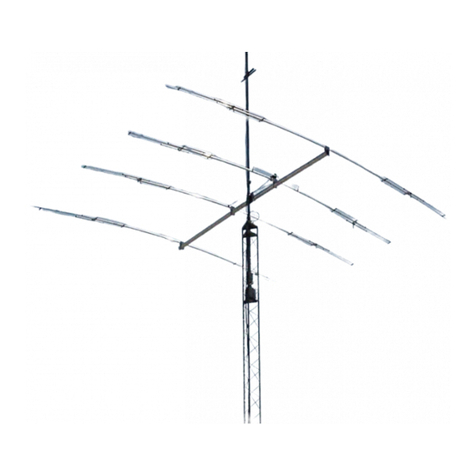
The 400CP30A is a practical sized, yet high performance circular polarized antenna with a remarkably clean pat-
tern. The pattern is important in order to match the antenna’s noise temperature with modern low noise preamps. This
antenna is ideal for satellite work but is also excellent for terrestrial uses like ATV, repeater operation, and long haul tropo
DX. The CNC machined driven element module is O-ring sealed and weather tight for low maintenance and long-term
peak performance. Internal connected are encapsulated in a space-age silicone gel that seals out moisture and improves
power handling. The 3/16” 6061-T6 rod elements are centered to minimize interaction and maintain good ellipticity. Insu-
lators are UV stabilized and locked in place with stainless keepers. Rugged construction, uncompromising performance
for the boom length: that's the M2 400CP30A!
SPECIFICATIONS:
*Subtract 2.14 from dBi for dBd
TYPICAL TOOLS REQUIRED: measuring tape, phillips screwdriver, 5/16”, 11/32, 7/16, and 1/2
spin-tite, end wrenches and / or sockets. Heavy duty models may require larger sizes.
1. Lay out the boom sections and assemble using the
DIMENSION sheet as a guide for position and hardware.
2. Cut a strip of masking tape about 6” long. Fold the
ends under and stick the tape to a flat surface, stickey
side up. Lay out the elements by length and position as
shown the DIMENSION sheet. NOTE: THE ELEMENTS
IN THIS ANTENNA DO NOT ALL TAPER IN LENGTH.
Now lift off the REFLECTOR and find the rough center by
balancing it across finger. Push on a black button
insulator to about 1/2” from center. Insert the element
through the holes at the rear of the boom and install the
second button. IF THE ELEMENT IS LOOSE IN THE
BUTTONS, SQUEEZE THE SMALL END OF EACH
BUTTON SLIGHTLY WITH PLIERS UNTIL IT OFFERS
SIGNIFICANT RESISTANCE WHEN THE ELEMENT IS
INSERTED. THIS WILL HELP TO HOLD THE ELEMENT
IN POSITION DURING SUBSEQUENT OPERATIONS.
Install the 3/16” rod DRIVEN ELEMENT as you did the
reflector. Then continue with the installation of the
DIRECTORS. Note that the Director Elements may not
consistently diminish in length from rear to front, so
pay close attention to length and position.
3. Now begin centering the elements. Use a tape measure to EQUALIZE the amount the element
sticking out on each side of the boom. Once all are centered, sight down the antenna from the rear
and compare tip symmetry. Look for any
obvious discrepancies and correct if found.
4. Stainless steel SHAFT RETAINERS are used
for securing the elements and insulators.
Always use retainers for permanent and long
term antenna installations. For most portable or
temporary use, the button insulators are
satisfactory and the retainers may be left off.
5. Use thumb and index finger to hold a Shaft
Retainer over end of the 3/8 x 3” push tube
(internal fingers dished into tube). Hold the
element firmly and start the keeper onto the rod
by applying pressure with the push tube. Push
the Shaft Retainer down element until tight against the button insulator (Locking pliers, lightly
clamped up against opposite button insulator will help maintain center reference and keep you from
pushing the first Shaft Retainer too far). Repeat for the opposite side. Continue installing Shaft
Retainers until all elements are locked in place.
6. Mount the DRIVEN ELEMENT FEED BLOCKS to the boom using a single 8-32 screw 1-1/4" long.
Orient with feed and balun connectors as shown on the Dimension Sheet or use OPTIONAL
POLARITY SWITCHING driven element. The ‘T’ block mounts behind the rear driven element.
MASKINGTAPE
OREQUIVALENT
FACEUP
ELEMENTPREPARATION
REFLECTOR
ELEPREP
M.STAAL
5-24-05
FRONTDIRECTOR
400CP30A ASSEMBLY MANUAL
7. Generally the balun is installed in one long loop. Attach balun to the block connectors and tighten
gently using a 7/16" end wrench. Form the balun coax close to the boom and secure with cable ties
(snug but not crushing or kinking the coax).
8. Install the 8-32 x 1/4” set screws (internal Allen head - tool supplied) into the SHORTING BARS.
Slide the bars onto the 3/16” rod driven element tips and the 1/4" Feed Block Rods. Position the
Shorting Bars as specified on the DIMENSION SHEET: the distance given is between the outer
face of the Feed Block and the inner face of the Shorting Bar. Align the bars and rods with each
other and tighten the sets crews. NOTE: the shorting bar dimensions are different on the
OPTIONAL circular switched driven element.
9. Now attach all the cables. The two medium length cables are the 1/2 wave baluns. The long coax
cable goes to the front driven element. And the short cable goes to the rear driven element. Tighten
the connectors lightly with a 7/16” end wrench.
REMEMBER CENTER MOUNTED ANTENNA MUST BE PLACE ON A FIBERGLASS OR OTHER
STRONG, NON CONDUCTIVE MAST AND THE FEEDLINES MUST RUN OFF THE REAR OF
THE ANTENNA. THIS PREVENTS THE CIRCULAR FIELD OF THE ANTENNA FROM BEING
DISTORTED BY A METALIC MAST OR METALIC FEEDLINE.
10. For center mounted antennas, the boom to mast plate is normally mounted as close as possible to
the balance point (with feedline or a temporary equivalent attached). For rear mounted antennas,
use the boom length provided behind the reflector element. Keep mounting plate at least 1" from
any element. Secure plate with two U-bolts and the stainless nuts and lock washers provided. DO
NOT OVER TIGHTEN. Additional U-bolts and stainless nuts / lock washers are provided for
mounting the antenna to your mast. THIS COMPLETES THE ANTENNA ASSEMBLY.
11. For optimum performance, mount antenna high and in the clear. Always use high quality coax and
connectors. Old, corroded, or poor quality materials can SERIOUSLY affect VSWR, gain, and
pattern. If possible, test the antenna, connectors and feedline BEFORE installation. At 6' in height,
the antenna will exhibit performance approaching the specifications. If it doesn't, check feedline
and connectors for continuity and shorts. Check antenna shorting bars, element placement and
length, against Dimension Sheet.
12. MOUNTING AND STACKING INFORMATION
Rear mounted antennas can generally be mounted in any polarization to any type of mast,
conductive or non-conductive.
Center mounted antennas can also be mounted in any polarity. However, a mast or crossboom
in-line (parallel) with the element plane must be non-conductive. Anything conductive in the
element plane will disrupt the pattern and reduce performance (even the feedline). When a non-
conductive mast or crossboom is in-line with elements, route feedline away at right angles to the
elements and reattach at least 6" beyond element tips. Fiberglass is the recommended material for
a non-conductive mast or crossboom because of it's strength and weather resistance.
Stacking: See the Dimension Sheet for stacking separation dimensions.
1. All driven element blocks MUST be oriented to the same side of boom.
2. All boom-to-mast plates MUST be mounted at the same point on the boom.
3. Feed / phasing lines MUST be of equal electrical length or, ideally, multiples of 1 wavelength in
order to maintain equal phasing in the array.
M2 ANTENNA SYSTEMS, INC.
4402 N. Selland AVE., FRESNO, CA 93722
(559) 432-8873 FAX: 432-3059
www.m2inc.com Email: [email protected]
400CP30A ASSEMBLY MANUAL
400CP30A DIMENSION SHEET
NOTE:
RIGHT HAND CIRCULARITY SHOWN
400CP30A CP SWITCH DIMENSION SHEET
NOTE:
RIGHT HAND CIRCULARITY SHOWN
400CP30A DRIVEN ELEMENT CABLE ROUTES
D.E. BALUN
PHAS LINE
1/4 WAVE
PHASE LINE
3/4 WAVE
JUNCTION BLOCK
SCREW, 8-32 X 1-1/4”
D.E. BLOCK
D.E. BALUN
D.E. BLOCK
SCREW, 8-32 X 1-1/4”,SS
D.E. BALUN
PS DRIVEN
ELEMENT BLOK
PHASE LINE
3/4 WAVE
JUNCTION BLOCK
SCREW, 8-32 X 1-1/4”
PHASE LINE
1/4 WAVE
D.E. BALUN
D.E. BLOCK
SCREW, 8-32 X 1-1/4”,SS
400CP30A POLARITY SWITCH CABLE ROUTES
DESCRIPTION................................................................ QTY
BOOM SECTION #1, 1.0 X .058 X 60" SOE .................. 1
BOOM SECTION #2, 1.0 X .058 X 58" SOE .................. 1
BOOM SECTION #3, 1.0 X .058 X 28.75" ...................... 1
BOOM-TO-MAST PLATE, 3 X 4 X 1/8”(M2APT0019).... 1
ELEMENT SET , 3/16” X SEE DIM” SHEET .................. 1
DRIVEN ELEMENT ASSEMBLY, .................................. 2
JUNCTION BLOCK ASSEMBLY (SADE0065)............... 1
BALUN CABLE , 1/2 WAVE RG-6U ............................... 2
PHASE LINE, LONG, 3/4 WAVE RG-6U........................ 1
PHASE LING, SHORT, 1/4 WAVE RG-6U ..................... 1
U-BOLT AND CRADLE, 2" ............................................. 2
U-BOLT, 1-1/2" ............................................................... 2
U-BOLT 1” , NO CRADLE............................................... 2
ASSEMBLY MANUAL..................................................... 1
IN HARDWARE BAG:
SHORTING BAR, 1/8 AND 3/16 HOLES......................... 4
BUTTON INSULATORS ................................................... 60
SHAFT RETAINER, (KEEPER) SS .................................. 60
NUT, 5/16-18 SS............................................................... 4
LOCKWASHER, 5/16 SS.................................................. 4
NUT, 1/4-20, SS................................................................ 4
LOCK WASHER, 1/4” SPLIT RING , SS .......................... 4
SCREW, 8-32 X 1-1/4 SS ................................................. 7
SET SCREW, 8-32 X 1/4, SS ........................................... 8
LOCKNUT, 8-32 SS.......................................................... 4
CABLE TIE, NYLON ........................................................ 4
ALLEN HEAD WRENCH, 5/64” ........................................ 1
PUSH TUBE, 3/8 X 3” ....................................................... 1
OPTIONAL CIRCULARITY SWITCH PART LIST
DESCRIPTION QTY
INTEGRAL DRIVEN ELEMENT AND SWITCH ASSEMBLY 1
SCREW, 8-32 X 1-1/4” , SS 2
M2 ANTENNA SYSTEMS, INC.
4402 N. SELLAND AVE.
FRESNO, CA 93722
(559) 432-8873 FAX: 432-3059
www.m2inc.com Email: [email protected]
400CP30A PARTS & HARDWARE
400CP30A (ASSEMBLED) PARTS & HARDWARE
DESCRIPTION ................................................................………..QTY
BOOM SECTION #1, 1.0 X .058 X 60" (ASSEMBLY)……………..1
BOOM SECTION #2, 1.0 X .058 X 58" SOE (ASSEMBLY)……….1
BOOM SECTION #3, 1.0 X .058 X 28.75" (ASSEMBLY)………….1
BOOM-TO-MAST PLATE, 3 X 4 X 1/8”(M2APT0019) ....………….1
U-BOLT AND CRADLE, 2"..............................................………….2
U-BOLT, 1-1/2" ................................................................………….2
U-BOLT 1”, (NO CRADLE)..............................................………….2
ZINC PASTE ...................................................................………….1
ASSEMBLY MANUAL .....................................................………….1
IN HARDWARE BAG:
NUT, 5/16-18 SS ...............................................................………...4
LOCKWASHER, 5/16 SS ..................................................………...4
NUT, 1/4-20, SS ................................................................………...4
LOCK WASHER, 1/4” SPLIT RING , SS...........................………...4
SCREW, 8-32 X 1-1/4 SS..................................................………...4
LOCKNUT, 8-32 SS ..........................................................………...4
ALLEN HEAD WRENCH, 5/64”.........................................………...1
PUSH TUBE, 3/8 X 3” .......................................................…………1
M2 ANTENNA SYSTEMS, INC.
4402 N. SELLAND AVE.
FRESNO, CA 93722
(559) 432-8873 FAX: 432-3059
www.m2inc.com Email: [email protected]

Other M2 Antenna Systems Antenna manuals
M2 Antenna Systems FD35.5 User manual

M2 Antenna Systems

M2 Antenna Systems FD35.5 User manual

M2 Antenna Systems 222 HO LOOP User manual

M2 Antenna Systems

M2 Antenna Systems 222 HO LOOP User manual

M2 Antenna Systems 406-6SX User manual

M2 Antenna Systems

M2 Antenna Systems 406-6SX User manual

M2 Antenna Systems 6M5XHP User manual

M2 Antenna Systems

M2 Antenna Systems 6M5XHP User manual

M2 Antenna Systems 6M6LN User manual

M2 Antenna Systems

M2 Antenna Systems 6M6LN User manual

M2 Antenna Systems FG170-230-5 User manual

M2 Antenna Systems

M2 Antenna Systems FG170-230-5 User manual

M2 Antenna Systems 902-14WLC User manual

M2 Antenna Systems

M2 Antenna Systems 902-14WLC User manual

M2 Antenna Systems 440-6SX User manual

M2 Antenna Systems

M2 Antenna Systems 440-6SX User manual

M2 Antenna Systems 915XBISP User manual

M2 Antenna Systems

M2 Antenna Systems 915XBISP User manual

M2 Antenna Systems 2M8WL User manual

M2 Antenna Systems

M2 Antenna Systems 2M8WL User manual

M2 Antenna Systems 6M3 User manual

M2 Antenna Systems

M2 Antenna Systems 6M3 User manual

M2 Antenna Systems 146CP8 User manual

M2 Antenna Systems

M2 Antenna Systems 146CP8 User manual

M2 Antenna Systems 440-460-11HD User manual

M2 Antenna Systems

M2 Antenna Systems 440-460-11HD User manual

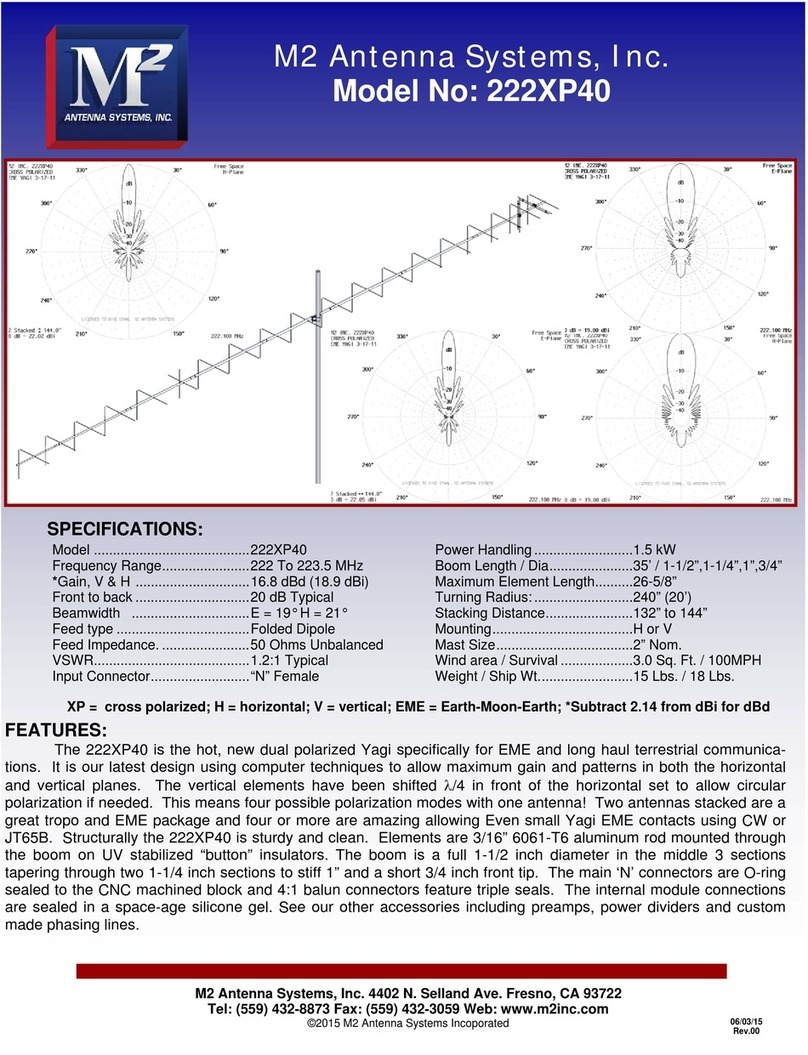
M2 Antenna Systems 222XP40 User manual
M2 Antenna Systems

M2 Antenna Systems 222XP40 User manual

M2 Antenna Systems 10M4DX User manual

M2 Antenna Systems

M2 Antenna Systems 10M4DX User manual

M2 Antenna Systems 222XP30 User manual

M2 Antenna Systems

M2 Antenna Systems 222XP30 User manual

M2 Antenna Systems 40M1L User manual

M2 Antenna Systems

M2 Antenna Systems 40M1L User manual

M2 Antenna Systems 436CP30 User manual

M2 Antenna Systems

M2 Antenna Systems 436CP30 User manual

M2 Antenna Systems 450-800-12 User manual

M2 Antenna Systems

M2 Antenna Systems 450-800-12 User manual

M2 Antenna Systems 20M4DX User manual

M2 Antenna Systems

M2 Antenna Systems 20M4DX User manual

M2 Antenna Systems 348CP18 User manual

M2 Antenna Systems

M2 Antenna Systems 348CP18 User manual

M2 Antenna Systems 2M-440XPSS User manual
M2 Antenna Systems

M2 Antenna Systems 2M-440XPSS User manual

M2 Antenna Systems EB-144/RK2M User manual

M2 Antenna Systems

M2 Antenna Systems EB-144/RK2M User manual

M2 Antenna Systems 30M3-125 User manual

M2 Antenna Systems

M2 Antenna Systems 30M3-125 User manual

Popular Antenna manuals by other brands

CUSHCRAFT X740 Assembly & installation

CUSHCRAFT

CUSHCRAFT X740 Assembly & installation

TRENDnet TEW-AI75OB - 11a/g 7/5dBi Indoor Omni Directional... Lühike paigaldusjuhend

TRENDnet

TRENDnet TEW-AI75OB - 11a/g 7/5dBi Indoor Omni Directional... Lühike paigaldusjuhend

Hawking HAI15SC Specifications

Hawking

Hawking HAI15SC Specifications

Steren ANT-9004 instruction manual

Steren

Steren ANT-9004 instruction manual

LEAX 903-CIS0163-B installation instructions

LEAX

LEAX 903-CIS0163-B installation instructions

Maco Antennas FLAT 8 Assembly instructions

Maco Antennas

Maco Antennas FLAT 8 Assembly instructions

Shure PSM PA821SWB user guide

Shure

Shure PSM PA821SWB user guide

RFI CSA20-41-DIN Installation

RFI

RFI CSA20-41-DIN Installation

Linksys HGA9N user guide

Linksys

Linksys HGA9N user guide

KVH Industries TracPhone V30 Installation Addendum

KVH Industries

KVH Industries TracPhone V30 Installation Addendum

ETS-Lindgren 3148B user manual

ETS-Lindgren

ETS-Lindgren 3148B user manual

MFJ MFJ-1796 instruction manual

MFJ

MFJ MFJ-1796 instruction manual

Directive Systems & Engineering DSE1245LY manual

Directive Systems & Engineering

Directive Systems & Engineering DSE1245LY manual

RF Elements CC Series manual

RF Elements

RF Elements CC Series manual

Fractus Antennas NN03-320 user manual

Fractus Antennas

Fractus Antennas NN03-320 user manual

RF Elements StarterDish UM manual

RF Elements

RF Elements StarterDish UM manual

RCA ANT301F user guide

RCA

RCA ANT301F user guide

Mohu Flow + 60 instruction manual

Mohu

Mohu Flow + 60 instruction manual

manuals.online logo
manuals.online logoBrands
  • About & Mission
  • Contact us
  • Privacy Policy
  • Terms and Conditions

Copyright 2025 Manuals.Online. All Rights Reserved.