Mahindra BBLST5 User manual

1
READ&FOLLOWALLSAFETYRULES&INSTRUCTIONSBEFORE
OPERATINGYOUREQUIPMENT
107791-EN R-04062015
*ASSEMBLY *REPAIRPARTS
*OPERATION *MAINTENANCE
01077910

2

3
TABLEOFCONTENTS
INTRODUCTION ...................................................................................................................................................... 1
SAFETYPRECAUTIONS ........................................................................................................................................ 2
SAFETYDECALS .................................................................................................................................................... 4
ASSEMBLY
Assemblyinstructions ................................................................................................................................. 5
Step1 Hitchassembly ............................................................................................................................. 6
Step2 3pointhookup .............................................................................................................................. 7
ADJUSTMENTS ....................................................................................................................................................... 9
OPERATION ......................................................................................................................................................... 11
TRANSPORT ......................................................................................................................................................... 14
MAINTENANCE&STORAGE ................................................................................................................................. 15
PARTSBREAKDOWNANDPARTSLIST
RearBladeStandardduty5’ ........................................................................................................................ 16
RearBladeStandardduty6’ ........................................................................................................................ 19
RearBladeStandardduty7’ ........................................................................................................................ 21
TORQUESPECIFICATIONTABLE ........................................................................................................................ 23
PAGE

1
INTRODUCTION
TO THE PURCHASER
This new accessory was carefully designed to give years of dependable service. This manual has been provided to
assist in the safe operation and servicing of your attachment.
NOTE:
All photographs and illustrations in the manual may not necessarily depict the actual models or attachment, but
are intended for reference only and are based on the latest product information available at the time of publication.
Familiarize yourself fully with the safety recommendations
and operating procedures before putting the machine to
use. Carefully read, understand and follow these recommendations and insist that they be followed by those who will
use this attachment.
THIS SAFETY ALERT SYMBOL IDENTIFIES AN IMPORTANT SAFETY MESSAGE IN THIS
MANUAL THAT HELPS YOU AND OTHERS AVOID PERSONAL INJURY OR EVEN DEATH.
DANGER, WARNING, AND CAUTION ARE SIGNAL WORDS USED TO IDENTIFY THE LEVEL OF
HAZARD. HOWEVER, REGARDLESS OF THE HAZARD, BE EXTREMELY CAREFUL.
DANGER:
Signals an extreme hazard that will cause serious injury or death if recommended precautions
are not followed.
WARNING:
Signals a hazard that may cause serious injury or death if the recommended precautions are
not followed.
CAUTION:
Signals a hazard that may cause minor or moderate injury if the recommended precautions are
not followed.
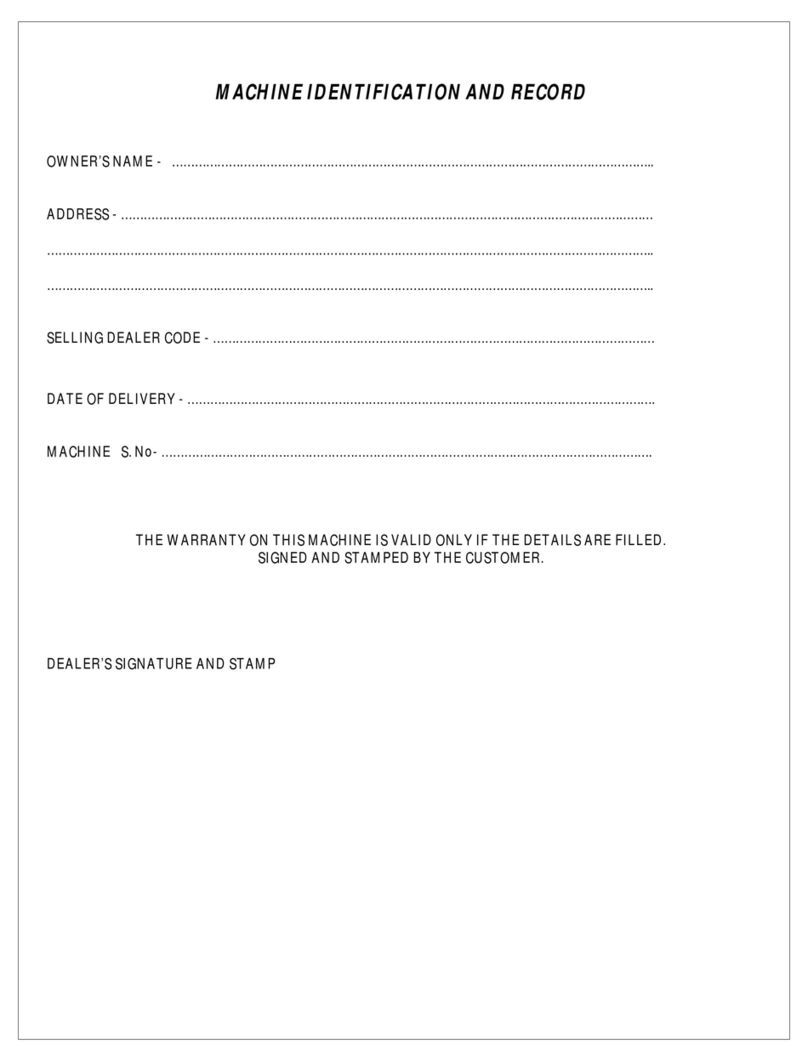
Record your attachment serial number and purchase date in the section reserved below (there is no serial number on
the subframe). Your dealer requires this information to give you prompt, effi
cient service when ordering replacement
parts. Use only genuine parts when replacements are required.
If warranty repairs are required please present this registration booklet and original sales invoice to your selling dealer
for warranty service.
This manual should be kept for future reference.
Please check if you have received all the parts for your kit with the list of the
bag and the list of the box.
SERIAL NUMBER : ___________________________
(IF APPLICABLE)
MODEL NUMBER: ___________________________
PURCHASE DATE : ___________________________

2
SAFETYPRECAUTIONS

3
SAFETYPRECAUTIONS

4
SAFETYLABELS
REPLACEIFDECALSAREDAMAGED
FORDECALLOCATIONSEEPARTLIST
DECAL#107650

5
ASSEMBLY
ASSEMBLYINSTRUCTIONS
IMPORTANT:UNLESSOTHERWISESPECIFIEDTORQUEALLBOLTSACCORDINGTOTORQUESPECI-
FICATIONTABLE(SEETABLEOFCONTENTS)WHENSTATED:TIGHTENFIRMLY.REFERTOPARTS
BREAKDOWNSECTIONFORPARTIDENTIFICATION.
Overallview
NOTE:Inthismanual,therightandleftsideisdeterminedbeingseatedonthedriver’sseatfacingforward.
RemovetheRearbladefromtheshippingcrate.
TRACTORREQUIREMENTS
Therearbladewasdesignedfora3-pointcategory1hitch.Fortractorswithhorsepowerupto40HP.

6
ASSEMBLY
STEP1
BLADEASSEMBLY
Insert blade pivot (item 1) through pivot hole in main
frame(item2).
Secure the blade pivot into the main frame using a
nyloninsertlocknut1-1/8”(item3)
Screwuntil verticalplay is removedfrom pivot shaft.
Hint : screw until blade cannot rotate freely then
unscrew 1/8 turn or until the blade is able to rotate
freely.
Line up turntable holes in blade assembly (item 4)
andmainframeassemblyandinsertlockpin(item5).
Thensecurelockpinwithcotterpin(item6).
Lower parking stand (item 7) by pulling the lock pin
(item8)inholeB.
DANGER
TOPREVENTINJURIES:
Rear Blade components are very heavy and can
injureapersonshouldtheysuddenlyfallfromalifting
device or improvised supports. Always make certain
components are properly secured before lifting and
properly supported on the ground before removing
liftingdevice.Alwayskeepfeetandotherextremities
clearofareaswherecomponentscanfall.
Installthepin(item1)onbothsideofthebladeusing
lockwasher(item2)andnut(item3)asillustrated.

7
ASSEMBLY
STEP2
3POINTHOOKUP
IMPORTANT:
A3pointcategory1hitchisrequired.
Thelowerarmsofthe3pointhitchmustbestabilized
topreventsidetosidemovement.Mosttractorshave
swayblocksoradjustablechainsforthispurpose.
Slowly back up the tractor to the implement and use
thetractor’s3pointhydrauliccontrol.
Returntothetractorandoperatethetractor’s3-point
hydraulic control up until the blade comes off the
ground.
Lifttheparkingstand.
Returntothetractorandslowlyoperatethetractor’s3
-point hydraulic control up and down to check for
clearancebetweentires,framedrawbar,etc.
Move or removethe draw bar if it interfereswith the
implement.
DANGER
TOPREVENTINJURIES:
Hooking up equipment to the tractor is dangerous
and can result in serious injury or death. Do not
allow anyone to stand between the tractor and the
implement while backing up to the equipment. Do
not operate hydraulic 3-point lift controls while
someone is directly behind tractor or near the
implement.
WARNING
TOPREVENTINJURIES:
Parkthevehicleonaflatsurfaceinawellventilated
area.
DisengagetheP.T.O.
Applyparkingbrake.
Stoptheengineandremovetheignitionkey.
Wait until all moving parts have stopped before
leavingthedriver’sseat.
Attachtractor’slowerarms(item1) onthepins(item
2)andsecurewithlynchpins(item3)
Connect top center link (item 4) to the upper hitch
usingapinandhairpin(item5)asshowninfigure.
DANGER
TOPREVENTINJURIES:
Alwayscheckallhardwarefortightnessbeforeusing
or working around the blade.Themoldboard willfall
offifbladepivotnutismissing.

8
LEVELINGTHEREARBLADE
Manually adjust one of the two lower lift arms up or
downtoleveltheimplementfromlefttoright.
Manually adjustthelengthofthetop-link tolevel the
implementfromfronttorear.
Ensurethatthelowerliftarmsareblockedtoprevent
excessivemovement.
CHECKINTERFERENCE
If required, offset blade to desired setting. Refer to
“Blade Offset” in the Adjustment section for
instructions.
Ifrequired,tiltendofbladetodesiredsetting.Referto
“BladeTilt”intheAdjustmentsectionforinstructions
Raisebladeoffthegroundandanglebladeasfaras
possibletowardstherightreartractortire.Referto
“Blade Angling” in the Adjustment section for
instructions.
Returntothetractorandslowlyraise3-pointliftarms
fullyupanddowntomakesurebladedoesnotmake
contact with tractor tire, drawbar, and any other
equipmentonthetractor.
-Moveorremovedrawbarifitinterfereswithblade.
-Settractorcontrolleverstoptorestrictliftingheightif
bladeinterfereswithtractortire.
Dothesame,butanglebladeasfaras
possibletowardstheleftreartractortire.
ASSEMBLY

9
ADJUSTMENTS
There are 5adjustments that can be made manually
totheblade.Theyarebladeoffset,angling,reversing,
tilt,andpitch.
IMPORTANT:
The Rear Blade must be hitched to a tractor and
raised off the ground several inches to make the
followingadjustments.
BLADEADJUSTMENTS
BladeOffset:
Theblademaybeoffsetrightorleft12".
Unboltmoldboard(item1)fromblademount(item2).
Usingalternativeholesinthemoldboard,reattach
moldboardtoblademountwith1/2"-13x11/4"GR5
carriagebolts(item3),flatwashers(item4),andhex
nuts(item5).Tightenhexnutstothecorrecttorque.
CAUTION
TOPREVENTINJURIES:
Do not come in contact with turntables or stick
objectsintotheturntableholeswhileadjustingblade
offset or angling. Doing so can pinchor shear body
extremitiesandobjects.
DANGER
TOPREVENTINJURIES:
Alwayscheckallhardwarefortightnessbeforeusing
orworkingaroundtheblade.Makesuremoldboardis
securedwithnyloninsertlocknut
CAUTION
TOPREVENTINJURIES:
Neverangle,tilt,oroffsetbladeintotractortires.This
candamagebladeandtractortires.
BladeAngling:
Holesareprovidedforanglingthebladeoneachside
ofcenterin15°incrementsupto45°.
Pullpin(item1)androtateblade(item2).
Whenbladeisatdesiredangle,reinsertpin.
DANGER
TOPREVENTINJURIES:
Always support underside of Rear Blade with solid
blocking before working beneath unit. Never work
underequipmentsupportedbyhydraulics.Hydraulics
candropequipmentinstantlyifcontrolsareactuated
evenwhenpowertohydraulicsisshutoff.
DANGER
TOPREVENTINJURIES:
Always keep your feetand/or legs out from under the
bladewhileadjustingit.Itispossibleforthebladetofall
causinginjurytoyourfeetand/orlegs.

10
ADJUSTMENTS
BladeReversing:
NOTE:
Rotate blade 180 degrees before using it in reverse
direction. Blade must be hooked to a tractor and
parkingstanduptoreverseblade.
Holes are provided for angling the blade in reverse
positiontoeachsideofcenterin15°incrementsupto
45°.
Pull pin (item 1) and rotate blade (item 2) around
180°.
Whenbladeisatdesiredangle,reinsertpin.
BladeTilt
The blade may be tilted for ditching so one end is
lower than the other by adjusting the tractor’s lower
linklevelingcrank.
BladePitch
Blade pitch can be adjusted by lengthening or
shortening the tractor’s top center 3-point link.
Increasing blade pitch will increase blade’s ability to
dig.
Lengthen center 3-point link to increase blade pitch
when grading whiletraveling forward.Shortencenter
3-pointlinktodecreasebladepitch.
The opposite is true if backfilling. Shorten center 3-
pointlinktoincreasebladepitchandlengthencenter
3-pointlinktodecreasebladepitch.
To help protect the Rear Blade from becoming
damagedwhilebackfilling,lengthentractor’scenter3-
pointlinkuntilthe blademovesacrossthetopofthe
groundwithoutforcingitselfintothesoil.
WARNING
TOPREVENTINJURIES:
Donotaltertherearblade.Alteringthebladecanaffect
its performance and reliability causing damage to the
blade, tractor and/or injury. Always replace damaged
partswithoriginalmanufacturerparts.

11
OPERATION
DANGER
TOPREVENTINJURIES:
Always support underside of Rear Blade with solid
blocking before working beneath unit. Never work
underequipmentsupportedbyhydraulics.Hydraulics
candropequipmentinstantlyifcontrolsareactuated
evenwhenpowertohydraulicsisshutoff.
DANGER
TOPREVENTINJURIES:
Never allow riders including children on the tractor or
therear blade. Theycan falland be ranover causing
seriousinjuryordeath.
WARNING
TOPREVENTINJURIES:
It is the operator’s responsibility not to allow anyone
neartherearbladeduringit’soperation.
DANGER
TOPREVENTINJURIES:
Always keep your feetand/or legs out from under the
bladewhileadjustingit.Itispossibleforthebladetofall
causinginjurytoyourfeetand/orlegs.
CAUTION
TOPREVENTINJURIES:
Be sure you are not working over any underground
wiring,pipesorotherobstructions.Ifthereisanydoubt,
callyourlocalutilityservicessotheymaydeterminethe
locationtoanyundergroundutilitiesinthearea.Besure
to ask how close you can work to the marks or flags
theypositioned.
DANGER
TOPREVENTINJURIES:
Alwayscheckallhardwarefortightnessbeforeusing
or working around the blade.Themoldboard willfall
offifbladepivotboltorbladetiltnutsaremissing.
DANGER
TOPREVENTINJURIES:
Always keep a safe distance from obstructions. The
bladecanextendbeyondtractortiresandwillmakea
wideswingingpatternwhenturning.Neverhitasolid
object with blade as this can damage property and
cause tractor to pivot violently resulting in loss of
control,seriousinjury,ordeath.
WARNING
TOPREVENTINJURIES:
Use the rear blade for it’s intended purpose only. Do
not use Rear Blade for pulling objects out of the
ground,liftingobjects,carryingobjects,pushingother
equipment, or towing other equipment. Any of the
above can result in Rear Blade damage, serious
bodilyinjuryordeath
CAUTION
TOPREVENTINJURIES:
Make certain parking stand is properly pinned with
wire retaining pin. If not pinned properly, the Rear
Bladecanfallcausingseriousinjury.
CAUTION
TOPREVENTINJURIES:
Neverangle,tilt,oroffsetbladeintotractortires.This
candamagebladeandtractortires.
WARNING
TOPREVENTINJURIES:
Operate blade only from a tractor equipped with a
ROPSintheraisedpositionorwithaROPScaband
withseatbeltsecurelyfastened.
Hazard control and accident prevention are
dependent upon the awareness, concern, prudence,
and proper training involved in the operation,
transport, storage, and maintenance of the blade.
Therefore, It is absolutely essential that no one
operates the Rear Blade without first having read,
fully understood,and become totally familiar withthe
Operator’sManual.
WARNING
TOPREVENTINJURIES:
Do not allow anyoneto operate therear blade who is
undertheageof16orhasnotbeenproperlytrainedin
safeoperation.Allowingsomeonewhoistoo youngor
not properly trained to operate the rear blade could
result in damage to the blade, serious bodily injury or
death.

12
OPERATION
IMPORTANT: Do not hitch Rear Blade to a tractor
rated outside the recommended horsepower range.
Doingsocanbendand/orbreaktheblade.
IMPORTANT: Be careful when working areas where
obstructions can be hidden. Always check the area
beforeworkingitandmarkanypotentialhazardswith
a visible flag. Travel slowly through high risk areas
and always be prepared to stop immediately should
theblademakecontactwithasolidobject.
BasicOperatingInstructions
Thoroughly inspect the work area for buried utility
cables, pipelines, sprinkler heads, and any
unforeseenobjects.Markanypotentialhazards.
Placegradestakesifyouintendtodevelopaspecific
gradeorsoillevel.
Adjust blade to the desired angle, tilt, and offset
positionbeforeloweringbladetotheground.
Lower blade to theground and proceed forward ata
speedofnomorethan2to4mph.Thebladeshould
immediatelybeginshavingthesoilsurface.
Set tractor’s draft-link height control lever to the
desiredgradeposition.Ifbladeissetata90degree
angletothedirectionoftravel,itmaybenecessaryto
raisethebladeslightlysothatdirtandgravelcanflow
outevenlyunderthebladeasitshavesoffhighspots
andfillsinpotholesordepressions.
InspectionAfterHook-Up
Make the following inspections after attaching the
RearBladetothetractor:
Inspecttractor safetyequipmenttomakesureitisin
goodworkingcondition.
Make sure all blade components are properly
lubricated.See“LubricationPoints”.
Check clearances between blade and tractor
throughout the range of all blade motions. See
“CheckInterferences”fordetailedinstructions.
UnhookingtheRearBlade
Un-hookRearBladefromthetractorasfollows:
Parkonalevelsolidhardsurface.Placetractorgear
selectorinparkandsetparkbrake.
Lowerparkingjackandsecurewithhitchpin.
Lower blade and parking stand onto level ground or
ontoblockssupportingtheunitjustaboveground.
Shuttractorengineoffandremovekey.
If needed, adjust length of upper center 3-point link
untilhitchpincanberemovedfromhitchframe.
Removelinchpinsfromlowerhitchpinsandpullhitch
pinsout.
Movelower3-pointarmsoutofthewayandreinstall
hitch pins, linchpins, and hairpin cotters in the Rear
Bladehitchframeforstorage.
Refer to“LongTerm Storage” when storing theRear
Bladeforalongtime.
RearBladeFunctions
IMPORTANT: The warranty shall not apply to
damage caused by misuse, abuse, or contact with
obstructions.
NOTE:Placegradestakesifyouintendtodevelopa
specificgradeorsoillevel.
Grading
Pivot moldboard to the desired angle, lower blade to
the ground, and set the tractor’s draft-link height
control tothe desired position. Proceed forward ata
speedofnomorethan2to4mph.Thebladeshould
immediatelybeginshavingthesurface.
A blade full of material can be raised slightlyso that
the material can flow out evenly under the blade to
effectivelyshave offhighspotsandfillin potholesor
depressions.
Loose soilcanbe smoothed out by pushing the soil
withthebackofthemoldboardwhilebacking-up.
Make sure Rear Blade does not block tractor’s Slow
Moving Vehicle (SMV) sign while transporting on a
road.InstallaSMVsignontheRearBladeiftractor’s
SMVsignisblocked.
Traffic not alerted to a slow moving tractor might hit
thetractorcausingseriousinjuryordeath.

13
OPERATION
EdgeWork:
If blade is wide enough, material close to fences,
buildings, and other obstructions can be graded by
offsettingthemoldboardtotherightorleftbeyondthe
tractortire.Makecertaintheendofthebladeisoffset
farenoughtobevisibletotheoperator.Alwayskeep
a safe distance away formobstructions, drive slowly
when passing by them,and stay clear of them when
turning. Always be aware that the blade will make a
wide swinging pattern in aturn and always be ready
tostop immediately.Neverhitan obstruction as this
candamagethebladeand/ortheobstruction.
DitchWork
Fill ditchesbyoffsettingthe blade beyondthe tractor
wheel to keep the tractor out of the ditch. Angle the
bladetomovethedirttowardandintotheditchwhile
traveling forward. Set blade depth as needed (see
GradingInstructions)whensettingthebladedepth.
Backfilling:
Backfilling is a process where the operator turns the
blade around 180⁰ and pushes the product while
backing-up. Be careful not to overstress the Rear
Blade while backfilling as load forces on the blade
andframeincreasewhenbackingup.Tohelpprotect
the rear blade from damage, lengthen the tractor’s
centertoplinkuntilthebladewillmoveacrossthetop
ofthegroundwithoutforcingitselfintothesoil,adjust
theoffsettobestraightbehindthetractorandsetthe
blade angle at 90⁰ (perpendicular to the mainframe).
Keep the load in the center of the blade and not on
theendoftheblade.Don’tramaloadwiththeblade
andalwaysoperateatslowspeedswhenbacking-up.
Be ready to stop immediately if a solid object is hit.
Removing snow while backing-up is especially
dangerous as snow can hide solid objects andthere
isatendencytodrivetoofasttogetthesnowremoval
jobdone.Highspeedsmultiplytheforcesexertedon
therearblade.

14
DANGER
TOPREVENTINJURIES:
When traveling on public roads, use accessory lights,
SMVsign,cleanreflectorsandotheradequatedevices
to warn operators in other vehicles of your presence.
Always comply with all federal, state, provincial and
locallaws.
Watch out for fences, trees, rocks, wires while
operatingandtransportingtheattachment.
Turning the tractor too tight may cause hitched
accessories to ride up on the wheels. This could
resultininjuryand/orequipmentdamage.
TRANSPORTATION
DANGER
TOPREVENTINJURIES:
Always keep a safe distance from obstructions. The
bladecan extend beyondtractor tires and willmake a
wide swinging pattern when turning. Never hit a solid
object with blade as this can damage property and
cause tractor to pivot violently resulting in loss of
control,seriousinjuryordeath.
DANGER
TOPREVENTINJURIES:
Make sure Rear Blade does not block tractor’s Slow
Moving Vehicle (SMV) sign while transporting on a
road. Install a SMV on the rear blade iftractor’s SMV
sign is blocked. Traffic not alerted to a slow moving
tractor might hit the tractor causing serious injury or
death.
WARNING
TOPREVENTINJURIES:
Transport with rear blade centered behind the tractor.
An offset blade extends past the tractor farther and
carries a higher risk of hitting traffic and other
obstructionsthatcancauseseriousinjuryordeath.
Donotoperatetractorwithweakbrakesorworntires.
Transport on roadways with blade centered behind
thetractortominimizebladeoverhang.
Select a safe ground speed when transporting from
one area to another and be sure to reduce speed
whenturning.
When turning, leave enough clearance so the blade
does not contact obstacles such as buildings, trees,
orfences.
Whentravelingonroadways,transportinsuchaway
that faster moving vehicles may pass safely. A slow
moving vehicle sign should be properly displayed
whentravelingonpublicroadsorright-of-ways.
Slowdowniftravelingonawetslickroad.
Shift tolower gear when traveling overroughor hilly
terrainandwhengoingdownhill.

15
MAINTENANCE&STORAGE
ALWAYSPRACTICESAFEMAINTENANCE
Always understand the procedures before doing any
work. Use the proper tools and equipment, refer to
theOwner’smanualforadditionalinformation.
Alwaysworkinacleandryarea.
Lower the attachment to the ground, put tractor in
park,turnofftheengineandremovekeybeforedoing
anymaintenance.
Lettheaccessorycoolbeforedoinganyworkonit.
Disconnect the battery ground cable(-) before
servicing or adjusting electrical systems or before
weldingontheaccessory.
Do not grease or oil the accessory while it is in
operationunlessotherwisespecified.
Inspect all parts. Make sure parts are in good
condition&properlyinstalled.
Removeanybuild-upofgrease,oilordebris.
Remove all tools and unused parts from accessory
beforeoperating.
Properservicingandadjustmentsarethekeytolong
life of any accessory. With careful inspection and
routinemaintenanceyoucanavoidcostlyrepairsand
WARNING
TOPREVENTINJURIES:
Parkthevehicleonaflatsurfaceinawellventilated
area.
DisengagetheP.T.O.
Applyparkingbrake.
Stoptheengineandremovetheignitionkey.
Wait until all moving parts have stopped before
leavingthedriver’sseat.
LONGTERMSTORAGE
Clean, inspect, service and make necessary repairs
totherearbladewhenparkingitforlongperiodsand
when parking it at end of working season. This will
ensure that the blade is ready for use next time you
needit.
Cleanoffanydirtthatmayhaveaccumulatedonthe
rear blade and thoroughly wash surfaces with a
gardenhose.
Inspect blade forloose, damaged,orwornparts and
hardware. Adjust and tighten loose parts. When
needed replace parts with genuine manufacturer’s
parts.
Repaint parts where paint is worn or scratched to
preventrust.
Replacealldamagedormissingdecals.
LubricateasnotedunderLubricationPoints.
A coating of oil or grease may be applied to the
moldboardandbladetominimizeoxidation.
Store rear blade on a level surface in a clean dry
place. Inside storage will reduce maintenance and
makeforalongerlifespan.
DANGER
TOPREVENTINJURIES:
Always support underside of rear blade with solid
blockingbeforeworkingbeneathunit.Neverworkunder
equipment supported by hydraulics. Hydraulics can
drop equipment instantly if controls are actuated even
whenpowertohydraulicsisshutoff.
LUBRICATIONPOINTS
Greasethemoldboardandbladewhenstoringforan
extendedperiodoftime.
Typeoflubrication:Multi-purposegrease
Quantity:CoatGenerously
DANGER
TOPREVENTINJURIES:
Alwayscheckallhardwarefortightnessbeforeusing
or working around the blade.Themoldboard willfall
offifbladepivotnutismissing.

16
PARTSBREAKDOWN&PARTSLIST
BBLST5
BBLST5
BBLST5
BBLST5

17
This manual suits for next models
2
Table of contents
Other Mahindra Tractor Accessories manuals
Popular Tractor Accessories manuals by other brands

Original Tractor Cabs
Original Tractor Cabs 12244 Assembly instructions

Raven
Raven RS1 installation manual

Toro
Toro 08752 Operator's manual

Avantco
Avantco A37456 Operator's manual for Attachment

Avantco
Avantco Backhoe 260 Operator's manual for Attachment

Avantco
Avantco Dozer blade 1400 Operator's manual for Attachment