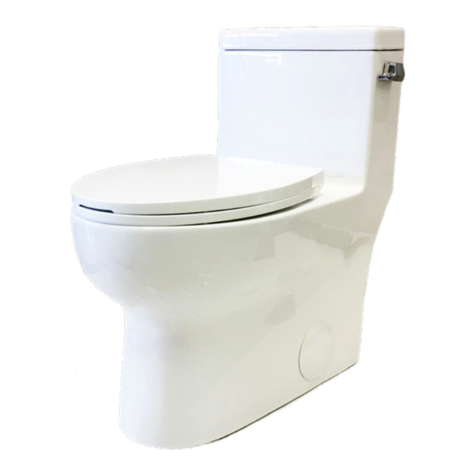
MAINLINE MLS10421 User manual

DUAL FLUSH
ROUND AND ELONGATED TOILETS
INSTALLATION INSTRUCTIONS
© 2022 rev 01/19/22
MLS10421
MLS10008, MLS10010, MLS10011
Tank
Bowl

HARDWARE NOT INCLUDED HARDWARE INCLUDED
Part
Description
Qty
Picture
AA Floor Bolt 2
BB Plastic Retaining
Washer 2
CC Wax Ring 1
DD Plastic Disc 2
EE Metal Washer 2
FF Nut 2
Part
Description
Qty
Picture
GG Bolt Cap 2
HH Metal Washer 4
II Rubber Washer 2
JJ Bolt 2
KK Hex Nut 4
LL Rubber
Sealing Gasket 1

Figure
1
WARNINGS AND CAUTIONS
•Handle with care. Vitreous chinaware is glass-like with sharp edges if broken. Do not drop,
handle roughly or overtighten bolts.
•Risk of hazardous gases. If new toilet is not installed immediately, temporarily plug floor flange
hole with a towel (or cover) to block sewer gases from escaping.
•Observe local plumbing and building codes.
PREPARATION
•Before beginning installation of product, make sure all parts are present. Compare parts with
package contents list and diagram above. If any part is missing or damaged, do not attempt to
assemble, install or operate the product. Contact customer service for replacement parts.
•Estimated Assembly Time: 60 minutes
•Tools Required for Assembly and Installation (not included): Toilet Water Supply Line,
Adjustable Wrench, Putty Knife, Flathead Screwdriver, Hacksaw, Carpenters Level.
ASSEMBLY INSTRUCTIONS
1. Remove Old Toilet
•Turn off water supply and flush tank completely. Towel or sponge remaining water from tank
and bowl.
•Disconnect and remove old water supply line.
•Remove tank from bowl by removing old tank-to-bowl hardware.
•Remove bowl from floor by removing bolt caps and floor bolt nuts.
•Remove floor bolts from toilet flange and clean old wax, putty and sealant from base area.
(Temporarily plug floor flange with a towel or cover to block sewer gases from escaping.)
•NOTE: MOUNTING SURFACE MUST BE CLEAN AND LEVEL BEFORE NEW TOILET IS
INSTALLED.
2. Install Floor Bolts (AA*), (Figure 1)
•Insert new floor bolts (AA*) into the toilet flange
(not included) with bolt heads down and threaded
ends facing up (use plastic retaining washers
(BB*) to hold bolts in full-length, upright position).
•Floor bolts (AA*) should be parallel to wall and 6
inches apart.
*AA, and BB not included.

3. Install Wax Ring (CC*), (Figure 2)
•Turn toilet bowl (B) upside down onto a towel or
cushioned surface. With the rounded (tapered)
end of the ring facing the toilet, place the wax ring
(CC*) around the raised outlet ring of the bowl (B),
and press firmly enough so the wax ring (CC*)
adheres to the bowl (B).
4. Position Toilet Bowl (B) on Toilet Flange, (Figure 3)
•Unplug waste opening in toilet flange. Gently place
toilet bowl (B) (right side up) in position with the
floor bolts (AA*) protruding up through the holes in
the base of the toilet bowl (B). Level toilet bowl (B)
as it is lowered onto the toilet flange.
•Once toilet bowl (B) is in position, press down with
a slight twisting motion on the top center of the
bowl (B); eventually applying full body weight to
evenly compress the wax ring (CC*), creating a
water-tight seal. (Do not rock the bowl
back-and-forth as this may break the seal.)
•Make sure the toilet bowl (B) is as level as
possible. It may be necessary to use small wedges
(shims) under the edge of the bowl due to slight
variations in vitreous chinaware or uneven floors.
(Toilet bowl (B) should be firmly seated on the
floor, so it does not wobble or rock.)
Figure 2
Figure 3
Figure
4
ASSEMBLY INSTRUCTIONS
5. Secure Bowl to Floor, (Figure 4)
•Place plastic disc (DD*) (Note: "THIS SIDE UP"),
metal washers (EE*) and nuts (FF*) on floor bolts
(AA*). Alternately tighten nuts (FF*) until toilet bowl
(B) is firmly seated on floor.
•DO NOT OVERTIGHTEN NUTS (FF*) BECAUSE
VITREOUS CHINA CAN EASILY CRACK OR
CHIP.
•Pour water into toilet bowl (B) to prevent the
escape of sewer gases.
•Using a hacksaw, cut off excess length of floor
bolts (AA*) so bolt caps (GG) will fit. (Leave no
more than 1/4-in length above nuts (FF*)). Place
bolt caps (GG) over floor bolts (AA*) and press
down for secure fit.
*AA, CC, DD, EE, and FF not included.

Figure 7
Figure 5
A
Figure 6 D
7. Install Push Button (D)
•Unscrew the tightening nut, which is attached to the button
mechanism.
•Insert the push button body through the tank lid hole. Tighten with
the large nut supplied. (Figure 6)
•Adjust thread rods using locknuts so that the rods are positioned
just over and slightly touching the top of the half flush and full flush
mechanism.
•Note that the half flush is the green tab in the rear and the full flush
is the white tab in front. (Figure 7)
•Note:All toilets come preset and do not need to be adjusted.
6.Install Tank (A), (Figure 5)
•Place rubber washer (II) onto bolt (JJ). Insert bolt (JJ)
with washers through hole inside the tank (A).
•Place metal washer (HH) followed by hex nut (KK) onto
bolt (JJ) protruding from bottom of tank (A). Tighten
hex nut (KK) to create a proper and secure seal.
•Attach rubber sealing gasket (LL) to center drain hole
under tank (A).
•Gently place tank (A) on toilet bowl (B) with bolts (JJ)
protruding out underneath.
•Place metal washer (HH) followed by hex nut (KK)
onto the protruding bolt (JJ).
•Tighten hex nut (KK) enough so that the tank (A) sits
flat on the toilet bowl (B).
•Make sure the toilet tank (A) is parallel to the wall and
straight on the toilet bowl (B).
•CAUTION: DO NOT OVERTIGHTEN NUTS. SEVERE
DAMAGE MAY OCCUR.
ASSEMBLY INSTRUCTIONS

Figure 8
8. Connect the Water Supply Line, (Figure 8)
•Connect the water supply line (not included)
between the tank (A) and shut-off valve.
•Tighten the tank connection coupling nut ¼ turn
beyond hand tight. (DO NOT OVERTIGHTEN
THE TANK CONNECTION.)
•Turn on supply valve and allow tank (A) to fill.
•Check for leakage at all connections and tighten
or correct as needed.
ASSEMBLY INSTRUCTIONS

LIMITED WARRANTY
Mainline products will be covered by Foremost Groups, lnc.'s limited warranty. It is as follows: Foremost warrants its
products to be free from defects in material or workmanship for 5 years (Vitreous China) and 1 year (Parts and Fittings)
from the date of purchase of the product by the original purchaser.
If inspection of this plumbing product, within 5 years (Vitreous China product) or 1 year (parts and fittings) after its initial
purchase, confirms that it is defective in materials or workmanship, Foremost will repair or at its option, exchange the
product for a similar model. Foremost provides no warranties or guarantees beyond those in this Limited Foremost
Warranty.
This limited warranty applies only to the original purchaser and installation of these products. All de-installation and re-
installation and transportation costs or charges incidental to warranty services are to be borne by the owner. In no event
will Foremost be liable for the cost of repair or replacement of any installation materials, including but not limited to,
tiles, marble etc. Foremost will not be responsible for and this warranty does not cover and specifically excludes any
liability to the purchaser or any third party for consequential or incidental damages, all of which are hereby expressly
disclaimed, or the extension beyond the duration of this warranty of any implied warranties, including those of
merchantability or fitness for an intended purpose.
This warranty does not apply to local building code compliance. Since local building codes vary considerably, the
purchaser of this product should check with a local building or plumbing contractor to ensure local code compliance
before installation. Foremost shall not be responsible or liable for any failure or damage to its toilet tank trim, plumbing
fittings, or china products caused by the use of either chloramines or high concentration of chlorine, lime/ iron sediments
and/or other minerals not removed from public water during the treatment of public water supplies or caused by toilet
tank type cleaners containing chlorine, calcium hypochlorite, and I or other chemicals.
This warranty is void if the product has been moved from its initial place of installation; if it has been subjected to faulty
maintenance, abuse, misuse, accident or other damages; if it was not installed in accordance with Foremast's instructions;
or if it has been modified in a manner inconsistent with the product as shipped by Foremost.
Note: Some states or provinces do not allow the limitations on an implied warranty, and some states/provinces do not allow
exclusions or limitations regarding incidental or consequential damages, so the above limitations may not apply to you. This
warranty gives you specific legal rights, and you may have other rights, which vary from state to state or province to
province. No person is authorized to change, add to, or creates any warranty or obligation other than that set forth herein.
Need Help? Please call our toll-free customer service line at 1-225-295-4212 for additional assistance or service. If you
have any questions or concerns regarding our warranty plan, please email:
customerservice@1858brands.com
Monday-Friday 7:30 AM to 5:00 PM EST
This warranty gives the original purchaser of this product specific legal right, which may vary from state to state or from
province to province. In some states or provinces, the exclusion or limitation of incidental or consequential damages is not
allowed, so those exclusions may not apply to you.

INODOROS REDONDOS Y ALARGADOS
DE DOBLE DESCARGA
INSTRUCCIONES DE INSTALACIÓN
MLS10421
MLS10008, MLS10010, MLS10011
Tanque
Taza
© 2022 rev 01/19/22

PIEZAS DE FERRETERÍA
Pieza
Descripción
Cant.
Dibujo
AA Perno para piso 2
BB Arandela de
retención de
plástico
2
CC Anillo de cera 1
DD Discp de plástico 2
EE Arandela
metálica 2
FF Tuerca 2
Pieza
Descripción
Cant.
Dibujo
GG
Tapa
para perno 2
HH
Arandela metálica
4
II Arandela
de goma 2
JJ Perno 2
KK Tuerca
hexagonal 4
LL Empaquetadura
de sellado de
goma 1

Figura
1
Brida
de
inodoro
ADVERTENCIAS Y PRECAUCIONES
•Manipule con cuidado. Los objetos de porcelanavítrea son similares al vidrio, con bordes cortantes
si se rompen. No los deje caer, no los manipulecon rudeza ni le apriete demasiadolos pernos.
•Peligro de emisión de gases nocivos. Si no va a instalar el nuevo inodoro de inmediato, tape
provisionalmente el orificio de la brida en el piso con una toalla (o cúbralo) para bloquear la entrada
de gases del sistema de alcantarillado.
•Cumpla con los códigos locales de fontanería y construcción.
PREPARACIÓN
•Antes de comenzar a instalar el producto, verifique que estén todas las piezas. Compare la lista
de piezas que viene en el paquete y el diagrama anterior. Si alguna pieza falta o está dañada,
no intente armarla, instalarla ni poner en funcionamiento el producto. Póngase en contacto con
el servicio de atención al cliente, y solicite piezas de repuesto.
•Tiempo estimado para el armado: 60 minutos
•Herramientas necesarias para el armado y la instalación (que no se incluyen): tubo de suministro
de agua al inodoro, llave regulable, espátula para masilla, destornillador de punta plana, sierra
para metales, nivel de carpintero.
INSTRUCCIONES PARA EL ARMADO
1.Quite el inodoro usado
•Cierre la llave de paso de agua y descargue el tanque para dejarlo completamente vacío.
Absorba con una toalla o una esponja el agua que quede en el tanque y la taza.
•Desconecte y quite el tubo de suministro de agua usado.
•Quite los herrajes y retire el tanque de la taza.
•Quite las tapas de los pernos y las tuercas de los pernos de piso y saque la taza.
•Saque los pernos de piso de la brida del inodoro y limpie la cera, la masilla y el sellador del área
de la base. (Provisionalmente, tape con una toalla el orificio de la brida del piso, o cúbralo, para
evitar la entrada de gases del sistema de alcantarillado.)
•NOTA: LA SUPERFICIE DE MONTAJE DEBE ESTAR LIMPIAY UNIFORME ANTES DE
INSTALAR EL INODORO NUEVO
2.Instale los pernos de piso (AA*), (Figura 1)
•Introduzca los nuevos pernos de piso (AA*) en la
brida del inodoro (que no se incluye), con las
cabezas orientadas hacia abajo y los extremos
roscados hacia arriba (use arandelas de retención
de plástico (BB*) para mantener los pernos en
posición vertical, a todo lo largo).
•Los pernos de piso (AA*) deben quedar paralelos a
la pared y a una distancia de 6 pulgadas entre sí.
*AA, y BB no esta incluido.

Figura 2
Figura 3
Figura
4
INSTRUCCIONES PARA EL ARMADO
3.Instale un anillo de cera (CC* ), (Figura 2)
•Coloquela taza (B) bocaabajo,sobre unatoalla o superficie
acolchada. Con el extremo redondeado (cónico)del anilloorientado
hacia el inodoro,coloqueel anillode cera (CC*) alrededor del aro de
salida elevadode la taza (B), y presionelo suficientecomo para que
el anillode cera (CC*) se adhieraa la taza (B).
4.Ubique la taza del inodoro(B) sobre la brida de inodoro, (Figura 3)
•Destape la aberturade evacuaciónde desechosde la brida de
inodoro.Lentamente, coloque en su sitio la taza del inodoro(B)
(conel lado derecho orientadohacia arriba), de modoque los
pernosde piso (AA*) sobresalgana través de los orificiosde la
basede la taza del inodoro(B). Nivele la taza (B) a medida que la
bajasobrela brida de inodoro.
•Cuandohaya colocado la taza (B) en su sitio, presionehacia abajo
con un ligero movimiento giratorio sobre el centro de la parte
superiorde la taza (B); luego, presione con toda su fuerza, para
comprimiruniformementeel anillo de cera (CC*) y crear un sello
hermético.(No meza la taza, ya queestopuede dañar el sello.)
•Verifique que la taza del inodoro(B) estélo más nivelada que sea
posible.Es posible que sea necesario colocar cuñas pequeñas
debajo del borde de la taza, debidoa las ligerasvariacionesque
puedenexistir entre los artículos de porcelanavítrea o a desniveles
en el piso. (La taza de inodoro(B) debe quedarfirmemente
asentadaen el piso, de modoqueno se bamboleeni se meza).
5.Fije la taza al piso, (Figura 4)
•Coloquelos discos de plástico (DD*) (Observe la
advertencia"ESTE LADO HACIAARRIBA"), las
arandelas metálicas(EE*) y las tuercas (FF*) sobre los
pernosde piso (AA*). Apriete, en forma alterna, las
tuercas (FF*) hasta que la taza (B) quede firmemente
asentadasobre el piso.
•NOAPRIETE DEMASIADO LASTUERCAS (FF*)
PORQUE LAPORCELANAVÍTREASE PUEDE
AGRIETARO RAJAR CON FACILIDAD.
•Vierta agua en la taza del inodoro (B) para evitar el
escape de gases del sistemade alcantarillado.
•Conuna sierra para metales, corte el tramo sobrante de
los pernosde piso (AA*), de modoque se puedan
montar las tapasde los pernos (GG). (Dejeno más de
1/4 de pulgadapor encimade las tuercas(FF*)).
Coloquelas tapas de lospernos(GG) sobre los pernos
de piso (AA*) y empu]elas hacia abaJb para fijarlas.
*AA, CC, DD, EE, yFF no esta incluido.

•PRECAUCIÓN: NO APRIETE DEMASIADO LAS TUERCAS,
YA QUE ESTO PUEDE CAUSAR DAÑOS GRAVES.
Figura 5
A
6.Instale el tanque (A), (Figura 5)
•Coloque la arandela de caucho (II) sobre el perno (JJ).
Pase el perno (JJ) con las arandelas por el orificio
ubicado en el interior del tanque (A).
•Coloque la arandela metálica (HH) y luego la tuerca
hexagonal (KK) sobre el perno (JJ) que sobresale
desde el fondo del tanque (A). Apriete la tuerca
hexagonal (KK), para crear un sello seguro y correcto.
•Monte la empaquetadura de caucho (LL) en el orificio
de drenaje del centro, ubicado debajo del tanque (A).
•Coloque lentamente el tanque (A) sobre la taza del
inodoro (B)con los pernos (JJ) que sobresalen por la
parte inferior.
•Coloque la arandela metálica (HH) y luego la tuerca
hexagonal (KK) sobre el perno que sobresale (JJ).
•Apriete la tuerca hexagonal (KK) lo suficiente para que
el tanque (A) quede asentado de forma plana sobre la
taza (B).
•Verifique que el tanque del inodoro (A) quede paralelo
ala pared y derecho sobre la taza (B).
7. Instale del botón de presión (D)
•Desenrosca la tuerca de ajuste que está fijada al mecanismo del
botón.
•Inserta el cuerpo del botón de presión a través del orificio de la
tapa del tanque. Aprieta con la tuerca grande suministrada.
(Figura 6)
•Ajusta las varillas roscadas con tuercas de cierre para que así
aquellas queden colocadas justo encima, tocando ligeramente la
parte superior del mecanismo de descarga media y completa.
•Tenga en cuenta que la mitad de la descarga es una pestaña
verde en la parte trasera y la descarga completa es una pestaña
blanca en la parte delantera. (Figura 7)
•Nota: Todos los inodoros vienen preconfigurados y no necesitan
ajustarse.
INSTRUCCIONES PARA EL ARMADO
Figure 7
Figure 6 D

Figura 8
8.Conecte el tubo de suministro de agua, (Figura 8)
•Conecte el tubo de suministro de agua (que no
se incluye) entre el tanque (A) y la válvula de
cierre.
•Apriete la tuerca de unión del conector del
tanque dándole ¼ de vuelta más después de
apretarla a mano. (NO APRIETE DEMASIADO
ELCONECTOR DEL TANQUE).
•Abra la válvula de suministro y deje que el
tanque (A) se llene.
•Verifique que no existan fugas en ninguna de las
conexiones y apriételas o corrija la situación
según sea necesario.
INSTRUCCIONES PARA EL ARMADO

GARANTÍA LIMITADA
Los productos de la línea principal estarán cubiertos por la garantía limitada de Foremost Groups, Inc. Esta
consiste en lo siguiente:
Foremost garantiza al comprador original, a partir de la fecha de la compra, sus productos de cerámica
vítrea por un período de 5años y sus piezas y accesorios por un período de 1año contra defectos de
material o de fabricación.
Si la inspección de este producto de fontanería, en el plazo de 5años para los productos de cerámica, o de 1
año para las piezas y accesorios, contado desde la compra inicial, revela que tiene defectos de material o de
fabricación, Foremost reparará o, a su opción, cambiará el producto por otro de modelo similar. Foremost no
ofrece otras garantías que no sean las señaladas en esta garantía limitada.
Esta garantía limitada es válida únicamente para el comprador y la instalación originales de estos productos.
Todos los gastos y cargos de desinstalación, reinstalación y de transporte relacionados con el servicio de
garantía son por cuenta del cliente. Foremost no se hace responsable en ningún caso por el costo de
reparación o de reposición de ningún material de instalación, que puede incluir, a título ilustrativo mas no
taxativo, los azulejos, losas de mármol, etc. Foremost no asume responsabilidad ni esta garantía la ampara,
sino que la excluye específicamente, por los daños y perjuicios o daños secundarios que correspondan al
comprador o a terceros, los que quedan expresamente excluidos; asimismo quedan excluidas las
ampliaciones al plazo de vigencia de la presente garantía y las garantías implícitas sobre la idoneidad de los
productos para propósitos previstos.
Esta garantía no ampara las obligaciones señaladas por los códigos locales de construcción civil. Debido a
que los códigos de construcción civil varían considerablemente de un lugar a otro, el comprador de este
producto debe consultar con algún contratista local de construcción civil o de instalaciones sanitarias para
constatar que se cumplan con las estipulaciones de los reglamentos locales antes de la instalación. Foremost
no es responsable por fallas o daños a las piezas del tanque del inodoro, accesorios de fontanería, o
artículos de cerámica producidos por las cloraminas o alta concentración de cloro, residuos de cal/hierro u
otros minerales no eliminados durante el tratamiento del agua del servicio público o generados por
productos de limpieza para tanques de inodoros que contengan cloro, hipoclorito de calcio u otras substancias
químicas.
Esta garantía queda anulada si el producto ha sido retirado del lugar donde se instaló originalmente, si ha
sido sometido a mantenimiento inadecuado, abuso, uso indebido, accidentes u otros daños, si no se ha
instalado según lo indican las instrucciones de Foremost, o si se modificó de una forma incongruente con el
producto enviado por Foremost.
Nota: Algunos estados o provincias no permiten las limitaciones sobre garantías implícitas y algunos estados
o provincias no permiten las exclusiones o limitaciones sobre los daños indirectos o secundarios, por lo que
es posible que estas limitaciones no se apliquen a su caso. Esta garantía le otorga derechos específicos, y
es posible que usted tenga otros derechos que varíen según el estado o la provincia en cuestión. Nadie está
facultado para cambiar, añadir o conceder garantías o aceptar obligaciones que no sean las señaladas en el
presentedocumento.
¿Necesita ayuda? Por favor, llame a nuestra línea gratuita de servicio al cliente al 1-225-295-4212 para
asistencia o servicio adicional. Si tiene alguna pregunta o duda sobre nuestro plan de garantía, por favor
envíe un correo electrónico:
De lunes a viernes, de 7:30 a 17:00 (hora del este)
customerservice@1858brands.com
Esta garantía le otorga al comprador original de este producto un derecho legal específico, que puede variar
de un estado a otro o de una provincia a otra. En algunos estados o provincias, la exclusión o limitación de
daños indirectos o secundarios no está permitida, por lo que esas exclusiones pueden no aplicarse en su
caso.
This manual suits for next models
3
Table of contents
Languages:
Other MAINLINE Toilet manuals
Popular Toilet manuals by other brands

Swiss Madison
Swiss Madison Carré SM-1T264 installation instructions

JABSCO
JABSCO 37010 Series quick start guide

Thetford
Thetford C-250 Series manual

Drive
Drive Raised toilet seat installation instructions

Catalano
Catalano Sfera 3213001703 Technical overview

Kekkilä
Kekkilä Hasselfors Composting Dry Toilet instructions