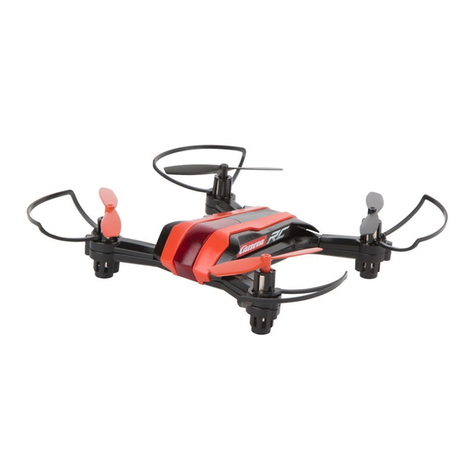
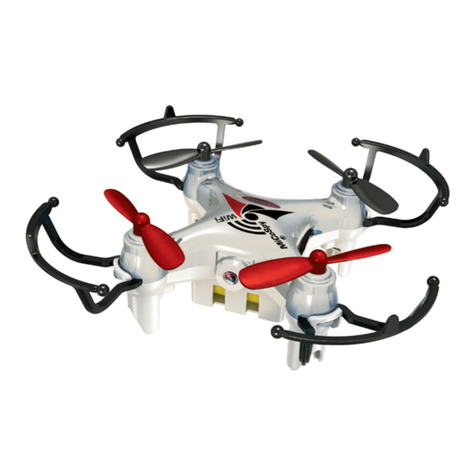
Makerfire BNF Micro FPV User manual

Content
Key Features..................................................................................................................................... 3
Specifications.................................................................................................................................... 3
Set up..................................................................................................................................................6
Binding Procedure.......................................................................................................................6
Status LED....................................................................................................................................7
Flight Controller Set Up...............................................................................................................7
Flight Modes Settings..................................................................................................................9
Accelerometer and Gyro Calibration.......................................................................................... 9
AIO FPV Camera Setup.............................................................................................................. 10
Ready to Fly............................................................................................................................... 11
Flash Firmware............................................................................................................................... 12
Binding & Betaflight Setup Procedure with External FrSky RX..............................................15
Note & FAQ......................................................................................................................................17

Makerfire BNF Micro FPV drone integrated F3 EVO Brushed FC ,Frsky D8 or Spektrum
DSM protocol receiver, 25mW AIO camera, special sauce edition motors and 200mAh
battery, this MICRO FPV is capable of flying in the smallest of places with ease and much
more like a racing quad than a toy quad.
Key Features
Fully programmable through Betalfight, using the on board USB port, tune all the
parameters, PID's, and rates to your perfect settings
64mm motor spacing, four carefully-tuned electric ducted fans
F3 EVO Brushed flight controller fully programmable through Betaflight
Built in native Spektrum DSM receiver, compatible with almost ALL Spektrum
transmitter,like DX6/DX8/DX9/DX18 etc
5.8G AIO 25mW camera, with 10°tilt camera mount
Special 17500KV sauce edition motors, offer a nice punch
35C 200mAh 1S battery, 3 min 40 seconds flight time
Specifications
Wheelbase: 64mm
Weight: 22g (without battery)
Flight Controller: F3 EVO Brushed FC with Native DSM receiver
Motor: 17500KV 6x15mm Coreless Brush Motor
Receiver: Spektrum DSM compatible native receiver
Camera and 5.8G Tx: AIO 520TVL 1/4 Inch Camera 25mW 40CH
Battery: 3.7V 200mAh Lipo battery with Pico JST connector
Flight time: 3 min 40 seconds
Native Spektrum DSM Receiver:
Compatible with ALL Spektrum radios or Spektrum compatible transmitter module.No
more hacks, just bind and fly!

F3 EVO flight controller:
Fully programmable through Betalfight using the on board USB port! Tune all the
parameters, PID's, and rates to your perfect settings!
17500kv these motors:
Considerably more powerful than almost all of the motors used for Tiny Whoop style
aircraft,without encountering considerable oscilations.

10°tilt camera mount:
Perfect angle for Tiny Whoop flight. At this angle the pilot can still see everything ahead in
full-blown fast forward flight.

Set up
Getting set up and ready to fly is a quick and simple task.Follow these easy steps and you
will be shredding the sky in just a few minutes!
Binding Procedure
Step 1:
Click the bind-button meanwhile powering on the Drone, either by connecting the battery
or USB power. Then the receiver will enter bind mode, indicated by rapid blue receiver
LED flashing.
Step 2:
Now, on the radio, hold the bind-button while powering on the radio (or what it takes to
enter bind-mode).
Step 3:
The blue receiver LED should stop blinking when the bind is completed.

Step 4:
Only need to bind the radio ONCE.Next time the receiver will bind to the last radio
automatically.
If you have problems binding change the TX to DSM2/22ms mode. Normally what you set on the TX is
the desired mode and the TX+RX negotiate their capabilities and select a mutually compatible mode.
The receiver in this quad seems unable to do that reliably.
If you still have problems binding take the TX and walk to the other side of the room. This is a solution
that Spektrum themselves recommend for some TX+RX firmware combinations. This seems to be the
case between my DX8 and this quad
Status LED
This board has 3 LEDs to indicate the status,including RX LED (blue),FC status LED (blue)
and FC power LED (red) .
Flight Controller Set Up
The flight controller board comes pre-flashed with Betaflight and proper settings for the
Makerfire FPV Micro Drone already set up but you still need to configure the receiver
settings. Also if you upgrade the firmware or reset settings, you will lose the receiver
settings and need to set them up again.
CLI Tab Settings
Go to CLI and type this in
set motor_pwm_rate=10000
save
Please confirm the setting is correct if the motors spin up when battery is pluged in.
Receiver Settings
Receiver Mode,choose RX_PPM;Serial Receiver Provider,choose SPEKTRUM1024. And
click the Save and Reboot button in the lower right corner.
The native DSM receiver is NOT serial. It outputs PPM signal.
The receiver does not follow the Spektrum channel mapping. Instead it outputs AETR1234.
LED color
Description
RX LED solid (blue)
Bind to Transmitter
RX LED flashing (blue)
Enter Bind Mode
Power LED solid (red)
Power On
FC LED solid (blue)
Motor Armed

if you cannot seem to bind your controller to the FC board then make sure that these settings are set
correctly.
ESC / Motor Settings
ESC/Motor protocol, click and select BRUSHED, switch on MOTOR_STOP(optional)
Other Configuration Section Settings
Set Minimum Throttle = 1050
Set Maximum Throttle = 2000
Set Center Value for RC Channels = 1500
Feel free to turn off Barometer and Magnetometer if you’d like, as you do not need
them

Flight Modes Settings
Most pilots will prefer to fly in HORIZON mode as that allows for both stabilization and
also flips and rolls. The other modes to use are:
ANGLE - full stabilization, no flips, ideal for first time pilots
Rate - if you do not have ANGLE or HORIZON turned on then the quad is in full rate
mode, with no stabilization, giving the pilot full control of the quad at all times. We
highly recommend to fly in rate mode with AIR MODE
AIR MODE - spins the props at zero throttle, allowing the quad to maintain its attitude
and angle at all times. This mode that allows for advanced aerial maneuvers
Accelerometer and Gyro Calibration
Calibrate in Betaflight

Open BetaFlight and hit “Connect”
Put a spirit level on a surface and make it level, place the Micro FPV drone on the
level surface
In the first tab, click “Calibrate Accelerometer”
Using radio sticks
Power up the radio and Micro FPV drone, remaining disarmed for the duration of this
process
Put a spirit level on a surface and make it level, place the Micro FPV drone on the
level surface
For the accelerometer, move the throttle stick up-left and pitch down-center,you will
see the blue LED blink for confirmation
Now for the gyro, move the throttle stick down-left and the pick down-center
AIO FPV Camera Setup
The camera is 600TVL like most larger FPV cameras, but with huge improvements.It
performs much better in low light, has clearer colors, and comes with a lens that provides
a beautiful 120°field of view.
The 25mw 5.8GHz video transmitter is capable of changing quickly between 40 channels
with a single button. Long press changes the band, short press changes the channel, 1
through 8.With a simple linear polarized dipole antenna, it has a slightly shorter range but
is much more crash resistant.
Also the camera is 10°tilt mounted.This is the perfect angle for Tiny Whoop flight. At
this angle you can see down a bit between the ducts to drop through slots in the foliage of
a magnolia tree, but I can still see everything ahead in full-blown fast forward flight.
Operation:
NTSC/PAL Switch still touch up 2 second
Short touch flip switch
Frequency group A~F selected still touch up to 2 second
Channel CH1~CH8 selected with short touch

Ready to Fly
With the receiver bound to the radio, video feed set up, and battery charged, you are
ready to fly.

Flash Firmware
If you wish to flash a different firmware or update Betaflight to the newest version, please
follow these steps.
1.Click the Firmware Flasher tab
2.Select “SPRACINGF3EVO” as the board, and pick the version of Betaflight you wish to
flash (latest is 3.0.1)
Do not use “SPRACINGF3” or other targets. If no firmware is currently available do NOT attempt to
flash. Flashing the wrong firmware can cause the FC to be permanently damaged.
3.Click “Load firmware [Online]” and wait for firmware to download and read release notes
before flashing
Situations 1:
If you have lost communication with the board and no reboot sequence(also called
bootloader) exit, you should do as following:
a: Enable “No reboot sequence”,enable “Full chip erase”
b: Jumper the BOOT pins and power on the board by connecting USB cable. Then
remove the BOOT jumper
c: Now DFU will appear in the list of ports and flashing via DFU will available. Click “Flash
Firmware”. After flashing the virtual COM port will appear as “COMxx”

Situations 2:
If reboot sequence (also called bootloader) exit and work well, you could flash the
firmware without jumper the BOOT pins. This is the the state when the stock firmware
works well and you want to upgrade to the latest version.Do as following.
a:Disable “No reboot sequence”
b: Power on the board by connecting USB cable. You could find the virtual COM port will
appear on the up right corner
c: Click “Flash Firmware”. First, the board will reboot into DFU mode. Then wait the ST
DFU DRIVER Automatic installation. It’s successfully installed when you see the DFU port
on the up right corner. Now flashing via DFU will proceed. After flashing the virtual COM
port will re-appear
Q: Unable to flash firmware via DFU.
A: Likely the correct DFU drivers are not installed. Put the board in BOOTLOADER mode
(jump boot pins, connect USB cable). Then update DFU drivers.
Here is how to update DFU drivers:
Chrome may have problems automatically installed DFU driver for ST devices in DFU
Mode on Windows.The solution is to replace the ST driver with a libusb driver.
Download and launch Zadig
http://zadig.akeo.ie/
a. Options -> List All Devices
b. Select STM32 Bootloader from the drop down.
c. Choose WinUSB as the replacement.

d. Click “Replace Driver”. Some times the Replace progress will be slow or no response,
you can close it and do it again.
e. Restart Chrome (make sure it is completely closed, logout and login if unsure)
f. Now the DFU device should be seen by Configurator
g. Also you could see USB Flashing section of Betaflight/Cleanflight manual for details.
https://github.com/cleanflight/cleanflight/blob/master/docs/USB%20Flashing.md

Binding & Betaflight Setup Procedure with External FrSky RX
a.Turn on transmitter, create new mode and enter setup, the Mode must be D8.
b.Power on the quadcopter by connecting the battery,red LED at the tail of the drone will
flash rapidly on receiver after 6 seconds, the receiver is in ready for binding mode.Then
turn on the transmitter, enter the binding mode, the red LED will turn solid, this means it
has binded successfully with the default mode in SBUS.
Connecting the USB cable will not power on the FrSky RX,so you MUST connect the battery when
binding.
Turn on the transmitter for 6 to 30 second to be binded in SBUS mode; Turn on the transmitter after 30
seconds to be binded in PPM mode. The flight controller will default SBUS mode.
c.For each flight, turn on the transmitter firstly, then power on the quadcopter, if the
receiver has a solid red LED,this means it is binded correctly,with RSSI and voltage
telemetry.
With FrSky RX,there are several different configurations to DSMX RX with Betaflight GUI .
The FrSky receiver is serial.It outputs SBUS signal.
Ports Tab:Switch on Serial RX of UART2.And click the Save and Reboot button in the
lower right corner.

Configuration Tab:Receiver Mode, choose RX_SERIAL; Serial Receiver Provider, choose
SBUS.And click the Save and Reboot button in the lower right corner.

Note & FAQ
The flight controller board comes pre-flashed with BetaFlight.
This is a Spektrum DSMX/DSM2 compatible receiver. It is not an official Spektrum
receiver. The Spektrum, DSMX and DSM2 brand is a trademark of Horizon Hobbies, USA.
Q:Can I enjoy it if i am a drone hobby beginner?
This is not a beginners quad.You will need a decent transmitter.
You will need to know how to use the program Cleanflight / BetaFlight.
Most importantly,you should have 5.8G goggles to enjoy the FPV experience.
Q:What radio control protocols are used by the board?
The DSMX compatible version uses PPM 7 Channel that is compatible will all DSMX and
DSM2 Spectrum radios.
Any radio that can take the Orange Rx version module, such as the Turnigy 9X, is
compatible with the DSMX version of the board.
Q:I want more information about the brush flight controller.
Makerfire F3 brushed flight controller with native DSM receiver, compatiable with All
Spektrum radios.(e.g.DX6,DX6i,DX7,DX8)or Spektrum,compatible transmitter module(e.g.
Turnigy 9X with Orange Rx module).
Q:What Flight Modes does it have?
The board runs the popular Cleanflight/Betaflight firmware that is fully customizable and
includes several different modes: Auto-Level, Horizon (auto-leveling mode with ability to
flip), and full manual (rate). You can also enable airMode and be able to control the quad
at any speed and attitude
Makerfire team comes with a detailed manual that is reviewed and maintained by the
developers and community. No more out-of-date wiki pages and second-hand information
from official website.Also you could send email to info@crazepony.com for help.
Flight Controller Official Link:
http://www.crazepony.com/products/f3-brushed-fc.html
BNF Micro FPV Drone Official Link:
http://www.crazepony.com/products/mkf-micro-fpv.html
Table of contents


