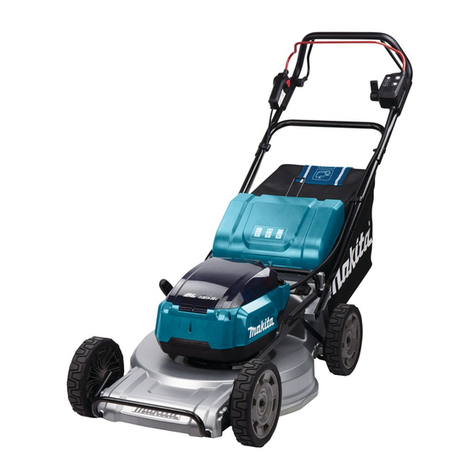
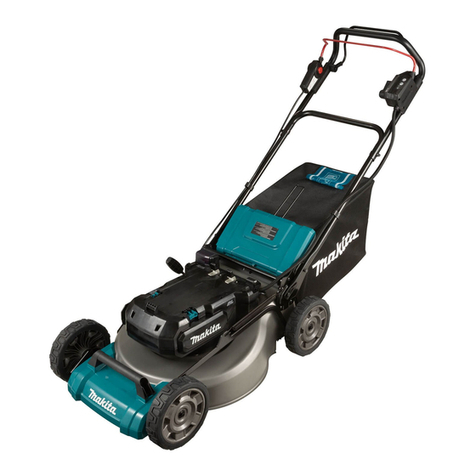
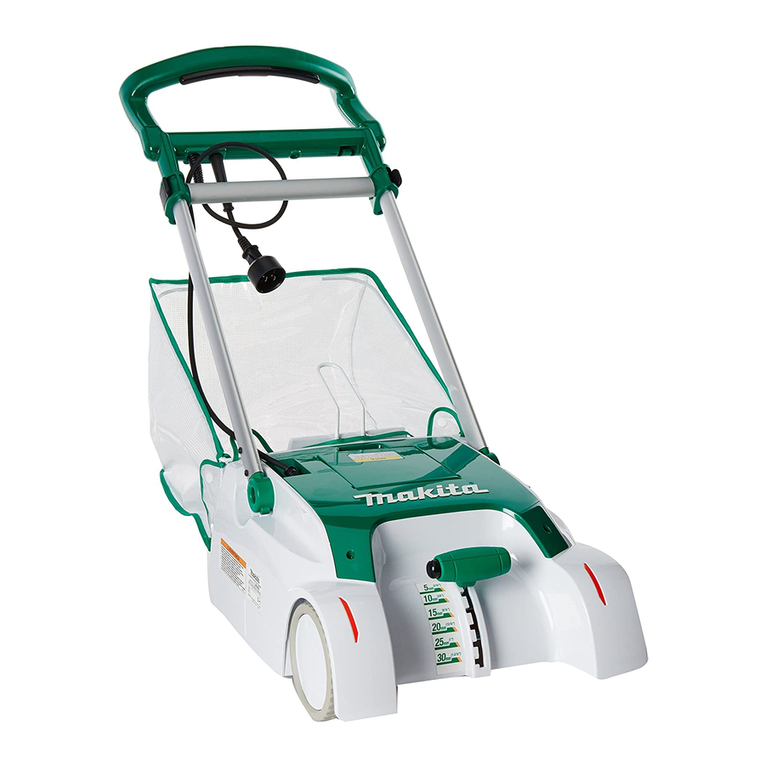
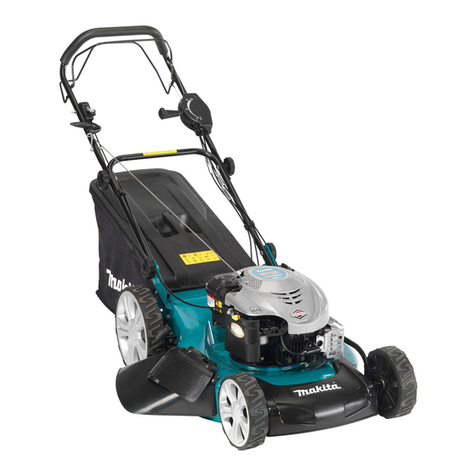
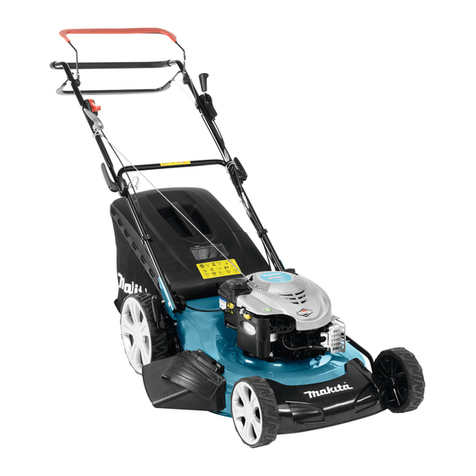
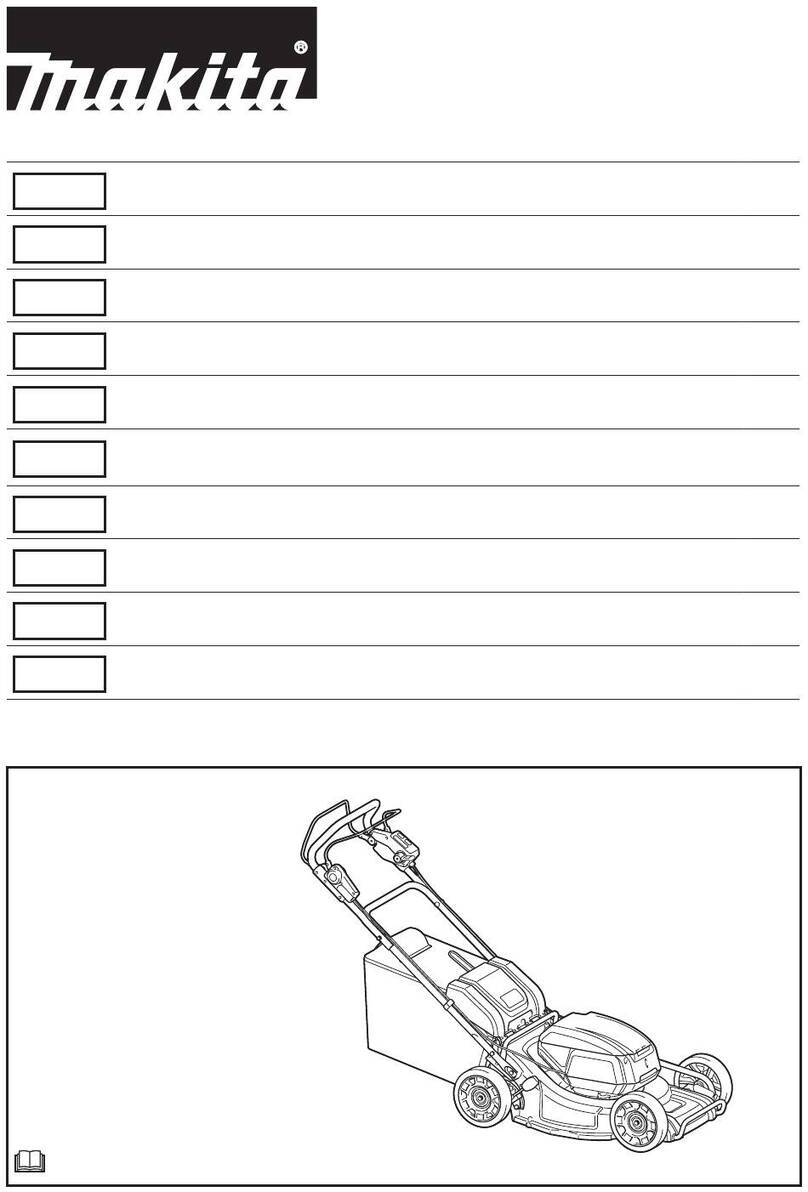
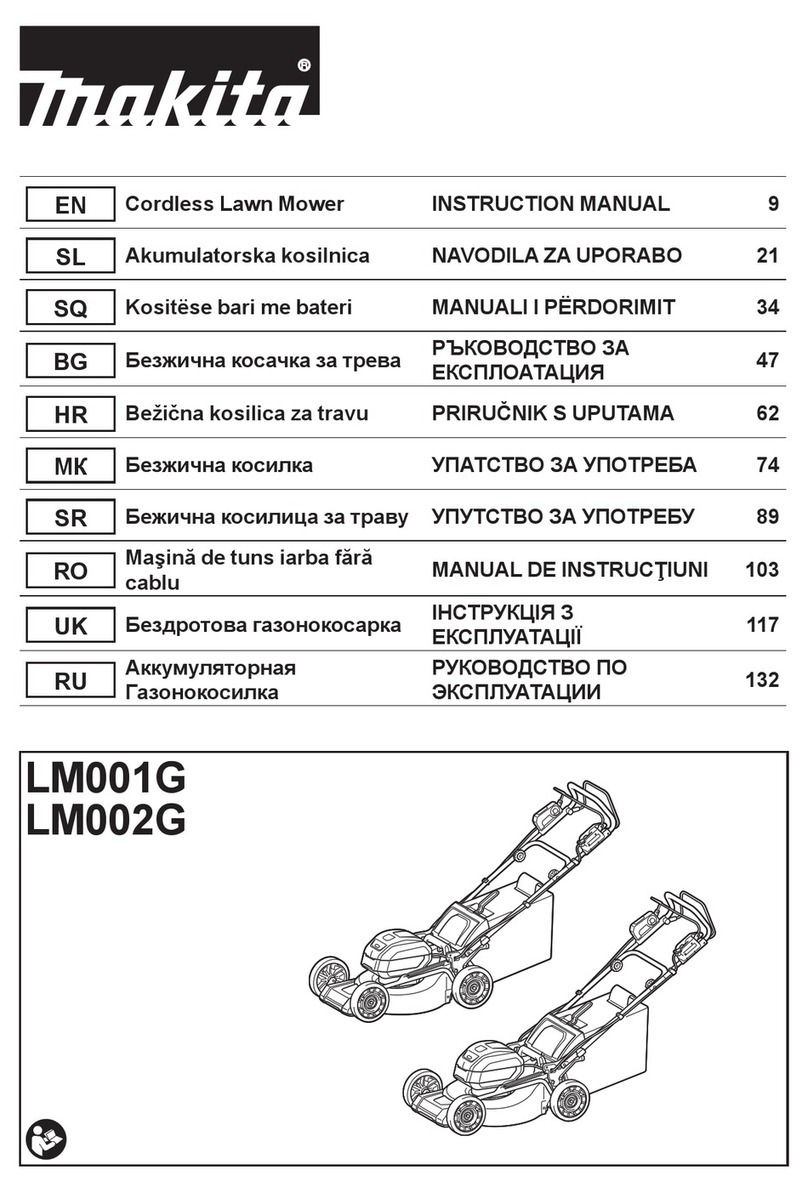
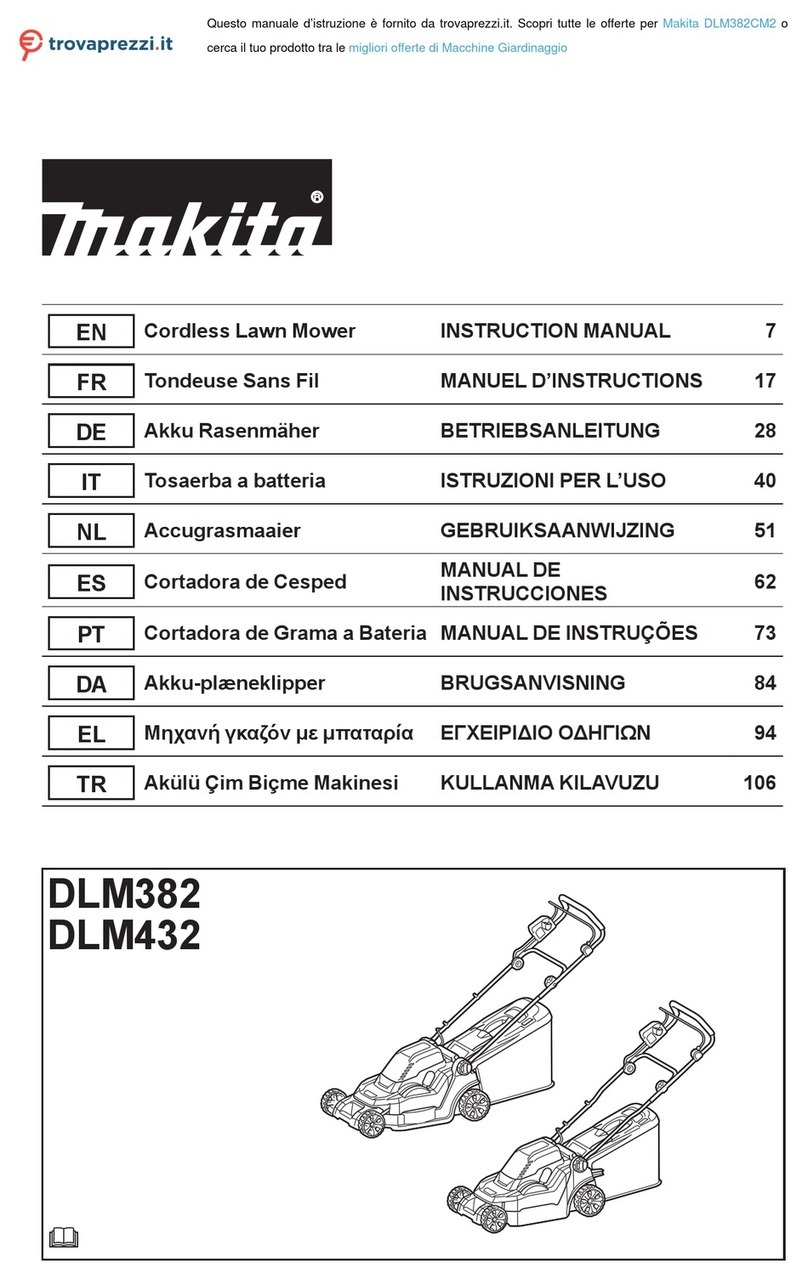
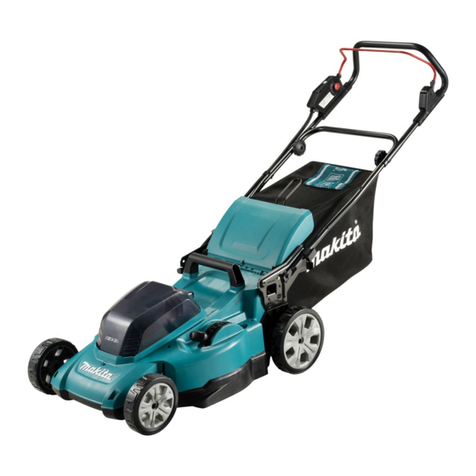
Makita DLM382 User manual

DLM382
DLM432
EN Cordless Lawn Mower INSTRUCTION MANUAL 7
SL Akumulatorska kosilnica NAVODILA ZA UPORABO 16
SQ Kositëse bari me bateri MANUALI I PËRDORIMIT 25
BG Безжична косачка за трева РЪКОВОДСТВО ЗА
ЕКСПЛОАТАЦИЯ 34
HR Bežična kosilica za travu PRIRUČNIK S UPUTAMA 45
МК Безжична косилка УПАТСТВО ЗА УПОТРЕБА 54
SR Бежична косилица за траву УПУТСТВО ЗА УПОТРЕБУ 65
RO Maşină de tuns iarba fără
cablu MANUAL DE INSTRUCŢIUNI 75
UK Бездротова газонокосарка ІНСТРУКЦІЯ З
ЕКСПЛУАТАЦІЇ 85
RU Аккумуляторная
Газонокосилка РУКОВОДСТВО ПО
ЭКСПЛУАТАЦИИ 96

3
1
2
Fig.1
Fig.2
1
2
Fig.3
1
2
Fig.4
2
2
1
Fig.5
1
Fig.6
1
Fig.7
1
2
Fig.8
2

1
Fig.9
1
2
3
Fig.10
1
2
Fig.11
1
2
Fig.12
1
2
Fig.13
1
Fig.14
1
Fig.15
1
Fig.16
3

1
2
Fig.17
21
Fig.18
12
Fig.19
1
Fig.20
1
Fig.21
1
2
Fig.22
Fig.23
Fig.24
4

12
33
Fig.25
Fig.26
1
2
Fig.27
12
Fig.28
1
2
Fig.29
1
2
Fig.30
1
Fig.31
1
23
Fig.32
5

3
1
2
Fig.33
1
23
Fig.34
1
2
3
4
Fig.35
6

7ENGLISH
ENGLISH (Original instructions)
SPECIFICATIONS
Model: DLM382 DLM432
Mowing width (blade diameter) 380 mm 430 mm
No load speed 3,700 min-1 3,600 min-1
Part number of replacement mower blade 191D41-2 191D43-8
Dimensions
(L x W x H)
during operation L: 1,380 mm to 1,410 mm
W: 450 mm
H: 985 mm to 1,005 mm
L: 1,435 mm to 1,490 mm
W: 460 mm
H: 1,005 mm to 1,045 mm
when stored
(without grass basket)
860 mm x 450 mm x 475 mm 865 mm x 460 mm x 475 mm
Rated voltage D.C. 36 V
Net weight 16.2 - 16.9 kg 16.8 - 17.5 kg
•
Due to our continuing program of research and development, the specications herein are subject to change without notice.
• Specications may differ from country to country.
• The weight may differ depending on the attachment(s), including the battery cartridge. The lightest and heavi-
est combination, according to EPTA-Procedure 01/2014, are shown in the table.
Applicable battery cartridge
BL1815N / BL1820 / BL1820B / BL1830 / BL1830B / BL1840 / BL1840B / BL1850 / BL1850B / BL1860B
• Some of the battery cartridges listed above may not be available depending on your region of residence.
WARNING:
Only use the battery cartridges listed above. Use of any other battery cartridges may cause injury and/or re.
Symbols
The followings show the symbols used for the equip-
ment. Be sure that you understand their meaning before
use.
Take particular care and attention.
Read instruction manual.
Danger; be aware of thrown objects.
The distance between the tool and
bystanders must be at least 15 m.
Never put your hands and feet near the
blade under the mower. Blades continue to
rotate after the motor is switched off.
Remove the lock key before inspecting,
adjusting, cleaning, servicing, leaving and
storing the mower.
Ni-MH
Li-ion
Only for EU countries
Do not dispose of electric equipment or
battery pack together with household waste
material!
In observance of the European Directives,
on Waste Electric and Electronic
Equipment and Batteries and Accumulators
and Waste Batteries and Accumulators
and their implementation in accordance
with national laws, electric equipment and
batteries and battery pack(s) that have
reached the end of their life must be col-
lected separately and returned to an envi-
ronmentally compatible recycling facility.
Intended use
The machine is intended for lawn mowing.
Noise
The typical A-weighted noise level determined accord-
ing to EN60335-2-77:
Model DLM382
Sound pressure level (LpA) : 81 dB(A)
Sound power level (LWA) : 91 dB (A)
Uncertainty (K) : 3 dB(A)
Model DLM432
Sound pressure level (LpA) : 81 dB(A)
Sound power level (LWA) : 92 dB (A)
Uncertainty (K) : 3 dB(A)
NOTE:
The declared noise emission value(s) has been
measured in accordance with a standard test method
and may be used for comparing one tool with another.
NOTE:
The declared noise emission value(s) may
also be used in a preliminary assessment of exposure.
WARNING: Wear ear protection.
WARNING:
The noise emission during actual
use of the power tool can differ from the declared
value(s) depending on the ways in which the tool is
used especially what kind of workpiece is processed.
WARNING:
Be sure to identify safety measures
to protect the operator that are based on an estima-
tion of exposure in the actual conditions of use (tak-
ing account of all parts of the operating cycle such
as the times when the tool is switched off and when
it is running idle in addition to the trigger time).

8ENGLISH
Vibration
The vibration total value (tri-axial vector sum) deter-
mined according to EN60335-2-77:
Model DLM382
Vibration emission (ah) : 2.5 m/s2or less
Uncertainty (K) : 2.0 m/s2
Model DLM432
Vibration emission (ah) : 2.5 m/s2or less
Uncertainty (K) : 1.5 m/s2
NOTE: The declared vibration total value(s) has been
measured in accordance with a standard test method
and may be used for comparing one tool with another.
NOTE: The declared vibration total value(s) may also
be used in a preliminary assessment of exposure.
WARNING: The vibration emission during
actual use of the power tool can differ from the
declared value(s) depending on the ways in which
the tool is used especially what kind of workpiece
is processed.
WARNING: Be sure to identify safety mea-
sures to protect the operator that are based on an
estimation of exposure in the actual conditions of
use (taking account of all parts of the operating
cycle such as the times when the tool is switched
off and when it is running idle in addition to the
trigger time).
EC Declaration of Conformity
For European countries only
The EC declaration of conformity is included as Annex A
to this instruction manual.
SAFETY WARNINGS
IMPORTANT SAFETY
INSTRUCTIONS
WARNING: Read all safety warnings and
all instructions. Failure to follow the warnings and
instructions may result in electric shock, re and/or
serious injury.
Save all warnings and instruc-
tions for future reference.
Training
1.
Read the instructions carefully. Be familiar with
the controls and the proper use of the mower.
2. Never allow children or people unfamiliar with
these instructions to use the mower. Local
regulations can restrict the age of the operator.
3. Never operate the mower while people, espe-
cially children, or pets are nearby.
4. Keep in mind that the operator or user is
responsible for accidents or hazards occurring
to other people or their property.
5. Children should be supervised to ensure that
they do not play with the mower.
6. Physical condition - Do not operate mower
while under the inuence of drugs, alcohol, or
any medication.
Preparation
1. While operating the mower, always wear sub-
stantial footwear and long trousers. Do not
operate the mower when barefoot or wearing
open sandals. Avoid wearing clothing or jew-
elry that is loose tting or that has hanging
cords or ties. They can be caught in moving
parts.
2. Before use, always visually inspect the mower
for damaged, missing or misplaced guards or
shields.
3. Be sure the area is clear of other people before
mowing. Stop mower if anyone enters the area.
4. Do not insert the lock key into mower until it is
ready to be used.
5. Always wear protective goggles to protect
your eyes from injury when using power tools.
The goggles must comply with ANSI Z87.1 in
the USA, EN 166 in Europe, or AS/NZS 1336
in Australia/New Zealand. In Australia/New
Zealand, it is legally required to wear a face
shield to protect your face, too.
It is an employer's responsibility to enforce
the use of appropriate safety protective equip-
ments by the tool operators and by other per-
sons in the immediate working area.
6. Check the blades or blade bolts carefully for
cracks or damage before operation. Replace
cracked or damaged blades or blade bolts
immediately.
7. Remove foreign matters such as rocks, wire,
bottles, bones and large sticks from the work
area before mowing to prevent personal injury
or damage to the mower.
8. Objects struck by the mower blade can cause
severe injuries to persons. The lawn should
always be carefully examined and cleared of
all objects prior to each mowing.
9. Watch for holes, ruts, bumps, rocks, or other
hidden objects. Uneven terrain could cause a slip
and fall accident. Tall grass can hide obstacles.
Operation
1. Do not overreach. Keep the balance at all
times. Always be sure of the footing on slopes.
Walk, never run.

9ENGLISH
2. Stop the mower and remove the lock key, and
make sure that all moving parts have come to
a complete stop:
- whenever you leave the mower,
- before clearing blockages or unclogging chute,
- before checking, cleaning or working on the
mower,
- after striking a foreign object. Inspect the
mower for damage and make repairs before
restarting and operating the mower,
- whenever the mower starts vibrating
abnormally.
3.
Never operate the mower with defective guards
or shields, or without safety devices, for exam-
ple deectors and/or grass basket, in place.
4. Avoid using the mower in bad weather con-
ditions especially when there is a risk of
lightning.
5. Wear eye protection and stout shoes at all
times while operating the mower.
6. Operate the mower only in daylight or in good
articial light.
7. Switch on the mower carefully according to
instructions and with feet well away from the
blade(s).
8. Take care against injury to feet and hands from
the mower blades.
9. Always ensure that the ventilation openings
are kept clear of debris.
10. Mow across the face of slopes, never up and
down. Exercise extreme caution when chang-
ing direction on slopes. Do not mow exces-
sively steep slopes.
11. Use extreme caution when reversing or pulling
the mower towards you.
12. Stop the blade(s) if the mower has to be tilted
for transportation when crossing surfaces
other than grass, and when transporting the
mower to and from the area to be used.
13. Do not tilt the mower when switching on the
motor, except if the mower has to be tilted
for starting. In this case, do not tilt it more
than absolutely necessary and lift only the
part, which is away from the operator. Always
ensure that both hands are in the operating
position before returning the mower to the
ground.
14. Do not put hands or feet near or under rotating
parts. Keep clear of the discharge opening at
all times.
15. Do not transport the mower while the mower is
turned on.
16. Avoid operating the mower in wet grass.
17. Never operate the mower in the rain.
18. Always keep a rm hold on the handle.
19. Don't grasp the exposed cutting blades or
cutting edges when picking up or holding the
mower.
20. Keep hands and feet away from rotating
blades. Caution - Blades coast after the mower
is switched off.
21. Stop operation immediately if you notice
anything unusual. Switch off the mower and
remove the lock key. Then inspect the mower.
22. Never attempt to make cutting height adjust-
ments while mower is running if the mower
has cutting height adjustment feature.
23. Release switch lever and wait for blade rota-
tion to stop before crossing driveways, walks,
roads, and any gravel-covered areas. Also
remove the lock key if you leave the mower,
reach to pick up or remove something out of
your way, or for any other reason that may
distract you from what you are doing.
24. If the mower strikes a foreign object, follow
these steps:
- Stop the mower, release the switch lever and
wait until the blade comes to a complete stop.
- Remove the lock key and the battery
cartridge.
- Thoroughly inspect the mower for any
damage.
- Replace the blade if it is damaged in any way.
Repair any damage before restarting and con-
tinuing to operate the mower.
25. Do not start the mower when standing in front
of the discharge opening.
26. If the mower starts to vibrate abnormally
(check immediately)
- inspect for damage,
- replace or repair any damaged parts,
- check for and tighten any loose parts.
27. Never direct discharged material toward
anyone. Avoid discharging material against a
wall or obstruction. Material may ricochet back
toward the operator. Stop the blade when crossing
gravel surfaces.
28. Do not pull the mower backwards unless
absolutely necessary. When you are compelled
to back the mower from a fence or other similar
obstruction, look down and behind before and
while moving backwards.
29. Shut the motor off and wait until the blade
comes to a complete stop before removing the
grass catcher. Beware that the blades coast after
turn off.
Maintenance and storage
1. Replace worn or damaged parts for safety.
Use only genuine replacement parts and
accessories.
2. Inspect and maintain the mower regularly.
3. When not in use, store the mower out of the
reach of children.
4. Keep all nuts, bolts, and screws tight to
be sure the equipment is in safe working
condition.
5. Check the grass basket frequently for wear or
deterioration. For storage, always make sure
the grass basket is empty. Replace a worn
grass basket with a new factory replacement
for safety.
6. Use only the manufacturer genuine blades
specied in this manual.
7. Be careful during adjustment of the mower
to prevent entrapment of the ngers between
moving blades and xed parts of the mower.
8. Do not wash with a hose; avoid getting water
in motor and electrical connections.

10 ENGLISH
9. Check the blade mounting bolt at frequent
intervals for proper tightness.
10. Always allow the mower to cool down before
storing.
11. When servicing the blades be aware that, even
though the power source is switched off, the
blades can still be moved.
12. Never remove or tamper with safety devices.
Check their proper operation regularly. Never
do anything to interfere with the intended
function of a safety device or to reduce the
protection provided by a safety device.
Battery tool use and care
1. Recharge only with the charger specied by
the manufacturer. A charger that is suitable for
one type of battery pack may create a risk of re
when used with another battery pack.
2. Use power tools only with specically desig-
nated battery packs. Use of any other battery
packs may create a risk of injury and re.
3. When battery pack is not in use, keep it away
from other metal objects, like paper clips,
coins, keys, nails, screws or other small metal
objects, that can make a connection from one
terminal to another. Shorting the battery termi-
nals together may cause burns or a re.
4. Under abusive conditions, liquid may be
ejected from the battery; avoid contact. If con-
tact accidentally occurs, ush with water. If
liquid contacts eyes, additionally seek medical
help. Liquid ejected from the battery may cause
irritation or burns.
5. Do not use a battery pack or tool that is dam-
aged or modied. Damaged or modied batteries
may exhibit unpredictable behaviour resulting in
re, explosion or risk of injury.
6. Do not expose a battery pack or tool to re or
excessive temperature. Exposure to re or tem-
perature above 130 °C may cause explosion.
7. Follow all charging instructions and do not
charge the battery pack or tool outside the
temperature range specied in the instruc-
tions. Charging improperly or at temperatures
outside the specied range may damage the
battery and increase the risk of re.
Electrical and battery safety
1. Do not dispose of the battery(ies) in a re.
The cell may explode. Check with local codes for
possible special disposal instructions.
2. Do not open or mutilate the battery(ies).
Released electrolyte is corrosive and may cause
damage to the eyes or skin. It may be toxic if
swallowed.
3. Do not charge battery in rain, or in wet
locations.
4. Do not charge the battery outdoors.
5. Do not handle charger, including charger plug,
and charger terminals with wet hands.
Service
1. Have your power tool serviced by a qualied
repair person using only identical replacement
parts. This will ensure that the safety of the power
tool is maintained.
2. Never service damaged battery packs. Service
of battery packs should only be performed by the
manufacturer or authorized service providers.
SAVE THESE INSTRUCTIONS.
WARNING: DO NOT let comfort or familiarity
with product (gained from repeated use) replace
strict adherence to safety rules for the subject
product.
MISUSE or failure to follow the safety rules stated
in this instruction manual may cause serious
personal injury.
Important safety instructions for
battery cartridge
1.
Before using battery cartridge, read all instruc-
tions and cautionary markings on (1) battery char-
ger, (2) battery, and (3) product using battery.
2. Do not disassemble battery cartridge.
3. If operating time has become excessively
shorter, stop operating immediately. It may
result in a risk of overheating, possible burns
and even an explosion.
4. If electrolyte gets into your eyes, rinse them
out with clear water and seek medical atten-
tion right away. It may result in loss of your
eyesight.
5. Do not short the battery cartridge:
(1) Do not touch the terminals with any con-
ductive material.
(2) Avoid storing battery cartridge in a con-
tainer with other metal objects such as
nails, coins, etc.
(3) Do not expose battery cartridge to water
or rain.
A battery short can cause a large current
ow, overheating, possible burns and even a
breakdown.
6. Do not store the tool and battery cartridge in
locations where the temperature may reach or
exceed 50 °C (122 °F).
7. Do not incinerate the battery cartridge even if
it is severely damaged or is completely worn
out. The battery cartridge can explode in a re.
8. Be careful not to drop or strike battery.
9. Do not use a damaged battery.
10.
The contained lithium-ion batteries are subject to
the Dangerous Goods Legislation requirements.
For commercial transports e.g. by third parties,
forwarding agents, special requirement on pack-
aging and labeling must be observed.
For preparation of the item being shipped, consult-
ing an expert for hazardous material is required.
Please also observe possibly more detailed
national regulations.
Tape or mask off open contacts and pack up the
battery in such a manner that it cannot move
around in the packaging.
11. When disposing the battery cartridge, remove
it from the tool and dispose of it in a safe
place. Follow your local regulations relating to
disposal of battery.
11 ENGLISH
12. Use the batteries only with the products
specied by Makita. Installing the batteries to
non-compliant products may result in a re, exces-
sive heat, explosion, or leak of electrolyte.
13. If the tool is not used for a long period of time,
the battery must be removed from the tool.
SAVE THESE INSTRUCTIONS.
CAUTION:
Only use genuine Makita batteries.
Use of non-genuine Makita batteries, or batteries that
have been altered, may result in the battery bursting
causing res, personal injury and damage. It will also
void the Makita warranty for the Makita tool and charger.
Tips for maintaining maximum
battery life
1.
Charge the battery cartridge before completely dis-
charged. Always stop tool operation and charge the
battery cartridge when you notice less tool power.
2.
Never recharge a fully charged battery cartridge.
Overcharging shortens the battery service life.
3.
Charge the battery cartridge with room tempera-
ture at 10 °C - 40 °C (50 °F - 104 °F). Let a hot
battery cartridge cool down before charging it.
4. Charge the battery cartridge if you do not use
it for a long period (more than six months).
ASSEMBLY
WARNING: Always be sure that the lock key
and battery cartridge are removed before carrying
out any work on the mower. Failure to remove the
lock key and the battery cartridge may result in seri-
ous personal injury from accidental start-up.
WARNING: Never start the mower unless it is
completely assembled. Operation of the machine
in a partially assembled state may result in serious
personal injury from accidental start-up.
Installing the battery cover
WARNING: Do not insert the lock key and bat-
tery cartridge before installing the battery cover.
Failure to do so may cause a serious injury.
Install the battery cover completely before the opera-
tion. The battery cover protects the mower and battery
cartridge from mud, dirt, and water.
1. Place the battery cover with the protrusions on the
mower aligned with the holes on the battery cover.
► Fig.1: 1. Protrusion 2. Hole 3. Battery cover
2. Place your hands in the middle of the battery
cover and push it.
► Fig.2
3. Before the rst operation, check that the pivot
point of the battery cover is attached properly. If the
battery cover is installed correctly, it will not open until
the battery cover locking lever is pulled.
► Fig.3: 1. Pivot point 2. Battery cover locking lever
Installing the handle
NOTICE: When installing handles, position the
cords so that they are not caught by anything
between the handles. If the cord is damaged, the
mower switch may not work.
1. Slide the both ends of lower handle into the
grooves of the mower then fully tighten the clamping
screws.
► Fig.4: 1. Clamping screw 2. Lower handle
2. Align the screw holes of upper handle and lower
handle. Secure them with the clamping screws and
nuts.
► Fig.5: 1. Clamping nut 2. Clamping screw
NOTE: Hold the upper handle rmly so that it does
not drop off your hand.
3. Attach the holders to the handle. Position the
power supply cord as shown in the gure.
► Fig.6: 1. Holder
Removing the mulching plug
Optional accessory
1. Open the rear cover.
► Fig.7: 1. Rear cover
2. Hold the mulching plug by the handle, and then
pull it out from the mower body as shown in the gure.
► Fig.8: 1. Mulching plug 2. Handle
Installing the grass basket
1. Open the rear cover.
► Fig.9: 1. Rear cover
2. Hook the grass basket on the rod of the mower
body as shown in the gure.
► Fig.10: 1. Hook 2. Rod 3. Grass basket
Attaching the mulching plug
Optional accessory
1. Open the rear cover, and then remove the grass
basket.
► Fig.11: 1. Rear cover 2. Grass basket
2. Hold the mulching plug by the handle, and then
attach it to the mower body as shown in the gure.
► Fig.12: 1. Mulching plug 2. Handle

12 ENGLISH
FUNCTIONAL DESCRIPTION
Installing or removing battery cartridge
CAUTION: Always switch off the machine
before installing or removing of the battery
cartridge.
CAUTION: Make sure that you lock the battery
cover before use. Otherwise, mud, dirt, or water may
cause damage to the product or the battery cartridge.
CAUTION: Always install the battery cartridge
fully until the red indicator cannot be seen. If not,
it may accidentally fall out of the machine, causing
injury to you or someone around you.
CAUTION: Do not install the battery cartridge
forcibly. If the cartridge does not slide in easily, it is
not being inserted correctly.
NOTE: The machine does not work with only one
battery cartridge.
To install the battery cartridge;
1. Slide the battery cover locking lever and open the
battery cover.
► Fig.13: 1. Battery cover 2. Battery cover locking
lever
2. Align the tongue on the battery cartridge with the
slot on the mower then slide the cartridge until it locks in
place with a little click.
► Fig.14: 1. Battery cartridge
3. Insert the lock key in the place shown in the gure
as far as it will go.
► Fig.15: 1. Lock key
4. Close the battery cover and push it until it is
latched with the locking lever.
To remove the battery cartridge from the mower;
1. Slide the battery cover locking lever and open the
battery cover.
2. Pull out the battery cartridge from the mower while
sliding the button on the front of the cartridge.
3. Pull out the lock key.
4. Close the battery cover.
Machine / battery protection system
The machine is equipped with a machine/battery
protection system. This system automatically cuts off
power to the motor to extend tool and battery life. The
machine will automatically stop during operation if the
machine or battery is placed under one of the following
conditions.
Overload protection
When the machine is operated in a manner that causes
it to draw an abnormally high current, the machine
automatically stops without any indication. In this situ-
ation, turn the machine off and stop the application that
caused the machine to become overloaded. Then turn
the machine on to restart.
Overheat protection
When the machine is overheated, the machine stops
automatically. Let the machine cool down before turning
the machine on again.
Overdischarge protection
When the battery capacity becomes low, the machine
stops automatically. If the product does not operate
even when the switches are operated, remove the bat-
teries from the machine and charge the batteries.
Indicating the remaining battery
capacity
► Fig.16: 1. Battery indicator
When the remaining battery capacity gets low, the bat-
tery indicator blinks on the applicable battery side. By
further use, the machine stops and the battery indicator
lights up about 10 seconds. In this situation, charge the
battery cartridge.
Indicating the remaining battery
capacity
Only for battery cartridges with the indicator
► Fig.17: 1. Indicator lamps 2. Check button
Press the check button on the battery cartridge to indi-
cate the remaining battery capacity. The indicator lamps
light up for a few seconds.
Indicator lamps Remaining
capacity
Lighted Off Blinking
75% to 100%
50% to 75%
25% to 50%
0% to 25%
Charge the
battery.
The battery
may have
malfunctioned.
NOTE: Depending on the conditions of use and the
ambient temperature, the indication may differ slightly
from the actual capacity.
Switch action
WARNING: Before installing the battery car-
tridge, always check to see that the switch lever
actuates properly and returns to the original
position when released. Operating a machine with a
switch that does not actuate properly can lead to loss
of control and serious personal injury.

13 ENGLISH
NOTE: The mower does not start without pressing the
switch button even the switch lever is pulled.
NOTE: Mower may not start due to the overload
when you try to mow long or dense grass at a time.
Increase the mowing height in this case.
This mower is equipped with the interlock switch and
handle switch. If you notice anything unusual with either
of these switches, stop operation immediately and
have them checked by your nearest Makita Authorized
Service Center.
1. Install the battery cartridges. Insert the lock key
into the interlock switch and then close the battery
cover.
► Fig.18: 1. Battery cartridge 2. Lock key
2. Press the switch button and hold it.
3. Grab the upper handle and pull the switch lever.
► Fig.19: 1. Switch button 2. Switch lever
4. Release the switch button as soon as the motor
starts running. The mower will continue to run until you
release the switch lever.
5. Release the switch lever to stop the motor.
Adjusting the mowing height
WARNING: Never put your hand or leg under
the mower body when adjusting the mowing
height.
WARNING: Always make sure that the lever
ts in the groove properly before operation.
The mowing height can be adjusted in the range of
between 20 mm and 75 mm.
1. Remove the lock key.
2. Pull the mowing height adjusting lever to the
outward of the mower body and move it to your desired
mowing height.
► Fig.20: 1. Mowing height adjusting lever
NOTE: The mowing height gures should be used
just as a guideline. Depending on the conditions of
the lawn or the ground, the actual lawn height may
become slightly different from the set height.
NOTE: Try a test mowing of grass in a less conspicu-
ous place to get your desired height.
Grass level indicator
► Fig.21: 1. Grass level indicator
Grass level indicator shows the volume of mowed
grass.
• When the grass basket is not full, the indicator
oats during mowing.
• When the grass basket is full, the indicator does
not oat during mowing. In this case, stop mowing
immediately and empty the basket. After emptying
the basket, clean it so that its meshwork vents the
air.
NOTE: This indicator is a rough guide. Depending on
the conditions of inside of the basket, this indicator
may not work properly.
Using mulching plug
Optional accessory
The mulching plug allows you to return the cut grass to
the ground without gathering the cut grass in the grass
basket. When you operate the machine with the mulch-
ing plug, be sure to remove the grass basket.
NOTICE: When using the machine with the
mulching plug, make sure that the total length of
grass is 30 mm or more, or the cut length is 15
mm or less.
► Fig.22: (1) 30 mm or more (2) 15 mm or less
OPERATION
Mowing
WARNING: Before mowing, clear away sticks
and stones from mowing area. Furthermore, clear
away any weeds from mowing area in advance.
WARNING: Always wear the safety goggles or
safety glasses with side shields when operating
the mower.
CAUTION: If the cut grass or foreign object
blocks up inside of the mower body, be sure to
remove the lock key and battery cartridge and
wear gloves before removing the grass or foreign
object.
NOTICE: Use this machine for mowing lawn only.
Do not mow weeds with this machine.
► Fig.23
Firmly hold the handle with both hands when mowing.
The mowing speed guideline is approximately 1 meter
per 4 seconds.
► Fig.24
The outside edges of the front wheels are guidelines
to mowing width. Using the outside edges of the front
wheels as guidelines, mow in strips. Overlap by one half
to one third the previous strip to mow the lawn evenly.
► Fig.25: 1. Mowing width 2. Overlapping area
3. Outside edge
Change the mowing direction each time to prevent the
grass grain pattern from forming in just one direction.
► Fig.26
Periodically check the grass basket for mowed grass.
Empty the grass before it becomes full. Before every
periodical check, be sure to stop the mower then
remove the lock key and the battery cartridge.
NOTICE: Using the mower with the grass basket
full prevents smooth blade rotation and places
an extra load on the motor, which may cause
breakdown.

14 ENGLISH
Mowing a long-grass lawn
Do not try to cut long grass all in one go. Instead, mow
the lawn in some steps. Leave a day or two between
mows until the lawn becomes evenly short.
NOTE: Mowing long grass to a short length all in one
go may cause the grass to die. The cut grass may
also block up inside of the mower body.
Emptying the grass basket
WARNING:
To reduce a risk of accident, regu-
larly check the grass basket for any damage or weak-
ened strength. Replace the grass basket if necessary.
1. Release the switch lever.
2. Remove the lock key.
3. Open the rear cover and take out the grass basket
by holding the handle.
► Fig.27: 1. Rear cover 2. Handle
4. Empty the grass basket.
MAINTENANCE
WARNING: Always be sure that the lock
key and battery cartridge are removed from the
mower before storing or carrying the mower or
attempting to perform inspection or maintenance.
WARNING: Always remove the lock key when
the mower is not in use. Store the lock key in a
safe place out of reach of children.
WARNING: Wear gloves when performing
inspection or maintenance.
WARNING: Always wear the safety goggles or
safety glasses with side shields when performing
inspection or maintenance.
NOTICE: Never use gasoline, benzine, thinner,
alcohol or the like. Discoloration, deformation or
cracks may result.
To maintain product SAFETY and RELIABILITY,
repairs, any other maintenance or adjustment should
be performed by Makita Authorized or Factory Service
Centers, always using Makita replacement parts.
Maintenance
1. Remove the lock key. Store it in a safe place out of
the reach of children.
2. Clean the mower using only a wet cloth. Do not
spray or pour water on the mower when cleaning.
3. Put the mower on its side and clean grass clip-
pings accumulated on the underside of mower deck.
4. Check all nuts, bolts, knobs, screws, fasteners etc.
for tightness.
5. Inspect moving parts for damage, breakage, and
wear. Damaged or missing parts should be repaired or
replaced.
Storage
WARNING: When carrying or storing the
mower, do not hold the folded handles but the
front grip of the mower. Holding the folded handles
may cause a serious injury or damage to the mower.
Before storing the mower, remove the battery cartridge
and lock key.
Store mower indoors in a cool, dry and locked place.
Don't store the mower and charger in locations where
the temperature may reach or exceed 40 °C.
► Fig.28: 1. Front grip 2. Rear grip
1. Loosen the clamping screws and expand the
lower handle to both sides. Move down the handle for-
ward. At this time, keep a rm grip on the lower handle
so that the handle does not fall down to the far side from
the mower body.
► Fig.29: 1. Clamping screw 2. Lower handle
2. Loosen the clamping nuts and pivot the upper
handle back while expanding the both sides.
► Fig.30: 1. Clamping nut 2. Upper handle
3. Store the grass basket between the handle and
the mower body.
► Fig.31: 1. Grass basket
NOTE: When putting the mower in the upright posi-
tion, do not hold the handle but use the front grip of
the mower.
Removing or installing the mower
blade
WARNING: Always remove the lock key and
battery cartridge when removing or installing the
blade. Failure to remove the lock key and battery
cartridge may cause a serious injury.
WARNING: The blade coasts for a few sec-
onds after releasing the switch. Do not start any
operation until the blade comes to a complete
stop.
WARNING: Always wear gloves when han-
dling the blade.
Removing the mower blade
For DLM382
1. Put the mower on its side so that the mowing
height adjusting lever comes to the upper side.
2. To lock the blade rotation, insert a screwdriver or a
similar tool into a hole on the mower body.
3. Turn the bolt counterclockwise with the wrench.
► Fig.32: 1. Mower blade 2. Screwdriver 3. Wrench
4. Remove the bolt and blade in order.
► Fig.33: 1. Blade support 2. Mower blade 3. Bolt

15 ENGLISH
For DLM432
1. Put the mower on its side so that the mowing
height adjusting lever comes to the upper side.
2. To lock the blade rotation, insert a screwdriver or a
similar tool into a hole on the mower body.
3. Turn the bolt counterclockwise with the wrench.
► Fig.34: 1. Mower blade 2. Screwdriver 3. Wrench
4. Remove the bolt, outer ange, mower blade, and
inner ange in order.
► Fig.35: 1. Inner ange 2. Mower blade 3. Outer
ange 4. Bolt
Installing the mower blade
To install the mower blade, take the removal procedure
in reverse.
WARNING: Install the mower blade carefully.
It has a top/bottom facing. Place the blade so that
the rotational direction arrow faces outward.
WARNING: Tighten the bolt clockwise rmly
to secure the blade.
WARNING: Make sure that the mower blade
and all the xing parts are installed correctly and
tightened securely.
WARNING: When you replace the blades,
always follow the instructions provided in this
manual.
TROUBLESHOOTING
Before asking for repairs, conduct your own inspection rst. If you nd a problem that is not explained in the manual,
do not attempt to dismantle the tool. Instead, ask Makita Authorized Service Centers, always using Makita replace-
ment parts for repairs.
State of abnormality Probable cause (malfunction) Remedy
Mower does not start. Two battery cartridges are not installed. Install the charged battery cartridges.
Battery problem (under voltage) Recharge the battery cartridge. If recharging is not
effective, replace battery cartridge.
The lock key is not inserted. Insert the lock key.
Motor stops running after a little use. Battery's charge level is low. Recharge the battery cartridge. If recharging is not
effective, replace battery cartridge.
Cutting height is too low. Increase the cutting height.
Motor does not reach maximum
RPM.
Battery cartridge is installed improperly. Install the battery cartridge as described in this
manual.
Battery power is dropping. Recharge the battery cartridge. If recharging is not
effective, replace battery cartridge.
The drive system does not work
correctly.
Ask your local authorized service center for repair.
Mower blade does not rotate:
stop the mower immediately!
Foreign object such as a branch is
jammed near the blade.
Remove the foreign object.
The drive system does not work
correctly.
Ask your local authorized service center for repair.
Abnormal vibration:
stop the mower immediately!
Blade is imbalanced, excessively or
unevenly worn.
Replace the blade.
OPTIONAL
ACCESSORIES
CAUTION: These accessories or attachments
are recommended for use with your Makita tool
specied in this manual. The use of any other
accessories or attachments might present a risk of
injury to persons. Only use accessory or attachment
for its stated purpose.
If you need any assistance for more details regard-
ing these accessories, ask your local Makita Service
Center.
• Mower blade
• Mulching plug
• Makita genuine battery and charger
NOTE: Some items in the list may be included in the
tool package as standard accessories. They may
differ from country to country.

16 SLOVENŠČINA
SLOVENŠČINA (Originalna navodila)
TEHNIČNI PODATKI
Model: DLM382 DLM432
Širina košnje (premer rezila) 380 mm 430 mm
Hitrost brez obremenitve 3.700 min-1 3.600 min-1
Številka dela nadomestnega rezila kosilnice 191D41-2 191D43-8
Mere
(D x Š x V)
v času uporabe D: 1.380 mm do 1.410 mm
Š: 450 mm
V: 985 mm do 1.005 mm
D: 1.435 mm do 1.490 mm
Š: 460 mm
V: 1.005 mm do 1.045 mm
v času shranjevanja
(brez koša za travo)
860 mm x 450 mm x 475 mm 865 mm x 460 mm x 475 mm
Nazivna napetost D.C. 36 V
Neto teža 16,2 – 16,9 kg 16,8 – 17,5 kg
•
Ker nenehno opravljamo raziskave in razvijamo svoje izdelke, se lahko tehnični podatki v tem dokumentu spremenijo brez obvestila.
• Tehnični podatki se lahko razlikujejo od države do države.
• Teža se lahko razlikuje glede na priključke, vključno z akumulatorsko baterijo. Najlažja in najtežja kombinacija v
skladu s postopkom EPTA 01/2014 sta prikazani v preglednici.
Uporabna akumulatorska baterija
BL1815N / BL1820 / BL1820B / BL1830 / BL1830B / BL1840 / BL1840B / BL1850 / BL1850B / BL1860B
• Nekatere zgoraj navedene akumulatorske baterije morda v vaši državi prebivališča niso na voljo.
OPOZORILO: Uporabljajte le zgoraj navedene akumulatorske baterije. Uporaba drugih akumulatorskih
baterij lahko povzroči telesne poškodbe in/ali požar.
Simboli
Naslednji simboli se uporabljajo v povezavi s strojem.
Pred uporabo izdelka se obvezno seznanite z njihovim
pomenom.
Potrebna je posebna pozornost in
previdnost.
Preberite navodila za uporabo.
Nevarnost; pazite se letečih predmetov.
Razdalja med orodjem in osebami v bližini
mora biti najmanj 15 m.
Nikoli ne približujte rok in nog rezilu pod
kosilnico. Ko izključite motor, se rezila še
vedno vrtijo.
Pred pregledovanjem, prilagajanjem,
čiščenjem, servisiranjem, puščanjem in
shranjevanjem kosilnice vedno odstranite
ključ za zaklep.
Ni-MH
Li-ion
Samo za države EU
Ne zavrzite izrabljene električne opreme ali aku-
mulatorskega sklopa med gospodinjske odpadke!
V skladu z Evropskimi direktivami o
odpadni električni in elektronski opremi,
baterijah in akumulatorjih, odpadnih bate-
rijah in akumulatorjih ter upoštevanjem
njihovih določil v skladu z državno zako-
nodajo je treba električno opremo, baterije
in akumulatorje, katerih življenjski cikel
je pretekel, zbirati ločeno in jih dostaviti
v ustrezen obrat za recikliranje, ki deluje
skladno z okoljevarstvenimi zahtevami.
Predvidena uporaba
Stroj je namenjen košnji trave.
Hrup
Običajna A-ovrednotena raven hrupa v skladu z EN60335-2-77:
Model DLM382
Raven zvočnega tlaka (LpA): 81 dB (A)
Raven zvočne moči (LWA): 91 dB (A)
Odstopanje (K): 3 dB (A)
Model DLM432
Raven zvočnega tlaka (LpA): 81 dB (A)
Raven zvočne moči (LWA): 92 dB (A)
Odstopanje (K): 3 dB (A)
OPOMBA: Navedene vrednosti oddajanja hrupa so
bile izmerjene v skladu s standardnimi metodami
testiranja in se lahko uporabljajo za primerjavo orodij.
OPOMBA:
Navedene vrednosti oddajanja hrupa se
lahko uporabljajo tudi pri predhodni oceni izpostavljenosti.
OPOZORILO: Uporabljajte zaščito za sluh.
OPOZORILO: Oddajanje hrupa med dejansko
uporabo električnega orodja se lahko razlikuje od
navedenih vrednosti, odvisno od načina uporabe
orodja in predvsem vrste obdelovanca.
OPOZORILO:
Upravljavec mora za lastno
zaščito poznati varnostne ukrepe, ki temeljijo na
oceni izpostavljenosti v dejanskih pogojih upo-
rabe (poleg časa proženja je treba upoštevati celo-
ten delovni cikel, vključno s časom, ko je orodje
izklopljeno, in časom, ko deluje v prostem teku).

17 SLOVENŠČINA
Vibracije
Skupne vrednosti vibracij (vektorska vsota treh osi) v
skladu z EN60335-2-77:
Model DLM382
Emisije vibracij (ah): 2,5 m/s2 ali manj
Odstopanje (K): 2,0 m/s2
Model DLM432
Emisije vibracij (ah): 2,5 m/s2 ali manj
Odstopanje (K): 1,5 m/s2
OPOMBA:
Navedene skupne vrednosti oddajanja vibra-
cij so bile izmerjene v skladu s standardnimi metodami
testiranja in se lahko uporabljajo za primerjavo orodij.
OPOMBA:
Navedene skupne vrednosti oddajanja vibracij
se lahko uporabljajo tudi pri predhodni oceni izpostavljenosti.
OPOZORILO:
Oddajanje vibracij med
dejansko uporabo električnega orodja se lahko raz-
likuje od navedenih vrednosti, odvisno od načina
uporabe orodja in predvsem vrste obdelovanca.
OPOZORILO:
Upravljavec mora za lastno
zaščito poznati varnostne ukrepe, ki temeljijo na
oceni izpostavljenosti v dejanskih pogojih uporabe
(poleg časa proženja je treba upoštevati celoten
delovni cikel, vključno s časom, ko je orodje izklo-
pljeno, in časom, ko deluje v prostem teku).
Izjava o skladnosti ES
Samo za evropske države
Izjava ES o skladnosti je vključena v dodatku A, ki je
priložen tem navodilom za uporabo.
VARNOSTNA OPOZORILA
POMEMBNA VARNOSTNA
NAVODILA
OPOZORILO: Preberite vsa varnostna opo-
zorila in navodila. Neupoštevanje opozoril in navodil
lahko privede do električnega udara, požara in/ali
resnih telesnih poškodb.
Shranite vsa opozorila in navo-
dila za poznejšo uporabo.
Usposabljanje
1.
Pozorno preberite navodila. Seznanite se s funkci-
jami za upravljanje in pravilno uporabo kosilnice.
2.
Nikoli ne dovolite uporabe kosilnice otrokom ali
osebam, ki niso seznanjene z navodili. Lokalni
predpisi lahko omejijo starost uporabnika naprave.
3. Nikoli ne uporabljajte kosilnice v bližini ljudi,
zlasti otrok ali hišnih ljubljenčkov.
4. Upoštevajte, da je upravljavec ali uporabnik
odgovoren za nesreče ali nevarnosti, ki se
zgodijo drugim ljudem ali njihovi lastnini.
5. Zagotovite ustrezen nadzor otrok in preprečite
igranje s kosilnico.
6. Fizično stanje – ne uporabljajte kosilnice,
kadar ste pod vplivom drog, alkohola ali
kakršnih koli zdravil.
Priprava
1. Med delom s kosilnico vedno nosite ustrezno
obutev in dolge hlače. Kosilnice ne upo-
rabljajte, ko ste bosi ali nosite odprte sandale.
Ne nosite oblačil ali nakita, ki so ohlapna ali
imajo viseče vrvice ali pentlje. Lahko se zatak-
nejo v gibljive dele.
2. Preden začnete uporabljati kosilnico, pre-
verite, da ni poškodovana in ji ne manjkajo
nobena varovala in ščitniki oz. so ti ustrezno
nameščeni.
3. Pred košnjo se prepričajte, da v območju koš-
nje ni drugih oseb. Če kdor koli vstopi v obmo-
čje, ustavite kosilnico.
4. Ne vstavljajte ključa za zaklep v kosilnico,
dokler ni pripravljena za uporabo.
5. Pri uporabi električnih orodij vedno nosite
zaščitna očala, da preprečite poškodbe oči.
Očala morajo ustrezati standardu ANSI Z87.1
v ZDA, EN 166 v Evropi ali AS/NZS 1336 v
Avstraliji/Novi Zelandiji. V Avstraliji/Novi
Zelandiji je zakonsko zahtevano tudi nošenje
obrazne zaščite.
Delodajalec mora zagotoviti, da upravljavci
orodja in druge osebe v neposrednem delov-
nem območju uporabljajo ustrezno zaščitno
opremo.
6. Pred uporabo skrbno preverite rezila ali vijake
rezil glede obrabe, razpok ali poškodb. Takoj
zamenjajte počena ali poškodovana rezila ali
vijake rezil.
7. Pred košnjo iz delovnega območja odstranite
tujke, kot so kamni, žice, steklenice, kosti in
velike palice, da preprečite telesne poškodbe
ali poškodbe kosilnice.
8. Predmeti, ob katere zadene rezilo, lahko pov-
zročijo hude telesne poškodbe oseb. Pred
vsako košnjo je treba trato vedno skrbno pre-
gledati in z nje odstraniti vse predmete.
9. Osredotočite se na luknje, praske, vdolbine,
kamne ali druge skrite predmete. Delo na
neravnem terenu lahko povzroči drsenje in padec.
Visoka trava lahko prikrije ovire.
Uporaba
1. Ne segajte predaleč. Vselej pazite na to, da
ohranite ravnotežje. Pri hoji po pobočjih bodite
vedno previdni. Hodite, ne tecite.

18 SLOVENŠČINA
2. Izklopite kosilnico, odstranite ključ za zaklep
in se prepričajte, da so vsi premični deli popol-
noma pri miru:
– kadar pustite kosilnico nenadzorovano,
– preden odpravite ovire ali očistite korito,
– pred pregledom, čiščenjem ali delom na
kosilnici,
– po trku s tujkom. Preden ponovno zaženete
in uporabite kosilnico, jo preglejte, da ni poš-
kodovana, in jo popravite,
– kadar kosilnica začne neobičajno vibrirati.
3. Ne uporabljajte kosilnice z okvarjenimi varo-
vali ali ščitniki ali brez varnostnih naprav, npr.
deektorjev, in/ali nameščenega koša za travo.
4. Kosilnice ne uporabljajte ob slabem vremenu,
še posebej, kadar bliska.
5. Med uporabo kosilnice vedno nosite zaščito za
oči in robustne čevlje.
6. Kosilnico upravljajte samo podnevi ali ob
dobri umetni svetlobi.
7. Zaženite kosilnico v skladu z navodili in bodite
pozorni, da so vaše noge in roke dovolj odda-
ljene od rezil/-a.
8. Bodite previdni, da si z rezili kosilnice ne
poškodujete stopal in dlani.
9. Poskrbite, da v odprtinah za prezračevanje
nikoli ni smeti.
10. Kosite prečno po pobočju, nikoli gor in dol.
Kadar na pobočjih menjujete smer, bodite izje-
mno previdni. Ne kosite pri izredno nagnjenih
pobočjih.
11. Bodite izjemno previdni, ko premikate kosil-
nico vzvratno ali jo vlečete proti sebi.
12. Ustavite rezilo/-a, če morate kosilnico nagniti,
kadar se pomikate po netravnatih površinah in
kadar kosilnico prenašate do območja, ki ga
želite pokositi, ali z njega.
13. Med zagonom motorja ne nagibajte kosil-
nice, razen če je to potrebno. V tem primeru
kosilnice ne nagibajte več, kot je potrebno, in
dvignite samo tisti del, ki je obrnjen stran od
upravljavca. Preden postavite kosilnico na tla,
se vedno prepričajte, da sta obe roki v delov-
nem položaju.
14. Ne segajte z rokami ali nogami pod vrteče se
dele ali v njihovo bližino. Vedno bodite odmak-
njeni od odprtine za izmet.
15. Med prevozom kosilnica ne sme biti vključena.
16. Ne uporabljajte kosilnice za košnjo mokre
trave.
17. Nikoli ne uporabljajte kosilnice v dežju.
18. Vedno trdno držite ročaj.
19. Kadar dvigujete ali držite kosilnico, ne prije-
majte izpostavljenih rezil ali rezalnih robov.
20. Ne približujte rok in nog vrtečim se rezilom.
Previdno: rezila se po izklopu kosilnice prosto
premikajo.
21. Če opazite kaj neobičajnega, takoj prenehajte
uporabljati kosilnico. Izklopite kosilnico in
odstranite ključ za zaklep. Nato preglejte
kosilnico.
22. Če ima kosilnica funkcijo nastavitve višine za
rezanje, nikoli ne poskušajte prilagajati višine
za rezanje, ko je kosilnica vklopljena.
23. Preden prečkate dovoze, pločnike, ceste in
katere koli peščene površine, sprostite preklo-
pno ročico in počakajte, da se rezilo ustavi.
Ključ za zaklep odstranite tudi če pustite kosil-
nico, sežete, da bi pobrali ali odstranili nekaj s
poti, ali iz katerega koli drugega razloga, ki bi
vam lahko preusmeril pozornost.
24. Če kosilnica zadene ob tujek, upoštevajte
naslednja navodila:
– Ustavite kosilnico, sprostite preklopno
ročico in počakajte, da se rezilo popolnoma
ustavi.
– Odstranite ključ za zaklep in akumulatorsko
baterijo.
– Natančno preglejte kosilnico in preverite
morebitne poškodbe.
– Če je rezilo kakor koli poškodovano, ga
zamenjajte. Pred ponovnim zagonom in nadalj-
njo uporabo kosilnice popravite vse poškodbe.
25. Ne zaganjajte kosilnice, kadar stojite pred
odprtino za izmet.
26. Če začne kosilnica neobičajno vibrirati (takoj
preglejte):
– preglejte glede poškodb,
– zamenjajte ali popravite vse poškodovane
dele,
– preverite in pritrdite vse razrahljane dele.
27. Ne usmerjajte izvrženega materiala v ljudi. Ne
praznite materiala v steno ali drugo oviro. V
tem primeru se lahko namreč odbije nazaj v uprav-
ljavca. Zaustavite rezilo, ko peljete čez pesek.
28. Ne vlecite kosilnice vzvratno, če to ni res
nujno. Ko morate kosilnico peljati vzvratno, da se
izognete ograji ali podobni oviri, glejte na tla in za
sabo pred vzvratnim pomikanjem in med njim.
29. Izklopite motor in počakajte, da se rezilo zaus-
tavi, preden odstranite lovilnik trave. Bodite
previdni, saj se rezila po izklopu še vedno nekaj
časa vrtijo.
Vzdrževanje in shranjevanje
1. Zaradi varnosti zamenjajte obrabljene ali
poškodovane dele. Uporabljajte samo origi-
nalne nadomestne dele in pripomočke.
2. Redno pregledujte in vzdržujte kosilnico.
3. Kadar kosilnice ne uporabljate, jo hranite izven
dosega otrok.
4. Vse matice, čepi in vijaki naj bodo trdno priviti,
da zagotovite varno delovanje naprave.
5. Redno pregledujte koš za travo glede obra-
bljenosti ali okvar. Pri shranjevanju se vedno
prepričajte, da je koš za travo prazen. Zaradi
varnosti obrabljeni koš za travo zamenjajte z
novim tovarniškim košem.
6. Uporabljajte samo originalna proizvajalčeva
rezila, opredeljena v tem priročniku.
7. Med nastavljanjem kosilnice bodite previdni,
da preprečite ujetje prstov med premikajoča se
rezila in ksne dele stroja.
8. Ne spirajte kosilnice z vrtno cevjo; preprečite
vdor vode v motor in električne priključke.
9. Pogosto preverite, ali je vijak za pritrditev
rezila ustrezno zategnjen.
10. Pred shranjevanjem vedno počakajte, da se
kosilnica ohladi.

19 SLOVENŠČINA
11. Pri servisu rezil upoštevajte, da se lahko rezila
še vedno premaknejo, čeprav je napajanje
izključeno.
12. Ne odstranjujte ali spreminjajte varnostnih
naprav. Redno preverjajte njihovo pravilno
delovanje. Ne poskušajte spreminjati funkcije,
za katero je namenjena varnostna naprava, ali
vplivati na zaščito, ki jo ponuja.
Uporaba akumulatorskega orodja in ravnanje z njim
1. Orodje polnite samo s polnilnikom, ki ga je
določil proizvajalec. Polnilnik, ki je primeren za
eno vrsto akumulatorskih baterij, lahko pomeni
nevarnost požara, če ga uporabljate z drugimi
akumulatorskimi baterijami.
2. Električno orodje uporabljajte le s posebej
označenimi akumulatorskimi baterijami.
Uporaba drugih akumulatorskih baterij lahko
pomeni nevarnost telesnih poškodb in požara.
3.
Ko akumulatorske baterije ne uporabljate, je ne
hranite ob kovinskih predmetih, kot so sponke
za papir, kovanci, ključi, žeblji, vijaki ali drugi
manjši kovinski predmeti, ki lahko povzročijo
stik med priključkoma. Kratek stik akumulator-
skih priključkov lahko povzroči opekline ali požar.
4. V neprimernih pogojih lahko iz akumulatorja
uhaja tekočina; izogibajte se stiku. Če pride do
nenamernega stika, sperite z vodo. Če pride
tekočina v stik z očmi, takoj poiščite zdrav-
niško pomoč. Tekočina iz akumulatorja lahko
povzroči draženje ali opekline.
5. Ne uporabljajte akumulatorskega sklopa ali
orodja, ki je poškodovano ali spremenjeno.
Delovanje poškodovanih ali spremenjenih akumu-
latorjev je nepredvidljivo in lahko povzroči požar,
eksplozijo ali telesne poškodbe.
6. Akumulatorskega sklopa in orodja ne
izpostavljajte ognju ali previsoki temperaturi.
Izpostavljenost ognju ali temperaturam nad 130
°C lahko povzroči eksplozijo.
7. Upoštevajte vsa navodila glede polnjenja in
akumulatorskih baterij ali orodja ne polnite
zunaj določenega temperaturnega obsega.
Nepravilno polnjenje ali polnjenje pri temperatu-
rah, ki so zunaj določenega obsega, lahko poško-
duje akumulator in poveča nevarnost požara.
Električna zaščita in zaščita akumulatorja
1. Akumulatorja/-ev ni dovoljeno metati v
ogenj. Celica lahko eksplodira. Preverite lokalne
predpise glede morebitnih posebnih navodil za
odstranjevanje.
2. Ne odpirajte ali spreminjajte akumulatorja/-ev.
Sproščeni elektrolit je koroziven in lahko povzroči
poškodbe oči ali kože. Pri zaužitju je lahko
strupen.
3. Akumulatorja ne polnite v dežju ali na mokrih
mestih.
4. Akumulatorja ne polnite na prostem.
5. Ne dotikajte se polnilnika, vtiča polnilnika in
priključkov polnilnika z mokrimi rokami.
Servis
1. Električno orodje lahko servisira samo
usposobljen serviser, ki uporablja ustrezne
nadomestne dele. Tako bo zagotovljena varnost
električnega orodja.
2. Nikoli ne servisirajte poškodovanih akumula-
torskih sklopov. Servis akumulatorskih sklopov
lahko izvaja samo proizvajalec ali pooblaščeni
serviser.
SHRANITE TA NAVODILA.
OPOZORILO: NE dovolite, da bi zaradi udob-
nejšega dela ali znanja o uporabi izdelka (prido-
bljenega z večkratno uporabo) opustili strogo
upoštevanje varnostnih zahtev v okviru pravilne
uporabe orodja.
ZLORABA ali neupoštevanje varnostnih zahtev
v teh navodilih za uporabo lahko povzroči resne
telesne poškodbe.
Pomembna varnostna navodila za
akumulatorsko baterijo
1. Pred uporabo baterijskega vložka preberite
vsa navodila in opozorilne oznake na (1) pol-
nilniku akumulatorja, (2) akumulatorju in (3)
izdelku, ki uporablja akumulator.
2. Ne razstavljajte baterijskega vložka.
3. Če se je čas delovanja občutno skrajšal, takoj
prenehajte uporabljati orodje. V nasprotnem
primeru lahko pride do pregretja, morebitnih
opeklin in celo eksplozije.
4. Če pride elektrolit v stik z očmi, jih sperite s
čisto vodo in takoj poiščite zdravniško pomoč.
Posledica je lahko izguba vida.
5.
Ne povzročite kratkega stika baterijskega vložka:
(1) Ne dotikajte se priključkov s kakršnim
koli prevodnim materialom.
(2) Izogibajte se shranjevanju baterijskega
vložka v vsebniku z drugimi kovinskimi
predmeti kot so žeblji, kovanci itn.
(3) Ne izpostavljajte baterijskega vložka vodi
ali dežju.
Kratek stik akumulatorja lahko povzroči velik
električni tok, pregrevanje, morebitne opekline
in celo okvaro.
6. Ne shranjujte orodja in baterijskega vložka
na mestih, kjer lahko temperatura doseže ali
preseže 50 °C.
7. Ne sežigajte baterijskega vložka, tudi če je
hudo poškodovan ali v celoti izpraznjen.
Baterijski vložek lahko v ognju eksplodira.
8. Poskrbite, da akumulator ne bo izpostavljen
padcem ali udarcem.
9. Ne uporabljajte poškodovanih akumulatorjev.
10. Priložene litij-ionske baterije ustrezajo zahte-
vam zakonodaje v zvezi z nevarnim blagom.
Za komercialne prevoze, npr. tiste, ki jih opravljajo
tretje stranke in carinski posredniki, je treba upo-
števati posebne zahteve v zvezi z embalažo in
označevanjem.
Med postopkom priprave na odpremo izdelka se
je treba posvetovati s strokovnjakom za nevarne
snovi. Pri tem upoštevajte tudi podrobnejše nacio-
nalne predpise.
Odprte stike oblepite z lepilnim trakom ali jih dru-
gače zaščitite, baterijo pa zapakirajte tako, da se v
embalaži ne more premikati.

20 SLOVENŠČINA
11. Ko odstranjujete akumulatorsko baterijo, jo
vzemite iz orodja in varno zavrzite. Upoštevajte
lokalne uredbe glede odlaganja baterije.
12. Baterije uporabljajte le z izdelki, ki jih določi
Makita. Če namestite baterije v neskladne izdelke,
lahko pride do požara, pregrevanja, eksplozije ali
puščanja elektrolita.
13. Če orodja dlje časa ne uporabljate, morate iz
njega odstraniti baterijo.
SHRANITE TA NAVODILA.
POZOR: Uporabljajte le originalne baterije
Makita. Če uporabljate neoriginalne baterije Makita
ali baterije, ki so bile spremenjene, lahko pride do
eksplozije baterije in posledično do požara, telesnih
poškodb ali materialne škode. S takšno uporabo
boste tudi razveljavili garancijo Makita za orodje in
polnilnik Makita.
Nasveti za ohranjanje največje
zmogljivosti akumulatorja
1.
Napolnite baterijski vložek, preden se v celoti izprazni.
Ko opazite, da ima orodje manjšo moč, vedno ustavite
delovanje orodja in napolnite baterijski vložek.
2. Nikoli znova ne polnite popolnoma napol-
njenega baterijskega vložka. Prenapolnjenje
skrajša življenjsko dobo akumulatorja.
3. Baterijski vložek s sobno temperaturo pol-
nite pri temperaturi okolja od 10 °C do 40 °C.
Počakajte, da se vroč baterijski vložek pred
polnjenjem ohladi.
4. Če baterijskega vložka ne uporabljate dalj časa
(več kot 6 mesecev), ga napolnite.
MONTAŽA
OPOZORILO: Pred izvajanjem kakršnih koli
opravil na kosilnici se prepričajte, da sta ključ
za zaklep in akumulatorska baterija odstranjena.
Če ne odstranite ključa za zaklep in akumulatorske
baterije, lahko pride do hudih telesnih poškodb zaradi
nenamernega zagona.
OPOZORILO: Ne zaženite kosilnice, če ni
povsem sestavljena. Uporaba delno sestavljenega
stroja lahko povzroči hude telesne poškodbe zaradi
nenamernega zagona.
Nameščanje pokrova akumulatorja
OPOZORILO: Ne vstavljajte ključa za zaklep
in akumulatorske baterije, preden ne namestite
pokrova akumulatorja. V nasprotnem primeru lahko
pride do hudih telesnih poškodb.
Pred uporabo kosilnice ustrezno namestite pokrov
akumulatorja. Pokrov akumulatorja varuje kosilnico in
akumulatorsko baterijo pred blatom, umazanijo in vodo.
1. Namestite pokrov akumulatorja tako, da poravnate
odprtini z izboklinama na kosilnici.
► Sl.1: 1. Izboklina 2. Odprtina 3. Pokrov
akumulatorja
2. Postavite roki na sredino pokrova akumulatorja in
potisnite pokrov navzdol.
► Sl.2
3. Pred prvo uporabo preverite, ali je točka vrtenja
pokrova akumulatorja pravilno nameščena. Če je
pokrov akumulatorja pravilno nameščen, se ne bo
odprl, dokler ne povlečete ročice za zaklep pokrova
akumulatorja.
► Sl.3: 1. Točka vrtenja 2. Ročica za zaklep pokrova
akumulatorja
Namestitev ročaja
OBVESTILO: Ko nameščate ročaja, nastavite
kable tako, da se ne bodo ujeli mednju. Če je
kabel poškodovan, stikalo kosilnice morda ne bo
delovalo.
1. Potisnite oba konca spodnjega ročaja v utora na
kosilnici in trdno zategnite vpenjalna vijaka.
► Sl.4: 1. Vpenjalni vijak 2. Spodnji ročaj
2. Poravnajte vijačne odprtine zgornjega in spo-
dnjega ročaja. Pritrdite ročaj z vpenjalnima vijakoma in
maticama.
► Sl.5: 1. Vpenjalna matica 2. Vpenjalni vijak
OPOMBA: Trdno držite zgornji ročaj, da vam ne pade
iz rok.
3. Pritrdite držali na ročaj. Vpnite napajalni kabel, kot
prikazuje slika.
► Sl.6: 1. Držalo
Odstranjevanje nastavka za
zastiranje
Dodatna oprema
1. Odprite zadnji pokrov.
► Sl.7: 1. Zadnji pokrov
2. Držite ročaj nastavka za zastiranje in ga izvlecite
iz ohišja kosilnice, kot je prikazano na sliki.
► Sl.8: 1. Nastavek za zastiranje 2. Ročaj
Nameščanje koša za travo
1. Odprite zadnji pokrov.
► Sl.9: 1. Zadnji pokrov
2. Zataknite koš za travo na drog na ohišju kosilnice,
kot je prikazano na sliki.
► Sl.10: 1. Kavelj 2. Drog 3. Koš za travo
Pritrjevanje nastavka za zastiranje
Dodatna oprema
1. Odprite zadnji pokrov in odstranite koš za travo.
► Sl.11: 1. Zadnji pokrov 2. Koš za travo
2. Držite ročaj nastavka za zastiranje in ga pritrdite
na ohišje kosilnice, kot je prikazano na sliki.
► Sl.12: 1. Nastavek za zastiranje 2. Ročaj
Other manuals for DLM382
11
This manual suits for next models
1
Table of contents
Languages:
Other Makita Lawn Mower manuals

Makita
Makita UM401D Manual

Makita
Makita DLM533 User manual

Makita
Makita XML06 Series User manual

Makita
Makita DLM431 User manual

Makita
Makita LM001C User manual

Makita
Makita DLM380 User manual

Makita
Makita PLM4626N User manual

Makita
Makita DLM537Z User manual

Makita
Makita DLM463 User manual

Makita
Makita LM004J User manual

Makita
Makita ELM4121 User manual

Makita
Makita DLM537 User manual

Makita
Makita DLM463 User manual

Makita
Makita DLM230 User manual

Makita
Makita DLM431 User manual

Makita
Makita PLM5113 User guide

Makita
Makita LM001C User manual

Makita
Makita LM001J User manual

Makita
Makita DOLMAR EM411 User manual

Makita
Makita BLM430 User manual