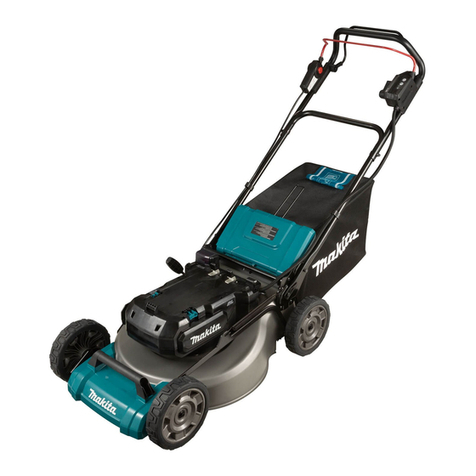
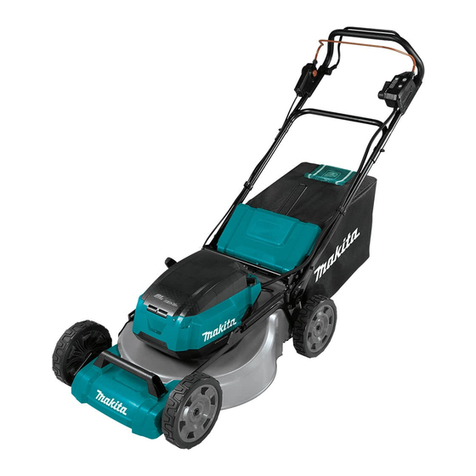
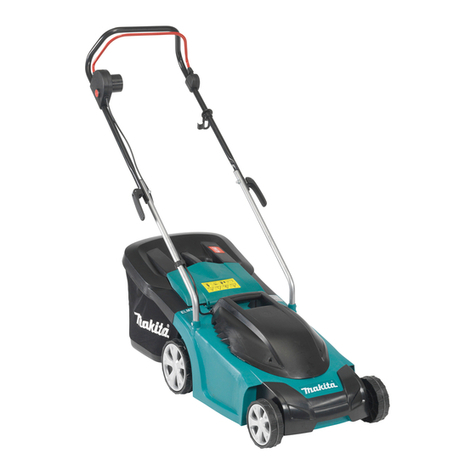
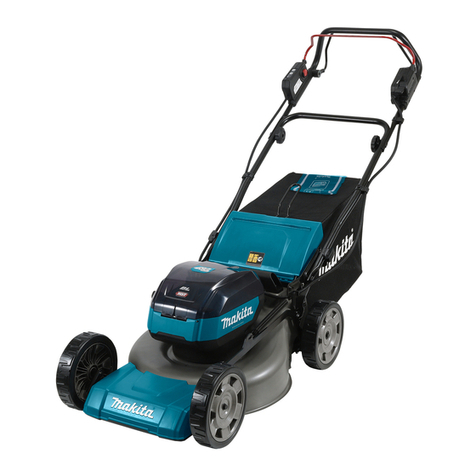
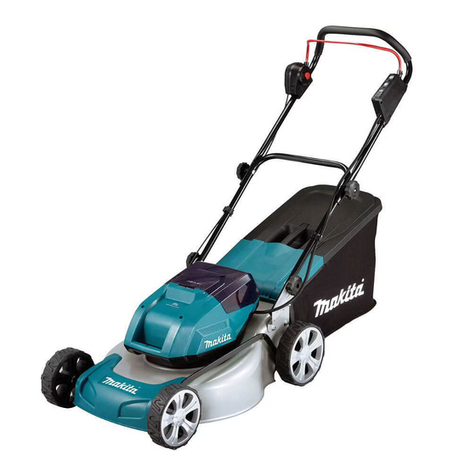
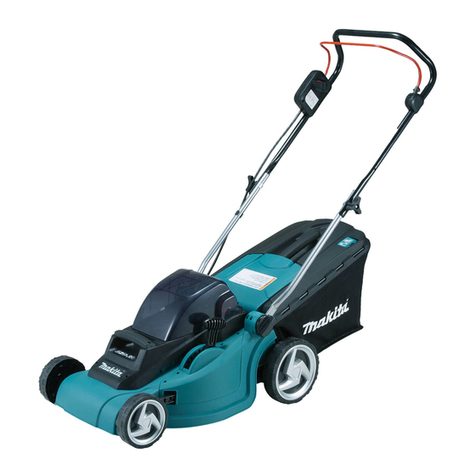
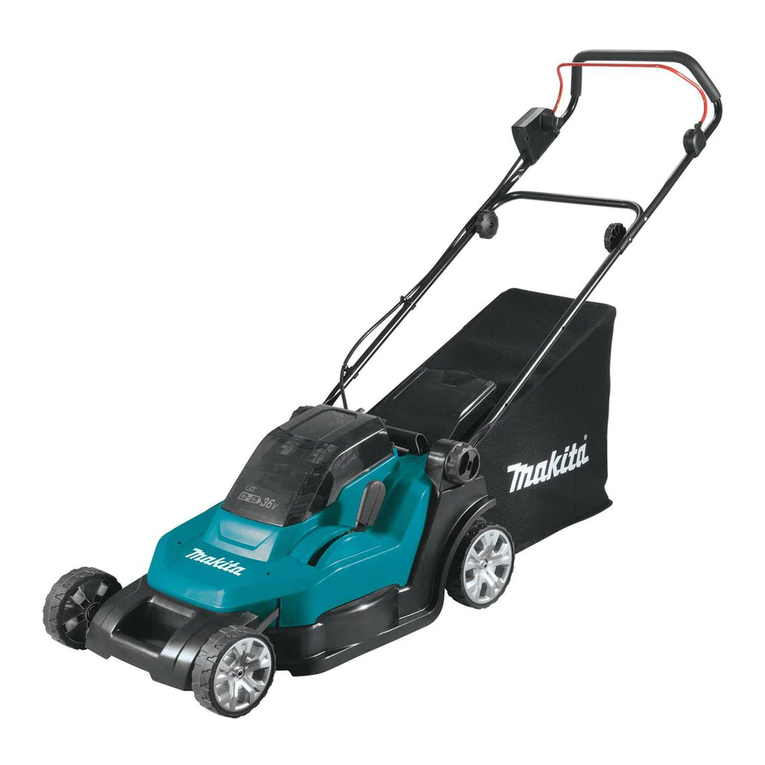
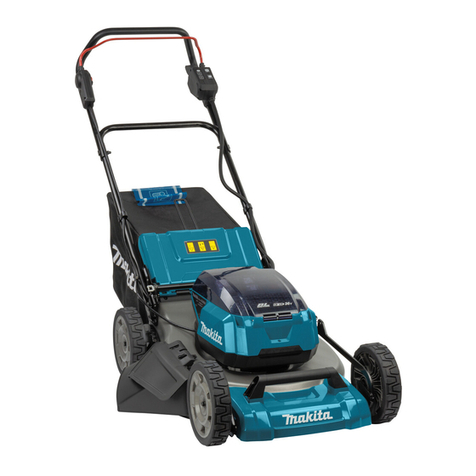
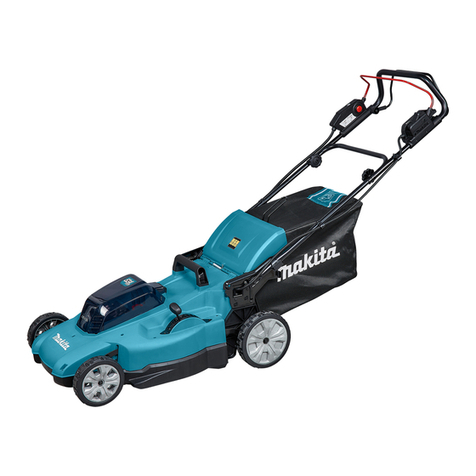
Makita DLM431 User manual

DLM431
EN Cordless Lawn Mower INSTRUCTION MANUAL 6
SL Akumulatorska kosilnica NAVODILA ZA UPORABO 14
SQ Kositëse bari me bateri MANUALI I PËRDORIMIT 22
BG Безжична косачка за трева РЪКОВОДСТВО ЗА
ЕКСПЛОАТАЦИЯ 30
HR Bežična kosilica za travu PRIRUČNIK S UPUTAMA 39
МК Безжична косилка УПАТСТВО ЗА УПОТРЕБА 47
SR Бежична косилица за траву УПУТСТВО ЗА УПОТРЕБУ 56
RO Maşină de tuns iarba fără
cablu MANUAL DE INSTRUCŢIUNI 65
UK Бездротова газонокосарка ІНСТРУКЦІЯ З
ЕКСПЛУАТАЦІЇ 74
RU Аккумуляторная
газонокосилка
РУКОВОДСТВО ПО
ЭКСПЛУАТАЦИИ 83

1
2
Fig.1
1
Fig.2
1
Fig.3
2
1
Fig.4
1
2
Fig.5
21
Fig.6
12
Fig.7
1
Fig.8
2

1
Fig.9
3
1
2
Fig.10
Fig.11
1
2
Fig.12
1
2
Fig.13
2
2
1
Fig.14
1
Fig.15
1
23
Fig.16
3

1
2
3
4
5
Fig.17
Fig.18
1
2
3
Fig.19
Fig.20
1
2
Fig.21
12
Fig.22
1
2
Fig.23
1
2
Fig.24
4

1
Fig.25
5

6ENGLISH
ENGLISH (Original instructions)
SPECIFICATIONS
Model: DLM431
Mowing width (blade diameter) 430 mm
No load speed 3,600 min-1
Dimensions
(L x W x H)
during operation Max. 1,490 mm x 460 mm x 1,020 mm
Min. 1,450 mm x 460 mm x 950 mm
when stored
(without grass basket)
490 mm x 460 mm x 910 mm
Rated voltage D.C. 36 V
Standard battery cartridge(s)
Warning: Use only the battery cartridge(s) described.
BL1815N/BL1820/BL1820B BL1830/BL1830B/BL1840/
BL1840B/BL1850/BL1850B/
BL1860B
Net weight 17.8 kg 18.3 kg
• Duetoourcontinuingprogramofresearchanddevelopment,thespecicationshereinaresubjecttochange
without notice.
• Specicationsandbatterycartridgemaydifferfromcountrytocountry.
• Weight,withbatterycartridge,accordingtoEPTA-Procedure01/2003
Symbols
Thefollowingshowthesymbolsusedfortheequip-
ment.Besurethatyouunderstandtheirmeaningbefore
use.
Takeparticularcareandattention.
Read instruction manual.
Danger;beawareofthrownobjects.
Thedistancebetweenthetooland
bystanders must be at least 15 m.
Neverputyourhandsandfeetnearthe
blade under the mower. Blades continue to
rotateafterthemotorisswitchedoff.
Removethelockkeybeforeinspecting,
adjusting,cleaning,servicing,leavingand
storing the mower.
Cd
Ni-MH
Li-ion
OnlyforEUcountries
Donotdisposeofelectricequipmentor
battery pack together with household waste
material!
InobservanceoftheEuropeanDirectives,
onWasteElectricandElectronic
EquipmentandBatteriesandAccumulators
andWasteBatteriesandAccumulators
and their implementation in accordance
withnationallaws,electricequipmentand
batteries and battery pack(s) that have
reachedtheendoftheirlifemustbecol-
lected separately and returned to an envi-
ronmentallycompatiblerecyclingfacility.
Intended use
Thetoolisintendedforlawnmowing.
Noise
ThetypicalA-weightednoiseleveldeterminedaccord-
ingtoEN60335:
Sound pressure level (LpA):80dB(A)
Sound power level (LWA):93dB(A)
Uncertainty(K):3dB(A)
Thenoiselevelunderworkingmayexceed80dB(A).
Vibration
Thevibrationtotalvalue(tri-axialvectorsum)deter-
minedaccordingtoEN60335:
Vibration emission (ah) : 2.5 m/s2or less
Uncertainty (K) : 1.5 m/s2
NOTE:Thedeclaredvibrationemissionvaluehas
been measured in accordance with the standard test
methodandmaybeusedforcomparingonetoolwith
another.
NOTE:Thedeclaredvibrationemissionvalue
mayalsobeusedinapreliminaryassessmentof
exposure.
WARNING:Thevibrationemissionduringactual
useofthepowertoolcandifferfromthedeclared
emission value depending on the ways in which the
tool is used.
WARNING:Besuretoidentifysafetymeasures
to protect the operator that are based on an estima-
tionofexposureintheactualconditionsofuse(taking
accountofallpartsoftheoperatingcyclesuchas
thetimeswhenthetoolisswitchedoffandwhenitis
running idle in addition to the trigger time).

7ENGLISH
EC Declaration of Conformity
For European countries only
MakitadeclaresthatthefollowingMachine(s):
DesignationofMachine:CordlessLawnMower
ModelNo./Type:DLM431
ConformstothefollowingEuropeanDirectives:
2000/14/EC,2006/42/EC
Theyaremanufacturedinaccordancewiththefollowing
standardorstandardizeddocuments:EN60335
Thetechnicalleinaccordancewith2006/42/ECis
availablefrom:
Makita, Jan-Baptist Vinkstraat 2, 3070, Belgium
Theconformityassessmentprocedurerequiredby
Directive2000/14/ECwasinAccordancewithannexVI.
NotiedBody:TÜVRheinlandLGAProductsGmbH
AmGrauenStein2951105KölnGermany
Identicationnumber0197
MeasuredSoundPowerLevel:93dB(A)
GuaranteedSoundPowerLevel:94dB(A)
1.12.2015
Yasushi Fukaya
Director
Makita, Jan-Baptist Vinkstraat 2, 3070, Belgium
IMPORTANT SAFETY
INSTRUCTIONS
WARNING: Read all safety warnings and
all instructions. Failuretofollowthewarningsand
instructionsmayresultinelectricshock,reand/or
seriousinjury.
Save all warnings and instruc-
tions for future reference.
1. Do not insert the key into mower until it is
ready to be used.
2. Children should be supervised to ensure that
they do not play with the mower.
3. Never allow children or people unfamiliar with
these instructions to use the mower. Local
regulations can restrict the age of the operator.
4. Never operate the mower while people, espe-
cially children, or pets are nearby.
5. Keep in mind that the operator or user is
responsible for accidents or hazards occurring
to other people or their property.
6. While operating the mower, always wear sub-
stantial footwear and long trousers. Do not
operate the mower when barefoot or wearing
open sandals. Avoid wearing clothing or jew-
elry that is loose tting or that has hanging
cords or ties. They can be caught in moving
parts.
7. Operate the mower only in daylight or in good
articial light.
8. Avoid operating the mower in wet grass.
9. Never operate the mower in the rain.
10. Battery tool use and care
- Recharge only with the charger specied by
the manufacturer. Achargerthatissuitablefor
onetypeofbatterycartridgemaycreateariskof
rewhenusedwithanotherbatterycartridge.
- Use power tools only with specically desig-
nated battery cartridges.Useofanyotherbat-
terycartridgesmaycreateariskofinjuryandre.
- When battery cartridge is not in use, keep
it away from other metal objects, like paper
clips, coins, keys, nails, screws or other small
metal objects, that can make a connection
from one terminal to another. Shorting the bat-
teryterminalstogethermaycauseburnsorare.
- Under abusive conditions, liquid may be
ejected from the battery; avoid contact. If con-
tact accidentally occurs, ush with water. If
liquid contacts eyes, additionally seek medical
help.Liquidejectedfromthebatterymaycause
irritation or burns.
11. Always keep a rm hold on the handle.
12. Always be sure of your footing on slopes.
13. Walk, never run.
14.
Don't grasp the exposed cutting blades or cutting
edges when picking up or holding the mower.
15. Physical condition - Do not operate mower
while under the inuence of drugs, alcohol, or
any medication.
16. Keep hands and feet away from rotating
blades. Caution - Blades coast after the mower
is switched off.
17. Use only the manufacturer genuine blades
specied in this manual.
18. Check the blades carefully for cracks or dam-
age before operation. Replace cracked or
damaged blades immediately.
19. Be sure the area is clear of other people before
mowing. Stop mower if anyone enters the area.
20. Remove foreign matters such as rocks, wire,
bottles, bones and large sticks from the work
area before mowing to prevent personal injury
or damage to the mower.
21. Stop operation immediately if you notice
anything unusual. Switch off the mower and
remove the key. Then inspect the mower.
22. Never attempt to make wheel height adjust-
ments while mower is running.
23. Release switch lever and wait for blade rota-
tion to stop before crossing driveways, walks,
roads, and any gravel-covered areas. Also
remove the key if you leave the mower, reach
to pick up or remove something out of your
way, or for any other reason that may distract
you from what you are doing.
24. Objects struck by the mower blade can cause
severe injuries to persons. The lawn should
always be carefully examined and cleared of
all objects prior to each mowing.
25. If the mower strikes a foreign object, follow
these steps:
- Stop the mower, release the switch lever and
wait until the blade comes to a complete stop.
- Remove the key and the battery cartridge.
- Thoroughly inspect the mower for any
damage.
8ENGLISH
- Replace the blade if it is damaged in any way.
Repair any damage before restarting and con-
tinuing to operate the mower.
26. Check the grass basket frequently for wear or
deterioration. For storage, always make sure
the grass basket is empty. Replace a worn
grass basket with a new factory replacement
for safety.
27. Use extreme caution when reversing or pulling
the mower towards you.
28. Stop the blade(s) if the mower has to be tilted
for transportation when crossing surfaces
other than grass, and when transporting the
mower to and from the area to be used.
29.
Never operate the mower with defective guards
or shields, or without safety devices, for exam-
ple deectors and/or grass basket, in place.
30. Switch on the mower carefully according to
instructions and with feet well away from the
blade(s).
31. Do not tilt the mower when switching on the
motor, except if the mower has to be tilted for
starting. In this case, do not tilt it more than
absolutely necessary and lift only the part,
which is away from the operator.
32. Do not start the mower when standing in front
of the discharge opening.
33. Do not put hands or feet near or under rotating
parts. Keep clear of the discharge opening at
all times.
34. Do not transport the mower while the mower is
turned on.
35. Stop the mower, and remove the disabling
device. Make sure that all moving parts have
come to a complete stop
- whenever you leave the mower,
- before clearing blockages or unclogging
chute,
- before checking, cleaning or working on the
mower,
- after striking a foreign object. Inspect the
mower for damage and make repairs before
restarting and operating the mower.
36. If the mower starts to vibrate abnormally
(check immediately)
- inspect for damage,
- replace or repair any damaged parts,
- check for and tighten any loose parts.
37. Be careful during adjustment of the mower
to prevent entrapment of the ngers between
moving blades and xed parts of the mower.
38. Mow across the face of slopes, never up and
down. Exercise extreme caution when chang-
ing direction on slopes. Do not mow exces-
sively steep slopes.
39. Do not wash with a hose; avoid getting water
in motor and electrical connections.
40. Check the blade mounting bolt at frequent
intervals for proper tightness.
41. Keep all nuts, bolts, and screws tight to
be sure the equipment is in safe working
condition.
42. Always allow the mower to cool down before
storing.
43. When servicing the blades be aware that, even
though the power source is switched off, the
blades can still be moved.
44. Replace worn or damaged parts for safety.
Use only genuine replacement parts and
accessories.
SAVE THESE INSTRUCTIONS.
WARNING: DO NOT let comfort or familiarity
with product (gained from repeated use) replace
strict adherence to safety rules for the subject
product.
MISUSE or failure to follow the safety rules stated
in this instruction manual may cause serious
personal injury.
Important safety instructions for
battery cartridge
1. Before using battery cartridge, read all instruc-
tions and cautionary markings on (1) battery
charger, (2) battery, and (3) product using
battery.
2. Do not disassemble battery cartridge.
3. If operating time has become excessively
shorter, stop operating immediately. It may
result in a risk of overheating, possible burns
and even an explosion.
4. If electrolyte gets into your eyes, rinse them
out with clear water and seek medical atten-
tion right away. It may result in loss of your
eyesight.
5. Do not short the battery cartridge:
(1) Do not touch the terminals with any con-
ductive material.
(2) Avoid storing battery cartridge in a con-
tainer with other metal objects such as
nails, coins, etc.
(3) Do not expose battery cartridge to water
or rain.
A battery short can cause a large current
ow, overheating, possible burns and even a
breakdown.
6. Do not store the tool and battery cartridge in
locations where the temperature may reach or
exceed 50 °C (122 °F).
7. Do not incinerate the battery cartridge even if
it is severely damaged or is completely worn
out. The battery cartridge can explode in a re.
8. Be careful not to drop or strike battery.
9. Do not use a damaged battery.
10. The contained lithium-ion batteries are subject
to the Dangerous Goods Legislation require-
ments.
For commercial transports e.g. by third parties,
forwardingagents,specialrequirementonpack-
aging and labeling must be observed.
Forpreparationoftheitembeingshipped,consult-
inganexpertforhazardousmaterialisrequired.
Pleasealsoobservepossiblymoredetailed
national regulations.
Tapeormaskoffopencontactsandpackupthe
battery in such a manner that it cannot move
around in the packaging.

9ENGLISH
11. Follow your local regulations relating to dis-
posal of battery.
SAVE THESE INSTRUCTIONS.
CAUTION: Only use genuine Makita batteries.
Useofnon-genuineMakitabatteries,orbatteriesthat
have been altered, may result in the battery bursting
causingres,personalinjuryanddamage.Itwill
alsovoidtheMakitawarrantyfortheMakitatooland
charger.
Tips for maintaining maximum
battery life
1. Charge the battery cartridge before completely
discharged. Always stop tool operation and
charge the battery cartridge when you notice
less tool power.
2. Never recharge a fully charged battery car-
tridge. Overcharging shortens the battery
service life.
3. Charge the battery cartridge with room tem-
perature at 10 °C - 40 °C (50 °F - 104 °F). Let
a hot battery cartridge cool down before
charging it.
4. Charge the battery cartridge if you do not use
it for a long period (more than six months).
FUNCTIONAL
DESCRIPTION
Installing or removing battery
cartridge
CAUTION: Always switch off the tool before
installing or removing of the battery cartridge.
CAUTION: Make sure that you lock the battery
cover before use. Otherwise, mud, dirt, or water may
cause damage to the product or the battery cartridge.
CAUTION: Always install the battery cartridge
fully until the red indicator cannot be seen.Ifnot,
itmayaccidentallyfalloutofthetool,causinginjuryto
you or someone around you.
CAUTION: Do not install the battery cartridge
forcibly.Ifthecartridgedoesnotslideineasily,itis
not being inserted correctly.
NOTE:Thetooldoesnotworkwithonlyonebattery
cartridge.
To install the battery cartridge;
1. Slide the battery cover locking lever and open the
battery cover.
►Fig.1: 1. Battery cover 2. Battery cover locking lever
2. Alignthetongueonthebatterycartridgewiththe
slot on the mower then slide the cartridge until it locks in
placewithalittleclick.Ifyoucanseetheredindicator
ontheuppersideofthebutton,batterycartridgeisnot
locked completely.
►Fig.2: 1. Battery cartridge
3. Insertthelockkeyintheplaceshowninthegure
asfarasitwillgo.
►Fig.3: 1. Lock key
4. Close the battery cover and push it until it is
latched with the locking lever.
To remove the battery cartridge from the mower;
1. Slide the battery cover locking lever and open the
battery cover.
2. Pulloutthebatterycartridgefromthemowerwhile
slidingthebuttononthefrontofthecartridge.
3. Pulloutthelockkey.
4. Close the battery cover.
Tool / battery protection system
Thetoolisequippedwithatool/batteryprotectionsys-
tem.Thissystemautomaticallycutsoffpowertothe
motortoextendtoolandbatterylife.Thetoolwillauto-
maticallystopduringoperationifthetoolorbatteryis
placedunderoneofthefollowingconditions.
Overload protection
When the tool is operated in a manner that causes it to
draw an abnormally high current, the tool automatically
stops without any indication. In this situation, turn the
tooloffandstoptheapplicationthatcausedthetoolto
becomeoverloaded.Thenturnthetoolontorestart.
Overheat protection
When the tool is overheated, the tool stops automati-
cally.Letthetoolcooldownbeforeturningthetoolon
again.
Overdischarge protection
When the battery capacity becomes low, the tool stops
automatically.Iftheproductdoesnotoperateeven
when the switches are operated, remove the batteries
fromthetoolandchargethebatteries.
Indicating the remaining battery
capacity
►Fig.4: 1. Battery indicator 2. Check button
Pressthecheckbuttontoindicatetheremainingbattery
capacities.Thebatteryindicatorscorrespondtoeach
battery.
Battery indicator status
Remaining battery
capacity
On Off
50% - 100%
20% - 50%

10 ENGLISH
Battery indicator status
Remaining battery
capacity
On Off
0% - 20%
Indicating the remaining battery
capacity
Only for battery cartridges with "B" at the end of the
model number
►Fig.5: 1. Indicator lamps 2. Check button
Pressthecheckbuttononthebatterycartridgetoindi-
catetheremainingbatterycapacity.Theindicatorlamps
lightupforfewseconds.
Indicator lamps Remaining
capacity
Lighted Off Blinking
75% to 100%
50% to 75%
25% to 50%
0% to 25%
Charge the
battery.
Thebattery
may have
malfunctioned.
NOTE:Dependingontheconditionsofuseandthe
ambienttemperature,theindicationmaydifferslightly
fromtheactualcapacity.
Switch action
WARNING: Before installing the battery car-
tridge, always check to see that the switch lever
actuates properly and returns to the original posi-
tion when released. Operating a tool with a switch
thatdoesnotactuateproperlycanleadtolossof
controlandseriouspersonalinjury.
NOTE:Themowerdoesnotstartwithoutpressingthe
switch button even the switch lever is pulled.
NOTE: Mower may not start due to the overload
when you try to mow long or dense grass at a time.
Increase the mowing height in this case.
Thismowerisequippedwiththeinterlockswitchand
handleswitch.Ifyounoticeanythingunusualwitheither
oftheseswitches,stopoperationimmediatelyand
havethemcheckedbyyournearestMakitaAuthorized
Service Center.
1. Install the battery cartridges. Insert the lock key
into the interlock switch and then close the battery
cover.
►Fig.6: 1. Battery cartridge 2. Lock key
2. Presstheswitchbuttonandholdit.
3. Grabtheupperhandleandpulltheswitchlever.
►Fig.7: 1. Switch button 2. Switch lever
4. Release the switch button as soon as the motor
startsrunning.Themowerwillcontinuetorununtilyou
release the switch lever.
5. Release the switch lever to stop the motor.
Adjusting the mowing height
WARNING: Never put your hand or leg under
the mower body when adjusting the mowing
height.
WARNING: Always make sure that the lever
ts in the groove properly before operation.
Themowingheightcanbeadjustedintherangeof
between 20 mm - 75 mm.
1. Remove the lock key.
2. Pullthemowingheightadjustinglevertothe
outwardofthemowerbodyandmoveittoyourdesired
mowing height.
►Fig.8: 1.Mowingheightadjustinglever
NOTE:Themowingheightguresshouldbeused
justasaguideline.Dependingontheconditionsof
the lawn or the ground, the actual lawn height may
becomeslightlydifferentfromthesetheight.
NOTE:Tryatestmowingofgrassinalessconspicu-
ous place to get your desired height.
Grass level indicator
►Fig.9: 1.Grasslevelindicator
Grasslevelindicatorshowsthevolumeofmowed
grass.
• Whenthegrassbasketisnotfull,theindicator
oatsduringmowing.
• Whenthegrassbasketisfull,theindicatordoes
notoatduringmowing.Inthiscase,stopmowing
immediatelyandemptythebasket.Afteremptying
the basket, clean it so that its meshwork vents the
air.
NOTE:Thisindicatorisaroughguide.Dependingon
theconditionsofinsideofthebasket,thisindicator
may not work properly.

11 ENGLISH
ASSEMBLY
WARNING: Always be sure that the lock key
and battery cartridge are removed before carrying
out any work on the mower. Failure to remove the
lock key and the battery cartridge may result in seri-
ouspersonalinjuryfromaccidentalstart-up.
WARNING: Never start the mower unless it is
completely assembled.Operationofthetoolsina
partially assembled state may result in serious per-
sonalinjuryfromaccidentalstart-up.
Installing the battery cover
WARNING: Do not insert the lock key and bat-
tery cartridge before installing the battery cover.
Failuretodosomaycauseaseriousinjury.
Installthebatterycovercompletelybeforetheopera-
tion.Thebatterycoverprotectsthemowerandbattery
cartridgefrommud,dirt,andwater.
1. Placethebatterycoverwiththeprotrusionsonthe
mower aligned to the holes on the battery cover.
►Fig.10: 1.Protrusion2. Hole 3. Battery cover
2. Placeyourhandsinthemiddleofthebattery
cover and push it.
►Fig.11
3. Beforetherstoperation,checkthatthepivot
pointofthebatterycoverisattachedproperly.Ifthe
battery cover is installed correctly, it will not open until
the battery cover locking lever is pulled.
►Fig.12: 1.Pivotpoint2. Battery cover locking lever
Installing the handle
NOTICE: When installing handles, position the
cords so that they are not caught by anything
between the handles. If the cord is damaged, the
mower switch may not work.
1. Slidethebothendsoflowerhandleintothe
groovesofthemowerthenfullytightentheclamping
screws.
►Fig.13: 1. Clamping screw 2. Lower handle
2. Alignthescrewholesofupperhandleandlower
handle. Secure them with the clamping screws and
nuts.
►Fig.14: 1. Clamping nut 2. Clamping screw
NOTE:Holdtheupperhandlermlysothatitdoes
notdropoffyourhand.
3. Attachtheholderstothehandle.Positionthe
powersupplycordasshowninthegure.
►Fig.15: 1. Holder
Removing or installing the mower
blade
WARNING: Always remove the lock key and
battery cartridge when removing or installing the
blade. Failure to remove the lock key and battery
cartridge may cause a serious injury.
WARNING: The blade coasts for a few sec-
onds after releasing the switch. Do not start any
operation until the blade comes to a complete
stop.
WARNING: Always wear gloves when han-
dling the blade.
Toremovethemowerblade,takethefollowingsteps.
1. Putthemoweronitssidesothatthemowing
heightadjustinglevercomestotheupperside.
2. Tolockthebladerotation,insertascrewdriverora
similartoolintoaholeonthebaseoftheblade.
3. Turntheboltcounterclockwisewiththewrench.
►Fig.16: 1. Mower blade 2. Screwdriver 3. Wrench
4. Removethebolt,outerange,mowerblade,and
innerangeinorder.
►Fig.17: 1.Innerange2. Rotational direction arrow
3.Outerange4. Bolt 5. Mower blade
Toinstallthemowerblade,taketheremovalprocedure
in reverse.
WARNING: Install the blade carefully. It has
a top/bottom facing. Place the blade so that the
rotational direction arrow faces outward.
WARNING: Tighten the bolt clockwise rmly
to secure the blade.
WARNING: Make sure that the blade and all
the xing parts are installed correctly and tight-
ened securely.
WARNING: When you replace the blades,
always follow the instructions provided in this
manual.
Installing the grass basket
1. Remove the lock key.
2. Lifttherearguardofthemowerbody.
►Fig.18
3. Hookthegrassbasketonthegrooveofthemower
bodyasshowninthegure.
►Fig.19: 1. Hook 2.Groove3.Grassbasket

12 ENGLISH
OPERATION
Mowing
WARNING: Before mowing, clear away sticks
and stones from mowing area. Furthermore, clear
away any weeds from mowing area in advance.
WARNING: Always wear the safety goggles or
safety glasses with side shields when operating
the mower.
►Fig.20
Firmly hold the lawn mower handle with both hands
when mowing.
Theoutsideedgesofthefrontwheelsistheguideline
formowingwidth.Usingthetwofrontwheeloutside
edges as a guideline, mow in strips, overlapping by
onehalftoonethirdthepreviousstrip,tomowthelawn
evenly.
Periodicallycheckthegrassbasketformowedgrass.
Emptythegrassbeforeitbecomesfull.Beforeevery
periodical check, be sure to stop the mower then
remove the lock key and the battery cartridge.
NOTE:Usingthemowerwiththegrassbasketfull
prevents smooth blade rotation and places an extra
load on the motor, which may cause breakdown.
Mowing a long-grass lawn
Do not try to cut long grass all in one go. Instead, mow
the lawn in some steps. Leave a day or two between
mows until the lawn becomes evenly short.
NOTE: Mowing long grass to a short length all in one
gomaycausethegrasstodie.Thecutgrassmay
alsoblockupinsideofthemowerbody.
Emptying the grass basket
WARNING: To reduce a risk of accident, reg-
ularly check the grass basket for any damage or
weakened strength. Replace the grass basket if
necessary.
1. Release the switch lever.
2. Remove the lock key.
3. Lifttherearguardandtakeoutthegrassbasket
by holding the handle.
►Fig.21: 1. Rear guard 2. Handle
4. Emptythegrassbasket.
MAINTENANCE &
STORAGE
WARNING: Always be sure that the lock
key and battery cartridge are removed from the
mower before storage or attempting to perform
inspection or maintenance.
WARNING: Always remove the lock key when
the mower is not in use. Store the lock key in a
safe place out of reach of children.
WARNING: Wear gloves when performing
inspection or maintenance.
NOTICE: Never use gasoline, benzine, thinner,
alcohol or the like. Discoloration, deformation or
cracks may result.
Maintenance
1. Removethelockkey.Storeitinasafeplaceoutof
thereachofchildren.
2. Clean the mower using only a wet cloth. Do not
spray or pour water on the mower when cleaning.
3. Putthemoweronitssideandcleangrassclip-
pingsaccumulatedontheundersideofmowerdeck.
4. Checkallnuts,bolts,knobs,screws,fastenersetc.
fortightness.
5. Inspectmovingpartsfordamage,breakage,and
wear. Damaged or missing parts should be repaired or
replaced.
Storage
WARNING: When carrying or storing the
mower, do not hold the folded handles but the
front grip of the mower. Holdingthefoldedhandles
maycauseaseriousinjuryordamagetothemower.
Beforestoringthemower,removethebatterycartridge
fromit.
Store mower indoors in a cool, dry and locked place.
Don't store the mower and charger in locations where
the temperature may reach or exceed 40 °C (104 °F).
►Fig.22: 1. Front grip 2. Rear grip
1. Loosen the clamping screws and expand the
lowerhandletobothsides.Movedownthehandlefor-
ward.Atthistime,keeparmgriponthelowerhandle
sothatthehandledoesnotfalldowntothefarsidefrom
the mower body.
►Fig.23: 1. Clamping screw 2. Lower handle
2. Loosen the clamping nuts and pivot the upper
handle back while expanding the both sides.
►Fig.24: 1. Clamping nut 2. Upper handle
3. Store the grass basket between the handle and
the mower body.
►Fig.25: 1.Grassbasket

13 ENGLISH
NOTE: When putting the mower in the upright posi-
tion,donotholdthehandlebutusethefrontgripof
the mower.
TomaintainproductSAFETYandRELIABILITY,
repairs,anyothermaintenanceoradjustmentshould
beperformedbyMakitaAuthorizedorFactoryService
Centers, always using Makita replacement parts.
TROUBLE SHOOTING
Beforeaskingforrepairs,conductyourowninspectionrst.Ifyoundaproblemthatisnotexplainedinthemanual,
donotattempttodismantlethetool.Instead,askMakitaAuthorizedServiceCenters,alwaysusingMakitareplace-
mentpartsforrepairs.
State of abnormality Probable cause (malfunction) Remedy
Mower does not start. Twobatterycartridgesarenotinstalled. Install the charged battery cartridges.
Battery problem (under voltage) Rechargethebatterycartridge.Ifrechargingisnot
effective,replacebatterycartridge.
Thelockkeyisnotinserted. Insert the lock key.
Motorstopsrunningafteralittleuse. Battery's charge level is low. Rechargethebatterycartridge.Ifrechargingisnot
effective,replacebatterycartridge.
Cutting height is too low. Raise the cutting height.
Motor does not reach maximum
RPM.
Battery cartridge is installed improperly. Install the battery cartridge as described in this
manual.
Battery power is dropping. Rechargethebatterycartridge.Ifrechargingisnot
effective,replacebatterycartridge.
Thedrivesystemdoesnotwork
correctly.
Askyourlocalauthorizedservicecenterforrepair.
Cutting tool does not rotate:
stop the mower immediately!
Foreignobjectsuchasabranchis
jammedneartheblade.
Removetheforeignobject.
Thedrivesystemdoesnotwork
correctly.
Askyourlocalauthorizedservicecenterforrepair.
Abnormalvibration:
stop the mower immediately!
Blade is imbalanced, excessively or
unevenly worn.
Replace the blade.
OPTIONAL
ACCESSORIES
CAUTION: These accessories or attachments
are recommended for use with your Makita tool
specied in this manual.Theuseofanyother
accessoriesorattachmentsmightpresentariskof
injurytopersons.Onlyuseaccessoryorattachment
foritsstatedpurpose.
Ifyouneedanyassistanceformoredetailsregard-
ing these accessories, ask your local Makita Service
Center.
• Mowerblade
• Makitagenuinebatteryandcharger
NOTE: Some items in the list may be included in the
toolpackageasstandardaccessories.Theymay
differfromcountrytocountry.

14 SLOVENŠČINA
SLOVENŠČINA (Originalna navodila)
TEHNIČNI PODATKI
Model: DLM431
Širinakošnje(premerrezila) 430 mm
Hitrost brez obremenitve 3.600 min-1
Mere
(D x Š x V)
včasuuporabe Najv.1.490mmx460mmx1.020mm
Najm.1.450mmx460mmx950mm
včasushranjevanja
(brez koša za travo)
490 mm x 460 mm x 910 mm
Nazivna napetost D.C. 36 V
Standardneakumulatorskebaterije
Opozorilo:uporabljajtesamonavedeneakumulatorske
baterije.
BL1815N/BL1820/BL1820B BL1830/BL1830B/BL1840/
BL1840B/BL1850/BL1850B/
BL1860B
Netoteža 17,8 kg 18,3 kg
• Kernenehnoopravljamoraziskaveinrazvijamosvojeizdelke,selahkotehničnipodatkivtemdokumentu
spremenijobrezvnaprejšnjegaobvestila.
• Tehničnipodatkiinakumulatorskebaterijeselahkorazlikujejogledenadržavouporabeizdelka.
• TežaskupajzakumulatorskobaterijovskladuspostopkomEPTA01/2003
Simboli
Naslednjisimboliseuporabljajovpovezavisstrojem.
Preduporaboizdelkaseobveznoseznaniteznjihovim
pomenom.
Potrebnajeposebnapozornostin
previdnost.
Preberitenavodilazauporabo.
Nevarnost;paziteseletečihpredmetov.
Razdaljamedorodjeminosebamivbližini
morabitinajmanj15m.
Nikolinepribližujterokinnogrezilupod
kosilnico.Koizključitemotor,serezilaše
vednovrtijo.
Predpregledovanjem,prilagajanjem,
čiščenjem,servisiranjem,puščanjemin
shranjevanjemkosilnicevednoodstranite
ključzazaklep.
Cd
Ni-MH
Li-ion
SamozadržaveEU
Nezavrziteizrabljeneelektričneopremeali
akumulatorskegasklopamedgospodinjske
odpadke!
VskladuzEvropskimidirektivamio
odpadnielektričniinelektronskiopremi,
baterijahinakumulatorjih,odpadnihbate-
rijahinakumulatorjihterupoštevanjem
njihovihdoločilvskladuzdržavnozako-
nodajojetrebaelektričnoopremo,baterije
inakumulatorje,katerihživljenjskicikel
jepretekel,zbiratiločenoinjihdostaviti
vustrezenobratzarecikliranje,kideluje
skladnozokoljevarstvenimizahtevami.
Predvidena uporaba
Orodjejenamenjenozakošnjotrave.
Hrup
ObičajnaA-ovrednotenaravenhrupavskladuz
EN60335:
Ravenzvočnegatlaka(LpA):80dB(A)
Ravenzvočnemoči(LWA):93dB(A)
Odstopanje(K):3dB(A)
Nivohrupameddelomlahkopreseže80dB(A).
Vibracije
Skupnevrednostivibracij(vektorskavsotatrehosi)v
skladuzEN60335:
Emisijevibracij(ah): 2,5 m/s2alimanj
Odstopanje(K):1,5m/s2
OPOMBA:Navedenavrednostoddajanjavibracij
jebilaizmerjenavskladusstandardnimimetodami
testiranjainselahkouporabljazaprimerjavoorodij.
OPOMBA:Navedenavrednostoddajanjavibra-
cijselahkouporabljatudipripredhodnioceni
izpostavljenosti.
OPOZORILO:Oddajanjevibracijmeddejansko
uporaboelektričnegaorodjaselahkorazlikujeod
navedenevrednostioddajanja,odvisnoodnačina
uporabeorodja.
OPOZORILO:Upravljavecmorazalastnozaš-
čitopoznativarnostneukrepe,kitemeljijonaoceni
izpostavljenostivdejanskihpogojihuporabe(poleg
časaproženjajetrebaupoštevaticelotendelovni
cikel,vključnosčasom,kojeorodjeizklopljeno,in
časom,kodelujevprostemteku).

15 SLOVENŠČINA
ES Izjava o skladnosti
Samo za evropske države
DružbaMakitaizjavlja,dasonaslednjiizdelki:
Oznakastroja:Akumulatorskakosilnica
Številka/tip modela: DLM431
skladniznaslednjimievropskimidirektivami:2000/14/
EC,2006/42/EC
Izdelanisovskladuznaslednjimstandardomalistan-
dardiziranimidokumenti:EN60335
Tehničnadokumentacijavskladuzdirektivo2006/42/
ESjenavoljonanaslovu:
Makita,Jan-BaptistVinkstraat2,3070,Belgija
Postopekzaugotavljanjeskladnosti,kigapredpisuje
direktiva2000/14/ES,jevskladusprilogoVI.
Priglašeniorgan:TÜVRheinlandLGAProductsGmbH
AmGrauenStein2951105Köln,Nemčija
Identikacijskaštevilka0197
Izmerjenastopnjajakostizvoka:93dB(A)
Zajamčenastopnjajakostizvoka:94dB(A)
1.12.2015
Yasushi Fukaya
Direktor
Makita,Jan-BaptistVinkstraat2,3070,Belgija
POMEMBNA VARNOSTNA
NAVODILA
OPOZORILO: Preberite vsa varnostna opo-
zorila in navodila. Neupoštevanjeopozorilinnavodil
lahkoprivededoelektričnegaudara,požarain/ali
resnih telesnih poškodb.
Shranite vsa opozorila in navo-
dila za poznejšo uporabo.
1. Ne vstavljajte ključa v kosilnico, dokler ni
pripravljena za uporabo.
2. Zagotovite ustrezen nadzor otrok in preprečite
igranje s kosilnico.
3. Nikoli ne dovolite uporabe kosilnice otrokom
ali osebam, ki niso seznanjene z navodili.
Lokalni predpisi lahko omejijo starost uporab-
nika naprave.
4. Nikoli ne uporabljajte kosilnice v bližini ljudi,
zlasti otrok ali hišnih ljubljenčkov.
5. Upoštevajte, da je upravljavec ali uporabnik
odgovoren za nesreče ali nevarnosti, ki se
zgodijo drugim ljudem ali njihovi lastnini.
6. Med delom s kosilnico vedno nosite ustrezno
obutev in dolge hlače. Kosilnice ne upo-
rabljajte, ko ste bosi ali nosite odprte sandale.
Ne nosite oblačil ali nakita, ki so ohlapna ali
imajo viseče vrvice ali pentlje. Lahko se zatak-
nejo v gibljive dele.
7. Kosilnico upravljajte samo podnevi ali ob
dobri umetni svetlobi.
8. Ne uporabljajte kosilnice za košnjo mokre
trave.
9. Nikoli ne uporabljajte kosilnice v dežju.
10. Uporaba akumulatorskega orodja in ravnanje z
njim
– Ponovno napolnite le s polnilnikom, ki ga je
določil proizvajalec. Polnilnik,kijeprimerenza
enovrstoakumulatorskihbaterij,lahkopovzroči
nevarnostpožara,čegauporabljatezdrugimi
akumulatorskimibaterijami.
– Električno orodje uporabljajte le s posebej
oblikovanimi akumulatorskimi baterijami.
Uporabadrugihakumulatorskihbaterijlahko
pomeninevarnosttelesnihpoškodbalipožara.
– Kadar akumulatorske baterije ne uporabljate,
je ne hranite ob kovinskih predmetih, kot so
sponke za papir, kovanci, ključi, žeblji, vijaki ali
drugi manjši kovinski predmeti, ki lahko pove-
žejo oba terminala. Kratek stik akumulatorskih
priključkovlahkopovzročiopeklinealipožar.
– V neprimernih pogojih lahko iz akumulatorja
uhaja tekočina; izogibajte se stiku. Če pride do
nenamernega stika, sperite z vodo. Če pride
tekočina v stik z očmi, takoj poiščite zdrav-
niško pomoč.Tekočinaizakumulatorjalahko
povzročidraženjealiopekline.
11. Vedno trdno držite ročaj.
12. Pri hoji po pobočjih bodite vedno previdni.
13. Hodite, ne tecite.
14. Kadar dvigujete ali držite kosilnico, ne prije-
majte izpostavljenih rezil ali rezalnih robov.
15. Fizično stanje – ne uporabljajte kosilnice,
kadar ste pod vplivom drog, alkohola ali
kakršnih koli zdravil.
16. Ne približujte rok in nog vrtečim se rezilom.
Previdno: rezila se po izklopu kosilnice prosto
premikajo.
17. Uporabljajte samo originalna proizvajalčeva
rezila, opredeljena v tem priročniku.
18. Pred uporabo skrbno preverite rezila glede
obrabe, razpok ali poškodb. Takoj zamenjajte
počena ali poškodovana rezila.
19. Pred košnjo se prepričajte, da v območju koš-
nje ni drugih oseb. Če kdor koli vstopi v obmo-
čje, ustavite kosilnico.
20. Pred košnjo iz delovnega območja odstranite
tujke, kot so kamni, žice, steklenice, kosti in
velike palice, da preprečite telesne poškodbe
ali poškodbe kosilnice.
21. Če opazite kaj neobičajnega, takoj prenehajte
uporabljati kosilnico. Izklopite kosilnico in
odstranite ključ. Nato preglejte kosilnico.
22. Med delovanjem kosilnice nikoli ne poskušajte
prilagoditi višine kolesa.
23. Preden prečkate dovoze, pločnike, ceste in
katere koli peščene površine, sprostite preklo-
pno ročico in počakajte, da se rezilo ustavi.
Ključ odstranite tudi če pustite kosilnico,
sežete, da bi pobrali ali odstranili nekaj s poti,
ali iz katerega koli drugega razloga, ki bi vam
lahko preusmeril pozornost.
24. Predmeti, ob katere zadene rezilo, lahko pov-
zročijo hude telesne poškodbe oseb. Pred
vsako košnjo je treba trato vedno skrbno pre-
gledati in z nje odstraniti vse predmete.
25. Če kosilnica zadene ob tujek, upoštevajte
naslednja navodila:

16 SLOVENŠČINA
– Ustavite kosilnico, sprostite preklopno ročico
in počakajte, da se rezilo popolnoma ustavi.
– Odstranite ključ in akumulatorsko baterijo.
– Natančno preglejte kosilnico in preverite
morebitne poškodbe.
– Če je rezilo kakor koli poškodovano, ga
zamenjajte. Pred ponovnim zagonom in nadalj-
njo uporabo kosilnice popravite vse poškodbe.
26. Redno pregledujte koš za travo glede obra-
bljenosti ali okvar. Pri shranjevanju se vedno
prepričajte, da je koš za travo prazen. Zaradi
varnosti obrabljeni koš za travo zamenjajte z
novim tovarniškim košem.
27. Bodite izjemno previdni, ko premikate kosil-
nico vzvratno ali jo vlečete proti sebi.
28. Ustavite rezilo/-a, če morate kosilnico nagniti,
kadar se pomikate po netravnatih površinah in
kadar kosilnico prenašate do območja, ki ga
želite pokositi, ali z njega.
29. Ne uporabljajte kosilnice z okvarjenimi varo-
vali ali ščitniki ali brez varnostnih naprav, npr.
deektorjev, in/ali nameščenega koša za travo.
30. Zaženite kosilnico v skladu z navodili in bodite
pozorni, da so vaše noge in roke dovolj odda-
ljene od rezil/-a.
31. Med zagonom motorja ne nagibajte kosilnice,
razen če je treba. V tem primeru kosilnice ne
nagibajte več, kot je treba, in dvignite samo
tisti del, ki je obrnjen stran od upravljavca.
32. Ne zaganjajte kosilnice, kadar stojite pred
odprtino za izmet.
33. Ne segajte z rokami ali nogami pod vrteče se
dele ali v njihovo bližino. Vedno bodite odmak-
njeni od odprtine za izmet.
34. Med prevozom kosilnica ne sme biti vključena.
35. Ustavite kosilnico in odstranite napravo za
onesposabljanje. Prepričajte se, da so se vsi
premični deli popolnoma ustavili:
– kadar pustite kosilnico nenadzorovano,
– preden odpravite ovire ali očistite korito,
– pred pregledom, čiščenjem ali delom na
kosilnici,
– po trku s tujkom. Preden ponovno zaženete
in uporabite kosilnico, jo preglejte glede
poškodb in izvedite popravila.
36. Če začne kosilnica neobičajno vibrirati (takoj
preglejte):
– preglejte glede poškodb,
– zamenjajte ali popravite vse poškodovane
dele,
– preverite in pritrdite vse razrahljane dele.
37. Med nastavljanjem kosilnice bodite previdni,
da preprečite ujetje prstov med premikajoča se
rezila in ksne dele stroja.
38. Kosite prečno po pobočju, nikoli gor in dol.
Kadar na pobočjih menjujete smer, bodite izje-
mno previdni. Ne kosite pri izredno nagnjenih
pobočjih.
39. Ne spirajte kosilnice z vrtno cevjo; preprečite
vdor vode v motor in električne priključke.
40. Pogosto preverite, ali je vijak za pritrditev
rezila ustrezno zategnjen.
41. Vse matice, čepi in vijaki naj bodo trdno priviti,
da zagotovite varno delovanje naprave.
42. Pred shranjevanjem vedno počakajte, da se
kosilnica ohladi.
43. Pri servisu rezil upoštevajte, da se lahko rezila
še vedno premaknejo, čeprav je napajanje
izključeno.
44. Zaradi varnosti zamenjajte obrabljene ali
poškodovane dele. Uporabljajte samo origi-
nalne nadomestne dele in pripomočke.
SHRANITE TA NAVODILA.
OPOZORILO:
NE dovolite, da bi zaradi udobnej-
šega dela ali znanja o uporabi izdelka (pridobljenega z
večkratno uporabo) opustili strogo upoštevanje var-
nostnih zahtev v okviru pravilne uporabe orodja.
ZLORABA ali neupoštevanje varnostnih zahtev
v teh navodilih za uporabo lahko povzroči resne
telesne poškodbe.
Pomembna varnostna navodila za
akumulatorsko baterijo
1. Pred uporabo baterijskega vložka preberite
vsa navodila in opozorilne oznake na (1) pol-
nilniku akumulatorja, (2) akumulatorju in (3)
izdelku, ki uporablja akumulator.
2. Ne razstavljajte baterijskega vložka.
3. Če se je čas delovanja občutno skrajšal, takoj
prenehajte uporabljati orodje. V nasprotnem
primeru lahko pride do pregretja, morebitnih
opeklin in celo eksplozije.
4. Če pride elektrolit v stik z očmi, jih sperite s
čisto vodo in takoj poiščite zdravniško pomoč.
Posledica je lahko izguba vida.
5.
Ne povzročite kratkega stika baterijskega vložka:
(1) Ne dotikajte se priključkov s kakršnim
koli prevodnim materialom.
(2) Izogibajte se shranjevanju baterijskega
vložka v vsebniku z drugimi kovinskimi
predmeti kot so žeblji, kovanci itn.
(3) Ne izpostavljajte baterijskega vložka vodi
ali dežju.
Kratek stik akumulatorja lahko povzroči velik
električni tok, pregrevanje, morebitne opekline
in celo okvaro.
6. Ne shranjujte orodja in baterijskega vložka
na mestih, kjer lahko temperatura doseže ali
preseže 50 °C.
7. Ne sežigajte baterijskega vložka, tudi če je
hudo poškodovan ali v celoti izpraznjen.
Baterijski vložek lahko v ognju eksplodira.
8. Poskrbite, da akumulator ne bo izpostavljen
padcem ali udarcem.
9. Ne uporabljajte poškodovanih akumulatorjev.
10. Priložene litij-ionske baterije ustrezajo zahte-
vam zakonodaje v zvezi z nevarnim blagom.
Zakomercialneprevoze,npr.tiste,kijihopravljajo
tretjestrankeincarinskiposredniki,jetrebaupo-
števatiposebnezahtevevzvezizembalažoin
označevanjem.
Med postopkom priprave na odpremo izdelka se
jetrebaposvetovatisstrokovnjakomzanevarne
snovi.Pritemupoštevajtetudipodrobnejšenacio-
nalne predpise.

17 SLOVENŠČINA
Odprtestikeoblepitezlepilnimtrakomalijihdru-
gačezaščitite,baterijopazapakirajtetako,dasev
embalažinemorepremikati.
11. Upoštevajte lokalne uredbe glede odlaganja
akumulatorja.
SHRANITE TA NAVODILA.
POZOR: Uporabljajte le originalne baterije
Makita.ČeuporabljateneoriginalnebaterijeMakita
alibaterije,kisobilespremenjene,lahkopridedo
eksplozijebaterijeinposledičnodopožara,telesnih
poškodb ali materialne škode. S takšno uporabo
bostetudirazveljaviligarancijoMakitazaorodjein
polnilnik Makita.
Nasveti za ohranjanje največje
zmogljivosti akumulatorja
1. Napolnite baterijski vložek, preden se v celoti
izprazni. Ko opazite, da ima orodje manjšo
moč, vedno ustavite delovanje orodja in napol-
nite baterijski vložek.
2. Nikoli znova ne polnite popolnoma napol-
njenega baterijskega vložka. Prenapolnjenje
skrajša življenjsko dobo akumulatorja.
3. Baterijski vložek s sobno temperaturo pol-
nite pri temperaturi okolja od 10 °C do 40 °C.
Počakajte, da se vroč baterijski vložek pred
polnjenjem ohladi.
4. Če baterijskega vložka ne uporabljate dalj časa
(več kot 6 mesecev), ga napolnite.
OPIS DELOVANJA
Nameščanje ali odstranjevanje
akumulatorske baterije
POZOR: Pred nameščanjem ali odstranje-
vanjem akumulatorske baterije vedno izklopite
orodje.
POZOR: Pokrov akumulatorja morate pred
uporabo zapreti. Sicerlahkoblato,umazanijaali
vodapoškodujeizdelekaliakumulatorskobaterijo.
POZOR: Vedno namestite akumulatorsko
baterijo tako, da rdeči indikator ni več viden.Če
teganeupoštevate,lahkoakumulatornepričakovano
padeizorodjainpoškodujevasaliosebevneposre-
dnibližini.
POZOR: Ne nameščajte akumulatorske bate-
rije s silo.Česeakumulatorskabaterijanezaskoči
zlahka,nipravilnovstavljena.
OPOMBA:Orodjenedelujesamozenoakumulator-
skobaterijo.
Za namestitev akumulatorske baterije:
1. Sprostiteročicozazakleppokrovaakumulatorjain
odpritepokrovakumulatorja.
►Sl.1: 1.Pokrovakumulatorja2.Ročicazazaklep
pokrovaakumulatorja
2. Poravnajtejezičekakumulatorskebaterijezrežo
nakosilniciinnatonamestitebaterijotako,dasesli-
šnozaskočinamestu.Čejerdečindikatornazgornji
stranigumbaviden,akumulatorskabaterijaniustrezno
zaklenjena.
►Sl.2: 1.Akumulatorskabaterija
3. Vstaviteključzazaklepdoomejilanamesto,
prikazano na sliki.
►Sl.3: 1.Ključzazaklep
4. Zapritepokrovakumulatorjaingapotisnite,dase
ročicazazaklepzaskoči.
Za odstranjevanje akumulatorske baterije iz
kosilnice:
1. Sprostiteročicozazakleppokrovaakumulatorjain
odpritepokrovakumulatorja.
2. Izvleciteakumulatorskobaterijoizkosilnice,pri
tempapomikajtegumbnasprednjistranibaterije.
3. Izvleciteključzazaklep.
4. Zapritezaščitnipokrovakumulatorja.
Zaščitni sistem orodja/akumulatorja
Orodjejeopremljenozzaščitnimsistemomorodja/aku-
mulatorja.Sistemsamodejnoprekinenapajanjeorodja,
dapodaljšaživljenjskodoboorodjainakumulatorja.
Orodjesebosamodejnozaustavilomeddelovanjem,
čestaorodjealiakumulatorzamenjanapodnaslednjimi
pogoji.Vnekaterihprimerihsvetijoindikatorji.
Zaščita pred preobremenitvijo
Kadarorodjeuporabljatenanačin,kipovzročauporabo
neobičajnovisokegatoka,seorodjesamodejnoustavi
brez kakršnih koli znakov. V tem primeru izklopite
orodjeinprenehajteizvajatidelo,kijepovzročilopre-
obremenitevorodja.Natovklopiteorodjeingaznova
zaženite.
Zaščita pred pregrevanjem
Česeorodjepregreje,sesamodejnoustavi.Počakajte,
daseorodjeohladi,predengaznovavklopite.
Zaščita pred izpraznjenjem
Kosezmogljivostakumulatorjazmanjša,seorodje
samodejnoustavi.Čeizdeleknedeluje,tudičeso
stikalavklopljena,odstraniteakumulatorizorodjainga
napolnite.
Prikazuje preostalo raven
napolnjenosti akumulatorja
►Sl.4: 1.Indikatorakumulatorja2.Gumbza
preverjanje
Pritisnitegumbzapreverjanje,dapreveriteraven
napolnjenostiakumulatorja.Indikatorjiakumulatorja
ustrezajovsakemuakumulatorju.

18 SLOVENŠČINA
Indikator ravni napolnjenosti
akumulatorja Prikaz preostale
ravni napolnje-
nosti akumulatorja
Sveti Ne sveti
od 50 % do 100 %
od 20 % do 50 %
od 0 % do 20 %
Prikazuje preostalo raven
napolnjenosti akumulatorja
Samo za baterijske vložke z znakom „B“ na koncu
številke modela
►Sl.5: 1.Indikatorskelučke2.Gumbzapreverjanje
Pritisnitegumbzapreverjanjenabaterijskemvložku,
dapreveriteravennapolnjenostiakumulatorja.
Indikatorskelučkenakratkozasvetijo.
Indikatorske lučke Prikaz pre-
ostale ravni
napolnjenosti
Sveti Ne sveti Utripa
od 75 % do
100 %
od 50 % do
75 %
od 25 % do
50 %
od 0 % do
25 %
Napolnite
akumulator.
Akumulator
jemorda
okvarjen.
OPOMBA:Odvisnoodpogojevuporabeinokoljske
temperatureseoznačbalahkonekolikorazlikujeod
dejanskenapolnjenosti.
Delovanje stikala
OPOZORILO: Preden namestite akumulator-
sko baterijo, se vedno prepričajte, ali se preklo-
pna ročica ustrezno sproža in vrača v prvotni
položaj, ko jo spustite.Uporabaorodjasstikalom,
kisenesprožipravilno,lahkoprivededoizgube
nadzora in resnih telesnih poškodb.
OPOMBA:Kosilnicasenezažene,čenepritisnete
preklopnegagumba,tudičejepreklopnaročica
povlečena.
OPOMBA:Kosilnicaseprikošnjidolgealigostetrate
zaradipreobremenjenostimordanebozagnala.V
temprimerupovečajtevišinokošnje.
Takosilnicajeopremljenazblokirniminročnimstika-
lom.Čeopazitekarkolinenavadnegaprikateremkoli
izmedtehstikal,takojprenehajteuporabljatikosilnico,
stikalipamorapregledatipooblaščeniserviserizdelkov
Makita.
1. Vstaviteakumulatorskibateriji.Vstaviteključ
za zaklep v blokirno stikalo, nato pa zaprite pokrov
akumulatorja.
►Sl.6: 1.Akumulatorskabaterija2.Ključzazaklep
2. Pridržitepreklopnigumb.
3. Zagrabitezgornjiročajinpovlecitepreklopno
ročico.
►Sl.7: 1.Preklopnigumb2.Preklopnaročica
4. Spustitepreklopnigumb,takojkosemotor
zažene.Kosilnicabodelovala,doklernespustite
preklopneročice.
5. Čeželitezaustavitimotor,spustitepreklopno
ročico.
Prilagoditev višine košnje
OPOZORILO: Kadar nastavljate višino koš-
nje, ne segajte z rokami ali nogami pod ohišje
kosilnice.
OPOZORILO: Pred uporabo se vedno prepri-
čajte, ali se ročica ustrezno prilega v utor.
Višinokošnjelahkoprilagoditevrazponuod20mmdo
75 mm.
1. Odstraniteključzazaklep.
2. Povleciteročicozaprilagoditevvišinekošnjenav-
zveninjopremaknitevpoložajzaželenovišinokošnje.
►Sl.8: 1.Ročicazaprilagoditevvišinekošnje
OPOMBA:Oznakezavišinokošnjesonamenjene
zgoljkotsmernice.Dejanskavišinakošnjeselahko
nekolikorazlikujeodnastavljene,odvisnoodpogojev
travnate ali talne površine.
OPOMBA:Najprejpreizkusiteželenovišinokošnje
travenamanjvidnemmestu.
Indikator količine trave
►Sl.9: 1.Indikatorkoličinetrave
Indikatorkoličinetraveprikazujekoličinopokošene
trave.
• Doklerkošzatravonipoln,indikatormedkošnjo
niha.
• Kojekošzatravopoln,indikatormedkošnjo
neniha.Vtemprimerutakojprenehajtekositiin
izpraznitekoš.Koizpraznitekoš,gaočistitetako,
daboprezračevalnamrežaspetzračna.

19 SLOVENŠČINA
OPOMBA:Taindikatorjesamookvirnovodilo.Ta
indikator morda ne bo pravilno deloval, odvisno od
pogojevznotrajkoša.
MONTAŽA
OPOZORILO: Pred izvajanjem kakršnih koli
opravil na kosilnici se prepričajte, da sta ključ
za zaklep in akumulatorska baterija odstranjena.
Čeneodstraniteključazazaklepinakumulatorske
baterije,lahkopridedohudihtelesnihpoškodbzaradi
nenamernega zagona.
OPOZORILO: Ne zaženite kosilnice, če ni
povsem sestavljena.Uporabadelnosestavljenih
orodijlahkopovzročihudetelesnepoškodbezaradi
nenamernega zagona.
Nameščanje pokrova akumulatorja
OPOZORILO: Ne vstavljajte ključa za zaklep
in akumulatorske baterije, preden ne namestite
pokrova akumulatorja. V nasprotnem primeru lahko
pride do hudih telesnih poškodb.
Preduporabokosilniceustreznonamestitepokrov
akumulatorja.Pokrovakumulatorjavarujekosilnicoin
akumulatorskobaterijopredblatom,umazanijoinvodo.
1. Namestitepokrovakumulatorjatako,daporavnate
odprtini z izboklinama na kosilnici.
►Sl.10: 1. Izboklina 2. Odprtina 3.Pokrov
akumulatorja
2. Postaviterokinasredinopokrovaakumulatorjain
potisnite pokrov navzdol.
►Sl.11
3. Predprvouporabopreverite,alijetočkavrtenja
pokrovaakumulatorjapravilnonameščena.Čeje
pokrovakumulatorjapravilnonameščen,senebo
odprl,doklernepovlečeteročicezazakleppokrova
akumulatorja.
►Sl.12: 1.Točkavrtenja2.Ročicazazakleppokrova
akumulatorja
Namestitev ročaja
OBVESTILO: Ko nameščate ročaja, nastavite
kable tako, da se ne bodo ujeli mednju. Če je
kabel poškodovan, stikalo kosilnice morda ne bo
delovalo.
1. Potisniteobakoncaspodnjegaročajavutorana
kosilniciintrdnozategnitevpenjalnavijaka.
►Sl.13: 1.Vpenjalnivijak2.Spodnjiročaj
2. Poravnajtevijačneodprtinezgornjegainspo-
dnjegaročaja.Pritrditeročajzvpenjalnimavijakomain
maticama.
►Sl.14: 1.Vpenjalnamatica2.Vpenjalnivijak
OPOMBA:Trdnodržitezgornjiročaj,davamnepade
iz rok.
3. Pritrditedržalinaročaj.Vpnitenapajalnikabel,kot
prikazujeslika.
►Sl.15: 1.Držalo
Odstranjevanje ali nameščanje
rezila kosilnice
OPOZORILO: Kadar odstranjujete ali name-
ščate rezilo, vedno izvlecite ključ za zaklep in
akumulatorsko baterijo. Če ne izvlečete ključa za
zaklep in akumulatorske baterije, lahko pride do
hudih telesnih poškodb.
OPOZORILO: Rezilo deluje v prostem teku še
nekaj sekund po sprostitvi stikala. Počakajte, da
se rezilo povsem ustavi.
OPOZORILO: Kadar rokujete z rezilom,
vedno nosite rokavice.
Rezilo kosilnice odstranite tako:
1. Kosilnicopoložitenabok,takodaboročicaza
prilagoditevvišinekošnjenazgornjistrani.
2. Zaklenitevrtenjerezilatako,davodprtino
podstavkarezilavstaviteizvijačalipodobnoorodje.
3. Sključemodvijtevijakvnasprotnismeriurnega
kazalca.
►Sl.16: 1. Rezilo kosilnice 2.Izvijač3.Ključ
4. Povrstiodstranitevijak,zunanjoprirobnico,rezilo
kosilniceinnotranjoprirobnico.
►Sl.17: 1.Notranjaprirobnica2. Oznaka smeri vrte-
nja3.Zunanjaprirobnica4.Vijak5. Rezilo
kosilnice
Novo rezilo kosilnice namestite v obratnem vrstnem
redu.
OPOZORILO: Pri nameščanju rezila bodite
previdni. Njegova zgornja in spodnja stran se
razlikujeta. Rezilo namestite tako, da je oznaka
smeri vrtenja obrnjena navzven.
OPOZORILO: Nato zategnite vijak v smeri
urinega kazalca, da pritrdite rezilo.
OPOZORILO: Preverite, ali so rezilo in vsi pri-
trdilni deli pravilno nameščeni in trdno pritrjeni.
OPOZORILO: Pri zamenjavi rezil vedno upo-
števajte navodila v tem priročniku.
Nameščanje koša za travo
1. Odstraniteključzazaklep.
2. Dvignitezadnjiščitnikohišjakosilnice.
►Sl.18
3. Zataknitekošzatravovutornaohišjukosilnice,
kotjeprikazanonasliki.
►Sl.19: 1.Kavelj2. Utor 3. Koš za travo

20 SLOVENŠČINA
UPRAVLJANJE
Košnja
OPOZORILO: Pred košnjo z območja košnje
odstranite palice in kamne. Z območja košnje
odstranite tudi ves plevel.
OPOZORILO: Med uporabo kosilnice vedno
nosite zaščitna očala s stransko zaščito.
►Sl.20
Medkošnjotrdnodržiteročajkosilnicezobema
rokama.
Zunanjarobovasprednjihkolesdoločataširinokošnje.
Medkošnjouporabljajtesprednjikolesikotvodilo,pri
čemerkositevpasovihtako,davsaknaslednjipas
prekrivapolovicoalitretjinoprejšnjega.Takobotrava
pokošena enakomerno.
Rednopreverjajtenapolnjenostkošazatravo.Koš
izpraznite,šepredensenapolni.Predvsakimrednim
preverjanjemzaustavitekosilnicoterodstraniteključza
zaklepinakumulatorskobaterijo.
OPOMBA: Uporaba kosilnice s polnim košem za
travopreprečujegladkovrtenjerezilainpomeni
dodatnoobremenitevmotorja,karlahkopovzroči
okvaro.
Košnja visoke trave
Neposkušajtekositivisoketravevenemkosu.
Namestotegakositezelenicopokorakih.Počakajte
danalidvamedposameznimikošnjami,dasetrava
enakomernoskrajša.
OPOMBA:Skošnjodolgetravenakrajšodolžinov
enemkosulahkouničitetravo.Polegtegaselahko
pokošenatravazagozdivohišjukosilnice.
Praznjenje koša za travo
OPOZORILO: Da zmanjšanje možnost
nezgode, redno pregledujte koš za travo glede
poškodb in obrabe. Koš za travo po potrebi
zamenjajte.
1. Spustitepreklopnoročico.
2. Odstraniteključzazaklep.
3. Privzdignitezadnjiščitnikinizvlecitekošzatravo,
takodagadržitezaročaj.
►Sl.21: 1.Zadnjiščitnik2.Ročaj
4. Izpraznite koš za travo.
VZDRŽEVANJE IN
HRAMBA
OPOZORILO: Pred shranjevanjem, pregle-
dovanjem ali vzdrževanjem se vedno prepričajte,
da sta ključ za zaklep in akumulatorska baterija
odstranjena s kosilnice.
OPOZORILO: Kadar kosilnice ne uporabljate,
vedno odstranite ključ za zaklep. Ključ za zaklep
hranite na varnem mestu in izven dosega otrok.
OPOZORILO: Med pregledovanjem ali
vzdrževanjem uporabljajte rokavice.
OBVESTILO: Nikoli ne uporabljajte bencina,
razredčila, alkohola ali podobnega sredstva. V
tem primeru se lahko orodje razbarva ali defor-
mira oziroma lahko nastanejo razpoke.
Vzdrževanje
1. Odstraniteključzazaklep.Shraniteganavarno
mesto in izven dosega otrok.
2. Kosilnicočistitesamozmokrokrpo.Pričiščenju
nepršiteinnepolivajtevodeprekkosilnice.
3. Obrnitekosilniconabokinočistiteostanketrave,
kisosenabralinaspodnjistranipokrovakosilnice.
4. Preverite,alisovsematice,vijaki,gumbi,pritrdila
itd.zategnjeni.
5. Preverite,alisopremičnidelipoškodovani,zlom-
ljenioziromaobrabljeni.Zamenjajtevsepoškodovane
alimanjkajočedele.
Shranjevanje
OPOZORILO: Pri transportu ali shranjevanju
kosilnice ne držite kosilnice za zložena ročaja,
temveč za sprednji ročaj kosilnice. Čedržitesamo
zazloženaročaja,lahkopridedohudihtelesnih
poškodb ali poškodb kosilnice.
Predhrambokosilniceodstraniteakumulatorsko
baterijo.
Kosilnico hranite v hladnem, suhem in zaprtem pro-
storu.Neshranjujtekosilniceinpolnilnikanamestih,
kjerlahkotemperaturadosežealipreseže40°C.
►Sl.22: 1.Sprednjiročaj2.Zadnjiročaj
1. Sprostitevpenjalnevijakeinrazširitespodnjiročaj
naobehstraneh.Pomakniteročajnavzdolvsmerinap-
rej.Dobrodržitespodnjiročaj,danepadenaoddaljeno
stran kosilnice.
►Sl.23: 1.Vpenjalnivijak2.Spodnjiročaj
2. Sprostitevpenjalnematiceinzložiteročajnazaj
tako, da ga razširite na obeh straneh.
►Sl.24: 1.Vpenjalnamatica2.Zgornjiročaj
3. Košzatravoshranitemedročajinohišjekosilnice.
►Sl.25: 1. Koš za travo
Other manuals for DLM431
7
Table of contents
Languages:
Other Makita Lawn Mower manuals

Makita
Makita DLM382 User manual

Makita
Makita PLM4631N2 User guide

Makita
Makita PLM4622N2 User guide

Makita
Makita DLM537Z User manual

Makita
Makita DLM460 User manual

Makita
Makita BLM430 User manual

Makita
Makita DLM462 User manual

Makita
Makita PLM4817 User guide

Makita
Makita DLM534 User manual

Makita
Makita PRM0700 User manual

Makita
Makita DLM431 User manual

Makita
Makita DLM463 User manual

Makita
Makita XML10 User manual

Makita
Makita XML13 User manual

Makita
Makita DLM382 User manual

Makita
Makita XML03CM1 User manual

Makita
Makita DLM382 User manual

Makita
Makita DLM382PM2 User manual

Makita
Makita PLM5600N2 User guide

Makita
Makita PLM4615NP Operation instructions