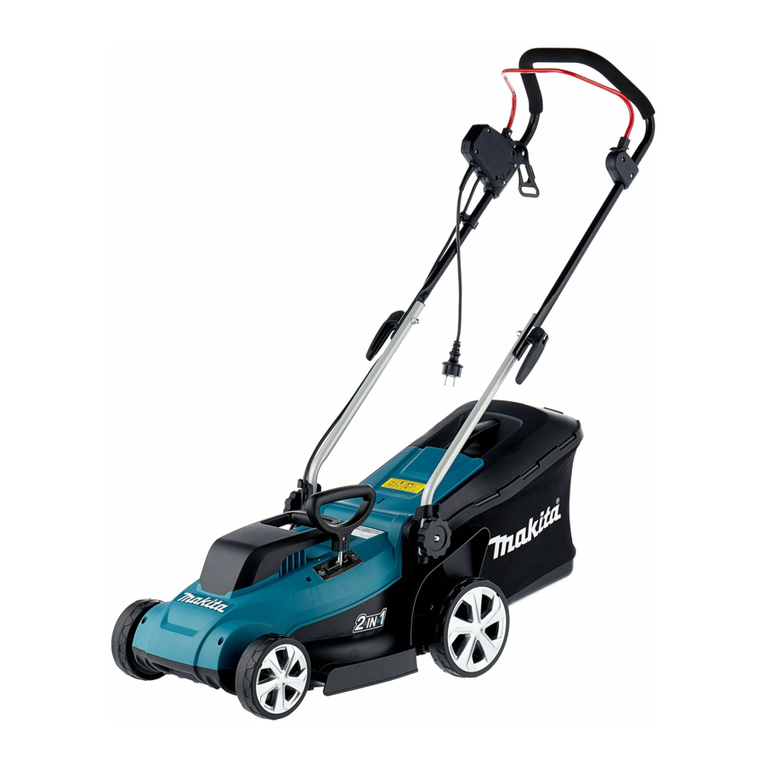
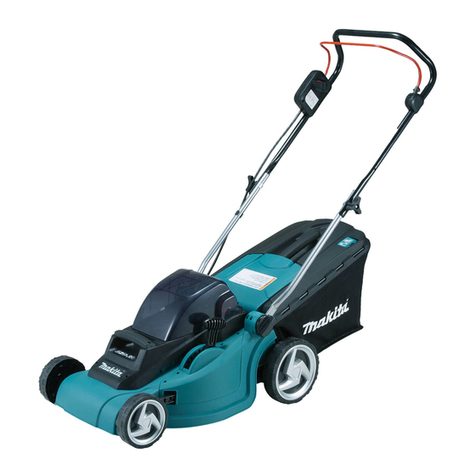
Makita ELM4110 User guide

GB
Electric Lawn Mower Original Instruction manual
D
Elektrischer Rasenmäher Original-Bedienungsanleitung
F
Tondeuse à gazon à moteur électrique Manuel d’instructions d’origine
IRasaerba con motore elettrico Manuale di istruzioni originale
NL
Grasmaaier met elektrische motor Oorspronkelijke gebruiksaanwijzing
E
Cortadora de pasto con motor eléctrico Manual de instrucciones original
P
Corta-relva com motor eléctrico Manual de instruções original
GR
Χλοοκοπτικό με ηλεκτρικό κινητήρα Πρωτότυπο εγχειρίδιο οδηγιών
TR
Elektrikli çim biçme makinesi Orijinal Kullanım kılavuzu
S
Gräsklippare med elektrisk motor Bruksanvisning
DK
Plæneklipper med elektrisk motor Original brugsanvisning
FIN
Sähkömoottorilla varustettu ruohonleikkuri Alkuperäinen käyttöohje
CZ
Elektrická sekačka na trávu Originální návod k obsluze
PL Elektryczna kosiarka do trawy
Oryginalna instrukcja obsługi
HU
Elektromos fűnyíró Eredeti használati útmutató
RUS
Газонокосилка сэлектродвигателем
Оригинальное руководство по эксплуатации
HR
Električna kosilica za travu Originalni priručnik s uputama
SI
Električna kosilnica Originalni priročnik navodil
SK
Elektrická kosačka Pôvodný návod na obsluhu
RO
Maşinăelectricăde tuns iarba Manual de instrucţiuni al producătorului
LT
ElektrinėvejapjovėOriginali naudojimo instrukcija
LV
Zāles pļaujmašīna ar elektromotoru Oriģinālālietošanas rokasgrāmata
EE
Elektrilise mootoriga muruniiduk Originaalne kasutusjuhend
RS
Električna kosilica Originalni priručnik sa uputstvima
PR
AR
ELM4110

2
1
23
45
1
2
3
4
5
6
7
8
9
10
11
12

3
67
89
10 11
12 13
(1)
(2)
(3)

4
14 15
16 17
18 19
20 21
13
(2)
(1)
(1)
(2)
(3)

5
22 23
(2)
(3)
(3)

6
CONTENTS
ENGLISH....................................................................................................................7
DEUTSCH ................................................................................................................15
FRANÇAIS ...............................................................................................................25
ITALIANO .................................................................................................................34
NEDERLANDS .........................................................................................................42
ESPAÑOL.................................................................................................................51
PORTUGUÊS...........................................................................................................60
ΕΛΛΗΝΙΚΑ ...............................................................................................................68
TÜRKÇE...................................................................................................................78
SVENSKA.................................................................................................................86
DANSK .....................................................................................................................94
SUOMI....................................................................................................................102
ČESKY ...................................................................................................................110
POLSKI...................................................................................................................118
MAGYAR ................................................................................................................127
РУССКИЙ ..............................................................................................................135
HRVATSKI..............................................................................................................145
SLOVENŠČINA ......................................................................................................153
SLOVENSKY..........................................................................................................160
ROMÂNĂ................................................................................................................168
LIETUVIŲKALBA...................................................................................................176
LATVIEŠU ..............................................................................................................184
EESTI .....................................................................................................................192
SRPSKI ..................................................................................................................200
.....................................................................................................................215
.....................................................................................................................222

7
ENGLISH
Explanation of general view
KNOW YOUR LAWN MOWER
Read this manual carefully, observing the recommended
safety instructions before, during and after using your
lawn mower. Following these simple instructions will also
maintain your lawn mower in good working order.
Familiarize yourself with the controls on your mower
before attempting to operate it, but above all, be sure you
know how to stop your mower in an emergency. Retain
this user manual and all other literature with your mower
for future reference.
1. SYMBOLS MARKED
ON THE PRODUCT
DOUBLE INSULATED
Your mower is double
insulated.
This means that all external parts
are electrically isolated from the
power supply. This is achieved by
placing an extra insulation barrier
between the electrical and
mechanical parts.
1. Upper handle
2. Switch handle
3. Switch box
4. Safety push-button
5. Grass catcher
6. Cable clamp
7. Wheel
8. Height adjusting lever
9. Underpan
10. Motor cover
11. Locking knob
12. Cable hook
13. Indicator light
Read this instruction book
carefully before using the
lawn mower and keep it in
a safe place for future
reference.
Keep bystanders away.
Beware of sharp blades.
Blades continue to rotate
after the motor is switched
off.
Remove the plug from the
machine before
maintenance or if cord
damaged.
Keep the supply flexible
cord away from the cutting
blades.
CE Marking
The product meets
demands and regulations
set by the European
Community.
WEEE Marking
CAUTION! Unusable
power tools do not belong
with domestic waste. They
must be taken to a
communal collecting point
for environmentally friendly
disposal in accordance
with local regulations.
Noise level marking
Your tool noise is not more
than 96 dB.
SAFETY ALERT
SYMBOL: Indicates
caution or warning may be
used in conjunction with
other symbols or pictures.

8
2. GENERAL SAFETY
RULES
The purpose of the safety rules is
to attract your attention to
possible dangers. The safety
symbols and the explanations
with them, require your careful
attention and understanding. The
safety warnings do not by
themselves eliminate any danger.
The instruction or warnings they
give are not substitutes for proper
accident prevention measures.
WARNING: Failure to obey
a safety warning can result in
serious injury to yourself or to
others. Always follow the safety
precautions to reduce the risk of
fire, electric shock and personal
injury. Save owners manual and
review frequently for continuing
safe operation and instructing
others who may use this tool.
WARNING: This machine
produces an electromagnetic field
during operation. This field may
under some circumstances
interfere with active or passive
medical implants. To reduce the
risk of serious or fatal injury, we
recommend persons with medical
implants to consult their physician
and the medical implant
manufacturer before operating
this machine.
WARNING: The operation of
any tool can result in foreign
objects being thrown into your
eyes, which can result in eyes
severely damaged. Before
beginning power tool operation,
always wears safety goggles or
safety glasses with side shields
and a full face shield when
needed. We recommend Wide
Vision Safety Mask for use over
eyeglasses or standard safety
glasses with side shield.
IMPORTANT
READ CAREFULLY
BEFORE USE.
KEEP FOR FUTURE
REFERENCE.
1. Read the instructions
carefully. Be familiar with the
controls and the proper use of
the equipment.
2. Never allow children or
people unfamiliar with these
instructions to use the lawn
mower. Local regulations can
restrict the age of the
operator.
3. Never mow while people,
especially children, or pets
are nearby.
4. Keep in mind that the
operator or user is
responsible for accidents or
hazards occurring to other
people or their property.

9
5. While mowing, always wear
substantial footwear and long
trousers. Do not operate the
equipment when barefoot or
wearing open sandals; Avoid
wearing clothing that is loose
fitting or that has hanging
cords or ties.
6. Thoroughly inspect the area
where the equipment is to be
used and remove all objects
which can be thrown by the
machine.
7. Before using, always visually
inspect to see that the blades,
blade bolts and cutter
assembly are not worn or
damaged. Replace worn or
damaged blades and bolts in
sets to preserve balance.
Replace damaged or
unreadable labels.
8. Before use check the supply
and extension cord for signs
of damage or worn. If the cord
becomes damaged during
use, disconnect the cord from
the supply immediately. DO
NOT TOUCH THE CORD
BEFORE DISCONNECTING
THE SUPPLY. Do not use the
appliance if the cord is
damaged or worn.
9. Mow only in daylight or in
good artificial light.
10. Avoid operating the
equipment in wet grass,
where feasible.
11. Always be sure of your
footing on slopes.
12. Walk, never run.
13. For wheeled rotary machines;
mow across the face of
slopes, never up and down.
14. Exercise extreme caution
when changing direction on
slopes.
15. Do not mow excessively
steep slopes.
16. Use extreme caution when
reversing or pulling the lawn
mower towards you.
17. Stop the blades if the lawn
mower has to be tilted for
transportation when crossing
surfaces other than grass,
and when transporting the
lawn mower to and from the
area to be mowed.
18. Never operate the lawn
mower with defective guards,
or without safety devices, for
example deflectors and/or
grass catchers, in place.
19. Start or switch on the motor
carefully according to
instructions and with feet well
away from the blades.
20. Do not tilt the lawn mower
when starting switching on
the motor, except if the lawn
mower has to be tilted for
starting. In this case, do not
tile it more than absolutely
necessary and lift only the
part which is away from the
operator.
21. Do not start the motor when
standing in front of the
discharge chute.

10
22. Do not put hands or feet near
or under rotating parts. Keep
clear of the discharge
opening at all times.
23. Never pick up or carry a lawn
mower while the motor is
running.
24. Stop the motor and
disconnect the plug. Make
sure that all moving parts
have come to a complete
stop.
- whenever you leave the
machine:
- before clearing blockages
or unclogging chute;
- before checking, cleaning
or working on the lawn
mower;
- after striking a foreign
object. Inspect the lawn
mower for damage and
make repairs before
restarting and operating the
lawn mower.
If lawn mower starts to
vibrate abnormally (check
immediately):
- inspect for damage;
- replace or repair any
damage parts;
- check for and tighten any
loose parts.
25. Stop the mower:
- whenever you leave the
lawn mower.
26. Keep all nuts, bolts and
screws tight to be sure the
equipment is in safe working
condition.
27. Check the grass catcher
frequently for wear or
deterioration.
28. Replace worn or damaged
parts for safety.
29. Do not use the lawn mower if
the cords are damaged or
worn.
30. Do not connect a damaged
cord to the supply or touch a
damaged cord before it is
disconnected from the supply.
A damaged cord can lead to
contact with live parts.
31. Do not touch the blade before
the machine is disconnected
form the supply and the blade
have come to a complete
stop.
32. To keep extension cords
away from the blade. The
blade can cause damage to
the cords and lead to contact
with live parts.
33. To disconnect the supply (i.e.
pulling the plug from the
socket):
- whenever leaving the
machine unattended;
- before clearing a blockage;
- before checking, cleaning
or working on the machine;
- after striking a foreign
object;
- whenever the machine
starts vibrating abnormally.
34. Children are not allowed to
use the machine.
35. This appliance is not intended
for use by persons with

11
reduced physical, sensory or
mental capabilities, or lack of
experience and knowledge,
unless they have been given
supervision or instruction
concerning use of the
appliance by a person
responsible for their safety.
36. If the external flexible cable or
cord is damaged, it shall be
exclusively replaced by the
manufacturer or his service
agent or a similar qualified
person in order to avoid a
hazard (not lighter than
H05VV-F 2 x1.0 mm2or
H05RN-F 2 x1.0 mm2).
37. Instructions for the safe
operation of the appliance,
including a recommendation
that the appliance should be
supplied via a Residual
Current Device (RCD) with a
tripping current of not more
than 30 mA.
38. Be careful during adjustment
of the machine to prevent
entrapment of the fingers
between moving blades and
fixed parts of the machine.
39. Always allow the machine to
cool before storing.
40. When servicing the blades be
aware that, even though the
power source is switched off,
the blades can still be moved.
41. Replace worn or damaged
parts for safety; Use only
genuine replacement parts
and accessories.
42. Be careful during adjustment
of the appliance to prevent
entrapment of the fingers
between moving blades and
fixed parts of appliance.
43. If the supply cord is damaged,
it must be replaced by the
manufacturer, its service
agent or similarly qualified
persons in order to avoid a
hazard.
3. PARTS DESCRIPTION (Fig. 1)

12
4. TECHNICAL DATA
5. ASSEMBLY
5-1 ASSEMBLY THE FOLDING HANDLE
A) Fix the lower handlebars into the unit body with
locking knobs. (Fig. 2 - 5)
B) Release the upper handlebars for folding. Connect the
upper handle and the lower handle with the locking
knob. (Fig. 6 & 7)
C) Position the cable over the handle shaft. Clamp it
around the middle of lower handle by the cable clamp
so that the cable is fixed on the outside of the
machine. Otherwise the cable may be pinched by
opening/closing the rear cover or forced by folding the
upper handle. (Fig. 8)
5-2 ASSEMBLY THE GRASS CATCHER
1. To fit: Raise the rear cover and hitch the grass catcher
on rear of mower. (Fig. 9 & 10)
2. To remove: Grasp and lift the rear cover, remove
grass catcher.
6. ADJUSTMENT OF CUTTING
HEIGHT
Apply outward pressure to disengage lever from rack.
Move lover forward or back to adjust height.
The height (the blade to the ground) can be adjusted from
20 mm (the lowest position) to 75 mm (the highest
position), 5 height positions (20 mm/32 mm/44 mm/
60 mm/75 mm). (Fig. 11)
WARNING: Make this adjustment only when the
blade is stopped.
7. ADJUSTMENT FOR AN
APPROPRIATE HEIGHT
1) Back out the locking knob which fixed the lower
handle, refer to Fig. 12.
2) Refer to Fig. 13, move the lower handle up and down,
adjust it to the proper height.
There is 3 adjusting height to be choose on this type
lawn mower; at 1 height, lower handle to the ground is
highest., 3 height is the lowest.
3) Adjusting to the proper height, then fix the lower
handle by the locking knobs.
WARNING: The left side and right side of lower
handle must adjust to the same height.
8. SAFETY PRECAUTIONS
a) Always operate with the deflector or grass catcher in
the correct position.
b) Always stop the motor before removing the grass
catcher or adjusting the height of cutting position.
1) Before mowing, remove all foreign objects from the
lawn which may be thrown by the machine. While
mowing, stay alert for any foreign objects which may
have been missed. (Fig. 14)
2) Never lift the rear of the mower while starting the
motor or during normal operation. (Fig. 15)
3) Always ensure that the ventilation openings are kept
clear of debris.
4) Never place your hands or feet underneath the
underpan or into the rear discharge chute while the
motor is running. (Fig. 16)
9. STARTING
Before connecting up the lawn mower to the electric
power supply, make sure that the mains supply voltage is
230 V – 50 Hz. When the lawn mower power on, the
indicator light will turn on (Fig. 17).
Start the motor as follows (Fig. 18).
a) Press the safety push-button (1).
b) And meanwhile, pull the switch handle (2),and keep it
in grasp.
Model: ELM4110
Rated Voltage: 230 V~
Rated Frequency: 50 Hz
Rated Power: 1,600 W
No Load Speed: 2,900/min
Cutting Width: 410 mm
Noise according to EN60335
Sound pressure level (LpA): 83 dB (A)
Sound power level (LwA): 91.4 dB (A)
Uncertainty (K): 2.38 dB (A)
Vibration according to EN60335
Vibration emission (ah): 2.5 m/s2or less
Uncertainty (K): 1.5 m/s2
Grass catcher: 50 L
Net weight: 25.8 kg
Degree of protection against liquid: IPX4
Height adjustment: 20 - 75 mm, 5 adjustment

13
c) Push the lawn mower manually when the motor is
running. If you release the switch handle, the motor
will stop.
CAUTION: The blade starts turning as soon as
the motor is started.
WARNING: Cutting elements continue to rotate
after the motor is switch off.
CAUTION: Determine the maximum permissible
system impedance Zmax (0.330Ω) at the interface point of
the user’s supply, declare Zmax (0.330Ω) in the
equipment instruction manual and instruct the user to
determine in consultation with the supply authority, if
necessary, that the equipment is connected only to a
supply of that impedance or less.
10. BLADE
The blade is made of pressed steel. It will be necessary to
reshape it frequently (with a grind wheel).
Ensure that it is always balanced (an unbalanced blade
will cause dangerous vibrations). To check for balance,
insert a round rod through the central hole and support
the blade horizontally. (Fig. 19) A balanced blade will
remain horizontal. If the blade is not balanced the heavy
end will rotate downwards. Reshape the heavy end until
the blade is currently balanced. (Fig. 20) To re mov e the
blade (2), unscrew the blade screw (3). (Fig. 21 - 23)
Check the conditions of the fan(1), and replace any parts,
which are damaged. (Fig. 21)
When reassembling, make sure that the cutting edges
face in the direction of the motor rotation. The blade screw
(3) must be tightened to 20 -25 Nm torque.
WARNING: For service,
replace the blade with: MAKITA
263001427 only.
11. EXTENSION CORDS
You should only use extension cords for outdoor use,
PVC or rubber cord ordinary duty with a cross sectional
area not less than 1.0 mm2.
Before using, check the supply and extension cords for
signs of damaged during use, disconnect the cord for
signs of damage or aging. If the cord becomes damaged
during use, disconnect the cord from the supply
immediately. DO NOT TOUCH THE CORD BEFORE
DISCONNECTING THE SUPPLY. Do not use the
appliance if the cord is damaged or worn. Keep extension
cord away from cutting elements.
12. MAINTENANCE AND CARE
WARNING: Before performing any Maintenance
or cleaning work, always pull out the mains plug!
Do not spray the unit with water. Ingress of water may
destroy the switch-plug combination unit and the electric
motor. Clean the unit with a cloth, hand brush, etc.
Never use gasoline, benzine, thinner, alcohol or the like.
Discoloration, deformation or cracks may result.
Expert inspection is required, do not make any
adjustment by yourself, must contact to Makita
authorized service centre:
a) If the lawn mower strikes an object.
b) If the motor stops suddenly.
c) If the blade is bent (do not align!).
d) If the motor shaft is bent (do not align!).
e) If a short-circuit occurs when the cable is connected.
f) If the gears are damaged.
g) If the V-belt is defective.
13. TROUBLE SHOOTING
WARNING: Before performing any maintenance
or cleaning work, always pull out the mains plug and wait
until the cutter has come to a standstill.
CAUTION: Faults which cannot be rectified with
the aid of this table may be rectified by Makita authorized
service centre only.
14. ENVIRONMENTALLY
FRIENDLY DISPOSAL
According to EU directive 2002/96/EC on
electric and electronic equipment and its
implementation into national law, all electric
tools must be separately collected and
environmentally friendly recycled.
Fault Remedial action
Motor does not
run
Check mains connection cable.
Start on short grass or on an area which
has already been mown.
Clean discharge channel/housing-the
mowing blade must rotate freely.
Correct the cutting height.
Motor power
drops
Correct the cutting height.
Clean discharge channel/housing.
Have mowing blade resharpened/
replaced
authorized service centre.
Grass catcher
is not filled
Correct the cutting height.
Allow the lawn to dry.
Have mowing blade resharpened/
replaced
authorized service centre.
Clean the grille on the grass catcher.
Clean the discharge channel/housing.

14
Alternative disposal: If the owner of the power tool does
not return the tool to the manufacturer, he is responsible
for proper disposal at a designated collection point that
prepares the device for recycling according to national
recycling laws and regulations.
This does not include accessories and tools without
electric or electronic components.
15. EC DECLARATION OF
CONFORMITY
For European countries only
The EC declaration of conformity is included as Annex A
to this instruction manual.

15
DEUTSCH
Erklärung der Gesamtdarstellung
LERNEN SIE IHREN
RASENMÄHER KENNEN
Lesen Sie diese Anleitung aufmerksam durch und
befolgen Sie die empfohlenen Sicherheitshinweise vor,
während und nach der Verwendung des Rasenmähers.
Durch Einhalten dieser einfachen Anweisungen halten
Sie den Rasenmäher auch in einem guten Zustand.
Machen Sie sich vor der Verwendung des Rasenmähers
mit den Steuerungen vertraut; stellen Sie vor allem sicher,
dass Sie wissen, wie Sie den Rasenmäher im Notfall
stoppen können. Bewahren Sie diese
Bedienungsanleitung sowie alle anderen, mit den
Rasenmäher gelieferten Unterlagen zum späteren
Nachschlagen gut auf.
1. SYMBOLE AM
PRODUKT
1. Oberer Griff
2. Schaltergriff
3. Schaltkasten
4. Sicherheitsdrucktaste
5. Grasfänger
6. Kabelklemme
7. Rad
8. Hebel für Höheneinstellung
9. Bodenwanne
10. Motorabdeckung
11. Verriegelungsknopf
12. Kabelhaken
13. Anzeigenleuchte
Lesen Sie diese Anleitung
aufmerksam durch, bevor
Sie den Rasenmäher
verwenden und bewahren
Sie sie zum späteren
Nachschlagen an einem
sicheren Ort auf.
Halten Sie Zuschauer fern.
Achten Sie auf die
scharfen Messer. Die
Messer drehen nach dem
Ausschalten des Motors
eine gewisse Zeit nach.
Ziehen Sie den
Netzstecker vom Gerät,
bevor Sie
Wartungsarbeiten
durchführen oder wenn
das Kabel beschädigt ist.
Halten Sie das flexible
Netzkabel in einem
Abstand zu den
Schneidklingen.
CE-Kennzeichen
Das Produkt entspricht
den von der Europäischen
Gemeinschaft festgelegten
Anforderungen und
Bestimmungen.

16
DOPPELT SCHUTZISOLIERT
Ihr Mäher ist doppelt
schutzisoliert.
Das bedeutet, dass alle externen
Bauteile elektrisch von der
Stromversorgung isoliert sind.
Dies wird durch eine zusätzliche
Isolierung zwischen elektrischen
und mechanischen Bauteilen
erreicht.
2.
ALLGEMEINE
SICHERHEITSREGELN
Mit diesen Sicherheitsregeln
sollen Sie auf mögliche Gefahren
aufmerksam gemacht werden.
Achten Sie unbedingt auf die
Sicherheitssymbole und
Erläuterungen und machen Sie
sich mit der Bedeutung dieser
Symbole vertraut. Die
Sicherheitswarnungen selbst
verhindern noch keine Gefahr.
Die Anweisungen und
Warnungen ersetzen keine
entsprechenden Maßnahmen zur
Unfallvermeidung.
WARNUNG: Ein
Nichtbeachten einer
Sicherheitswarnung führt zu
ernsthaften Verletzungen von
Ihnen oder anderen Personen.
Befolgen Sie stets die
Sicherheitsmaßnahmen, um die
Gefahr eines Brandes, eines
elektrischen Schlages oder von
Personenschäden zu vermeiden.
Heben Sie diese
Betriebsanleitung auf und
schlagen Sie für einen
fortwährenden sicheren Betrieb
und zur Anleitung anderer
Benutzer dieses Werkzeugs
regelmäßig Informationen in
dieser Betriebsanleitung nach.
WEEE-Kennzeichen
ACHTUNG! Nicht mehr
brauchbare Elektrogeräte
und Elektrowerkzeuge
gehören nicht in den
Hausmüll. Diese
Werkzeuge und Geräte
sind den dafür
eingerichteten
Sammelstellen zwecks
umweltgerechter
Entsorgung entsprechend
den geltenden Gesetzen
und Bestimmungen
zuzuführen.
Kennzeichnung der
Schallemission
Die Schallemission dieses
Werkzeugs liegt unter
96 dB.
GEFAHRENSYMBOL:
Bedeutet ACHTUNG oder
WARNUNG und wird
möglicherweise in
Verbindung mit anderen
Symbolen oder
Piktogrammen verwendet.

17
WARNUNG: Während des
Betriebs erzeugt dieses Gerät ein
elektromagnetisches Feld. Unter
bestimmten Umständen kann
dieses Feld Auswirkungen auf
aktive oder passive medizinische
Implantate haben. Zur
Verminderung der Gefahr
ernsthafter oder tödlicher
Verletzungen empfehlen wir
Personen mit medizinischen
Implantaten, sich vor der
Bedienung dieses Geräts an
einen Arzt oder den Hersteller
des medizinischen Implantats zu
wenden.
WARNUNG: Jegliche
Arbeiten können dazu führen,
dass Fremdkörper in Ihre Augen
gelangen, die ernsthafte
Augenverletzungen verursachen
können. Setzen Sie vor Beginn
der Arbeit mit Elektrowerkzeugen
stets eine Schutzbrille mit
Seitenschutz und – falls
erforderlich – einen
Gesichtsschutz auf. Wir
empfehlen, über einer Brille eine
Sicherheitsmaske mit breitem
Sichtfeld bzw. eine
Standardsicherheitsbrille mit
Seitenschutz zu tragen.
WICHTIG
LESEN SIE DIESE
INFORMATIONEN VOR
DER
INBETRIEBNAHME
AUFMERKSAM
DURCH.
BEWAHREN SIE DIESE
BETRIEBSANLEITUNG
ZUM SPÄTEREN
NACHSCHLAGEN
SORGFÄLTIG AUF.
1. Lesen Sie alle Anweisungen
aufmerksam durch. Machen
Sie sich mit den Steuerungen
und der ordnungsgemäßen
Verwendung des Geräts
vertraut.
2. Erlauben Sie Kindern und
Personen, die diese
Anleitungen nicht kennen,
niemals den Gebrauch des
Rasenmähers. Das
Mindestalter für den Bediener
kann durch geltende Gesetze
und Bestimmungen geregelt
sein.
3. Mähen Sie niemals, wenn
Personen, vor allem Kinder,
oder Haustiere in der Nähe
sind.
4. Beachten Sie, dass der
Bediener für Unfälle oder
Gefahren für andere
Personen oder deren
Eigentum verantwortlich ist.
5. Tragen Sie während des
Mähens stets festes
Schuhwerk und lange Hosen.
Bedienen Sie das Gerät nicht
barfuß oder mit offenem

18
Schuhwerk wie z. B.
Sandalen; tragen Sie keine
lose sitzende Kleidung oder
Kleidung mit
herunterhängenden Kordeln
oder Schnüren.
6. Überprüfen Sie sorgfältig das
zu mähende Gelände und
entfernen Sie alle
Gegenstände, die von dem
Mäher weggeschleudert
werden können.
7. Führen Sie vor jedem
Gebrauch eine Sichtprüfung
der Messer,
Messerschrauben und
Schnitteinheit auf Verschleiß
oder Beschädigungen durch.
Tauschen Sie verschlissene
oder beschädigte Messer und
Schrauben nur satzweise
aus, um eine Unwucht zu
vermeiden. Tauschen Sie
beschädigte oder unleserliche
Beschriftungen aus.
8. Prüfen Sie vor der
Verwendung das Netz- und
Verlängerungskabel auf
Anzeichen von
Beschädigungen oder
Verschleiß. Falls das Kabel
während der Arbeit
beschädigt wird, trennen Sie
das Kabel sofort von der
Stromversorgung.
BERÜHREN SIE DAS
KABEL ERST, NACHDEM ES
VON DER
STROMVERSORGUNG
GETRENNT WURDE.
Verwenden Sie das Gerät
nicht, wenn das Kabel
beschädigt oder verschlissen
ist.
9. Mähen Sie ausschließlich bei
Tageslicht oder
ausreichendem Kunstlicht.
10. Vermeiden Sie, wenn
möglich, den Betrieb des
Mähers in feuchtem Gras.
11. Achten Sie auch an Hängen
immer auf einen sicheren
Stand.
12. Gehen Sie beim Mähen,
rennen Sie niemals beim
Mähen.
13. Mähen Sie bei
Walzenmähern quer zum
Hang, niemals nach oben und
unten.
14. Seien Sie besonders
vorsichtig, wenn Sie die
Richtung am Hang ändern.
15. Mähen Sie nicht an sehr
steilen Hängen.
16. Seien Sie besonders
vorsichtig, wenn Sie den
Rasenmäher wenden oder zu
sich heranziehen.
17. Stoppen Sie die Messer,
wenn der Rasenmäher beim
Transport gekippt werden
muss, z.B. beim Überqueren
von Flächen, die kein Rasen
sind, oder beim Transport von
und zum zu mähenden
Gelände.
18. Verwenden Sie den
Rasenmäher niemals mit
defekten oder fehlenden

19
Schutzvorrichtungen,
beispielsweise ohne
Schutzbleche und/oder
Grasfänger.
19. Starten Sie den Motor
vorsichtig entsprechend den
Anweisungen und mit
ausreichendem Abstand
zwischen Füßen und
Messern.
20. Kippen Sie den Rasenmäher
beim Einschalten des Motors
nicht, außer wenn der
Rasenmäher zum Starten
gekippt werden muss. Kippen
Sie in diesem Fall den Mäher
nicht weiter als notwendig
und heben Sie nur den Teil
an, der nicht zum Bediener
zeigt.
21. Starten Sie den Motor nicht,
wenn Sie vor der
Auswurföffnung stehen.
22. Halten Sie weder Hände noch
Füße in die Nähe von
rotierenden Teilen oder
darunter. Achten Sie jederzeit
auf ausreichenden Abstand
zur Auswurföffnung.
23. Heben oder tragen Sie einen
Rasenmäher niemals mit
laufendem Motor.
24. Halten Sie in den unten
genannten Fällen den Motor
an und ziehen Sie den
Netzstecker ab. Stellen Sie in
folgenden Fällen sicher, dass
alle sich bewegenden Teile
zu einem vollständigen Stopp
gekommen sind:
- wenn Sie das Gerät
unbeaufsichtigt lassen;
- vor dem Lösen von
Blockierungen oder vor
dem Reinigen des
Auswurfs;
- vor dem Prüfen, Reinigen
oder Arbeiten am
Rasenmäher und
- nach dem Anschlagen an
Fremdkörper. Überprüfen
Sie den Rasenmäher auf
Beschädigungen und
nehmen Sie ggf.
Reparaturen vor, bevor Sie
den Rasenmäher wieder
starten und den Betrieb
fortsetzen.
Falls der Rasenmäher
ungewöhnlich zu vibrieren
beginnt, führen Sie
folgende Schritte aus
(sofort überprüfen):
- überprüfen Sie den
Mäher auf
Beschädigungen;
- tauschen Sie
beschädigte Teile aus
oder reparieren Sie diese
und
- überprüfen Sie, ob alle
Teile fest sitzen und
ziehen Sie ggf. lose Teile
fest.
25. Stoppen Sie den Mäher in
folgenden Fällen:
- wenn Sie den Rasenmäher
unbeaufsichtigt lassen.
26. Vergewissern Sie sich stets,
dass alle Muttern, Bolzen und

20
Schrauben festgezogen sind,
um sichere
Arbeitsbedingungen zu
gewährleisten.
27. Überprüfen Sie den
Grasfänger häufig auf
Verschleiß oder Zerstörung.
28. Tauschen Sie verschlissene
oder beschädigte Teile zu
Ihrer Sicherheit aus.
29. Verwenden Sie den
Rasenmäher nicht, wenn die
Kabel beschädigt oder
verschlissen sind.
30. Schließen Sie ein
beschädigtes Kabel nicht an
die Stromversorgung an und
berühren Sie ein
beschädigtes Kabel erst,
wenn es von der
Stromversorgung getrennt
wurde. Ein beschädigtes
Kabel kann in Kontakt mit
stromführenden Teilen
kommen.
31. Berühren Sie das Messer
erst, wenn das Gerät von der
Stromversorgung getrennt
wurde und das Messer zum
völligen Stillstand gekommen
ist.
32. Halten Sie
Verlängerungskabel vom
Messer fern. Das Messer
kann die Kabel beschädigen
und zum Kontakt mit
stromführenden Teilen
führen.
33. Unterbrechen Sie in
folgenden Fällen die
Stromzufuhr (d. h., Sie
müssen den Netzstecker aus
der Steckdose ziehen):
- immer, wenn das Gerät
unbeaufsichtigt ist;
- bevor Sie eine Verstopfung
beheben;
- vor dem Prüfen, Reinigen
oder Arbeiten am Gerät;
- nach dem Anschlagen an
Fremdkörper und
- immer, wenn das Gerät
ungewöhnlich zu vibrieren
beginnt.
34. Kinder dürfen das Gerät
keinesfalls bedienen.
35. Dieses Gerät darf nicht von
Personen mit verminderten
physischen, sensorischen
oder psychischen Fähigkeiten
oder fehlenden Erfahrungen
und Kenntnissen bedient
werden, es sei denn, sie
werden beaufsichtigt oder
wurden in der Anwendung
des Geräts von einem
Sicherheitsverantwortlichen
unterwiesen.
36. Um Gefahren zu vermeiden,
muss ein beschädigtes
flexibles Außenkabel oder
sonstiges Kabel durch den
Hersteller bzw. seinen
Kundendienstbeauftragten
oder durch eine Person mit
ähnlicher fachlicher
Qualifikation ausgetauscht
werden (nicht leichter als
H05VV-F 2 x1,0 mm2oder
H05RN-F 2 x1,0 mm2).
Other manuals for ELM4110
1
Table of contents
Languages:
Other Makita Lawn Mower manuals

Makita
Makita DLM330 User manual

Makita
Makita RM350D User manual

Makita
Makita DLM533 User manual

Makita
Makita DLM460 User manual
Makita
Makita PLM4817 User guide

Makita
Makita PLM4621 User guide

Makita
Makita LM001G User manual

Makita
Makita PLM5113N2 User guide

Makita
Makita PLM4120N User guide

Makita
Makita ELM3310 User guide

Makita
Makita EM2651LH User manual

Makita
Makita LM001J User manual

Makita
Makita PLM5600N2 User guide

Makita
Makita DCU180 User manual

Makita
Makita DLM480 User manual

Makita
Makita DLM480 User manual

Makita
Makita PLM4616 User manual

Makita
Makita PLM4630N User guide

Makita
Makita ELM4610 User guide

Makita
Makita DLM463 User manual