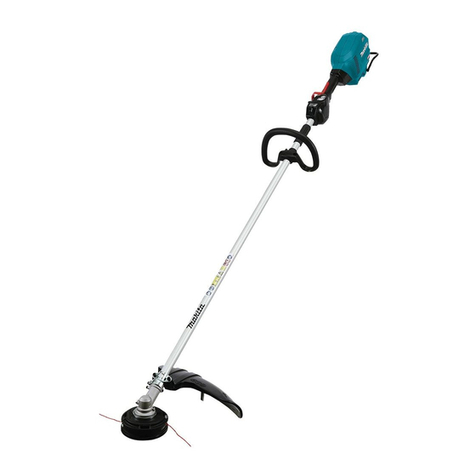
Makita UR014G User manual

UR014G
EN Cordless Grass Trimmer INSTRUCTION MANUAL 8
FR Coupe Herbe Sans Fil MANUEL D’ INSTRUCTIONS 19
DE Akku-Rasentrimmer BETRIEBSANLEITUNG 32
IT Tagliabordi a batteria ISTRUZ IONI PER L’ USO 45
NL Accugrastrimmer GEBRUIKSAANW IJZ ING 58
ES Cortador Inalámbrico de
Pasto
MANUAL DE
INSTRUCCIONES 71
PT TESOURA PARA GRAMA A
BATERIA MANUAL DE INSTRUÇÕ ES 84
DA Akku græstrimmer BRUGSANVISNING 97
EL Φορητό κουρευτικό γκαζόν ΕΓΕΙΙΔΙ ΔΗΓΙΝ 109
TR Akülü Yan Tırpan KULLANMA KILAVUZ U 122

2
Fig.1
12
43
5
6
14
13
12
7
8
9
10
11
Fig.2

3
1 1
2
3
Fig.3
1
2
Fig.4
2
1
Fig.5
2
1
Fig.6
1
Fig.7
2
1
Fig.8

4
2
1
Fig.9
1
2
3
45
Fig.10
1
Fig.11
1
2
Fig.12
1
2
Fig.13
1
2
3
Fig.14

5
1
2
3
Fig.15
1
2
3
4
Fig.16
1
2
3
Fig.17
1
2
3
Fig.18
Fig.19
1
Fig.20
Fig.21

6
1
Fig.22

7
1
2
4
3
5
6
3 m (9 ft)
100 mm
(3-15/16″)
Fig.23

8ENGLISH
ENGLISH (Original instructions)
SPECIFICATIONS
Model: UR014G
H a n d l e t y p e L o o p h a n d l e
N o l o a d s p e e d 0 - 5, 000 m i n -1
O v e r a l l l e n g t h
( w i t h o u t c u t t i n g t o o l a n d b a t t e r y )
1, 857 m m
N y l o n c o r d d i a m e t e r 2.7 m m
Ap p l i c a b l e c u t t i n g t o o l a n d
c u t t i n g d i a m e t e r
N y l o n c u t t i n g h e a d
( P / N 19 11Y 3-7 )
4 50 m m
R a t e d v o l t a g e D.C . 36 V - 4 0 V m a x
N e t w e i g h t 5.5 - 6.7 k g
P r o t e c t i o n d e g r e e IP X 4
•
Due to our continuing program of research and development, the specications herein are subject to change without notice.
Specications may dier from country to country.
The weight may dier depending on the attachment(s), including the battery cartridge. The lightest and heavi-
e s t c o m b i n a t i o n s , a c c o r d i n g t o EP T A-P r o c e d u r e 01/ 2014 , a r e s h o w n i n t h e t a b l e .
Applicable battery cartridge and charger
B a t t e r y c a r t r i d g e B L 4 020 / B L 4 025 / B L 4 04 0 / B L 4 050F * / B L 4 080F *
* : R e c o m m e n d e d b a t t e r y
C harger DC 4 0R A / DC 4 0R B / DC 4 0R C
•
S o m e o f t h e b a t t e r y c a r t r i d g e s a n d c h a r g e r s l i s t e d a b o v e m a y n o t b e a v a i l a b l e d e p e n d i n g o n y o u r r e g i o n o f r e s i d e n c e .
WARNING: Only use the battery cartridges and chargers listed above. U s e o f a n y o t h e r b a t t e r y c a r t r i d g e s
and chargers may cause injury and/or re.
Recommended cord connected pow er source
P o r t a b l e p o w e r p a c k P DC 01 / P DC 1200
•T h e c o r d c o n n e c t e d p o w e r s o u r c e ( s ) l i s t e d a b o v e m a y n o t b e a v a i l a b l e d e p e n d i n g o n y o u r r e g i o n o f r e s i d e n c e .
•B e f o r e u s i n g t h e c o r d c o n n e c t e d p o w e r s o u r c e , r e a d i n s t r u c t i o n a n d c a u t i o n a r y m a r k i n g s o n t h e m .
Noise
Ap p l i c a b l e s t a n d a r d : IS O 22868( IS O 11806-1) / EN 50636-2-9 1
Cutting tool
Sound pressure level (LpA) dB(A)
Sound pow er level (LW A) dB(A)
LpA dB(A)
Uncertainty (K)
dB(A)
LW A dB(A)
Uncertainty (K)
dB(A)
N y l o n c u t t i n g h e a d 7 7 .9 2.9 9 1.3 1.9
•Ev e n i f t h e s o u n d p r e s s u r e l e v e l l i s t e d a b o v e i s 80 d B ( A) o r l e s s , t h e l e v e l u n d e r w o r k i n g m a y e x c e e d 80 d B
( A) . W e a r e a r p r o t e c t i o n .
NOTE: T h e d e c l a r e d n o i s e e m i s s i o n v a l u e ( s ) h a s b e e n m e a s u r e d i n a c c o r d a n c e w i t h a s t a n d a r d t e s t m e t h o d a n d
m a y b e u s e d f o r c o m p a r i n g o n e t o o l w i t h a n o t h e r .
NOTE: T h e d e c l a r e d n o i s e e m i s s i o n v a l u e ( s ) m a y a l s o b e u s e d i n a p r e l i m i n a r y a s s e s s m e n t o f e x p o s u r e .
WARNING: W ear ear protection.
WARNING: The noise emission during actual use of the power tool can dier from the declared val-
ue(s) depending on the w ays in w hich the tool is used especially w hat kind of w orkpiece is processed.
WARNING: Be sure to identify safety measures to protect the operator that are based on an estimation
of exposure in the actual conditions of use (taking account of all parts of the operating cycle such as the
times when the tool is switched o and when it is running idle in addition to the trigger time).

9ENGLISH
Vibration
Ap p l i c a b l e s t a n d a r d : IS O 22867 ( IS O 11806-1)
Cutting tool Left hand Right hand
ah,W (m/s2)Uncertainty K
(m/s2)
ah,W (m/s2)Uncertainty K
(m/s2)
N y l o n c u t t i n g h e a d 2.5 1.5 2.5 1.5
NOTE: T h e d e c l a r e d v i b r a t i o n t o t a l v a l u e ( s ) h a s b e e n m e a s u r e d i n a c c o r d a n c e w i t h a s t a n d a r d t e s t m e t h o d a n d
m a y b e u s e d f o r c o m p a r i n g o n e t o o l w i t h a n o t h e r .
NOTE: T h e d e c l a r e d v i b r a t i o n t o t a l v a l u e ( s ) m a y a l s o b e u s e d i n a p r e l i m i n a r y a s s e s s m e n t o f e x p o s u r e .
WARNING: The vibration emission during actual use of the power tool can dier from the declared
value(s) depending on the w ays in w hich the tool is used especially w hat kind of w orkpiece is processed.
WARNING: Be sure to identify safety measures to protect the operator that are based on an estimation
of exposure in the actual conditions of use (taking account of all parts of the operating cycle such as the
times when the tool is switched o and when it is running idle in addition to the trigger time).
Symbols
T h e f o l l o w i n g s s h o w t h e s y m b o l s w h i c h m a y b e u s e d
f o r t h e e q u i p m e n t . B e s u r e t h a t y o u u n d e r s t a n d t h e i r
m e a n i n g b e f o r e u s e .
T a k e p a r t i c u l a r c a r e a n d a t t e n t i o n .
R e a d i n s t r u c t i o n m a n u a l .
W e a r e y e a n d e a r p r o t e c t i o n .
15m(50FT)K e e p d i s t a n c e a t l e a s t 15 m .
Danger; be aware of thrown objects.
W a r n i n g ; Di s c o n n e c t b a t t e r y b e f o r e
m aintenance.
N e v e r u s e m e t a l a n d p l a s t i c b l a d e .
Ni-MH
Li-ion
O n l y f o r EU c o u n t r i e s
Du e t o t h e p r e s e n c e o f h a z a r d o u s c o m -
p o n e n t s i n t h e e q u i p m e n t , w a s t e e l e c t r i c a l
a n d e l e c t r o n i c e q u i p m e n t , a c c u m u l a t o r s
a n d b a t t e r i e s m a y h a v e a n e g a t i v e i m p a c t
o n t h e e n v i r o n m e n t a n d h u m a n h e a l t h .
Do n o t d i s p o s e o f e l e c t r i c a l a n d e l e c t r o n i c
a p p l i a n c e s o r b a t t e r i e s w i t h h o u s e h o l d
w a s t e !
In a c c o r d a n c e w i t h t h e Eu r o p e a n Di r e c t i v e
o n w a s t e e l e c t r i c a l a n d e l e c t r o n i c e q u i p -
m e n t a n d o n a c c u m u l a t o r s a n d b a t t e r i e s
a n d w a s t e a c c u m u l a t o r s a n d b a t t e r i e s ,
a s w e l l a s t h e i r a d a p t a t i o n t o n a t i o n a l l a w ,
w a s t e e l e c t r i c a l e q u i p m e n t , b a t t e r i e s a n d
a c c u m u l a t o r s s h o u l d b e s t o r e d s e p a r a t e l y
a n d d e l i v e r e d t o a s e p a r a t e c o l l e c t i o n p o i n t
f o r m u n i c i p a l w a s t e , o p e r a t i n g i n a c c o r -
d a n c e w i t h t h e r e g u l a t i o n s o n e n v i r o n m e n -
t a l p r o t e c t i o n .
T h i s i s i n d i c a t e d b y t h e s y m b o l o f t h e
c r o s s e d -o u t w h e e l e d b i n p l a c e d o n t h e
equipm ent.
G u a r a n t e e d s o u n d p o w e r l e v e l a c c o r d i n g
t o EU O u t d o o r N o i s e Di r e c t i v e .
S o u n d p o w e r l e v e l a c c o r d i n g t o Au s t r a l i a
N S W N o i s e C o n t r o l R e g u l a t i o n .
Declarations of Conformity
For European countries only
T h e De c l a r a t i o n s o f c o n f o r m i t y a r e i n c l u d e d i n An n e x A
t o t h i s i n s t r u c t i o n m a n u a l .
SAFETY W ARNINGS
General pow er tool safety w arnings
WARNING Read all safety w arnings, instruc-
tions, illustrations and specications provided with
this pow er tool. F a i l u r e t o f o l l o w a l l i n s t r u c t i o n s l i s t e d
below may result in electric shock, re and/or serious
injury.
Save all w arnings and instruc-
tions for future reference.
T h e t e r m " p o w e r t o o l " i n t h e w a r n i n g s r e f e r s t o y o u r
m a i n s -o p e r a t e d ( c o r d e d ) p o w e r t o o l o r b a t t e r y -o p e r a t e d
( c o r d l e s s ) p o w e r t o o l .
Important safety instructions for the
tool
WARNING: Read all safety w arnings and
all instructions. F a i l u r e t o f o l l o w t h e w a r n i n g s a n d
instructions may result in electric shock, re and/or
serious injury.

10 ENGLISH
Save all w arnings and instruc-
tions for future reference.
Intended use
1. This tool is only intended for cutting grass,
w eeds, bushes and undergrow th. It should not
be used for any other purpose such as edging
or hedge cutting as this may cause injury.
General instructions
1. Never allow people unfamiliar w ith these
instructions, people (including children) w ith
reduced physical, sensory or mental capabil-
ities, or lack of experience and know ledge to
use the tool. Children should be supervised to
ensure that they do not play w ith the tool.
2.
Before starting the tool, read this instruction man-
ual to become familiar w ith the handling of the tool.
3. Do not lend the tool to a person with insu-
cient experience or know ledge regarding han-
dling of brushcutters and string trimmers.
4 . W hen lending the tool, alw ays attach this
instruction manual.
5.
Handle the tool w ith the utmost care and attention.
6. Never use the tool after consuming alcohol or
drugs, or if feeling tired or ill.
7 . Never attempt to modify the tool.
8.
Follow the regulations about handling of brush-
cutters and string trimmers in your country.
Personal protective equipment
Fig.1
1. W ear safety helmet, protective goggles and
protective gloves to protect yourself from
ying debris or falling objects.
2. Wear ear protection such as ear mus to pre-
vent hearing loss.
3. W ear proper clothing and shoes for safe
operation, such as a w ork overall and sturdy,
non-slip shoes. Do not w ear loose clothing or
jew elry. Loose clothes, jewelry or long hair can be
c a u g h t i n m o v i n g p a r t s .
4 . W hen touching the cutting tool, w ear protec-
tive gloves.
W ork area safety
1. Operate the tool under good visibility and day-
light conditions only. Do not operate the tool in
darkness or fog.
2. Do not operate the tool in explosive atmo-
spheres, such as in the presence of ammable
liquids, gases or dust. T h e t o o l c r e a t e s s p a r k s
w h i c h m a y i g n i t e t h e d u s t o r f u m e s .
3. During operation, never stand on an unstable
or slippery surface or a steep slope. During
the cold season, bew are of ice and snow and
alw ays ensure secure footing.
4 . During operation, keep bystanders or animals
at least 15 m aw ay from the tool. Stop the tool
as soon as someone approaches.
5. Never operate the tool w hile people, especially
children, or pets are nearby.
6.
Before operation, examine the w ork area for
stones or other solid objects. T h e y c a n b e t h r o w n
and result in serious injury and/or property damage.
7 . W ARNING: Use of this product can create
dust containing chemicals w hich may cause
respiratory or other illnesses. Some examples
of these chemicals are compounds found in
pesticides, insecticides, fertiliz ers and herbi-
cides. Your risk from these exposures varies,
depending on how often you do this type
of w ork. To reduce your exposure to these
chemicals: w ork in a w ell ventilated area, and
w ork w ith approved safety equipment, such as
those dust masks that are specially designed
to lter out microscopic particles.
Electrical and battery safety
1. Do not expose the tool to rain or w et condi-
tions. W a t e r e n t e r i n g t h e t o o l w i l l i n c r e a s e t h e r i s k
o f e l e c t r i c s h o c k .
2. Do not use the tool if the sw itch does not
turn it on and o. An y t o o l t h a t c a n n o t b e c o n -
t r o l l e d w i t h t h e s w i t c h i s d a n g e r o u s a n d m u s t b e
repaired.
3. Prevent unintentional starting. Ensure the
switch is in the o-position before installing a
battery pack, picking up or carrying the tool.
Carrying the tool with your nger on the switch or
e n e r g i s i n g t h e t o o l t h a t h a v e t h e s w i t c h o n i n v i t e s
a c c i d e n t s .
4 . Do not dispose of the battery(ies) in a re.
T h e c e l l m a y e x p l o d e . C h e c k w i t h l o c a l c o d e s f o r
p o s s i b l e s p e c i a l d i s p o s a l i n s t r u c t i o n s .
5. Do not open or mutilate the battery(ies).
R e l e a s e d e l e c t r o l y t e i s c o r r o s i v e a n d m a y c a u s e
d a m a g e t o t h e e y e s o r s k i n . It m a y b e t o x i c i f
s w a l l o w e d .
6.
Do not charge battery in rain, or in w et locations.
7 . Avoid dangerous environment. Don' t use the
tool in dump or w et locations or expose it to
rain. W a t e r e n t e r i n g t h e t o o l w i l l i n c r e a s e t h e r i s k
o f e l e c t r i c s h o c k .
8. Do not charge the battery outdoors.
9 . Do not handle charger, including charger plug,
and charger terminals w ith w et hands.
10. Do not replace the battery w ith w et hands.
11. Do not replace the battery in the rain.
12. Do not w et the terminal of battery w ith liquid
such as w ater, or submerge the battery. Do not
leave the battery in the rain, nor charge, use,
or store the battery in a damp or w et place. If
t h e t e r m i n a l g e t s w e t o r l i q u i d e n t e r s i n s i d e o f b a t -
t e r y , t h e b a t t e r y m a y b e s h o r t c i r c u i t e d a n d t h e r e i s
a risk of overheat, re, or explosion.
13. After removing the battery from the tool or
charger, be sure to attach the battery cover to
the battery and store it in a dry place.
14 . If the battery cartridge gets w et, drain the
w ater inside and then w ipe it w ith a dry cloth.
Dry the battery cartridge completely in a dry
place before use.
15. W hen you use the tool on muddy ground, w et
slope, or slippery place, pay attention to your
footing.

11 ENGLISH
Putting into operation
1. Before assembling or adjusting the tool,
remove the battery cartridge.
2. Before handling the cutting tool, w ear protec-
tive gloves.
3. Before installing the battery cartridge, inspect
the tool for damages, loose screw s/nuts or
improper assembly. If the cutting tool is bent
or damaged, replace it. Check all control levers
and sw itches for easy action. Clean and dry
the handles.
4 . Never attempt to sw itch on the tool if it is dam-
aged or not fully assembled. O t h e r w i s e s e r i o u s
injury may result.
5. Adjust the shoulder harness Adjust the
hand grip to suit the operator' s body siz e if
adjustable.
6. W hen inserting a battery cartridge, keep the
cutting attachment clear of your body and
other object, including the ground. It m a y r o t a t e
when starting and may cause injury or damage to
t h e t o o l a n d / o r p r o p e r t y .
7 . Remove any adjusting key, w rench before
turning the tool on. An a c c e s s o r y l e f t a t t a c h e d
t o a r o t a t i n g p a r t o f t h e t o o l m a y r e s u l t i n p e r s o n a l
injury.
8. The cutting tool has to be equipped w ith the
guard. Never run the tool w ith damaged guards
or w ithout guards in place!
9 . Make sure there are no electrical cables, w ater
pipes, gas pipes etc. that could cause a haz ard
if damaged by use of the tool.
Operation
1. In the event of an emergency, switch o the
tool immediately.
2. If you feel any unusual condition (e.g. noise,
vibration) during operation, switch o the
tool and remove the battery cartridge. Do not
use the tool until the cause is recogniz ed and
solved.
3. The cutting attachment continues to rotate for
a short period after turning the tool o. Dont
rush to contact the cutting attachment.
4 . During operation, use the shoulder harness if
supplied w ith the tool. Keep the tool on your
right side rmly.
5. Do not overreach. Keep proper footing and
balance at all times. W atch for hidden obsta-
cles such as tree stumps, roots and ditches to
avoid stumbling.
6. Alw ays be sure of your footing on slopes.
7 . W alk, never run.
8. Never w ork on a ladder or tree to avoid loss of
control.
9 . If the tool gets heavy impact or fall, check the
condition before continuing w ork. Check the
controls and safety devices for malfunction. If
there is any damage or doubt, ask our autho-
riz ed service center for the inspection and
repair.
10. Do not touch the gear case during and imme-
diately after the operation. T h e g e a r c a s e
b e c o m e s h o t d u r i n g o p e r a t i o n a n d c a n c a u s e b u r n
injury.
11. Take a rest to prevent loss of control caused
by fatigue. W e r e c o m m e n d t a k i n g a 10 t o 20-m i n -
u t e r e s t e v e r y h o u r .
12. W hen you leave the tool, even if it is a short
time, alw ays remove the battery cartridge. T h e
u n a t t e n d e d t o o l w i t h t h e b a t t e r y c a r t r i d g e i n s t a l l e d
m a y b e u s e d b y u n a u t h o r i z e d p e r s o n a n d c a u s e
s e r i o u s a c c i d e n t .
13. If grass or branches get caught betw een the
cutting attachment and guard, alw ays turn
the tool o and remove the battery cartridge
before cleaning. O t h e r w i s e t h e c u t t i n g a t t a c h -
m e n t m a y r o t a t e u n i n t e n t i o n a l l y a n d c a u s e s e r i o u s
injury.
14 . Never touch moving haz ardous parts before
the moving haz ardous parts have come to
a complete stop and the battery cartridge is
removed.
15. If the cutting attachment hits stones or other
hard objects, immediately turn the tool o.
Then remove the battery cartridge and inspect
the cutting attachment.
16. Check the cutting attachment frequently
during operation for cracks or damages.
Before the inspection, remove the battery
cartridge and w ait until the cutting attachment
stops completely. Replace damaged cutting
attachment immediately, even if it has only
supercial cracks.
17 . Never cut above w aist height.
18. Before starting the cutting operation, w ait until
the cutting attachment reaches a constant
speed after turning the tool on.
19 . W hen using a cutting tool, sw ing the tool
evenly in half-circle from right to left, like
using a scythe.
20. Hold the tool by insulated gripping surfaces
only, because the cutting tool may contact
hidden w iring. C u t t i n g t o o l c o n t a c t i n g a " l i v e " w i r e
m a y m a k e e x p o s e d m e t a l p a r t s o f t h e t o o l " l i v e "
a n d c o u l d g i v e t h e o p e r a t o r a n e l e c t r i c s h o c k .
21. Do not start the tool w hen the cutting tool is
tangled w ith cut grass.
22. Before starting the tool, be sure that the cut-
ting tool is not touching the ground and other
obstacles such as a tree.
23. During operation alw ays hold the tool w ith
both hands. Never hold the tool w ith one hand
during use.
24 . Do not operate the tool in bad w eather or if
there is a risk of lightning.
25. W hen you use the tool on muddy ground, w et
slope, or slippery place, pay attention to your
footing.
26. Avoid w orking in poor environment w here
increased user fatigue is expected.
27 . Do not use the tool in bad w eather w here visi-
bility is limited. F a i l u r e t o d o s o m a y c a u s e f a l l o r
i n c o r r e c t o p e r a t i o n d u e t o l o w v i s i b i l i t y .
28. Do not submerge the tool into a puddle.

12 ENGLISH
29 . Do not leave the tool unattended outdoors in
the rain.
30. W hen w et leaves or dirt adhere to the suc-
tion mouth (ventilation w indow ) due to rain,
remove them.
31. Do not use the tool in the snow .
Cutting tools
1. Do not use a cutting tool w hich is not recom-
mended by us.
2. Use an applicable cutting attachment for the
job in hand.
—N y l o n c u t t i n g h e a d s ( s t r i n g t r i m m e r h e a d s )
a r e s u i t a b l e f o r t r i m m i n g l a w n g r a s s .
—N e v e r u s e o t h e r b l a d e s i n c l u d i n g m e t a l
multi-piece pivoting chains and ail blades. It
may result in serious injury.
3. Only use the cutting tool that are marked w ith
a speed equal or higher than the speed marked
on the tool.
4 . Alw ays keep your hands, face, and clothes
aw ay from the cutting tool w hen it is rotating.
Failure to do so may cause personal injury.
5. Alw ays use the cutting attachment guard prop-
erly suited for the cutting attachment used.
Vibration
1. People w ith poor circulation w ho are exposed
to excessive vibration may experience injury
to blood vessels or the nervous system.
V i b r a t i o n m a y c a u s e t h e f o l l o w i n g s y m p t o m s
to occur in the ngers, hands or wrists: Falling
a s l e e p " ( n u m b n e s s ) , t i n g l i n g , p a i n , s t a b b i n g s e n -
s a t i o n , a l t e r a t i o n o f s k i n c o l o r o r o f t h e s k i n . If a n y
o f t h e s e s y m p t o m s o c c u r , s e e a p h y s i c i a n !
2. To reduce the risk of white nger disease,
keep your hands w arm during operation and
w ell maintain the tool and accessories.
Transport
1. Before transporting the tool, turn it o and
remove the battery cartridge.
2. W hen transporting the tool, carry it in a hori-
z ontal position by holding the shaft.
3. W hen transporting the tool in a vehicle, prop-
erly secure it to avoid turnover. O t h e r w i s e
d a m a g e t o t h e t o o l a n d o t h e r b a g g a g e m a y r e s u l t .
Maintenance
1. Have your tool serviced by our authoriz ed
service center, alw ays using only genuine
replacement parts. In c o r r e c t r e p a i r a n d p o o r
m a i n t e n a n c e c a n s h o r t e n t h e l i f e o f t h e t o o l a n d
i n c r e a s e t h e r i s k o f a c c i d e n t s .
2. Before doing any maintenance or repair w ork
or cleaning the tool, always turn it o and
remove the battery cartridge.
3. Alw ays w ear protective gloves w hen handling
the cutting tool.
4 . Always clean dust and dirt o the tool. Never
use gasoline, benz ine, thinner, alcohol or the
like for the purpose. Di s c o l o r a t i o n , d e f o r m a t i o n
o r c r a c k s o f t h e p l a s t i c c o m p o n e n t s m a y r e s u l t .
5. After each use, tighten all screw s and nuts.
6. Do not attempt any maintenance or repair not
described in the instruction manual. Ask our
authoriz ed service center for such w ork.
7 . Alw ays use our genuine spare parts and
accessories only. U s i n g p a r t s o r a c c e s s o r i e s
s u p p l i e d b y a t h i r d p a r t y m a y r e s u l t i n t h e t o o l
b r e a k d o w n , p r o p e r t y d a m a g e a n d / o r s e r i o u s
injury.
8. Request our authoriz ed service center to
inspect and maintain the tool at regular
interval.
9 . Alw ays keep the tool in good w orking condi-
tion. P o o r m a i n t e n a n c e c a n r e s u l t i n i n f e r i o r p e r -
f o r m a n c e a n d s h o r t e n t h e l i f e o f t h e t o o l .
10. Keep handles dry, clean and free from oil and
grease. Keep all cooling air inlets clear of
debris.
11. Do not w ash the tool w ith high pressure w ater.
12. W hen w ashing the tool, do not let w ater enter
the electrical mechanism such as battery,
motor, and terminals.
13. W hen storing the tool, avoid direct sunlight
and rain, and store it in a place w here it does
not get hot or humid.
14 . Perform inspection or maintenance in a place
w here rain can be avoided.
15. After using the tool, remove the adhered dirt
and dry the tool completely before storing.
De p e n d i n g o n t h e s e a s o n o r t h e a r e a , t h e r e i s a
r i s k o f m a l f u n c t i o n d u e t o f r e e z i n g .
Storage
1. Before storing the tool, perform full clean-
ing and maintenance. Remove the battery
cartridge.
2. Store the tool in a dry and high or locked loca-
tion out of reach of children.
3. Do not prop the tool against something, such
as a w all. O t h e r w i s e i t m a y f a l l s u d d e n l y a n d
cause an injury.
First aid
1. Always have a rst-aid kit close by.
Immediately replace any item taken from the
rst aid kit.
2. W hen asking for help, give the follow ing
information:
—P l a c e o f t h e a c c i d e n t
—W hathappened
Number of injured persons
Nature of the injury
—Y o u r n a m e
SAVE THESE INSTRUCTIONS.
WARNING: DO NOT let comfort or familiarity
w ith product (gained from repeated use) replace
strict adherence to safety rules for the subject
product. MISUSE or failure to follow the safety
rules stated in this instruction manual may cause
serious personal injury.

13 ENGLISH
Important safety instructions for
battery cartridge
1.
Before using battery cartridge, read all instruc-
tions and cautionary markings on (1) battery
charger, (2) battery, and (3) product using battery.
2. Do not disassemble or tamper w ith the battery
cartridge. It may result in a re, excessive heat,
o r e x p l o s i o n .
3. If operating time has become excessively
shorter, stop operating immediately. It may
result in a risk of overheating, possible burns
and even an explosion.
4 . If electrolyte gets into your eyes, rinse them
out w ith clear w ater and seek medical atten-
tion right aw ay. It may result in loss of your
eyesight.
5. Do not short the battery cartridge:
( 1) Do not touch the terminals w ith any con-
ductive material.
( 2) Avoid storing battery cartridge in a con-
tainer w ith other metal objects such as
nails, coins, etc.
( 3) Do not expose battery cartridge to w ater
or rain.
A battery short can cause a large current
ow, overheating, possible burns and even a
breakdow n.
6. Do not store and use the tool and battery car-
tridge in locations w here the temperature may
reach or exceed 50 ° C (122 ° F).
7 . Do not incinerate the battery cartridge even if
it is severely damaged or is completely w orn
out. The battery cartridge can explode in a re.
8. Do not nail, cut, crush, throw , drop the battery
cartridge, or hit against a hard object to the
battery cartridge. S u c h c o n d u c t m a y r e s u l t i n a
re, excessive heat, or explosion.
9 . Do not use a damaged battery.
10. The contained lithium-ion batteries are subject
to the Dangerous Goods Legislation require-
ments.
F o r c o m m e r c i a l t r a n s p o r t s e .g . b y t h i r d p a r t i e s ,
f o r w a r d i n g a g e n t s , s p e c i a l r e q u i r e m e n t o n p a c k -
a g i n g a n d l a b e l i n g m u s t b e o b s e r v e d .
F o r p r e p a r a t i o n o f t h e i t e m b e i n g s h i p p e d , c o n s u l t -
i n g a n e x p e r t f o r h a z a r d o u s m a t e r i a l i s r e q u i r e d .
P l e a s e a l s o o b s e r v e p o s s i b l y m o r e d e t a i l e d
n a t i o n a l r e g u l a t i o n s .
Tape or mask o open contacts and pack up the
b a t t e r y i n s u c h a m a n n e r t h a t i t c a n n o t m o v e
a r o u n d i n t h e p a c k a g i n g .
11. W hen disposing the battery cartridge, remove
it from the tool and dispose of it in a safe
place. Follow your local regulations relating to
disposal of battery.
12. Use the batteries only w ith the products
specied by Makita. In s t a l l i n g t h e b a t t e r i e s t o
non-compliant products may result in a re, exces-
s i v e h e a t , e x p l o s i o n , o r l e a k o f e l e c t r o l y t e .
13. If the tool is not used for a long period of time,
the battery must be removed from the tool.
14 . During and after use, the battery cartridge may
take on heat w hich can cause burns or low
temperature burns. Pay attention to the han-
dling of hot battery cartridges.
15. Do not touch the terminal of the tool imme-
diately after use as it may get hot enough to
cause burns.
16. Do not allow chips, dust, or soil stuck into the
terminals, holes, and grooves of the battery
cartridge. It may cause heating, catching re,
b u r s t a n d m a l f u n c t i o n o f t h e t o o l o r b a t t e r y c a r -
tridge, resulting in burns or personal injury.
17 . Unless the tool supports the use near
high-voltage electrical pow er lines, do not use
the battery cartridge near high-voltage electri-
cal pow er lines. It m a y r e s u l t i n a m a l f u n c t i o n o r
b r e a k d o w n o f t h e t o o l o r b a t t e r y c a r t r i d g e .
18. Keep the battery aw ay from children.
SAVE THESE INSTRUCTIONS.
CAUTION: Only use genuine Makita batteries.
U s e o f n o n -g e n u i n e M a k i t a b a t t e r i e s , o r b a t t e r i e s t h a t
h a v e b e e n a l t e r e d , m a y r e s u l t i n t h e b a t t e r y b u r s t i n g
causing res, personal injury and damage. It will
a l s o v o i d t h e M a k i t a w a r r a n t y f o r t h e M a k i t a t o o l a n d
c h a r g e r .
Tips for maintaining maximum
battery life
1.
Charge the battery cartridge before completely dis-
charged. Alw ays stop tool operation and charge the
battery cartridge w hen you notice less tool pow er.
2.
Never recharge a fully charged battery cartridge.
Overcharging shortens the battery service life.
3.
Charge the battery cartridge w ith room tempera-
ture at 10 ° C - 40 ° C (50 ° F - 104 ° F). Let a hot
battery cartridge cool dow n before charging it.
4 . W hen not using the battery cartridge, remove
it from the tool or the charger.
5. Charge the battery cartridge if you do not use
it for a long period (more than six months).
PARTS DESCRIPTION
Fig.2
1H i g h -t o r q u e l a m p 2R e v e r s e l a m p 3C a u t i o n l a m p 4M a i n p o w e r l a m p
5
R e v e r s e / h i g h -t o r q u e b u t t o n
6M a i n p o w e r b u t t o n 7B a t t e r y c a r t r i d g e 8S w i t c h t r i g g e r
9H a n g e r 10 H a n d l e 11 P r o t e c t o r 12 Adjusting lever
13 Lock-o lever 14 Shoulderharness ----

14 ENGLISH
FUNCTIONAL
DESCRIPTION
WARNING: Alw ays be sure that the tool is
switched o and the battery cartridge is removed
before adjusting or checking function on the tool.
Failure to switch o and remove the battery cartridge
may result in serious personal injury from accidental
s t a r t -u p .
Installing or removing battery
cartridge
CAUTION: Always switch o the tool before
installing or removing of the battery cartridge.
CAUTION: Hold the tool and the battery car-
tridge rmly when installing or removing battery
cartridge. F a i l u r e t o h o l d t h e t o o l a n d t h e b a t t e r y
cartridge rmly may cause them to slip o your hands
a n d r e s u l t i n d a m a g e t o t h e t o o l a n d b a t t e r y c a r t r i d g e
and a personal injury.
Fig.3: 1. R e d i n d i c a t o r 2. B u t t o n 3. B a t t e r y c a r t r i d g e
T o r e m o v e t h e b a t t e r y c a r t r i d g e , s l i d e i t f r o m t h e t o o l
w h i l e s l i d i n g t h e b u t t o n o n t h e f r o n t o f t h e c a r t r i d g e .
T o i n s t a l l t h e b a t t e r y c a r t r i d g e , a l i g n t h e t o n g u e o n t h e
b a t t e r y c a r t r i d g e w i t h t h e g r o o v e i n t h e h o u s i n g a n d s l i p
i t i n t o p l a c e . In s e r t i t a l l t h e w a y u n t i l i t l o c k s i n p l a c e
w i t h a l i t t l e c l i c k . If y o u c a n s e e t h e r e d i n d i c a t o r a s
shown in the gure, it is not locked completely.
CAUTION: Alw ays install the battery cartridge
fully until the red indicator cannot be seen. If n o t ,
it may accidentally fall out of the tool, causing injury to
y o u o r s o m e o n e a r o u n d y o u .
CAUTION: Do not install the battery cartridge
forcibly. If t h e c a r t r i d g e d o e s n o t s l i d e i n e a s i l y , i t i s
n o t b e i n g i n s e r t e d c o r r e c t l y .
Tool / battery protection system
T h e t o o l i s e q u i p p e d w i t h a t o o l / b a t t e r y p r o t e c t i o n
system. This system automatically cuts o power to
t h e m o t o r t o e x t e n d t o o l a n d b a t t e r y l i f e . T h e t o o l w i l l
a u t o m a t i c a l l y s t o p d u r i n g o p e r a t i o n i f t h e t o o l i s p l a c e d
u n d e r o n e o f t h e f o l l o w i n g c o n d i t i o n s :
Caution lamp Status
Color On Blinking
G r e e n O v e r l o a d
R e d ( t o o l ) / ( b a t t e r y ) O v e r h e a t
R e d O v e r
d i s c h a r g e
Overload protection
If t h e t o o l g e t s i n t o o n e o f t h e f o l l o w i n g s i t u a t i o n , t h e
t o o l a u t o m a t i c a l l y s t o p s a n d t h e c a u t i o n l a m p s t a r t s
b l i n k i n g i n g r e e n :
—T h e t o o l i s o v e r l o a d e d b y e n t a n g l e d w e e d s o r
o t h e r d e b r i s .
—T h e c u t t i n g t o o l i s l o c k e d .
—T h e m a i n p o w e r b u t t o n i s t u r n e d o n w h i l e t h e
s w i t c h t r i g g e r i s b e i n g p u l l e d .
In t h i s s i t u a t i o n , r e l e a s e t h e s w i t c h t r i g g e r a n d r e m o v e
e n t a n g l e d w e e d s o r d e b r i s i f n e c e s s a r y . Af t e r t h a t , p u l l
t h e s w i t c h t r i g g e r a g a i n t o r e s u m e .
CAUTION: If you need to remove the entan-
gled w eeds on the tool or release the locked
cutting tool, be sure to turn the tool o before you
start.
Overheat protection for tool or
battery
If t h e t o o l o r b a t t e r y c a r t r i d g e i s o v e r h e a t e d , t h e t o o l
s t o p s a u t o m a t i c a l l y . W h e n t h e t o o l i s o v e r h e a t e d , t h e
c a u t i o n l a m p l i g h t s u p i n r e d . W h e n t h e b a t t e r y c a r t r i d g e
i s o v e r h e a t e d , t h e c a u t i o n l a m p b l i n k s i n r e d . L e t t h e
t o o l a n d / o r b a t t e r y c o o l d o w n b e f o r e t u r n i n g t h e t o o l o n
again.
Overdischarge protection
W h e n t h e b a t t e r y c a p a c i t y b e c o m e s l o w , t h e t o o l s t o p s
a u t o m a t i c a l l y a n d t h e c a u t i o n l a m p s t a r t s b l i n k i n g i n r e d .
If t h e t o o l d o e s n o t o p e r a t e e v e n w h e n t h e s w i t c h e s a r e
o p e r a t e d , r e m o v e t h e b a t t e r y c a r t r i d g e f r o m t h e t o o l a n d
c h a r g e i t .
Indicating the remaining battery
capacity
P r e s s t h e c h e c k b u t t o n o n t h e b a t t e r y c a r t r i d g e t o i n d i -
c a t e t h e r e m a i n i n g b a t t e r y c a p a c i t y . T h e i n d i c a t o r l a m p s
l i g h t u p f o r a f e w s e c o n d s .
Fig.4: 1. In d i c a t o r l a m p s 2. C h e c k b u t t o n
Indicator lamps Remaining
capacity
Lighted O Blinking
7 5% t o 100%
50% t o 7 5%
25% t o 50%
0% t o 25%
C h a r g e t h e
b a t t e r y .
T h e b a t t e r y
m a y h a v e
m a l f u n c t i o n e d .

15 ENGLISH
NOTE: De p e n d i n g o n t h e c o n d i t i o n s o f u s e a n d t h e
ambient temperature, the indication may dier slightly
f r o m t h e a c t u a l c a p a c i t y .
NOTE: The rst (far left) indicator lamp will blink when
t h e b a t t e r y p r o t e c t i o n s y s t e m w o r k s .
Main pow er sw itch
T o t u r n o n t h e t o o l , p r e s s t h e m a i n p o w e r b u t t o n . T o t u r n
o the tool, press and hold the main power button until
the main power lamp goes o.
Fig.5: 1. M a i n p o w e r l a m p 2. M a i n p o w e r b u t t o n
NOTE: The tool will automatically turned o if it is left
w i t h o u t a n y o p e r a t i o n s f o r a c e r t a i n p e r i o d o f t i m e .
Sw itch action
WARNING: For your safety, this tool is
euipped with lock-o lever which prevents the
tool from unintended starting. NEVER use the tool
if it runs w hen you simply pull the sw itch trigger
without pressing the lock-o lever. Return the
tool to our authoriz ed service center for proper
repairs BEFORE further usage.
WARNING: NEVER tape dow n or defeat pur-
pose and function of lock-o lever.
CAUTION: Before installing the battery car-
tridge into the tool, alw ays check to see that the
sw itch trigger actuates properly and returns to
the " OFF" position w hen released. O p e r a t i n g a t o o l
w i t h a s w i t c h t h a t d o e s n o t a c t u a t e p r o p e r l y c a n l e a d
to loss of control and serious personal injury.
CAUTION: Never put your nger on the main
pow er button and sw itch trigger w hen carrying
the tool. T h e t o o l m a y s t a r t u n i n t e n t i o n a l l y a n d c a u s e
injury.
NOTICE: Do not pull the sw itch trigger hard w ith-
out pressing the lock-o lever. This can cause
sw itch breakage.
T o p r e v e n t t h e s w i t c h t r i g g e r f r o m b e i n g a c c i d e n t a l l y
pulled, a lock-o lever is provided. To start the tool,
depress the lock-o lever and pull the switch trigger.
R e l e a s e t h e s w i t c h t r i g g e r t o s t o p .
Fig.6: 1. Lock-o lever 2. S w i t c h t r i g g e r
Speed adjusting
You can adjust the tool speed using the adjusting lever.
To adjust the tool speed, move the lever while depress-
ing the lock-o lever and pulling the switch trigger. To
i n c r e a s e t h e s p e e d , m o v e t h e l e v e r t o w a r d y o u . T o
d e c r e a s e t h e s p e e d , m o v e t h e l e v e r f o r w a r d . W h e n t h e
adjusting lever is in the most forward position, the tool
s t o p s .
Fig.7: 1. Adjusting lever
Reverse button
WARNING: Switch o the tool and remove
the battery cartridge before you remove entan-
gled w eeds or debris w hich the reverse rotation
function can not remove. Failure to switch o and
r e m o v e t h e b a t t e r y c a r t r i d g e m a y r e s u l t i n s e r i o u s
personal injury from accidental start-up.
T h i s t o o l h a s t h e r e v e r s e b u t t o n t o c h a n g e t h e d i r e c t i o n
o f r o t a t i o n . B y c h a n g i n g t h e d i r e c t i o n o f r o t a t i o n , y o u
can change the direction in which the cut grass is own.
T h e r e v e r s e b u t t o n i s a l s o u s e d f o r r e m o v i n g w e e d s
a n d d e b r i s e n t a n g l e d i n t h e t o o l .
T o r e v e r s e t h e r o t a t i o n , p r e s s t h e r e v e r s e / h i g h -t o r q u e
b u t t o n w h e n t h e c u t t i n g t o o l i s s t o p p e d . T h e r e v e r s e
l a m p l i g h t s u p . T h e c u t t i n g t o o l r o t a t e s i n r e v e r s e d i r e c -
t i o n w h e n y o u p u l l t h e s w i t c h t r i g g e r w h i l e d e p r e s s i n g
the lock-o lever.
T o r e t u r n t o r e g u l a r r o t a t i o n , p r e s s t h e r e v e r s e / h i g h -
t o r q u e b u t t o n w h e n t h e c u t t i n g t o o l i s s t o p p e d .
Fig.8: 1. R e v e r s e l a m p 2. R e v e r s e / h i g h -t o r q u e
b u t t o n
NOTE: If y o u p r e s s t h e r e v e r s e / h i g h -t o r q u e b u t t o n
w h i l e t h e c u t t i n g t o o l i s s t i l l r o t a t i n g , t h e t o o l c o m e s t o
s t o p a n d t o b e r e a d y f o r r e v e r s e r o t a t i o n .
High-torque button
Y o u c a n u s e t h e t o o l i n t h e h i g h -t o r q u e m o d e . In t h e
h i g h -t o r q u e m o d e , t h e t o o l s p e e d i s l e s s l i k e l y t o
d e c r e a s e t h a n i n t h e n o r m a l m o d e w h e n t h e l o a d o f t h e
t o o l i s l a r g e .
T o u s e t h e t o o l i n t h e h i g h -t o r q u e m o d e , p r e s s a n d h o l d
t h e r e v e r s e / h i g h -t o r q u e b u t t o n . T h e h i g h -t o r q u e l a m p
l i g h t s u p . T o r e t u r n t o t h e n o r m a l m o d e , p r e s s a n d h o l d
t h e r e v e r s e / h i g h -t o r q u e b u t t o n a g a i n .
Fig.9: 1. H i g h -t o r q u e l a m p 2. R e v e r s e / h i g h -t o r q u e
b u t t o n
Electric brake
T h i s t o o l i s e q u i p p e d w i t h a n e l e c t r i c b r a k e . If t h e t o o l
c o n s i s t e n t l y f a i l s t o q u i c k l y s t o p a f t e r t h e s w i t c h t r i g g e r
i s r e l e a s e d , h a v e t h e t o o l s e r v i c e d a t o u r s e r v i c e c e n t e r .
CAUTION: This brake system is not a substi-
tute for the protector. Never use the tool w ithout
the protector. An u n g u a r d e d c u t t i n g t o o l m a y r e s u l t
in serious personal injury.
Electronic function
Constant speed control
T h e s p e e d c o n t r o l f u n c t i o n p r o v i d e s t h e c o n s t a n t r o t a -
t i o n s p e e d r e g a r d l e s s o f l o a d c o n d i t i o n s .
Soft start feature
S o f t s t a r t b e c a u s e o f s u p p r e s s e d s t a r t i n g s h o c k .

16 ENGLISH
ASSEMBLY
WARNING: Alw ays be sure that the tool is
switched o and battery cartridge is removed
before carrying out any w ork on the tool. F a i l u r e t o
switch o and remove the battery cartridge may result
in serious personal injury from accidental start-up.
WARNING: Never start the tool unless it is
completely assembled. O p e r a t i o n o f t h e t o o l i n a
p a r t i a l l y a s s e m b l e d s t a t e m a y r e s u l t i n s e r i o u s p e r -
sonal injury from accidental start-up.
Installing the handle
1. At t a c h t h e u p p e r a n d l o w e r c l a m p s o n t h e d a m p e r .
2. Put the handle on the upper clamp and x it with
h e x s o c k e t h e a d b o l t s a s i l l u s t r a t e d .
Fig.10: 1. H e x s o c k e t h e a d b o l t 2. H a n d l e 3. U p p e r
c l a m p 4. Da m p e r 5. L o w e r c l a m p
Hex w rench storage
CAUTION: Be careful not to leave the hex
w rench inserted in the tool head. It m a y c a u s e
injury and/or damage to the tool.
W h e n n o t i n u s e , s t o r e t h e h e x w r e n c h a s i l l u s t r a t e d t o
k e e p i t f r o m b e i n g l o s t .
Fig.11: 1. H e x w r e n c h
Installing the cutting tool
CAUTION: Alw ays use the supplied w renches
to remove or to install the cutting tool.
CAUTION: Be sure to remove the hex w rench
inserted into the tool head after installing the
cutting tool.
NOTE: T h e t y p e o f t h e c u t t i n g t o o l ( s ) s u p p l i e d a s
t h e s t a n d a r d a c c e s s o r y v a r i e s d e p e n d i n g o n t h e
c o u n t r i e s . T h e c u t t i n g t o o l i s n o t i n c l u d e d i n s o m e
c o u n t r i e s .
NOTE: T u r n t h e t o o l u p s i d e d o w n s o t h a t y o u c a n
r e p l a c e t h e c u t t i n g t o o l e a s i l y .
Nylon cutting head
NOTICE: Be sure to use genuine Makita nylon
cutting head.
1. In s e r t t h e h e x w r e n c h t h r o u g h t h e h o l e i n t h e g e a r
c a s e t o l o c k t h e s p i n d l e . R o t a t e t h e s p i n d l e u n t i l t h e h e x
w r e n c h i s f u l l y i n s e r t e d . R e m o v e t h e n u t b y t u r n i n g i t
c l o c k w i s e w i t h t h e b o x w r e n c h .
Fig.12: 1. N u t 2. H e x w r e n c h
2. R e m o v e t h e s p o o l h o l d e r b y p r e s s i n g t h e c l a w s .
Fig.13: 1. Spoolholder2. C l a w
3.
R e m o v e t h e s p o o l f r o m t h e s p o o l h o l d e r b y h o l d i n g
the nylon cord with your ngers and thumb, and then hook
b o t h s i d e s o f t h e n y l o n c o r d t o t h e n o t c h e s o f t h e s p o o l .
Fig.14: 1. S p o o l 2. S poolholder3. N o t c h
4. In s e r t t h e h e x w r e n c h t h r o u g h t h e h o l e i n t h e g e a r
c a s e t o l o c k t h e s p i n d l e . At t a c h t h e s p o o l h o l d e r t o t h e
s p i n d l e , a n d t h e n t i g h t e n t h e n u t b y t u r n i n g i t c o u n t e r -
c l o c k w i s e w i t h t h e b o x w r e n c h .
Fig.15: 1. N u t 2. Spoolholder3. H e x w r e n c h
NOTE: T h e r e c o m m e n d e d t i g h t e n i n g t o r q u e i s 20 t o
30 N • m .
5. At t a c h t h e s p o o l t o t h e s p o o l h o l d e r , a n d t h e n s e t
b o t h s i d e s o f t h e n y l o n c o r d t o t h e e y e l e t s o f t h e s p o o l
h o l d e r . At t a c h t h e s p o o l c o v e r t o t h e s p o o l h o l d e r .
Fig.16: 1. S p o o l 2. S poolholder3. Ey e l e t 4. S p o o l
c o v e r
6. R e m o v e t h e h e x w r e n c h f r o m t h e g e a r c a s e .
Correct combination of the cutting
tool and the protector
CAUTION: Alw ays use the correct combi-
nation of cutting tool and the protector. A w r o n g
c o m b i n a t i o n m a y n o t p r o t e c t y o u f r o m t h e c u t t i n g t o o l ,
ying debris, and stones. It can also aect the bal-
ance of the tool and result in an injury.
Cutting tool Protector
N y l o n c u t t i n g h e a d
Installing the protector
WARNING: Never use the tool w ithout the
guard illustrated in place. F a i l u r e t o d o s o c a n
cause serious personal injury.
CAUTION: Take care not to injure yourself on
the cutter for cutting the nylon cord.
At t a c h t h e p r o t e c t o r t o t h e c l a m p u s i n g b o l t s .
Fig.17: 1. C l a m p 2. P r o t e c t o r 3. C u t t e r
OPERATION
Attaching the shoulder harness
WARNING: Be extremely careful to maintain
control of the tool at all times. Do not allow the
tool to be deected toward you or anyone in the
w ork vicinity. F a i l u r e t o k e e p c o n t r o l o f t h e t o o l
could result in serious injury to the bystander and the
operator.

17 ENGLISH
CAUTION: Alw ays use the shoulder harness
attached to the tool. Before operation, adjust the
shoulder harness according to the user siz e to
prevent fatigue.
CAUTION: Before operation, make sure that
the shoulder harness is properly attached to the
hanger on the tool.
CAUTION: W hen you use the tool in combi-
nation of the backpack-type pow er supply such
as portable pow er pack, do not use the shoulder
harness included in the tool package, but use the
hanging band recommended by Makita.
If y o u p u t o n t h e s h o u l d e r h a r n e s s i n c l u d e d i n t h e
t o o l p a c k a g e a n d t h e s h o u l d e r h a r n e s s o f t h e b a c k -
p a c k -t y p e p o w e r s u p p l y a t t h e s a m e t i m e , r e m o v i n g
the tool or backpack-type power supply is dicult in
c a s e o f a n e m e r g e n c y , a n d i t m a y c a u s e a n a c c i d e n t
or injury. For the recommended hanging band, ask
M a k i t a Au t h o r i z e d S e r v i c e C e n t e r s .
1. C l a s p t h e h o o k o n t h e s h o u l d e r h a r n e s s t o t o o l ' s
r i n g a n d h a n g e r .
Fig.18: 1. R i n g 2. H o o k 3. H anger
2. P u t o n t h e s h o u l d e r h a r n e s s o n y o u r l e f t s h o u l d e r .
Adjust the shoulder harness to a comfortable working
p o s i t i o n .
Fig.19
T h e s h o u l d e r h a r n e s s f e a t u r e s a m e a n s o f q u i c k
r e l e a s e . S i m p l y s q u e e z e t h e s i d e s o f t h e b u c k l e w h i l e
h o l d i n g t h e t o o l t o r e l e a s e t h e t o o l f r o m t h e s h o u l d e r
h a r n e s s .
Fig.20: 1. B u c k l e
Correct handling of the tool
WARNING: Alw ays position the tool on your
right-hand side. C o r r e c t p o s i t i o n i n g o f t h e t o o l a l l o w s
f o r m a x i m u m c o n t r o l a n d w i l l r e d u c e t h e r i s k o f s e r i -
ous personal injury.
WARNING: Be extremely careful to maintain
control of the tool at all times. Do not allow the
tool to be deected toward you or anyone in the
w ork vicinity. F a i l u r e t o k e e p c o n t r o l o f t h e t o o l
could result in serious injury to the bystander and the
operator.
WARNING: To avoid accident, leave more
than 15m (50 ft) distance betw een operators w hen
tw o or more operators w ork in one area. Also,
arrange a person to observe the distance betw een
operators. If someone or an animal enters the
w orking area, immediately stop the operation.
CAUTION: If the cutting tool accidentally
impacts a rock or hard object during operation,
stop the tool and inspect for any damage. If the
cutting tool is damaged, replace it immediately.
U s e o f a d a m a g e d c u t t i n g t o o l m a y r e s u l t i n s e r i o u s
personal injury.
C o r r e c t p o s i t i o n i n g a n d h a n d l i n g a l l o w o p t i m u m c o n t r o l
and reduce the risk of injury.
Fig.21
W hen using a nylon cutting head (bump & feed
type)
T h e n y l o n c u t t i n g h e a d i s a d u a l s t r i n g t r i m m e r h e a d
p r o v i d e d w i t h a b u m p & f e e d m e c h a n i s m .
T o f e e d o u t t h e n y l o n c o r d , t a p t h e c u t t i n g h e a d a g a i n s t
t h e g r o u n d w h i l e r o t a t i n g .
Fig.22: 1. Most eective cutting area
NOTICE: The bump feed w ill not operate prop-
erly if the nylon cutting head is not rotating.
NOTE: If t h e n y l o n c o r d d o e s n o t f e e d o u t w h i l e
t a p p i n g t h e h e a d , r e w i n d / r e p l a c e t h e n y l o n c o r d
b y f o l l o w i n g t h e p r o c e d u r e s i n t h e s e c t i o n f o r t h e
m aintenance.
MAINTENANCE
WARNING: Alw ays be sure that the tool is
switched o and battery cartridge is removed
before attempting to perform inspection or main-
tenance on the tool. Failure to switch o and remove
t h e b a t t e r y c a r t r i d g e m a y r e s u l t i n s e r i o u s p e r s o n a l
injury from accidental start-up.
NOTICE: Never use gasoline, benz ine, thinner,
alcohol or the like. Discoloration, deformation or
cracks may result.
T o m a i n t a i n p r o d u c t S AF ET Y a n d R EL IAB IL IT Y ,
repairs, any other maintenance or adjustment should
b e p e r f o r m e d b y M a k i t a Au t h o r i z e d o r F a c t o r y S e r v i c e
C e n t e r s , a l w a y s u s i n g M a k i t a r e p l a c e m e n t p a r t s .
Cleaning the tool
Clean the tool by wiping o dust, dirt, or cut o grass
w i t h a d r y c l o t h o r o n e d i p p e d i n s o a p y w a t e r a n d w r u n g
o u t . T o a v o i d o v e r h e a t i n g o f t h e t o o l , b e s u r e t o r e m o v e
the cut o grass or debris adhered to the vent of the
t o o l .
Replacing the nylon cord
WARNING: Use only the nylon cord w ith
diameter specied in this instruction manual.
Never use heavier line, metal w ire, rope or the
like. F a i l u r e t o d o s o m a y c a u s e d a m a g e t o t h e t o o l
and result in serious personal injury.
WARNING: Alw ays remove the nylon cutting
head from the tool w hen replacing the nylon cord.
WARNING: Make sure that the cover of the
nylon cutting head is secured to the housing
properly as described below . F a i l u r e t o p r o p e r l y
s e c u r e t h e c o v e r m a y c a u s e t h e n y l o n c u t t i n g h e a d t o
y apart resulting in serious personal injury.
R e p l a c e t h e n y l o n c o r d i f i t i s n o t f e d a n y m o r e . T h e
m e t h o d o f r e p l a c i n g t h e n y l o n c o r d v a r i e s d e p e n d i n g o n
t h e t y p e o f t h e n y l o n c u t t i n g h e a d .
121-SP
Fig.23

18 ENGLISH
TROUBLESHOOTING
Before asking for repairs, conduct your own inspection rst. If you nd a problem that is not explained in the manual,
d o n o t a t t e m p t t o d i s m a n t l e t h e t o o l . In s t e a d , a s k M a k i t a Au t h o r i z e d S e r v i c e C e n t e r s , a l w a y s u s i n g M a k i t a r e p l a c e -
m e n t p a r t s f o r r e p a i r s .
State of abnormality Probable cause (malfunction) Remedy
M o t o r d o e s n o t r u n . B a t t e r y c a r t r i d g e i s n o t i n s t a l l e d . In s t a l l t h e b a t t e r y c a r t r i d g e .
B a t t e r y p r o b l e m ( u n d e r v o l t a g e ) R e c h a r g e t h e b a t t e r y c a r t r i d g e . If r e c h a r g i n g i s n o t
eective, replace battery cartridge.
T h e d r i v e s y s t e m d o e s n o t w o r k
c o r r e c t l y .
As k y o u r l o c a l a u t h o r i z e d s e r v i c e c e n t e r f o r r e p a i r .
M o t o r s t o p s r u n n i n g a f t e r a l i t t l e u s e . B a t t e r y ' s c h a r g e l e v e l i s l o w . R e c h a r g e t h e b a t t e r y c a r t r i d g e . If r e c h a r g i n g i s n o t
eective, replace battery cartridge.
O v e r h e a t i n g . S t o p u s i n g o f t o o l t o a l l o w i t t o c o o l d o w n .
T h e t o o l d o e s n o t r e a c h m a x i m u m
R P M .
B a t t e r y c a r t r i d g e i s i n s t a l l e d i m p r o p e r l y . In s t a l l t h e b a t t e r y c a r t r i d g e a s d e s c r i b e d i n t h i s
m anual.
B a t t e r y p o w e r i s d r o p p i n g . R e c h a r g e t h e b a t t e r y c a r t r i d g e . If r e c h a r g i n g i s n o t
eective, replace battery cartridge.
T h e d r i v e s y s t e m d o e s n o t w o r k
c o r r e c t l y .
As k y o u r l o c a l a u t h o r i z e d s e r v i c e c e n t e r f o r r e p a i r .
C u t t i n g t o o l d o e s n o t r o t a t e :
s t o p t h e m a c h i n e i m m e d i a t e l y !
Foreign object such as a branch is
jammed between the guard and the
c u t t i n g t o o l .
Remove the foreign object.
C u t t i n g t o o l i s l o o s e l y a t t a c h e d . T i g h t e n t h e c u t t i n g t o o l s e c u r e l y .
T h e d r i v e s y s t e m d o e s n o t w o r k
c o r r e c t l y .
As k y o u r l o c a l a u t h o r i z e d s e r v i c e c e n t e r f o r r e p a i r .
Ab n o r m a l v i b r a t i o n :
s t o p t h e m a c h i n e i m m e d i a t e l y !
B r o k e n , b e n t o r w o r n c u t t i n g t o o l R e p l a c e t h e c u t t i n g t o o l .
C u t t i n g t o o l i s l o o s e l y a t t a c h e d . T i g h t e n t h e c u t t i n g t o o l s e c u r e l y .
T h e d r i v e s y s t e m d o e s n o t w o r k
c o r r e c t l y .
As k y o u r l o c a l a u t h o r i z e d s e r v i c e c e n t e r f o r r e p a i r .
C u t t i n g t o o l a n d m o t o r c a n n o t s t o p :
R e m o v e t h e b a t t e r y i m m e d i a t e l y !
El e c t r i c o r e l e c t r o n i c m a l f u n c t i o n . R e m o v e t h e b a t t e r y c a r t r i d g e a n d a s k y o u r l o c a l
a u t h o r i z e d s e r v i c e c e n t e r f o r r e p a i r .
OPTIONAL ACCESSORIES
WARNING: Only use the recommended
accessories or attachments indicated in this man-
ual. T h e u s e o f a n y o t h e r a c c e s s o r y o r a t t a c h m e n t
may result in serious personal injury.
CAUTION: These accessories or attachments
are recommended for use w ith your Makita tool
specied in this manual. T h e u s e o f a n y o t h e r
a c c e s s o r i e s o r a t t a c h m e n t s m i g h t p r e s e n t a r i s k o f
injury to persons. Only use accessory or attachment
f o r i t s s t a t e d p u r p o s e .
If y o u n e e d a n y a s s i s t a n c e f o r m o r e d e t a i l s r e g a r d -
i n g t h e s e a c c e s s o r i e s , a s k y o u r l o c a l M a k i t a S e r v i c e
C e n t e r .
•N y l o n c u t t i n g h e a d
•N y l o n c o r d ( c u t t i n g l i n e )
•M a k i t a g e n u i n e b a t t e r y a n d c h a r g e r
NOTE: S o m e i t e m s i n t h e l i s t m a y b e i n c l u d e d i n t h e
t o o l p a c k a g e a s s t a n d a r d a c c e s s o r i e s . T h e y m a y
dier from country to country.

19 FRANÇAIS
FRANÇAIS (Instructions originales)
SPÉ CIFICATIONS
Modè le :UR014G
T y p e d e p o i g n é e P o i g n é e a r c e a u
V i t e s s e à v i d e 0 - 5 000 m i n -1
Longueurtotale
( s a n s o u t i l d e c o u p e e t b a t t e r i e )
1 857 m m
Di a m è t r e d u c o r d o n e n n y l o n 2, 7 m m
O u t i l d e c o u p e a p p l i c a b l e e t
d i a m è t r e d e c o u p e
Tête de coupe à l nylon
( P / N 19 11Y 3-7 )
4 50 m m
T e n s i o n n o m i n a l e 36 V - 4 0 V c .c . m a x .
P o i d s n e t 5, 5 - 6, 7 k g
De g r é d e p r o t e c t i o n IP X 4
tant donné l’évolution constante de notre programme de recherche et de développement, les spécications
contenues dans ce manuel sont sujettes à modication sans préavis.
Les spécications peuvent varier suivant les pays.
Le poids peut être diérent selon les accessoires, notamment la batterie. Les associations la plus légère et la
p l u s l o u r d e , c o n f o r m é m e n t à l a p r o c é d u r e EP T A 01/ 2014 , s o n t i n d i q u é e s d a n s l e t a b l e a u .
Batterie et chargeur applicables
B a t t e r i e B L 4 020 / B L 4 025 / B L 4 04 0 / B L 4 050F * / B L 4 080F *
* : B a t t e r i e r e c o m m a n d é e
C hargeur DC 4 0R A / DC 4 0R B / DC 4 0R C
•C e r t a i n s c h a r g e u r s e t b a t t e r i e s r é p e r t o r i é s c i -d e s s u s p e u v e n t n e p a s ê t r e d i s p o n i b l e s s e l o n l a r é g i o n o ù v o u s
r é s i d e z .
AVERTISSEMENT : N’ utilisez que les batteries et les chargeurs répertoriés ci-dessus. L ’ u t i l i s a t i o n
d ’ a u t r e s b a t t e r i e s e t c h a r g e u r s p e u t p r o v o q u e r d e s b l e s s u r e s e t / o u u n i n c e n d i e .
Source d’ alimentation connectée par cordon recommandée
S u p p o r t d ’ a l i m e n t a t i o n p o r t a b l e P DC 01 / P DC 1200
•L a o u l e s s o u r c e s d ’ a l i m e n t a t i o n c o n n e c t é e s p a r c o r d o n r é p e r t o r i é e s c i -d e s s u s p e u v e n t n e p a s ê t r e d i s p o -
n i b l e s s e l o n l a r é g i o n o ù v o u s r é s i d e z .
•Av a n t d ’ u t i l i s e r l a s o u r c e d ’ a l i m e n t a t i o n c o n n e c t é e p a r c o r d o n , l i s e z l e s i n s t r u c t i o n s e t l e s a v e r t i s s e m e n t s
i n s c r i t s d e s s u s .
Bruit
N o r m e a p p l i c a b l e : IS O 22868( IS O 11806-1) / EN 50636-2-9 1
Outil de coupe Niveau de pression sonore
(LpA) dB(A)
Niveau de puissance sonore
(LW A) dB(A)
(LpA) dB(A) Incertitude (K)
dB(A)
(LW A) dB(A) Incertitude (K)
dB(A)
Tête de coupe à l nylon 7 7 , 9 2, 9 9 1, 3 1, 9
•M ê m e s i l e n i v e a u d e p r e s s i o n s o n o r e i n d i q u é c i -d e s s u s e s t i n f é r i e u r o u é g a l à 80 d B ( A) , l e n i v e a u e n f o n c t i o n -
n e m e n t p e u t d é p a s s e r 80 d B ( A) . P o r t e z u n s e r r e -t ê t e a n t i b r u i t .
NOTE : L a o u l e s v a l e u r s d ’ é m i s s i o n d e b r u i t d é c l a r é e s o n t é t é m e s u r é e s c o n f o r m é m e n t à l a m é t h o d e d e t e s t
s t a n d a r d e t p e u v e n t ê t r e u t i l i s é e s p o u r c o m p a r e r l e s o u t i l s e n t r e e u x .
NOTE : L a o u l e s v a l e u r s d ’ é m i s s i o n d e b r u i t d é c l a r é e s p e u v e n t a u s s i ê t r e u t i l i s é e s p o u r l ’ é v a l u a t i o n p r é l i m i n a i r e
d e l ’ e x p o s i t i o n .

20 FRANÇAIS
AVERTISSEMENT : Portez un serre-tê te antibruit.
AVERTISSEMENT : Lémission de bruit lors de lusage réel de loutil électriue peut tre diérente de
la ou des valeurs déclarées, suivant la façon dont l’ outil est utilisé, particuliè rement selon le type de piè ce
usinée.
AVERTISSEMENT : Les mesures de sécurité à prendre pour protéger l’ utilisateur doivent ê tre basées
sur une estimation de l’ exposition dans des conditions réelles d’ utilisation (en tenant compte de toutes
les composantes du cycle d’ utilisation, comme par exemple le moment de sa mise hors tension, lorsqu’ il
tourne à vide et le moment de son déclenchement).
Vibration
N o r m e a p p l i c a b l e : IS O 22867 ( IS O 11806-1)
Outil de coupe Main gauche Main droite
ah,W (m/s2)Incertitude K
(m/s2)
ah,W (m/s2)Incertitude K
(m/s2)
Tête de coupe à l nylon 2, 5 1, 5 2, 5 1, 5
NOTE : L a o u l e s v a l e u r s d e v i b r a t i o n t o t a l e s d é c l a r é e s o n t é t é m e s u r é e s c o n f o r m é m e n t à l a m é t h o d e d e t e s t
s t a n d a r d e t p e u v e n t ê t r e u t i l i s é e s p o u r c o m p a r e r l e s o u t i l s e n t r e e u x .
NOTE : L a o u l e s v a l e u r s d e v i b r a t i o n t o t a l e s d é c l a r é e s p e u v e n t a u s s i ê t r e u t i l i s é e s p o u r l ’ é v a l u a t i o n p r é l i m i n a i r e
d e l ’ e x p o s i t i o n .
AVERTISSEMENT : Lémission de vibrations lors de lusage réel de loutil électriue peut tre dié-
rente de la ou des valeurs déclarées, suivant la façon dont l’ outil est utilisé, particuliè rement selon le type
de piè ce usinée.
AVERTISSEMENT : Les mesures de sécurité à prendre pour protéger l’ utilisateur doivent ê tre basées
sur une estimation de l’ exposition dans des conditions réelles d’ utilisation (en tenant compte de toutes
les composantes du cycle d’ utilisation, comme par exemple le moment de sa mise hors tension, lorsqu’ il
tourne à vide et le moment de son déclenchement).
Symboles
V o u s t r o u v e r e z c i -d e s s o u s l e s s y m b o l e s s u s c e p t i b l e s
d ’ ê t r e u t i l i s é s p o u r l ’ a p p a r e i l . V e i l l e z à c o m p r e n d r e l e u r
signication avant toute utilisation.
V e u i l l e z ê t r e p r u d e n t e t r e s t e r a t t e n t i f .
L i r e l e m o d e d ’ e m p l o i .
P o r t e r d e s l u n e t t e s d e p r o t e c t i o n e t u n
s e r r e -t ê t e a n t i b r u i t .
15m(50FT)M a i n t e n e z u n e d i s t a n c e d ’ a u m o i n s 15 m .
Danger ; prendre garde aux projections
d’objets.
Av e r t i s s e m e n t ; Dé c o n n e c t e z l a b a t t e r i e
a v a n t l ’ e n t r e t i e n .
N’utilisez jamais de lame en métal ou en
p l a s t i q u e .
Ni-MH
Li-ion
P o u r l e s p a y s d e l ’ U n i o n e u r o p é e n n e u n i q u e m e n t
En r a i s o n d e l a p r é s e n c e d e c o m p o s a n t s
d a n g e r e u x d a n s l ’ é q u i p e m e n t , l e s d é c h e t s
d ’ é q u i p e m e n t s é l e c t r i q u e s e t é l e c t r o -
n i q u e s , l e s a c c u m u l a t e u r s e t l e s b a t t e r i e s
p e u v e n t a v o i r u n i m p a c t n é g a t i f s u r l ’ e n v i -
r o n n e m e n t e t l a s a n t é h u m a i n e .
Ne jetez pas les appareils électriques et
é l e c t r o n i q u e s o u l e s b a t t e r i e s a v e c l e s
ordures m énagères !
C o n f o r m é m e n t à l a d i r e c t i v e e u r o p é e n n e
r e l a t i v e a u x d é c h e t s d ’ é q u i p e m e n t s é l e c -
t r i q u e s e t é l e c t r o n i q u e s e t a u x d é c h e t s
d ’ a c c u m u l a t e u r s e t d e b a t t e r i e s , a i n s i q u ’ à
s o n a d a p t a t i o n à l a l é g i s l a t i o n n a t i o n a l e ,
l e s d é c h e t s d ’ é q u i p e m e n t s é l e c t r i q u e s ,
l e s b a t t e r i e s e t l e s a c c u m u l a t e u r s d o i v e n t
ê t r e c o l l e c t é s s é p a r é m e n t e t d é p o s é s d a n s
u n p o i n t d e c o l l e c t e d i s t i n c t p o u r d é c h e t s
u r b a i n s , c o n f o r m é m e n t a u x r é g l e m e n t a t i o n s
e n m a t i è r e d e p r o t e c t i o n d e l ’ e n v i r o n n e m e n t .
C e l a e s t i n d i q u é p a r l e s y m b o l e d e l a p o u -
b e l l e à r o u l e t t e s b a r r é e s u r l ’ é q u i p e m e n t .
N i v e a u d e p u i s s a n c e s o n o r e g a r a n t i s e l o n
l a d i r e c t i v e e u r o p é e n n e s u r l e b r u i t d a n s
l ’ e n v i r o n n e m e n t .
N i v e a u d e p u i s s a n c e s o n o r e s e l o n l a
r é g l e m e n t a t i o n a u s t r a l i e n n e N S W s u r l e
c o n t r ô l e d u b r u i t
Déclarations de conformité
Pour les pays européens uniquement
L e s d é c l a r a t i o n s d e c o n f o r m i t é s o n t f o u r n i e s e n An n e x e
A à c e m o d e d ’ e m p l o i .
Other manuals for UR014G
6
Table of contents
Languages:
Other Makita Trimmer manuals

Makita
Makita GRU07T User manual

Makita
Makita EN401MP User manual

Makita
Makita DUR141 User manual

Makita
Makita HU01Z User manual

Makita
Makita UR100DSAE User manual

Makita
Makita DUH606 User manual

Makita
Makita UR016G User manual

Makita
Makita BBC300LRDE User manual

Makita
Makita DUR192L User manual

Makita
Makita RBC225 User guide

Makita
Makita BUH550 User manual

Makita
Makita XHU04 User manual

Makita
Makita UR3000 User manual

Makita
Makita DUN500W User manual

Makita
Makita DRT50 User manual

Makita
Makita UH 4030 User manual

Makita
Makita DUH481 User manual

Makita
Makita DUR188U User manual

Makita
Makita RBC201 User manual

Makita
Makita DUH601 User manual