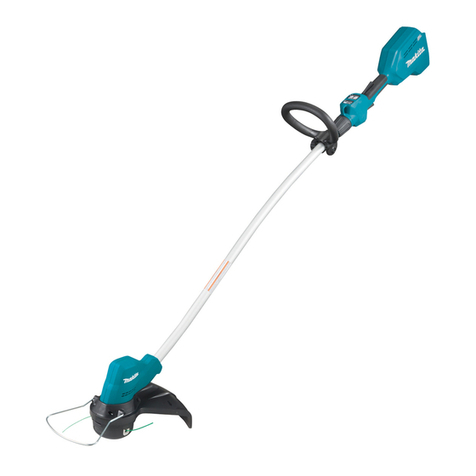
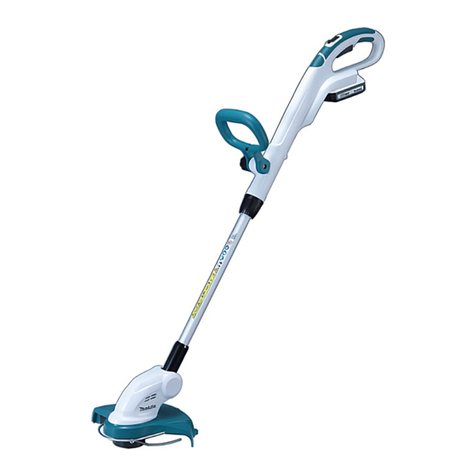
Makita UR100D User manual

UR100D
EN Cordless Grass Trimmer INSTRUCTION MANUAL 8
ZHCN 充电式割草机 使用说明书 18
ID Alat Potong Rumput Tanpa
Kabel PETUNJUK PENGGUNAAN 28
MS Pemangkas Rumput Tanpa
Kord MANUAL ARAHAN 39
VI Máy Tỉa Hàng Rào Cầm Tay
Hoạt Động Bằng Pin TÀI LIỆU HƯỚNG DẪN 50
TH 60

Fig.1
Fig.2
Fig.3
1
2
3
4
5
6
7
8
9
10
12
11
Fig.4
1
2
4
5
6
7
8
9
10
3
11
12
13
Fig.5
1
2
3
Fig.6
1
2
Fig.7
1
2
Fig.8
2

1
Fig.9
1
2
Fig.10
1
2
Fig.11
1
Fig.12
1
Fig.13
1
Fig.14
1
2
3
Fig.15
Fig.16
3

1
Fig.17
1
Fig.18
1
Fig.19
2
1
Fig.20
3
2
1
Fig.21
1
Fig.22
3
2
1
Fig.23
1
Fig.24
4

1
Fig.25
1
Fig.26
Fig.27
Fig.28
Fig.29
Fig.30
1
Fig.31
5

1
Fig.32
1
Fig.33
1
Fig.34
1
2
Fig.35
1
Fig.36
1
2
Fig.37
6

(1)
(2)
Fig.38
7

8ENGLISH
ENGLISH (Original instructions)
SPECIFICATIONS
Model: UR100D
No load speed
(without cutting tool)
10,000 min-1
Overall length
(without cutting tool)
835 - 1,185 mm
Nylon cord diameter 1.65 mm
Applicable
cutting tool
and cutting
diameter
Nylon cutting head (P/N
198852-2 / 198853-0)
260 mm
Plastic blade head (P/N
198847-5 / 198848-3)
230 mm
Rated voltage D.C. 10.8 V - 12 V max
Standard battery cartridge BL1015 / BL1016 / BL1020B / BL1021B / BL1040B / BL1041B
Net weight 1.9 - 2.1 kg
• Duetoourcontinuingprogramofresearchanddevelopment,thespecicationshereinaresubjecttochange
without notice.
• Specicationsandbatterycartridgemaydierfromcountrytocountry.
• Theweightmaydierdependingontheattachment(s),includingthebatterycartridge.Thelightestandheavi-
est combinations, according to EPTA-Procedure 01/2014, are shown in the table.
Symbols
The followings show the symbols which may be used
for the equipment. Be sure that you understand their
meaning before use.
Take particular care and attention.
Read instruction manual.
Danger;beawareofthrownobjects.
The distance between the tool and
bystanders must be at least 15 m.
360°
Keep bystanders away.
15m(50FT)Keep distance at least 15 m.
Wear safety glasses.
Wear ear protection.
Wear a helmet, goggles and ear protection.
Wear protective gloves.
Wear sturdy boots with nonslip soles.
Steeltoed safety boots are recommended.
Do not expose to moisture.
Top permissible tool speed.
Never use metal blade.
Ni-MH
Li-ion
Only for EU countries
Due to the presence of hazardous com-
ponents in the equipment, waste electrical
and electronic equipment, accumulators
and batteries may have a negative impact
on the environment and human health.
Do not dispose of electrical and electronic
appliances or batteries with household
waste!
In accordance with the European Directive
on waste electrical and electronic equip-
ment and on accumulators and batteries
and waste accumulators and batteries,
as well as their adaptation to national law,
waste electrical equipment, batteries and
accumulators should be stored separately
and delivered to a separate collection point
for municipal waste, operating in accor-
dance with the regulations on environmen-
tal protection.
This is indicated by the symbol of the
crossed-out wheeled bin placed on the
equipment.

9ENGLISH
SAFETY WARNINGS
IMPORTANT SAFETY
INSTRUCTIONS
WARNING: Read all safety warnings and
all instructions. Failure to follow the warnings and
instructionsmayresultinelectricshock,reand/or
seriousinjury.
Save all warnings and instruc-
tions for future reference.
1. Be familiar with the controls and proper use of
the equipment.
2. Cutting elements continue to rotate after the
motor is switched o.
3. Never allow children or people unfamiliar with
the instructions to use the machine. Local reg-
ulations may restrict the age of the operator.
4. Stop using the machine while people, espe-
cially children, or pets are nearby.
5. Only use the machine in daylight or good
articial light. Avoid using the machine in bad
weather conditions especially when there is a
risk of lightning.
6. Before using the machine and after any
impact, check for signs of wear or damage and
repair as necessary.
7. Take care against injury from any device
tted for trimming the lament line length.
After extending new cutter line always return
the machine to its normal operating position
before switching on.
8. Never t metal cutting elements.
9. This appliance is not intended for use by
persons (including children) with reduced
physical, sensory or mental capabilities, or
lack of experience and knowledge, unless they
have been given supervision or instruction
concerning use of the appliance by a person
responsible for their safety. Children should be
supervised to ensure that they do not play with
the appliance.
10. Use the tool with the utmost care and
attention.
11. Operate the tool only if you are in good phys-
ical condition. Perform all work calmly and
carefully. Use common sense and keep in mind
that the operator or user is responsible for
accidents or hazards occurring to other people
or their property.
12. Never operate the tool when tired, feeling ill or
under the inuence of alcohol or drugs.
13. The tool should be switched o immediately if
it shows any signs of unusual operation.
14. Keep ngers away from switch trigger when
not operating the tool and when moving from
one operating position to another.
Intended use of the tool
1. Use right tool. The cordless grass trimmer is
only intended for cutting grass, light weeds. It
should not be used for any other purpose such
as hedge cutting as this may cause injury.
Personal protective equipment
►Fig.1
►Fig.2
1. Dress Properly. The clothing worn should be
functional and appropriate, i.e. it should be
tight-tting but not cause hindrance. Do not
wear either jewelry or clothing which could
become entangled with high grass. Wear pro-
tective hair covering to contain long hair.
2. When using the tool, always wear sturdy shoes
with a non-slip sole. This protects against
injuries and ensures a good footing.
3. Always wear protective goggles to protect
your eyes from injury when using power tools.
The goggles must comply with ANSI Z87.1 in
the USA, EN 166 in Europe, or AS/NZS 1336
in Australia/New Zealand. In Australia/New
Zealand, it is legally required to wear a face
shield to protect your face, too.
It is an employer's responsibility to enforce
the use of appropriate safety protective equip-
ments by the tool operators and by other per-
sons in the immediate working area.
Electrical and battery safety
1. Avoid dangerous environment. Don't use the
tool in damp or wet locations or expose it to
rain. Water entering the tool will increase the
risk of electric shock.
2. Recharge only with the charger specied by
the manufacturer. A charger that is suitable for
one type of battery pack may create a risk of
re when used with another battery pack.
3. Use power tools only with specically desig-
nated battery packs. Use of any other battery
packs may create a risk of injury and re.
4. When battery pack is not in use, keep it away
from other metal objects, like paper clips,
coins, keys, nails, screws or other small metal
objects, that can make a connection from one
terminal to another. Shorting the battery termi-
nals together may cause burns or a re.

10 ENGLISH
5. Under abusive conditions, liquid may be
ejected from the battery; avoid contact. If con-
tact accidentally occurs, ush with water. If
liquid contacts eyes, seek medical help. Liquid
ejected from the battery may cause irritation or
burns.
6. Do not dispose of the battery(ies) in a re. The
cell may explode. Check with local codes for
possible special disposal instructions.
7. Do not open or mutilate the battery(ies).
Released electrolyte is corrosive and may
cause damage to the eyes or skin. It may be
toxic if swallowed.
8. Do not charge battery in rain, or in wet
locations.
Starting up the tool
►Fig.3
1. Make sure that there are no children or other
people within a working range of 15 meters
(50 ft), also pay attention to any animals in the
working vicinity. Otherwise stop using the tool.
2. Before use always check that the tool is safe
for operation. Check the security of the cutting
tool and the guard and the switch trigger/lever
for easy and proper action. Check for clean
and dry handles and test the on/o function of
the switch.
3. Check damaged parts before further use of
the tool. A guard or other part that is damaged
should be carefully checked to determine
that it will operate properly and perform its
intended function. Check for alignment of
moving parts, binding of moving parts, break-
age of parts, mounting, and any other condi-
tion that may aect its operation. A guard or
other part that is damaged should be properly
repaired or replaced by our authorized ser-
vice center unless indicated elsewhere in this
manual.
4. Switch on the motor only when hands and feet
are away from the cutting tool.
5. Before starting make sure that the cutting
tool has no contact with hard objects such as
branches, stones etc. as the cutting tool will
revolve when starting.
6. Make sure there are no electrical cables, water
pipes, gas pipes etc. that could cause a hazard
if damaged by use of the tool.
Method of operation
1. Never operate the machine with damaged
guards or without the guards in place.
2. Only use the tool in good light and visibility.
During the winter season beware of slippery
or wet areas, ice and snow (risk of slipping).
Always ensure a safe footing.
3. Take care against injury to feet and hands from
the cutting tool.
4. Keep hands and feet away from the cutting
means at all times and especially when switch-
ing on the motor.
5. Never cut above waist height.
6. Never stand on a ladder and run the tool.
7. Never work on unstable surfaces.
8. Don't overreach. Keep proper footing and
balance at all times.
9. Remove sand, stones, nails etc. found within
the working range. Foreign particles may
damage the cutting tool and can cause to be
thrown away, resulting in a serious injury.
10. Should the cutting tool hit stones or other hard
objects, immediately switch o the motor and
inspect the cutting tool.
11. Before commencing cutting, the cutting tool
must have reached full working speed.
12. During operation always hold the tool with
both hands. Never hold the tool with one hand
during use. Always ensure a safe footing.
13. All protective equipment such as guards
supplied with the tool must be used during
operation.
14. Except in case of emergency, never drop
or cast the tool to the ground or this may
severely damage the tool.
15. Never drag the tool on the ground when mov-
ing from place to place, the tool may become
damaged if moved in this manner.
16. Always remove the battery cartridge from the
tool:
— whenever leaving the tool unattended;
— before clearing a blockage;
— before checking, cleaning or working on
the tool;
— before making any adjustments, chang-
ing accessories or storing;
— whenever the tool starts vibrating
unusually;
— whenever transporting the tool.
17. Don't force the tool. It will do the job better and
with less likelihood of a risk of injury at the
rate for which it was designed.
18. Do not operate power tools in explosive atmo-
spheres, such as in the presence of ammable
liquids, gases or dust. Power tools create sparks
which may ignite the dust or fumes.
19. Take a rest to prevent loss of control caused
by fatigue. We recommend to take a 10 to
20-minute rest every hour.
20. Do not use the tool on steep slopes.
21. The shoulder harness must be used during
operation, if supplied with the tool.
Maintenance instructions
1. The condition of the cutting tool, protec-
tive devices and shoulder harness must be
checked before commencing work.
2. Turn o the motor and remove the battery
cartridge before carrying out maintenance,
replacing the cutting tool and cleaning the
tool.
3. After use, disconnect the battery cartridge
from the tool and check for damage.
4. Check for loose fasteners and damaged parts
such as nearly halfway cut-o state in the
cutting tool.
5. When not in use store the equipment in a dry
location that is locked up or out of children's
reach.

11 ENGLISH
6. Use only the manufacturer's recommended
replacement parts and accessories.
7. Always ensure that ventilation openings are
kept clear of debris.
8. Inspect and maintain the tool regularly, espe-
cially before/after use. Have the tool repaired
only by our authorized service center.
9. Keep handles dry, clean and free from oil and
grease.
SAVE THESE INSTRUCTIONS.
WARNING: DO NOT let comfort or familiarity
with product (gained from repeated use) replace
strict adherence to safety rules for the subject
product. MISUSE or failure to follow the safety
rules stated in this instruction manual may cause
serious personal injury.
Important safety instructions for
battery cartridge
1. Before using battery cartridge, read all instruc-
tions and cautionary markings on (1) battery
charger, (2) battery, and (3) product using
battery.
2. Do not disassemble or tamper with the battery
cartridge.Itmayresultinare,excessiveheat,
or explosion.
3. If operating time has become excessively
shorter, stop operating immediately. It may
result in a risk of overheating, possible burns
and even an explosion.
4. If electrolyte gets into your eyes, rinse them
out with clear water and seek medical atten-
tion right away. It may result in loss of your
eyesight.
5. Do not short the battery cartridge:
(1) Do not touch the terminals with any con-
ductive material.
(2) Avoid storing battery cartridge in a con-
tainer with other metal objects such as
nails, coins, etc.
(3) Do not expose battery cartridge to water
or rain.
A battery short can cause a large current
ow, overheating, possible burns and even a
breakdown.
6. Do not store and use the tool and battery car-
tridge in locations where the temperature may
reach or exceed 50 °C (122 °F).
7. Do not incinerate the battery cartridge even if
it is severely damaged or is completely worn
out. The battery cartridge can explode in a re.
8. Do not nail, cut, crush, throw, drop the battery
cartridge, or hit against a hard object to the
battery cartridge. Such conduct may result in a
re,excessiveheat,orexplosion.
9. Do not use a damaged battery.
10. The contained lithium-ion batteries are subject
to the Dangerous Goods Legislation require-
ments.
For commercial transports e.g. by third parties,
forwarding agents, special requirement on pack-
aging and labeling must be observed.
For preparation of the item being shipped, consult-
ing an expert for hazardous material is required.
Please also observe possibly more detailed
national regulations.
Tapeormaskoopencontactsandpackupthe
battery in such a manner that it cannot move
around in the packaging.
11. When disposing the battery cartridge, remove
it from the tool and dispose of it in a safe
place. Follow your local regulations relating to
disposal of battery.
12. Use the batteries only with the products
specied by Makita. Installing the batteries to
non-compliantproductsmayresultinare,exces-
sive heat, explosion, or leak of electrolyte.
13. If the tool is not used for a long period of time,
the battery must be removed from the tool.
14. During and after use, the battery cartridge may
take on heat which can cause burns or low
temperature burns. Pay attention to the han-
dling of hot battery cartridges.
15. Do not touch the terminal of the tool imme-
diately after use as it may get hot enough to
cause burns.
16. Do not allow chips, dust, or soil stuck into the
terminals, holes, and grooves of the battery
cartridge. It may result in poor performance or
breakdown of the tool or battery cartridge.
17. Unless the tool supports the use near
high-voltage electrical power lines, do not use
the battery cartridge near high-voltage electri-
cal power lines. It may result in a malfunction or
breakdown of the tool or battery cartridge.
18. Keep the battery away from children.
SAVE THESE INSTRUCTIONS.
CAUTION: Only use genuine Makita batteries.
Use of non-genuine Makita batteries, or batteries that
have been altered, may result in the battery bursting
causingres,personalinjuryanddamage.Itwill
also void the Makita warranty for the Makita tool and
charger.
Tips for maintaining maximum
battery life
1. Charge the battery cartridge before completely
discharged. Always stop tool operation and
charge the battery cartridge when you notice
less tool power.
2. Never recharge a fully charged battery car-
tridge. Overcharging shortens the battery
service life.
3. Charge the battery cartridge with room tem-
perature at 10 °C - 40 °C (50 °F - 104 °F). Let
a hot battery cartridge cool down before
charging it.
4. When not using the battery cartridge, remove
it from the tool or the charger.

12 ENGLISH
PARTS DESCRIPTION
Parts description (with nylon cutting
head)
►Fig.4
1Switch trigger 2Battery cartridge
3Lock lever 4Protector
5Nylon cutting head 6Nylon cord
7Wire guard 8Thumb nut
9Front grip 10 Hanger for shoulder
harness
11 Indication lamp 12 Lock-obutton
Parts description (with plastic blade)
►Fig.5
1Switch trigger 2Battery cartridge
3Blade holder 4Lock lever
5Protector 6Plastic blade head
7Plastic blade 8Wire guard
9Thumb nut 10 Front grip
11 Hanger for shoulder
harness
12 Indication lamp
13 Lock-obutton - -
FUNCTIONAL
DESCRIPTION
WARNING: Always be sure that the tool is
switched o and the battery cartridge is removed
before adjusting or checking function on the tool.
Failuretoswitchoandremovethebatterycartridge
mayresultinseriouspersonalinjuryfromaccidental
start-up.
Installing or removing battery
cartridge
CAUTION: Always switch o the tool before
installing or removing of the battery cartridge.
CAUTION: Hold the tool and the battery car-
tridge rmly when installing or removing battery
cartridge. Failure to hold the tool and the battery
cartridgermlymaycausethemtoslipoyourhands
and result in damage to the tool and battery cartridge
andapersonalinjury.
►Fig.6: 1. Red indicator 2. Button 3. Battery cartridge
To remove the battery cartridge, slide it from the tool
while sliding the button on the front of the cartridge.
To install the battery cartridge, align the tongue on the
battery cartridge with the groove in the housing and slip
it into place. Insert it all the way until it locks in place
with a little click. If you can see the red indicator as
showninthegure,itisnotlockedcompletely.
CAUTION: Always install the battery cartridge
fully until the red indicator cannot be seen. If not,
itmayaccidentallyfalloutofthetool,causinginjuryto
you or someone around you.
CAUTION: Do not install the battery cartridge
forcibly. If the cartridge does not slide in easily, it is
not being inserted correctly.
Battery protection system
The tool is equipped with a battery protection system.
Thissystemautomaticallycutsopowertothemotorto
extend battery life.
The tool will automatically stop during operation if the
tool and/or battery are placed under one of the following
conditions:
Overloaded:
The tool is operated in a manner that causes it to draw
an abnormally high current.
Inthissituation,turnthetooloandstoptheapplication
that caused the tool to become overloaded. Then turn
the tool on to restart.
If the tool does not start, the battery is overheated. In
this situation, let the battery cool before turning the tool
on again.
Low battery voltage:
The remaining battery capacity is too low and the tool
will not operate. If you turn the tool on, the motor runs
again but stops soon. In this situation, remove and
recharge the battery.
Indicating the remaining battery
capacity
Only for battery cartridges with the indicator
►Fig.7: 1. Indicator lamps 2. Check button
Press the check button on the battery cartridge to indi-
cate the remaining battery capacity. The indicator lamps
light up for a few seconds.
Indicator lamps Remaining
capacity
Lighted O
75% to 100%
50% to 75%
25% to 50%
0% to 25%
NOTE: Depending on the conditions of use and the
ambienttemperature,theindicationmaydierslightly
from the actual capacity.

13 ENGLISH
Switch action
WARNING: Before installing the battery car-
tridge into the tool, always check to see that the
switch trigger actuates properly and returns to
the “OFF” position when released.
WARNING: For your safety, this tool is
equipped with the lock-o button which prevents
the tool from unintended starting. Never use the
tool if it starts when you pull the switch trigger
without pressing the lock-o button. Ask your local
Makita Service Center for repairs.
WARNING: Never disable the lock function or
tape down the lock-o button.
NOTICE: Do not pull the switch trigger forcibly
without pressing the lock-o button. The switch
may break.
►Fig.8: 1. Switch trigger 2.Lock-obutton
To prevent the switch trigger from being accidentally
pulled,alock-obuttonisprovided.
Tostartthetool,pressthelock-obuttonandpullthe
switch trigger. Release the switch trigger to stop. The
lock-obuttoncanbepressedfromeithertherightor
left side.
Indication lamp
Running the tool allows the indication lamp to show the
battery cartridge capacity status.
►Fig.9: 1. Lamp
When the tool is also overloaded and has stopped
during operation, the lamp lights up in red. Refer to the
following table for the status and action to be taken for
the indication lamp.
Indication lamp Status Action to be taken
The lamp blinks
in red.
This indicates the
appropriate time to
replace the battery
cartridge when
the battery power
becomes low.
Recharge the
battery cartridge.
The lamp lights up
in red. (Note 1)
This function works
when the battery
power is almost
used up. At this
time, tool stops
immediately.
Recharge the
battery cartridge.
The lamp lights up
in red. (Note 1)
Autostop due to
overload.
Turnothetool.
Note 1: The time at which the indication lamp lights up varies by
the temperature around the work area and the battery cartridge
conditions.
Nylon cutting head
NOTICE: Do not bump the tool to the concrete or
asphalt surface. Bumping to this kind of objects
may cause the tool damage.
NOTE: If the nylon cord does not feed out while
bumping the head, rewind or replace the nylon cord
by following the procedures in this manual.
NOTE: The bump and feed mechanism will not work
properly if the nylon cutting head is not rotating.
►Fig.10: 1. Nylon cutting head 2. Cutter
The nylon cutting head has a bump and feed mecha-
nism. To feed the nylon cord, bump the cutting head
against the ground while the tool is running. As the
nylon cord is feeding out, it will automatically be cut to
the proper length by the cutter.
Plastic blade storage
►Fig.11: 1. Plastic blade 2. Blade holder
A plastic blade for replacement can be stored in the
blade holder of the tool. When storing or taking out the
blade, remove the battery cartridge.
Adjusting the position of the handle
and front grip
CAUTION: Before adjusting the shaft length,
be sure to switch o the tool and remove the
battery cartridge from the tool. Failure to do so may
causeapersonalinjury.
Adjustthelengthoftheshaftsothatyoucanholdthe
handle when lowering your right hand.
►Fig.12: 1. Handle
Toadjusttheshaftlength,openthelocklever,then
adjustthelengthoftheshaft,andthenclosethelock
lever.
►Fig.13: 1. Lock lever
Adjustthepositionofthefrontgripsothatyoucanhold
the front grip when lowering your left hand.
►Fig.14: 1. Front grip
ASSEMBLY
CAUTION: Always be sure that the tool is
switched o and the battery cartridge is removed
before carrying out any work on the tool.
CAUTION: Never start the tool unless it is
completely assembled. Operation of the tool in a
partially assembled state may result in serious per-
sonalinjuryfromaccidentalstart-up.

14 ENGLISH
Installing the front grip
Attach the front grip to the front grip holder and secure
it with a hex bolt and the thumb nut as shown in the
gure.
►Fig.15: 1. Front grip 2. Thumb nut 3. Hex bolt
Thefrontgripangleisadjustable.Toadjustthefront
grip angle, loosen the thumb nut, set the front grip at an
proper angle according to your work and then tighten
thethumbnutclockwisermly.
Installing the wire guard
NOTICE: Do not expand the wire guard outward
too much. Otherwise it may break.
►Fig.16
Toreducetheriskofdamagingtheobjectsinfrontofthe
cutting head, attach the wire guard to the protector so
that it controls the cutting range.
Slightly expand the wire guard outward and then insert
it into the holes of the protector.
For nylon cutting head:
Attach the wire guard to the holes on the front side of
the protector. The nylon cord mark on the protector
indicates the hole to be used.
►Fig.17: 1. Hole
For plastic blade head:
Attach the wire guard to the holes on the rear side of the
protector. The blade mark on the protector indicates the
hole to be used.
►Fig.18: 1. Hole
When wire guard is not in use, lift it for the idle position.
►Fig.19: 1. Wire guard
Installing the protector
CAUTION: While installing the protector, be
careful not to contact the nylon cord cutter on
the protector. Contact with the cutter could result in
personalinjury.
►Fig.20: 1. Screw 2. Protector
Mounttheprotectorbyttingitontothemotorhousing,
and then secure it with two screws.
Installing nylon cutting head
Optional accessory
CAUTION: If the nylon cutting head acciden-
tally impacts a rock or hard object during oper-
ation, stop the tool and inspect for any damage.
If the nylon cutting head is damaged, replace it
immediately. Use of a damaged cutting tool could
resultinseriouspersonalinjury.
CAUTION: Be sure to remove the hex wrench
after installation.
CAUTION: When installing or removing the
nylon cutting head, be careful not to contact the
nylon cord cutter on the protector. Contact with the
cuttermayresultinpersonalinjury.
NOTICE: Be sure to use genuine Makita nylon
cutting head.
1. Turn the tool upside down so that you can replace
the cutting tool easily.
2. Insert the hex wrench through the hole on the
motor housing and rotate the spindle until the spindle is
locked.
►Fig.21: 1. Hex wrench 2. Hole 3. Spindle
3. Place the nylon cutting head onto the spindle and
tighten it by turning it clockwise.
►Fig.22: 1. Nylon cutting head
4. Remove the hex wrench.
To remove the nylon cutting head, turn it counterclock-
wise while locking the spindle with the hex wrench.
Installing plastic blade head
Optional accessory
CAUTION: If the plastic blade accidentally
impacts a rock or hard object during operation,
stop the tool and inspect for any damage. If the
plastic blade is damaged, replace it immediately.
Use of a damaged cutting tool could result in serious
personalinjury.
CAUTION: Be sure to remove the hex wrench
after installation.
CAUTION: When installing or removing the
plastic blade head, be careful not to contact the
nylon cord cutter on the protector. Contact with the
cuttermayresultinpersonalinjury.
CAUTION: If the plastic blade head is worn
out, replace it with a new one. If it is worn out, the
plastic blade may be thrown away from the plastic
bladeheadduringoperationandcauseaninjury.
NOTICE: Be sure to use genuine Makita plastic
blade.
1. Turn the tool upside down so that you can replace
the cutting tool easily.
2. Insert the hex wrench through the hole on the
motor housing and rotate the spindle until the spindle is
locked.
►Fig.23: 1. Hex wrench 2. Hole 3. Spindle
3. Place the plastic blade head onto the spindle and
tighten it by turning it clockwise.
►Fig.24: 1. Plastic blade head
4. Remove the hex wrench.
To remove the plastic blade, turn it counterclockwise
while locking the spindle with the hex wrench.

15 ENGLISH
Attaching the shoulder harness
►Fig.25: 1. Hook
Attach the hooks of the shoulder harness to the tool as
showninthegure.
CAUTION: Be sure to attach the hooks of the
shoulder harness to the tool securely. If the hooks
are attached incompletely, they may come o and
cause injury.
Hex wrench storage
CAUTION: Be careful not to leave the hex
wrench inserted in the tool head. It may cause
injuryand/ordamagetothetool.
When not in use, store the hex wrench as shown in the
guretokeepitfrombeinglost.
►Fig.26: 1. Hex wrench
OPERATION
Cutting the grass
Hold the grass trimmer at the angle of about 50° to the
ground. Move the grass trimmer from right to left slowly.
Cut the grass a few times from the top of the grass at
the tip of the nylon cord or with the blade.
NOTICE: Do not cut high grass at a time. Cutting
the high grass at a time near the root may cause the
nylon cutting head or plastic blade to be entangled by
grass. This may cause the motor overload, resulting
in damage to the grass trimmer.
NOTICE: Use the grass trimmer without getting
the spool or plastic blade into a contact with the
ground surface. Using the spool or plastic blade
contacting the ground surface may cause the motor
under overload resulting in damage to the grass
trimmer.
►Fig.27
NOTICE: Do not force the trimmer in densely
growing grass.
►Fig.28
NOTICE: Do not use the trimmer as if you dig out
the ground.
►Fig.29
Cutting the grass near tree, block,
brick, or stone
Hold and tilt the grass trimmer at a height where the
spool or blade does not touch the ground. Cut the grass
using the nylon cord tip or plastic blade like knocking
the ground.
►Fig.30
NOTICE: When cutting the grass, move the
grass trimmer around the tree or blocks so that
the nylon cord or blade does not touch the tree or
blocks. It is recommended to keep the tool more than
5 cm away from the tree or block. If the nylon cord or
blade touch the tree or block, the nylon cord may be
torn or the blade may wear out rapidly. If the nylon
cord is torn in the spool, set the nylon cord again
referring to the replacement procedure in this manual.
Using the grass trimmer as an edger
Using the grass trimmer as an edger is suitable for
cutting the grass growing along the bricks or blocks.
Pull down the wire guard and rotate the grass trimmer
180°.
Asshowninthegure,whilecontactingthewireguard
with the ground, move the grass trimmer to cut the
grass.Youcancutthegrassecientlybywalkingin
parallel along the bricks or blocks.
►Fig.31: 1. Wire guard
Detaching the shoulder harness
WARNING: Be extremely careful to maintain
control of the machine when detaching the shoul-
der harness.
CAUTION: Before operation, adjust the
shoulder harness to the proper length to prevent
fatigue.
CAUTION: Be sure that the tool is held
securely by the shoulder harness before
operation.
The shoulder harness features a means of quick
release. Squeeze the sides of the buckle to release the
tool from the shoulder harness.
►Fig.32: 1. Buckle
MAINTENANCE
WARNING: Always be sure that the tool is
switched o and battery cartridge is removed
before attempting to perform inspection or main-
tenance on the tool.Failuretoswitchoandremove
the battery cartridge may result in serious personal
injuryfromaccidentalstart-up.
NOTICE: Never use gasoline, benzine, thinner,
alcohol or the like. Discoloration, deformation or
cracks may result.
To maintain product SAFETY and RELIABILITY,
repairs,anyothermaintenanceoradjustmentshould
be performed by Makita Authorized or Factory Service
Centers, always using Makita replacement parts.

16 ENGLISH
Cleaning the tool
Cleanthetoolbywipingodust,dirt,orcutograss
with a dry cloth or one dipped in soapy water and wrung
out.Ifthecutograssisadheredtothemotorhousing,
be sure to remove it.
►Fig.33: 1. Motor housing
Storage
The hole in the handle is convenient for hanging the tool
from a nail or screw on the wall. Before storing the tool,
raise the wire guard, shorten the shaft, and then fold the
front grip.
►Fig.34: 1. Wire guard
►Fig.35: 1. Front grip 2. Shaft
►Fig.36: 1. Hole
Replacing the plastic blade
If the plastic blade is worn out, replace it with a new
one. To install the plastic blade, align the direction of the
blade with the mark on the plastic blade head, and then
insert it all the way until it locks in place with a little click.
To remove the plastic blade, perform the installation
procedure in reverse.
►Fig.37: 1. Blade 2. Mark
NOTE: If the plastic blade is worn out, the vibration
increases when the machine is operated with no-load.
Replacing the nylon cord
WARNING: Use nylon cord with diameter specied in “SPECIFICATIONS” only. Never use heavier line,
metal wire, rope or the like. Use recommended nylon cord only, otherwise it may cause damage to the tool and
resultinseriouspersonalinjury.
WARNING: Make sure that the cover of the nylon cutting head is secured to the housing properly as
described below.Failuretoproperlysecurethecovermaycausethenyloncuttingheadtoyapartresultingin
seriouspersonalinjury.
Replace the nylon cord if the cord is not feeding any more.
►Fig.38: (1) Up to 8 m (2) 70 - 80 mm
TROUBLESHOOTING
Beforeaskingforrepairs,conductyourowninspectionrst.Ifyoundaproblemthatisnotexplainedinthemanual,
do not attempt to dismantle the tool. Instead, ask Makita Authorized Service Centers, always using Makita replace-
ment parts for repairs.
State of abnormality Probable cause (malfunction) Remedy
Motor does not run. Battery cartridge is not installed. Install the battery cartridge.
Battery problem (under voltage) Rechargethebattery.Ifrechargingisnoteective,
replace battery.
The drive system does not work correctly. Ask your local authorized service center for repair.
Motor stops running after a little
use.
Battery's charge level is low. Rechargethebattery.Ifrechargingisnoteective,
replace battery.
Overheating. Stop using of tool to allow it to cool down.
It does not reach maximum RPM. Battery is installed improperly. Install the battery cartridge as described in this
manual.
Battery power is dropping. Rechargethebattery.Ifrechargingisnoteective,
replace battery.
The drive system does not work correctly. Ask your local authorized service center for repair.
Cutting tool does not rotate:
stop the machine immediately!
Foreignobjectsuchasabranchisjammed
between the guard and the cutting tool.
Removetheforeignobject.
The drive system does not work correctly. Ask your local authorized service center for repair.
Abnormal vibration:
stop the machine immediately!
One end of the nylon cord has been
broken.
Tap the nylon cutting head against the ground
while it is rotating to cause the cord to feed.
The drive system does not work correctly. Ask your local authorized service center for repair.
Cutting tool and motor cannot stop:
Remove the battery
immediately!
Electric or electronic malfunction. Remove the battery and ask your local authorized
service center for repair.

17 ENGLISH
OPTIONAL ACCESSORIES
CAUTION: These accessories or attachments are recommended for use with your Makita tool spec-
ied in this manual.Theuseofanyotheraccessoriesorattachmentsmightpresentariskofinjurytopersons.
Only use accessory or attachment for its stated purpose.
If you need any assistance for more details regarding these accessories, ask your local Makita Service Center.
• Nylon cutting head
• Nylon cord (cutting line)
• Plastic blade head
• Plastic blade
• Makita genuine battery and charger
NOTE:Someitemsinthelistmaybeincludedinthetoolpackageasstandardaccessories.Theymaydierfrom
country to country.

18
中文简体
中文简体 (原本)
规格
型号: UR100D
空载速度
(不含切割工具)
10,000 /min
总长度
(不含切割工具)
835 - 1,185 mm
尼龙线直径 1.65 mm
适用切割
工具和切
割直径
尼龙打草头(零件
编号 198852-2 /
198853-0)
260 mm
塑料刀片头(零
件编号198847-5 /
198848-3)
230 mm
额定电压 D.C. 10.8 V - 12 V(最大)
标准电池组 BL1015 / BL1016 / BL1020B / BL1021B / BL1040B /
BL1041B
净重 1.9 - 2.1 kg
• 生产者保留变更规格不另行通知之权利。
• 规格和电池组可能因销往国家之不同而异。
• 重量因附件(包括电池组)而异。根据EPTA-Procedure 01/2014,最重与最轻的组合见
表格。
符号
以下显示本设备可能会使用的符号。在使用
工具之前,请务必理解其含义。
特别小心和注意。
阅读使用说明书。
危险;注意抛掷物体。
工具和旁观者的距离至少为
15 m。
360°
使旁观者远离。
15m(50FT)保持最少15 m的距离。
佩带安全眼镜。
佩带耳罩。
佩戴头盔、护目镜和耳罩。
佩戴防护手套。
穿戴具有防滑底的结实靴。
建议穿戴铁头安全靴。
勿暴露于潮湿环境。
允许的最高工具速度。
切勿使用金属刀片。

19
中文简体
Ni-MH
Li-ion 仅限于欧盟国家
由于本设备中包含有害成分,
因此废弃的电气和电子设备、
蓄电池和普通电池可能会对环
境和人体健康产生负面影响。
请勿将电气和电子工具或电池
与家庭普通废弃物放在一起处
置!
根据欧洲关于废弃电气电子设
备、蓄电池和普通电池、废弃
的蓄电池和普通电池的指令及
其国家层面的修订法案,废弃
的电气设备、普通电池和蓄电
池应当单独存放并递送至城市
垃圾收集点,根据环保法规进
行处置。
此规定由标有叉形标志的带轮
垃圾桶符号表示。
安全警告
重要安全注意事项
警告: 阅读所有警告和所有说明。不遵
照以下警告和说明会导致电击、着火和/或
严重伤害。
保存所有警告和说明书以备查
阅。
1. 熟悉控制和正确操作本设备的方法。
2. 电机关闭后切割部件还会继续旋转。
3. 勿允许儿童或不熟悉这些使用须知的人
员使用本机器。当地法规会限制操作人
员的年龄。
4. 切勿在附近有人(特别是儿童)或宠物
的情况下使用本机器。
5. 仅可在光线充足或良好照明的情况下使
用机器。请避免在恶劣天气尤其是雷电
天气条件下使用机器。
6. 在使用机器前或机器受到撞击后,检查
磨损或损坏情况,必要时进行维修。
7. 注意不要被割草线设备划伤。扩展新的
切割线之后,务必在开启设备前将其恢
复至正常操作位置。
8. 切勿安装金属切割部件。
9. 本设备不得由不熟悉操作说明的人员(包
括小孩)和体力、感觉及心智不健全或缺
乏经验和知识的人员使用,除非由负责他
们安全的人员在使用时对他们进行监督和
指导。应看管好儿童,勿让其玩耍本工具。
10. 使用工具时务必特别小心谨慎。
11. 请仅在身体状态良好的情况下操作工具。
镇定且小心地进行所有操作。操作时运用
常识并时刻谨记,如果给他人及其财产造
成损失,操作者或用户要为此负责。
12. 切勿在疲劳、身体不适或饮酒、服药的
情况下操作工具。
13. 如果工具有运行故障的迹象,应立即关
闭工具。
14. 不操作工具以及在操作位置之间移动时,
请使手指远离开关扳机。
工具用途
1. 使用正确的工具。充电式草坪修剪机仅
用于切割青草和草丛。不应将其用作其
他用途,如树篱切割,否则可能会造成
人身伤害。
个人防护设备
►图片1
►图片2
1. 注意衣装。着装应实用得体,如应穿着
紧身但不能妨碍操作的衣服。请勿佩戴
首饰或穿着可能会与草丛缠在一起的衣
服。佩带保护头盔来保护长发。
2. 使用工具时,务必穿戴具有防滑底的结
实靴。这可以避免受到伤害并确保立足
稳固。
3. 使用电动工具时请始终佩带护目镜以免伤
害眼睛。护目镜须符合美国ANSI Z87.1、
欧洲EN 166或者澳大利亚/新西兰的AS/
NZS 1336的规定。在澳大利亚/新西兰,
法律要求佩带面罩保护脸部。
雇主有责任监督工具操作者和其他近工
作区域人员佩带合适的安全防护设备。

20
中文简体
电气和电池安全
1. 避免危险的环境。请勿在潮湿或淋雨环
境下使用工具。工具受潮将增加触电的
危险。
2. 请仅使用制造商指定的充电器进行充电。
将适用于某一种类型电池组的充电器用于
其他类型的电池组时,可能会导致起火。
3. 电动工具仅可使用专门指定的电池组。
使用其他类型的电池组可能会导致人身
伤害或起火。
4. 不使用电池组时请将其远离纸夹、硬币、
钥匙、钉子、螺丝或其他小型金属物体放
置。这些物体可能会使电池端子短路。这
些物体可能会使电池端子短路,引起燃烧
或起火。
5. 使用过度时,电池中可能溢出液体。请
避免接触。如果意外接触到电池漏液,
请用水冲洗。如果液体接触到眼睛,请
就医。电池漏液可能会导致过敏发炎或
灼伤。
6. 请勿将电池弃于火中。否则会引起电池
爆炸。请查阅当地法规了解适当的特殊
处理说明。
7. 请勿打开或拆解电池。溢出的电解质具
有腐蚀性,可能会对眼睛或皮肤造成损
伤。吞服则有致毒危险。
8. 请勿在雨中或潮湿的地方充电。
启动工具
►图片3
1. 确保无儿童或其他人员在15 m(50英
尺)的工作范围内,并确保工作区域没
有任何其他动物。否则请停止使用工具。
2. 使用前务必检查并确保可以安全操作工
具。检查切割工具、保护罩以及开关扳
机/杆的的安全性,并确保其可以正常
工作。确保把手清洁干燥并测试开关的
启动/停止功能。
3. 进一步使用工具前请检查受损部件。应
仔细检查保护罩或其他部件有无损坏,
以确定工具是否可以正常运转。检查运
动部件是否有偏差或粘连、部件是否破
损、安装是否妥当以及其他可能会影响
工具运行的情况。除非本手册另有声明,
否则应对受损保护罩或其他部件进行修复
或由授权维修中心进行更换。
4. 仅当手和脚离开切割工具时方可打开电
机。
5. 打开切割工具前确保其不与硬质物体如,
枝干、石头等接触,否则会导致工具起动
时打转。
6. 请确保不存在电缆、水管、煤气管道等,
如果其因使用本工具而受损,可能会引起
危险。
操作方法
1. 切勿在保护罩受损或未将保护罩安装到
位时运行工具。
2. 仅在光线及可视性良好的环境下使用工
具。在冬季,要注意打滑或潮湿区域以
及冰雪等(打滑危险)。务必确保立足
稳固。
3. 小心避免切割工具伤及脚和手。
4. 请始终将手、足远离切割部件,在开启
电机后尤其需要注意。
5. 切勿在腰部高度以上进行切割。
6. 切勿站立在梯子上操作工具。
7. 切勿在非稳固表面上进行作业。
8. 请勿伸得过远。操作时请双脚站稳,始
终保持平衡。
9. 除去工作范围内的砂石、砾石、钉子等。
这些异物可能会损坏切割工具,可能会飞
溅出去导致严重的人身伤害。
10. 如果切割工具打到石头或其他硬物,应
立即关闭电机并对切割工具进行检查。
11. 开始切割前,必须使切割工具达到全速。
12. 操作时务必用双手握住工具。切勿在使
用时仅用一只手握住工具。务必确保立
足稳固。
13. 操作期间,必须使用工具附带的所有防
护设备,例如,保护罩。
14. 除紧急情况外,切勿抛掷或弃扔工具到
地面上,否则可能会严重损坏工具。
15. 移动工具时切勿在地面上拖曳工具,否
则会使工具受损。
16. 出现以下情况时,务必从工具上拆下电
池组:
— 工具无人照看时;
— 清除堵塞物前;
— 检查、清洁或处理工具前;
— 在进行任何调节、更换附件或存放
工具之前;
— 工具开始异常振动时;
— 搬运工具时。
17. 请勿滥用工具。在设计的额定功率下使
用设备可更好地完成工作并能降低损伤
风险。
18. 请勿在易爆环境,如有可燃性液体、气
体或粉尘的环境下操作电动工具。电动
工具产生的火花可能会引燃粉尘或气体。
Other manuals for UR100D
10
Table of contents
Languages:
Other Makita Trimmer manuals

Makita
Makita EH6000W Instruction Manual

Makita
Makita UR013G User manual

Makita
Makita UH4570 User manual

Makita
Makita DUR192L User manual

Makita
Makita XTR01 User manual

Makita
Makita UR100D User manual

Makita
Makita UH4570 User manual

Makita
Makita EH5000W User manual

Makita
Makita UR180D User manual

Makita
Makita DUH521Z User manual

Makita
Makita DUH501 User manual

Makita
Makita BBC231U User manual

Makita
Makita UH4570 User manual

Makita
Makita 3709 User manual

Makita
Makita UH6300 Manual

Makita
Makita XRU24 User manual

Makita
Makita DUR187LZ User manual

Makita
Makita UR100D User manual

Makita
Makita 3708F User manual

Makita
Makita DUH481 User manual