manuals.online logo
Brands
  1. Home
  2. •
  3. Brands
  4. •
  5. Malaguti
  6. •
  7. Motorcycle
  8. •
  9. Malaguti MONTE 125 User manual

Malaguti MONTE 125 User manual

MONTE125
MONTE PRO125
Manuale d‘uso
Bedienungsanleitung
User manual
Manual de instrucciones
Manuel de l‘utilisateur
Gebruiksaanwijzing
ITALIANOITALIANO DEUTSCHDEUTSCH ENGLISHENGLISH ESPAÑOLESPAÑOL FRANÇAISFRANÇAIS NEDERLANDSNEDERLANDS
Nel presente manuale si spe-
cificano i principali dettagli per
la cura della sua motocicletta,
affinché possa ottenere il migli-
or funzionamento e la maggior
durata con una spesa minima.
Curi della sua motocicletta, la
qualità Malaguti s’incaricherà
del resto, con i ricambi originali
ed una rete Nazionale di Agen-
ti ed officine autorizzate, siamo
sicuri del fatto che otterrá pie-
na soddisfazione dall’uso del
veicolo. Per qualsiasi problema,
rivolgers al rappresentante più
vicino.
BENVENUTO A MALAGUTI
A causa del suo criterio di mig-
lioramento costante dei propri
prodotti, Malaguti mantiene il
diritto di introdurre le modifiche
che consideri necessarie, senza
avviso previo.
Così può Lei contribuire alla
conservazione del medio am-
biente. Dal suo modo di guida-
re dipende pure il consumo di
combustibile e, quindi, il livel-
lo di emissione di contaminanti
della sua motocicletta. Inoltre, il
modo in cui tratta il veicolo in-
fluisce sul livello di rumore e nel
proprio logoramento. In questo
Manuale di Istruzioni si allegano
una serie di informazioni sulla
guida ecologica e contempora-
neamente economica della sua
motocicletta.
In dieser Betriebsanleitung wer-
den die wichtigsten Pflegehin-
weise erklärt, so dass Ihr Mo-
torrad optimal funktioniert und
eine lange Lebensdauer mit ge-
ringen Kosten hat. Pflegen Sie
Ihr Motorrad. Die Qualität von
Malaguti kümmert sich um al-
les andere. Wir sind sicher, dass
Sie mit der Verwendung dieses
Fahrzeugs, mit den Original-Er-
satzteilen und einem nationalen
Netz von Vertretern und Ge-
schäften vollkommen zufrieden
sein werden.Bei Problemen kön-
nen Sie sich ungestört an den
nächsten Vertreter wenden.
WILLKOMMEN BEI MALAGUTI
Im Hinblick auf die ständige Ver-
besserung ihrer Produkte behält
sich Malaguti das Recht vor,
ohne vorherige Ankündigung
die als zweckmäßig erachteten
Änderungen einzuführen.
So können Sie zum Umwelt-
schutz beitragen. Von Ihrem
Fahrstil hängt unter anderem
der Benzinverbrauch und da-
her auch die Schadstoffabgabe
Ihres Motorrades ab. Auch hat
die Art und Weise, wie Sie das
Fahrzeug behandeln, hat Ein-
fluss auf seinen Geräuschpegel
und auf seine Abnutzung. Die-
se Bedienungsanleitung enthält
eine Reihe von Anweisungen
für einen ökologisch verant-
wortungsvollen und gleichzeitig
wirtschaftlichen Fahrstil.
This manual will explain the
principal details of how to
maintain this motorcycle, so you
can get a longer duration with
a minimum cost and the best
performance. Take care of your
engine. Malaguti quality will
take care of everything else, we
are sure that you will get com-
plete satisfaction with the use
of this vehicle, with the original
spare parts and a National web
of agents and shops. If you en-
counter any problem, refer to
the nearest distributor.
WELCOME TO MALAGUTI
Due to its criterion of constant
improvement of its products,
Malaguti reserves the right to
introduce any modifications it
considers suitable, without prior
notice.
This is how you can contribute
to preserving the environment.
The way you ride determines
your fuel consumption and the-
refore how much your motor-
cycle pollutes the atmosphere.
In the same way, the way you
treat your moped affects its noi-
se level and wear and tear on
the vehicle. In the user manual
you will find a series of points
of information on how to ride
in an ecologically sound man-
ner, which will also be the most
economic way to ride your
motorcycle.
Introduzione
Einleitung
Introduction
Introducción
Introduction
Inleiding
2MONTE125 | MONTE PRO125
ITALIANOITALIANO DEUTSCHDEUTSCH ENGLISHENGLISH ESPAÑOLESPAÑOL FRANÇAISFRANÇAIS NEDERLANDSNEDERLANDS
En este manual se especifican
los principales detalles para el
cuidado de su motocicleta, para
que obtenga el mejor funciona-
miento y la mayor duración con
un mínimo coste. Cuide su mo-
tocicleta. La calidad Malaguti se
encargará del resto, con los re-
cambios originales y una red de
agentes y talleres autorizados,
estamos seguros de que ob-
tendrá plena satisfacción en el
uso del vehículo. Ante cualquier
problema, dirigirse al represen-
tante más próximo.
BIENVENIDO AL MUNDO
MALAGUTI
Debido a su criterio de cons-
tante mejora en sus productos,
Malaguti Motorcycles se reser-
va el derecho de introducir las
modificaciones que crea opor-
tunas, sin previo aviso.
Así puede Ud. contribuir a la
conservación del medio am-
biente. De su estilo de conducir
depende también el consumo
de combustible y, por lo tanto,
el nivel de emisión de conta-
minantes de su motocicleta.
Asimismo, la manera de tratar
el vehículo influye en el nivel
de ruidos y en el desgaste del
mismo. En este Manual de In-
strucciones se incluyen una
serie de informaciones sobre
una conducción ecológica y al
mismo tiempo económica de su
motocicleta.
Dans ce manuel sont spécifiés
les principaux détails pour l’ent-
retien de votre moto afin d’ob-
tenir le meilleur fonctionnement
et une plus grande durée de vie
au coût minimum. Prenez soin
de votre moto, le département
qualité Malaguti se chargera du
reste, avec les pièces de re-
change originales et un réseau
national et garages autorisés,
nous sommes sûrs que vous
obtiendrez la pleine satisfac-
tion dans l’utilisation de votre
véhicule. En cas de problème,
s’adresser au représentant le
plus proche.
BIENVENUE CHEZ MALAGUTI
Etant donné le critère d’amé-
lioration constante de ses pro-
duits, Malaguti Motorcycles se
réserve le droit d’introduire les
modifications qu’il jugerait op-
portunes sans préavis.
Vous pouvez contribuer à la
conservation de l’environne-
ment. De votre manière de
conduire dépend également la
consommation de combustible
et, donc, du taux d’émission
d’agents contaminants de votre
moto. La manière de traiter vo-
tre véhicule a des répercutions
sur le niveau de bruits et la vie
de votre véhicule. Ce Manuel
d’Instructions donne une série
d’informations sur une conduite
écologique et économique de
votre moto.
In deze handleiding vindt u de
belangrijkste details over het
onderhoud van deze motorfiets,
zodat u met minimale kosten de
beste prestaties en een langere
levensduur kunt krijgen. Zorg
voor uw motor. Malaguti kwa-
liteit zorgt voor al het andere,
wij zijn er zeker van dat u voll-
edig tevreden zult zijn met het
gebruik van dit voertuig, met
de originele reserveonderdelen
en een nationaal netwerk van
agenten en winkels. Als u een
probleem ondervindt, raad-
pleeg dan de dichtstbijzijnde
distributeur.
WELKOM BIJ MALAGUTI
Wegens constante verbetering
van de producten behoudt
Malaguti zich het recht om zon-
der voorafgaande kennisgeving
wijzigingen aan te brengen die
het geschikt acht.
Zo kunt u bijdragen aan het
behoud van het milieu. De ma-
nier waarop u rijdt bepaalt uw
brandstofverbruik en dus ook
de mate waarin uw motor de
atmosfeer vervuilt. Op dezelfde
manier beïnvloedt de manier
waarop u uw bromfiets be-
han- delt het geluidsniveau en
de slijtage van het voertuig. In
het instructieboekje vindt u een
reeks informatie over hoe u op
een ecologisch verantwoorde
manier kunt rijden.
3
ITALIANOITALIANO DEUTSCHDEUTSCH ENGLISHENGLISH ESPAÑOLESPAÑOL FRANÇAISFRANÇAIS NEDERLANDSNEDERLANDS
Diese Anleitung wurde für Sie
als Leitfaden für die Benutzung
Ihres Motorrads zusammen-
gestellt, die Anweisungen sind
einfach und klar verständlich.
Zusätzlich werden die War-
tungsvorgänge und periodi-
schen Kontrollen für Ihr Fahr-
zeug angegeben, wenden Sie
sich dafür an einen Vertrags-
händler oder an die autorisier-
ten Malaguti Fachwerkstätten.
Die Betriebsanleitung umfasst
auch einige Anweisungen für
einfache Reparaturen. Für die
Vorgänge, die in der vorliegen-
den Publikation nicht ausdrück-
lich erwähnt sind, benötigt man
eine Sonderausrüstung und
spezifisches technisches Wissen;
wenden Sie sich dafür an Ihren
Vertragshändler oder an die
Malaguti Verteiler.
This manual instructions have
been prepared to offer you an
easy and clear guide of how to
use this manual; it also indicates
a few maintenance tips on
operations and periodic con-
trols which the vehicle should
be submited at the dealers or
authorized Malaguti Assistance
centers. Also, the manual con-
tains the instructions to perform
some easy repairs. There are
operations which are not inclu-
ded in this publication due to
the fact that they require espe-
cial equipment and a specific
technical knowledge, we re-
commend you to refer to your
dealer or your distributor.
Le istruzioni del manuale sono
state preparate principalmente
per offrire una guida semplice
e chiara dell’uso; si indicano an-
che, piccole operazioni di ma-
nutenzione e controlli periodici
ai quali si deve sottomettere il
veicolo nei Concessionari o nei
Centri d’Assistenza Autorizza-
ti Malaguti. Inoltre, il manuale
contiene le istruzioni per rea-
lizzare alcune riparazioni sem-
plici. Le operazioni descritte
esplicitamente nella presente
pubblicazione, sono giustificate
in quanto necessitano di equi-
paggiamenti speciali e/o cono-
scenze tecniche specifiche per
la sua realizzazione, Le consig-
liamo, pertanto di rivolgersi ai
Concessionari o ai distribuitori
Malaguti.
Il testo evidenziato con
il fondo grigio, contiene
indicazioni importanti per
usare il veicolo e per ga-
rantire la massima sicurezza
di guida.
Der Text auf grauem
Hintergrund enthält wichti-
ge Hinweise für den Fahr-
zeuggebrauch und für die
optimale Sicherheit beim
Fahren.
The text which has gray
background contains im-
portant information of how
to use the vehicle and to
insure the maximun driving
condition
I segnali
Symbole
Manual signals
Las señales
Les signes
Symbolen
4MONTE125 | MONTE PRO125
ITALIANOITALIANO DEUTSCHDEUTSCH ENGLISHENGLISH ESPAÑOLESPAÑOL FRANÇAISFRANÇAIS NEDERLANDSNEDERLANDS
Concessionari Les instructions
de ce manuel on été prépa-
rées principalement pour vous
offrir un guide simple et clair
d’utilisation par l’indication, ent-
re autre, de petites opérations
de maintenance et de contrô-
le périodique auquels doit se
soumettre le vehicule dans les
concessionaires ou les centres
d’assistance autorisés Malaguti.
De plus, ce manuel contient les
instructions pour la réalisation
de quelques réparations simp-
les. Les opérations qui necessi-
tent un matériel spécifique ou
la connaissance de techniques
spécifiques pour sa réalisation
ne sont pas décrites dans le
présent document. Nous vous
conseillons pour cela de vous
diriger vers les concessionaires
ou les distributeurs Malaguti.
Las instrucciones de este ma-
nual hansido preparadas prin-
cipalmente para ofrecerle una
guía sencilla y clara de utilizar;
se indican asimismo pequeñas
operaciones de mantenimiento
y controles periódicos a los
cuales se debe someter el ve-
hículo en los Concesionarios o
en los Centros de Asistencia
Autorizados Malaguti. Además,
el manual contiene las instruc-
ciones para realizar algunas
reparaciones sencillas. Las ope-
raciones que no están descritas
explícitamente en la presente
publicación, es porque nece-
sitan equipos especiales y/o
conocimientos técnicos espe-
cíficos para su realización, le
aconsejamos por lo tanto que
se dirija a los Concesionarios o
a los distribuidores Malaguti.
De instructies zijn opgemaakt
om u een eenvoudige en dui-
delijke handleiding aan te bie-
den.
Enkele tips voor het onderhoud
en de periodieke controles
waarvoor het voertuig bij de
dealers of erkende Malaguti
Assistance centra moet worden
ingediend. De handleiding bevat
ook de instructies voor het uit-
voeren van eenvoudige repara-
ties. Er zijn operaties die niet in
deze publicatie zijn opgenomen
vanwege het feit dat ze spe-
ciale apparatuur en een speci-
fieke technische kennis vereisen.
Wij raden u aan om naar uw
dealer of uw distributeur te ver-
wijzen.
El texto evidenciado
con el fondo gris, contie-
ne indicaciones importantes
para utilizar el vehículo y
para garantizar la máxima
seguridad de conducción.
Les textes grisés con-
tiennent des indications im-
portantes pour l’utilisation
du véhicule et pour garan-
tir la sécurité maximale de
conduite.
De tekst met grijze ach-
tergrond bevat belangrijke
informatie over het gebruik
van het voertuig en het ver-
zekeren van de maximale
rijconditie.
5
ITALIANOITALIANO DEUTSCHDEUTSCH ENGLISHENGLISH ESPAÑOLESPAÑOL FRANÇAISFRANÇAIS NEDERLANDSNEDERLANDS
SYMBOLE FÜR EINWAND
FREIES FAHREN
Die auf dieser Seite abgebilde-
ten Symbole sind sehr wichtig.
Sie dienen dazu, in der ganzen
Betriebsanleitung die Stellen zu
finden, denen man besondere
Aufmerksamkeit schenken sollte.
Jedes Symbol wird mit einer
anderen Grafik dargestellt, da-
mit die verschiedenen Themen
einfacher gefunden werden
können.
Personensicherheit
VORSICHT Bei Nichteinhalten
oder nur teilweise Einhalten
der Vorschriften, kann die Per-
sonensicherheit in Gefahr ge-
bracht werden.
Umweltschutz
Gibt das ideale Fahrverhalten
an, damit der Fahrzeuggebrauch
nicht der Umwelt schadet.
Unversehrtheit des Fahr-
zeuges
VORSICHT Das Fahrzeug kann
beschädigt werden und der An-
spruch auf Garantie kann ver-
loren gehen, wenn Sie diese
Vorschriften nicht oder nur teil-
weise einhalten.
SIGNAL FOR A CORRECT DRI
VING
The represented signals are
very important. Effectively, these
are used in the manual to find
the places where you need to
pay special attention.
As you can see, each signal is
based on a different graphic
symbol to make easier and evi-
dent the location of the sub-
jects of differents areas.
Security of persons
ATTENTION The total or partial
failure of this prescriptions can
present a serious danger to the
physical integrity of people.
Environment protection
It indicates the correct behavi-
our that must be followed so
the use of the vehicle will not
damage the environmet
Vehicle integrity
ATTENTION The total or partial
failure of this prescriptions can
damage the vehicle seriously
and, in some cases, can cause
invalidation of the warranty
terms.
SEGNALI PER UNA GUIDA
CORRETTA
I segnali rappresentati in questa
pagina sono importanti. Effetti-
vamente, servono per trovare
nel manuale tutte quelle parti in
cui si deve prestare una specia-
le attenzione.
Come si può notare, ogni seg-
nale è formato da un simbolo
grafico distinto affinché sia più
facile ed evidente la localizza-
zione degli argomenti nelle di-
verse aree.
Sicurezza delle persone
ATTENZIONE l’inosservanza
totale o parziale delle presenti
indicazioni suppongono un gra-
ve pericolo per l’integrità fisica
delle persone.
Protezione del medio am-
biente
Indica i comportamenti idonei
che si devono seguire affinché
l’uso del veicolo non pregiudichi
la natura.
Integrità del veicolo
ATTENZIONE L’inosservanza
totale o parziale delle presen-
ti indicazioni può danneggiare
gravemente il veicolo e,in alcu-
ni casi, causare l’annullamento
della garanzia.
I segnali
Symbole
Manual signals
Las señales
Les signes
Symbolen
6MONTE125 | MONTE PRO125
ITALIANOITALIANO DEUTSCHDEUTSCH ENGLISHENGLISH ESPAÑOLESPAÑOL FRANÇAISFRANÇAIS NEDERLANDSNEDERLANDS
SIGNES POUR UNE CONDUI
TE CORRECTE
Les signes représentés sur cet-
te page sont très importantes.
Effectivement, ils servent à trou-
ver dans le manuel les parties
auxquelles il faut prêter une at-
tention particulière.
Comme vous le remarquerez,
chaque signe est représenté
par un symbole graphique afin
que ce soit plus facile et évi-
dent de localiser les sujets dans
les différents chapitres ou pa-
ragraphes.
Sécurité des personnes
ATENTION Le non respect total
ou partiel de ces prescriptions
peuvent supposer un danger
grave pour l’intégrité physique
des personnes.
Protection de l’environnement
Indique le comportement idéale
à suivre pour que l’utilisation du
véhicule ne porte pas de préju-
dice à la nature.
Intégrité du véhicule
ATTENTION Le non accomplis-
sement total ou partiel de ces
prescriptions peut nuire grave-
ment au véhicule et, dans cer-
tains cas, peut causer le refus
de la garantie.
LAS SEÑALES PARA UNA
CONDUCCIÓN CORRECTA
Las señales representadas en
esta página son muy importan-
tes. Efectivamente, sirven para
encontrar en el manual las par-
tes a las que hay que prestar
una especial atención.
Como puede notar, cada señal
está formada por un símbolo
gráfico distinto para que sea
más fácil y evidente la localiza-
ción de los temas en las dife-
rentes áreas.
Seguridad de las personas
ATENCIÓN El incumplimiento
total o parcial de estas pre-
scripciones puede suponer pe-
ligro grave para la integridad
física de las personas.
Protección del medio am-
biente
Indica los comportamientos
idóneos que se deben seguir
para que el uso del vehículo no
perjudique la naturaleza.
Integridad del vehículo
ATENCIÓN El incumplimiento
total o parcial de estas pre-
scripciones puede dañar grave-
mente el vehículo y, en algunos
casos puede causar la invalida-
ción de la garantía.
SYMBOLEN VOOR GOED RIJ
DEN
De symbolen op deze pagina
zijn zeer belangrijk. Ze wor-
den gebruikt om u te helpen
bij het vinden van de punten in
de hele handleiding waaraan u
bijzondere aandacht moet be-
steden.
Elk symbool wordt door een
andere afbeelding weergege-
ven, zodat de verschillende
onderwerpen gemakkelijker te
vinden zijn.
Veiligheid van personen
LET OP Het geheel of gedeel-
telijk negeren van deze voor-
schriften kan een ernstige licha-
melijke schade veroorzaken.
Bescherming van het milieu
Geeft het juiste gedrag aan dat
moet worden gevolgd zodat
het gebruik van het voertu-
ig geen schade toebrengt aan
het milieu.
Integriteit van het voertuig
OPGELET Het geheel of ge-
deeltelijk negeren van deze
voor- schriften kan het voertuig
ernstig beschadigen en in som-
mige gevallen de garantievoor-
waar- den ongeldig maken.
7
ITALIANOITALIANO DEUTSCHDEUTSCH ENGLISHENGLISH ESPAÑOLESPAÑOL FRANÇAISFRANÇAIS NEDERLANDSNEDERLANDS
Introduzione 2
I segnali 6
Indice 8
Strumentazione e funzioni di
controllo 10
Guida 40
Manutenzione 50
Candela 60
Filtro dell’aria 62
Freni 66
Batteria 72
Fusibili 76
Catena di trasmissione 78
Che fare se... Si brucia una lam-
pada 82
Che fare se... Si deve orientare
il faro 84
Che fare se... Si devono regola-
re i freni 86
Che fare se... Si deve regolare
l’acceleratore 88
Che fare se... Si deve regolare
la frizione 90
Che fare se... Inattività del vei-
colo per molto tempo 92
Che fare se... Si deve pulire il
veicolo 94
Che fare se... Si deve cercare la
causa di un guasto 96
Pezzi di ricambio 102
Caratterístiche tecniche 104
Annotazioni 110
Introduction 2
Manual signals 6
Table of contents 8
Instrument and control functi-
ons 10
Operation 40
Maintenance 50
Spark plug 60
Air filter 62
Brakes 66
Battery 72
Fuses 76
Drive chain 78
What to do if... The bulb is bur-
ned out 82
What to do if... The beam needs
to be aimed 84
What to do if... The brakes need
to be adjusted 86
What to do if... The throttle
needs to be adjusted 88
What to do if... The clutch needs
to be adjusted 90
What to do if... The vehicle is
stored for long periods 92
What to do if... The vehicle
needs to be cleaned 94
How to troubleshoot 98
Spare parts 102
Technical data 104
Notes 110
Einleitung 2
Symbole 6
Inhaltsverzeichnis 8
Instrumente und Bedienung 10
Fahrbetrieb 40
Wartung 50
Zündkerze 60
Luftfilter 62
Bremsen 66
Batterie 72
Sicherungen 76
Antriebskette 78
Was tun... Wenn eine Glühbirne
durchbrennt? 82
Was tun... Wenn der Scheinwer-
fer ausgerichtet werden muss?
84
Was tun... Wenn die Bremsen
eingestellt werden müssen? 86
Was tun... Wenn der Gasdreh-
griff eingestellt werden muss?88
Was tun... Wenn die Kupplung
eingestellt werden muss? 90
Was tun... Wenn das Fahrzeug
lange Zeit nicht benutzt wird?
92
Was tun... Beim Reinigen des
Fahrzeugs? 94
Was tun... Wenn sie die Ursache
einer Störung herausfinden wol-
len? 96
Ersatzteile 102
Technische Daten 104
Notizen 110
Indice
Inhaltsverzeichnis
Table of contents
Índice
Table des matieres
Inhoudsopgave
8MONTE125 | MONTE PRO125
ITALIANOITALIANO DEUTSCHDEUTSCH ENGLISHENGLISH ESPAÑOLESPAÑOL FRANÇAISFRANÇAIS NEDERLANDSNEDERLANDS
Introducción 2
Las señales 6
Índice 8
Funcionamiento de los mandos
de control 10
Conducción 40
Mantenimiento 50
Bujía 60
Filtro de aire 62
Frenos 66
Batería 72
Fusibles 76
Cadena de transmisión 78
Qué hacer si... Se funde una
lámpara 82
Qué hacer si... Se debe orientar
el faro 84
Qué hacer si... Se deben regular
los frenos 86
Qué hacer si... Se debe regular
el acelerador 88
Qué hacer si... Se debe regular
el embrague 90
Qué hacer si... Inactividad del
vehículo durante mucho tiempo
92
Qué hacer si... Se debe limpiar
el vehículo 94
Qué hacer si... Se debe buscar
la causa de una avería 98
Los recambios 102
Características técnicas 104
Notas 110
Introduction 2
Les signes 6
Table des matieres 8
Fonctions des instruments et
des commandes 10
Conduite 40
Maintenance 50
Bougie 60
Filtre à air 62
Freins 66
Batterie 72
Fusibles 76
Chaîne de transmission 78
Que faire si... Une lampe grille
82
Que faire si... On doit orienter le
phare 84
Que faire si... Vous devez régler
les freins 86
Que faire si... Vous devez régler
l’accélérateur 88
Que faire si... Vous devez régler
l’embrayage 90
Que faire si... Le véhicule est
inactif pendant une longue pé-
riode 92
Que faire si ... Vous devez la-
ver le véhicule 94
Que faire si... Vous devez cher-
cher la cause d’une panne 100
Les pièces de rechange 102
Característiques techniques 104
Notes 110
Inleiding 2
Symbolen 6
Inhoudsopgave 8
Instrumenten en controlefunc-
ties 10
Bediening 40
Onderhoud 50
Bougie 60
Luchtfilter 62
Remmen 66
Batterij 72
Zekeringen 76
Aandrijfketting 78
Wat te doen als... De lamp is
doorgebrand 82
Wat te doen als... De balk moet
worden gericht 84
Wat te doen als... De remmen
moeten worden afgesteld 86
Wat te doen als..... Het gaspe-
daal moet worden afgesteld 88
Wat te doen als... De koppeling
moet worden afgesteld 90
Wat te doen als..... Het voertuig
wordt voor langere tijd opges-
lagen 92
Wat te doen als..... Het voertuig
moet worden gereinigd 94
Hoe problemen oplossen 100
Onderdelen 102
Technische gegevens 104
Notities 110
9
ITALIANOITALIANO DEUTSCHDEUTSCH ENGLISHENGLISH ESPAÑOLESPAÑOL FRANÇAISFRANÇAIS NEDERLANDSNEDERLANDS
SCHLÜSSEL
1. Zündschalter / Lenkschloss
2. Blinkerschalter
3. Hupentaste
4. Lichtschalter
5. Kupplungssteuerhebel
6. „Select“-Taste & „Adjust“-
Taste
7. Kombiinstrument
8. Vorderer Bremshebel
9. Gasgriff
10. Startschalter
11. Motorstoppschalter
KEY
1. Ignition switch / steering lock
2. Turn indicator switch
3. Horn button
4. Light switch
5. Clutch control lever
6. „Select“ button & „Adjust“
button
7. Instrument cluster
8. Front brake lever
9. Throttle grip
10. Start switch
11. Engine stop switch
CHIAVE
1. Interruttore di accensione /
bloccasterzo
2. Girare l‘interruttore dell‘indi-
catore
3. Pulsante del clacson
4. Interruttore luci
5. Leva di comando della fri-
zione
6. „Tasto „Seleziona“ & „Regola
7. Strumentazione
8. Leva del freno anteriore
9. Impugnatura dell‘accelera-
tore
10. Interruttore di avvio
11. Interruttore di arresto del
motore
1
3
4
56 7 8 9
10
11
2
Strumentazione e funzioni di controllo
Instrumente und Bedienung
Instrument and control functions
Funcionamiento de los mandos de control
Fonctions des instruments et des commandes
Instrumenten en controlefuncties
10 MONTE125 | MONTE PRO125
ITALIANOITALIANO DEUTSCHDEUTSCH ENGLISHENGLISH ESPAÑOLESPAÑOL FRANÇAISFRANÇAIS NEDERLANDSNEDERLANDS
CLAVE
1. Interruptor de encendido /
bloqueo de la dirección
2. Interruptor indicador de giro
3. Botón de la bocina
4. Interruptor de luz
5. Palanca de control del em-
brague
6. Botón „Seleccionar“ y „Ajus-
tar“.
7. Grupo de instrumentos
8. Palanca de freno delantero
9. Empuñadura del acelerador
10. Interruptor de arranque
11. Interruptor de parada del
motor
CLÉ
1. Commutateur d‘allumage /
antivol de direction
2. Interrupteur des clignotants
3. Bouton d‘avertisseur sonore
4. Interrupteur d‘éclairage
5. Levier de commande d‘em-
brayage
6. „Bouton „Sélectionner“ et
„Ajuster
7. Groupe d‘instruments
8. Levier de frein avant
9. Poignée d‘accélérateur
10. Interrupteur de démarrage
11. Interrupteur d‘arrêt du mo-
teur
SLEUTEL
1. Contactschakelaar / stuurslot
2. Knipperlichtschakelaar draai-
en
3. Hoornknop
4. Lichtschakelaar
5. Koppelingshendel
6. „Selecteren“ knop & „Aan-
passen“ knop
7. Instrumentencluster
8. Remhendel voorrem
9. Grip op het gaspedaal
10. Start schakelaar
11. Motorstopschakelaar
1
3
4
56 7 8 9
10
11
2
11
ITALIANOITALIANO DEUTSCHDEUTSCH ENGLISHENGLISH ESPAÑOLESPAÑOL FRANÇAISFRANÇAIS NEDERLANDSNEDERLANDS
KOMBIINSTRUMENT
1. Blinker
2. Motorkontrollleuchte
3. Leerlaufkontrolle
4. Öldruckkontrolle
5. Fernlichtindikator
6. Kühlmitteltemperaturkont-
rolle
7. Tourenzähler
8. Ganganzeige
9. 24-Stunden Uhr
10. Schaltindikator
11. Geschwindigkeitsanzeige
12. Kilometerzähler
13. Kraftstoffindikator
INSTRUMENT CLUSTER
1. Turn signal
2. Engine indicator light
3. Idle speed control
4. Oil pressure control
5. High beam indicator
6. Coolant temperature control
7. Revolution Counter
8. Gear indicator
9. 24-hour clock
10. Shift indicator
11. Speed display
12. Odometer
13. Fuel indicator
STRUMENTAZIONE
1. Indicatore di direzione
2. Spia del motore
3. Controllo del numero di
giri al minimo
4. Controllo della pressione
dell‘olio
5. Indicatore abbagliante
6. Controllo della temperatu-
ra del refrigerante
7. Contagiri
8. Indicatore di marcia
9. Orologio 24 ore
10. Indicatore di spostamento
11. Visualizzazione della ve-
locità
12. Contachilometri
13. Indicatore del carburante
1 2 3 4 5 6 7 8
9
10
11
12
13
Strumentazione e funzioni di controllo
Instrumente und Bedienung
Instrument and control functions
Funcionamiento de los mandos de control
Fonctions des instruments et des commandes
Instrumenten en controlefuncties
12 MONTE125 | MONTE PRO125
ITALIANOITALIANO DEUTSCHDEUTSCH ENGLISHENGLISH ESPAÑOLESPAÑOL FRANÇAISFRANÇAIS NEDERLANDSNEDERLANDS
GRUPO DE INSTRUMENTOS
1. Señal de giro
2. Luz indicadora del motor
3. Control de la velocidad de
ralentí
4. Comprobación de la presión
del aceite
5. Indicador de luz alta
6. Control de la temperatura
del refrigerante
7. Contador de Revoluciones
8. Indicador de marcha
9. Reloj de 24 horas
10. Indicador de cambio
11. Pantalla de velocidad
12. Odómetro
13. Indicador de combustible
GROUPE D‘INSTRUMENTS
1. Clignotant
2. Témoin lumineux du moteur
3. Contrôle de la vitesse de
ralenti
4. Contrôle de la pression
d‘huile
5. Indicateur de faisceau de
route
6. Contrôle de la température
du liquide de refroidissement
7. Compteur de révolutions
8. Indicateur de vitesse
9. Une horloge de 24 heures
10. Indicateur d‘évolution
11. Affichage de la vitesse
12. Odomètre
13. Indicateur de carburant
1 2 3 4 5 6 7 8
9
10
11
12
13
13
INSTRUMENTENCLUSTER
1. Richtingaanwijzer
2. Motorindicatielampje
3. Controle van de stationaire
snelheid
4. Oliedrukcontrole
5. Grootlichtindicator
6. Koelvloeistoftemperatuurre-
geling
7. Revolutie Teller
8. Versnellingsindicator
9. 24-uursklok
10. Verschuivingsindicator
11. Snelheidsweergave
12. Kilometerteller
13. Brandstofindicator
ITALIANOITALIANO DEUTSCHDEUTSCH ENGLISHENGLISH ESPAÑOLESPAÑOL FRANÇAISFRANÇAIS NEDERLANDSNEDERLANDS
Il tachimetro ha 2 tasti - „Adjust“
& „Select“. Con il tasto „Adjust“
si può commutare tra ODO,
TRIP e velocità massima. Con il
tasto „Select“ è possibile rego-
lare l‘orologio.
OROLOGIO
L‘ora viene impostata con il
tasto „Select“. Basta tenere
premuto il pulsante per alcuni
secondi e l‘indicazione dell‘ora
inizia a lampeggiare. Seleziona-
re ora l‘ora desiderata premen-
do il tasto „Select“ e confer-
mare la selezione premendo il
tasto „Adjust“. Se ora si preme
nuovamente il tasto „Seleziona“,
l‘indicazione dei minuti lam-
peggia. Ora selezionare anche
i minuti desiderati premendo
il tasto „Select“ e confermare
la selezione premendo il tasto
„Adjust“.
CONTACHILOMETRI TOTALI
ODO
Il contachilometri totale (ODO)
mostra la distanza totale per-
corsa in km/miglio.
Der Tacho verfügt über 2 Tasten
- „Adjust“ & „Select“. Mit der
„Adjust“-Taste, lässt es sich zwi-
schen ODO, TRIP und Maximal
Geschwindigkeit umschalten. Mit
der „Select“-Taste, kann die Uhr
eingestellt werden.
UHR
Die Uhrzeit wir mit der „Select“-
Taste eingestellt. Dafür einfach
die Taste für ein paar Sekunden
halten und die Stundenanzeige
fängt zu blinken an. Jetzt mit
drücken der „Select“-Taste die
gewünschte Stunde selektieren
und mit einem Drücker auf die
„Adjust“-Taste die Auswahl be-
stätigen. Drücken Sie nun die
„Select“-Taste erneut, blinkt die
Minutenanzeige. Jetzt ebenfalls
mit drücken der „Select“-Taste
die gewünschten Minuten se-
lektieren und mit einem Drücker
auf die „Adjust“-Taste die Aus-
wahl bestätigen.
GESAMTKILOMETERZÄHLER
ODO
Der Gesamtkilometerzähler
(ODO) zeigt die insgesamt zu-
rückgelegte Wegstrecke in km/
meilen an.
The speedometer has 2 but-
tons - „Adjust“ & „Select“. With
the „Adjust“ button, it can be
switched between ODO, TRIP
and maximum speed. With the
„Select“ button, the clock can
be adjusted.
CLOCK
The time is set with the „Select“
key. Simply hold the button for
a few seconds and the hour
display will start flashing. Now
select the desired hour by pres-
sing the „Select“-key and con-
firm the selection by pressing
the „Adjust“-key. Now press the
„Select“-key again, the minute
display will start flashing. Now
select the desired minutes by
pressing the „Select“-key and
confirm the selection by pres-
sing the „Adjust“-key.
TOTAL ODOMETER ODO
The total odometer (ODO)
shows the total distance travel-
led in km/mile.
Strumentazione e funzioni di controllo
Instrumente und Bedienung
Instrument and control functions
Funcionamiento de los mandos de control
Fonctions des instruments et des commandes
Instrumenten en controlefuncties
14 MONTE125 | MONTE PRO125
ITALIANOITALIANO DEUTSCHDEUTSCH ENGLISHENGLISH ESPAÑOLESPAÑOL FRANÇAISFRANÇAIS NEDERLANDSNEDERLANDS
. El velocímetro tiene 2 botones:
„Ajustar“ y „Seleccionar“. Con
el botón „Ajustar“, se puede
cambiar entre ODO, TRIP y ve-
locidad máxima. Con el botón
„Seleccionar“, el reloj puede ser
ajustado.
RELOJ
La hora se ajusta con el botón
„Seleccionar“. Sólo mantenga
el botón durante unos segun-
dos y la pantalla de la hora
comenzará a parpadear. Ahora
seleccione la hora deseada pul-
sando el botón „Seleccionar“ y
confirme la selección pulsando
el botón „Ajustar“. Si ahora pre-
siona de nuevo el botón „Se-
lect“, la pantalla de los minutos
parpadeará. Ahora seleccione
también los minutos deseados
pulsando la tecla „Select“ y
confirme la selección pulsando
la tecla „Adjust“.
EL ODÓMETRO TOTAL ODO
El odómetro total (ODO) mu-
estra la distancia total recorrida
en km/milla.
L‘indicateur de vitesse a 2 bou-
tons - „Ajuster“ & „Sélection-
ner“. Le bouton „Adjust“ permet
de passer de ODO, TRIP à la
vitesse maximale. Avec le bou-
ton „Select“, l‘horloge peut être
ajustée.
HORLOGE
L‘heure est réglée à l‘aide du
bouton „Select“. Il suffit de
maintenir le bouton enfoncé
pendant quelques secondes
pour que l‘affichage de l‘heure
se mette à clignoter. Sélection-
nez maintenant l‘heure souhai-
tée en appuyant sur le bouton
„Select“ et confirmez la sélec-
tion en appuyant sur le bou-
ton „Adjust“. Si vous appuyez à
nouveau sur le bouton „Select“,
l‘affichage des minutes clignote.
Sélectionnez maintenant égale-
ment les minutes souhaitées en
appuyant sur la touche „Select“
et confirmez la sélection en ap-
puyant sur la touche „Adjust“.
ODOMÈTRE TOTAL ODO
L‘odomètre total (ODO) indique
la distance totale parcourue en
km/mile.
De snelheidsmeter heeft 2
knoppen - „Aanpassen“ & „Kie-
zen“. Met de knop „Adjust“ kan
worden omgeschakeld tussen
ODO, TRIP en maximale snel-
heid. Met de knop „Select“ kan
de klok worden aangepast.
KLOK
De tijd wordt ingesteld met de
knop „Select“. Houd de knop
enkele seconden ingedrukt
en de uurweergave begint te
knipperen. Selecteer nu het
gewenste uur door op de to-
ets „Selecteren“ te drukken en
bevestig de keuze door op de
toets „Aanpassen“ te drukken.
Als u nu weer op de toets
„Selecteren“ drukt, knippert de
minuutweergave. Selecteer nu
ook de gewenste minuten door
op de toets „Selecteren“ te
drukken en bevestig de keuze
door op de toets „Aanpassen“
te drukken.
TOTALE ODOMETER ODO
De total odometer (ODO) ge-
eft de totale afgelegde afstand
weer in km/mijl.
15
ITALIANOITALIANO DEUTSCHDEUTSCH ENGLISHENGLISH ESPAÑOLESPAÑOL FRANÇAISFRANÇAIS NEDERLANDSNEDERLANDS
MISURATORE DI ESCURSIONE
TRIP
Il Trip Meter (TRIP) mostra la
distanza attualmente percorsa
in km/miglio. Il parzializzato-
re può essere resettato con il
tasto „Adjust“. Per fare questo,
il pulsante deve essere tenuto
premuto per alcuni secondi.
VISUALIZZAZIONE DELLA VE
LOCITÀ
Il display della velocità indica la
velocità attuale in km/h o MPH.
VELOCITÀ MASSIMA
Premendo il tasto „Adjust“ si ac-
cede alla visualizzazione della
velocità massima. Questo indica
la velocità massima raggiunta.
CONTATORE DI VELOCITÀ
Il contatore dei giri mostra il
regime di rotazione attuale del
motore.
INDICATORE DI MARCIA
Mostra l‘ingranaggio attualmen-
te impegnato.
TAGESKILOMETERZÄHLER
TRIP
Der Tageskilometerzähler (TRIP)
zeigt die momentan zurückge-
lete Wegstrecke in km/meilen
an. Der Tageskilometerzähler
kann mit der „Adjust“-Taste zu-
rückgesetzt werden. Dazu muss
die Taste ein paar Sekunden
gehalten werden.
GESCHWINDIGKEITSANZEIGE
Die Geschwindigkeitsanzeige
zeigt die aktuelle Geschwindig-
keit in km/h oder MPH an.
MAXIMAL GESCHWINDIGKEIT
Durch drücken der „Adjust“-Tas-
te gelangen Sie auf die maximal
Geschwindigkeitsanzeige. Diese
zeichnet die höchste erreichte
Geschwindigkeit an.
TOURENZÄHLER
Der Tourenzähler zeigt die aktu-
elle Motordrehzahl an.
GANGANZEIGE
Zeigt den aktuell eingelegten
Gang an.
TRIP METER TRIP
The Trip Meter (TRIP) shows the
currently travelled distance in
km/mile. The trip meter can be
reset with the „Adjust“ button.
To do so, hold the button for a
few seconds.
SPEED DISPLAY
The speed display shows the
current speed in km/h or MPH.
MAXIMUM SPEED
By pressing the „Adjust“ key you
reach the maximum speed dis-
play. This indicates the highest
reached speed.
SPEED COUNTER
The revolution counter shows
the current engine speed.
GEAR INDICATOR
Shows the currently engaged
gear.
Strumentazione e funzioni di controllo
Instrumente und Bedienung
Instrument and control functions
Funcionamiento de los mandos de control
Fonctions des instruments et des commandes
Instrumenten en controlefuncties
16 MONTE125 | MONTE PRO125
ITALIANOITALIANO DEUTSCHDEUTSCH ENGLISHENGLISH ESPAÑOLESPAÑOL FRANÇAISFRANÇAIS NEDERLANDSNEDERLANDS
MEDIDOR DE VIAJE TRIP
El medidor de viaje (TRIP) mu-
estra la distancia recorrida actu-
almente en km/milla. El medidor
de recorrido se puede reajustar
con el botón „Adjust“. Para ello,
hay que mantener el botón pul-
sado durante unos segundos.
PANTALLA DE VELOCIDAD
La pantalla de velocidad mues-
tra la velocidad actual en km/h
o MPH.
VELOCIDAD MÁXIMA
Al pulsar el botón „Adjust“, se
puede acceder a la pantalla de
velocidad máxima. Esto indica
la mayor velocidad alcanzada.
CONTADOR DE VELOCIDAD
El contador de viajes muestra la
velocidad actual del motor.
INDICADOR DE MARCHA
Muestra la marcha actualmente
conectada.
COMPTEUR DE VOYAGE
TRIP
Le Trip Meter (TRIP) indique la
distance actuellement parcou-
rue en km/mile. Le compteur
journalier peut être réinitialisé à
l‘aide du bouton „Ajuster“. Pour
ce faire, il faut maintenir le bou-
ton enfoncé pendant quelques
secondes.
AFFICHAGE DE LA VITESSE
L‘affichage de la vitesse indique
la vitesse actuelle en km/h ou
en MPH.
VITESSE MAXIMALE
En appuyant sur le bouton
„Ajuster“, vous pouvez accéder
à l‘affichage de la vitesse maxi-
male. Ceci indique la vitesse la
plus élevée atteinte.
COMPTEUR DE VITESSE
Le compteur de trajet indique la
vitesse actuelle du moteur.
INDICATEUR DE VITESSE
Indique le rapport de vitesse
actuellement engagé.
RITMETER TRIP
De Ritmeter (TRIP) toont de
momenteel afgelegde afstand
in km/mijl. De dagteller kan
worden gereset met de knop
„Adjust“. Om dit te doen, moet
de knop enkele seconden wor-
den ingedrukt.
SNELHEIDSWEERGAVE
De snelheidsweergave toont
de huidige snelheid in km/h of
MPH.
SNELHEIDSWEERGAVE
MAXIMALE SNELHEID
Door op de knop „Adjust“ te
drukken, krijgt u toegang tot de
weergave van de maximums-
nelheid. Dit geeft de hoogst
bereikte snelheid aan.
SNELHEIDSTELLER
De tripteller geeft het huidige
motortoerental aan.
SCHAKELINDICATOR
Toont de momenteel ingescha-
kelde uitrusting.
17
ITALIANOITALIANO DEUTSCHDEUTSCH ENGLISHENGLISH ESPAÑOLESPAÑOL FRANÇAISFRANÇAIS NEDERLANDSNEDERLANDS
Schaltelemente, auf der linken
Seite des Lenkers.
LICHTSCHALTER 1
Hat zwei Positionen:
Unten, Abblendlicht
Oben, Fernlicht.
Damit dieser Schalter funk-
tioniert, müssen Sie zuerst den
Zündschlüssel in die Startposi-
tion geben.
SCHALTER SIGNALHUPE 2
SCHALTER BLINKLEUCHTEN 3
Mitte: Blinkleuchten ausgeschaltet
Rechts: rechte Blinkleuchten
eingeschaltet
Links: linke Blinkleuchten einge-
schaltet
Handle bar switches located at
the left side of the handlebar
LIGHT SWITCHES 1
It has two positions:
Down, low beam
Up, high beam.
To make this switch work, place
the contact key at starter posi-
tion.
HORN BUTTON 2
TURN LIGHT SWITCHES 3
Center: Turn light off
Right: Right side turn signal
lights “ON”
Left: Left side turn signal lights
“ON”
Gruppo commutatore, situato
nel lato sinistro del manubrio.
COMANDO LUCI 1
Possiede due posizioni:
Sotto, luce anabbagliante
Sopra, luce abbagliante.
Affinché questo comando fun-
zioni, prima inserire la chiave di
contatto in posizione d’avvia-
mento.
PULSANTE ACUSTICO CLAC
SON 2
COMANDO INTERMITTENTI 3
Centro: Intermittenti spenti
Destra: Intermittenti lato destro
accesi
Sinistra: Intermittenti lato sinistro
accesi
1
2
3
Strumentazione e funzioni di controllo
Instrumente und Bedienung
Instrument and control functions
Funcionamiento de los mandos de control
Fonctions des instruments et des commandes
Instrumenten en controlefuncties
18 MONTE125 | MONTE PRO125
ITALIANOITALIANO DEUTSCHDEUTSCH ENGLISHENGLISH ESPAÑOLESPAÑOL FRANÇAISFRANÇAIS NEDERLANDSNEDERLANDS
Schakelaars voor de stuurstang
bevinden zich aan de linkerkant
van het stuur.
LICHTSCHAKELAARS 1
Het heeft twee posities:
Omlaag, dimlicht
Omhoog, grootlicht.
Om deze schakelaar te laten
werken, plaatst u de contacts-
leutel op de startpositie.
HOORNKNOP 2
LICHTSCHAKELAARS 3 DRAAIEN
Centrum: Licht uitschakelen
Rechts: Richtingaanwijzers aan
de rechterkant „ON“.
Links: linker richtingaanwijzers
„AAN“.
Grupo conmutador, situado en
el lado izquierdo del manillar.
MANDO LUCES 1
Tiene dos posiciones:
Abajo, luz de cruce
Arriba, luz intensiva.
Para que este mando funcione,
poner antes la llave de contac-
to en posición de arranque.
PULSADOR ACÚSTICO CLA
XON 2
MANDO INTERMITENTES 3
Centro: Intermitentes apagados
Derecha: Intermitentes lado de-
recho encendidos
Izquierdo: Intermitentes lado iz-
quierdo encendidos
Groupe commutateur, situé sur
le côté gauche du guidon.
COMMANDE ÉCLAIRAGE 1
Il existe deux possibles positions:
Vers le bas, feux de croisement
Vers le haut, feux de route.
Pour que cette commande
fonctionne, il est nécessaire de
positionner la clef de contact
sur le point de démarrage.
BOUTON ACOUSTIQUE KLA
XON 2
COMMANDE CLIGNOTANTS 3
Centre: Clignotants éteints
Droite: Clignotants coté droit
allumés
Gauche: Clignotants coté gau-
che allumés
1
2
3
19
ITALIANOITALIANO DEUTSCHDEUTSCH ENGLISHENGLISH ESPAÑOLESPAÑOL FRANÇAISFRANÇAIS NEDERLANDSNEDERLANDS
SCHLÜSSELSTELLUNG
- Zündung ausgeschaltet
- Zündung eingeschaltet
- Lenkersperre - Drehen sie
den Lenker ganz nach rechts
oder links. Drücken Sie den
Zündschlüssel ins Zündschloss
und drehen Sie ihn gedrückt auf
die Position . Zum entsperren
des Lenkers, drehen Sie den
Schlüssel auf die Position .
KEY POSITION
- ignition switched off
- ignition switched on
- Handlebar Lock - Turn the
handlebars fully to the right or
left. Press the ignition key into
the ignition lock and turn it to
the position while keeping it
pressed. To unlock the handle-
bars, turn the key to position
.
POSIZIONE DELLA CHIAVE
- accensione disinserita
- accensione inserita
- Bloccaggio del manubrio
- Ruotare il manubrio comple-
tamente a destra o a sinistra.
Premere la chiave di accensione
nel blocchetto di accensione e
ruotarla in posizione tenen-
dola premuta. Per sbloccare il
manubrio, ruotare la chiave in
posizione .
In nessun caso girare
la chiave nella posizione
durante la marcia.
Drehen Sie den Schlüs-
sel nie auf die Position
wenn das Motorrad in
Fahrt ist.
Do not turn the key to
the position while
the engine is running.
Strumentazione e funzioni di controllo
Instrumente und Bedienung
Instrument and control functions
Funcionamiento de los mandos de control
Fonctions des instruments et des commandes
Instrumenten en controlefuncties
20 MONTE125 | MONTE PRO125

This manual suits for next models

1

Other Malaguti Motorcycle manuals

Malaguti XAM CE User manual

Malaguti

Malaguti XAM CE User manual

Malaguti MADISON 300 2018 User manual

Malaguti

Malaguti MADISON 300 2018 User manual

Malaguti CIAK MASTER 50-4T User guide

Malaguti

Malaguti CIAK MASTER 50-4T User guide

Malaguti F18 WARRIOR User guide

Malaguti

Malaguti F18 WARRIOR User guide

Malaguti Dune X 125 Guide
Malaguti

Malaguti Dune X 125 Guide

Malaguti XTM 50 Instruction manual

Malaguti

Malaguti XTM 50 Instruction manual

Malaguti XSM125 2018 User manual
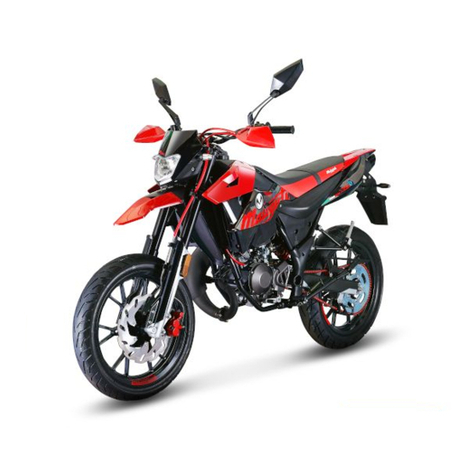
Malaguti

Malaguti XSM125 2018 User manual

Malaguti SPIDER MAX 500 User manual

Malaguti

Malaguti SPIDER MAX 500 User manual

Malaguti X3Motard Instruction manual

Malaguti

Malaguti X3Motard Instruction manual

Malaguti F12R L.C. 50 cc Instruction manual

Malaguti

Malaguti F12R L.C. 50 cc Instruction manual

Malaguti RST125 2018 User manual

Malaguti

Malaguti RST125 2018 User manual

Malaguti MADISON 125cc User manual

Malaguti

Malaguti MADISON 125cc User manual

Malaguti GRIZZLY User manual

Malaguti

Malaguti GRIZZLY User manual

Malaguti CNK 50 DRAKON Instruction manual

Malaguti

Malaguti CNK 50 DRAKON Instruction manual

Malaguti Dune 125 User manual

Malaguti

Malaguti Dune 125 User manual

Malaguti Fast Time F-10 50cc Operating instructions

Malaguti

Malaguti Fast Time F-10 50cc Operating instructions

Malaguti centro 125 ie User manual

Malaguti

Malaguti centro 125 ie User manual

Malaguti CNK 50 DRAKON Instruction manual

Malaguti

Malaguti CNK 50 DRAKON Instruction manual

Malaguti XTM 50 2007 User manual

Malaguti

Malaguti XTM 50 2007 User manual

Malaguti centro 160 ie User manual

Malaguti

Malaguti centro 160 ie User manual

Malaguti MADISON 125 User manual

Malaguti

Malaguti MADISON 125 User manual

Malaguti Blog 126 User manual

Malaguti

Malaguti Blog 126 User manual

Malaguti Drakon 50 User manual

Malaguti

Malaguti Drakon 50 User manual

Malaguti PHANTOM F12 User manual

Malaguti

Malaguti PHANTOM F12 User manual

Popular Motorcycle manuals by other brands

Yamaha TT-230RA owner's manual

Yamaha

Yamaha TT-230RA owner's manual

Motor Trike ADVENTURE owner's manual

Motor Trike

Motor Trike ADVENTURE owner's manual

Moto Morini 500 owner's manual

Moto Morini

Moto Morini 500 owner's manual

Yamaha XV17ASA owner's manual

Yamaha

Yamaha XV17ASA owner's manual

Yamaha YXZ1000RSS owner's manual

Yamaha

Yamaha YXZ1000RSS owner's manual

BMW K 1200 LT manual

BMW

BMW K 1200 LT manual

KTM 200 Duke 2016 owner's manual

KTM

KTM 200 Duke 2016 owner's manual

Yamaha MT09N owner's manual

Yamaha

Yamaha MT09N owner's manual

KTM 390 ADVENTURE 2021 owner's manual

KTM

KTM 390 ADVENTURE 2021 owner's manual

Yamaha DT125R 2004 owner's manual

Yamaha

Yamaha DT125R 2004 owner's manual

Coleman Powersports CT200U owner's manual

Coleman Powersports

Coleman Powersports CT200U owner's manual

APRILIA SCARABEO 100 - brochure

APRILIA

APRILIA SCARABEO 100 - brochure

Benelli TnT1130 Use and maintenance

Benelli

Benelli TnT1130 Use and maintenance

Suzuki drz 400E Service manual

Suzuki

Suzuki drz 400E Service manual

KSR GRS 125 user manual

KSR

KSR GRS 125 user manual

Yamaha STAR XVS950 owner's manual

Yamaha

Yamaha STAR XVS950 owner's manual

Benelli BN600R 2014 Service station manual

Benelli

Benelli BN600R 2014 Service station manual

Yamaha YZFR6X(C) owner's manual

Yamaha

Yamaha YZFR6X(C) owner's manual

manuals.online logo
manuals.online logoBrands
  • About & Mission
  • Contact us
  • Privacy Policy
  • Terms and Conditions

Copyright 2025 Manuals.Online. All Rights Reserved.