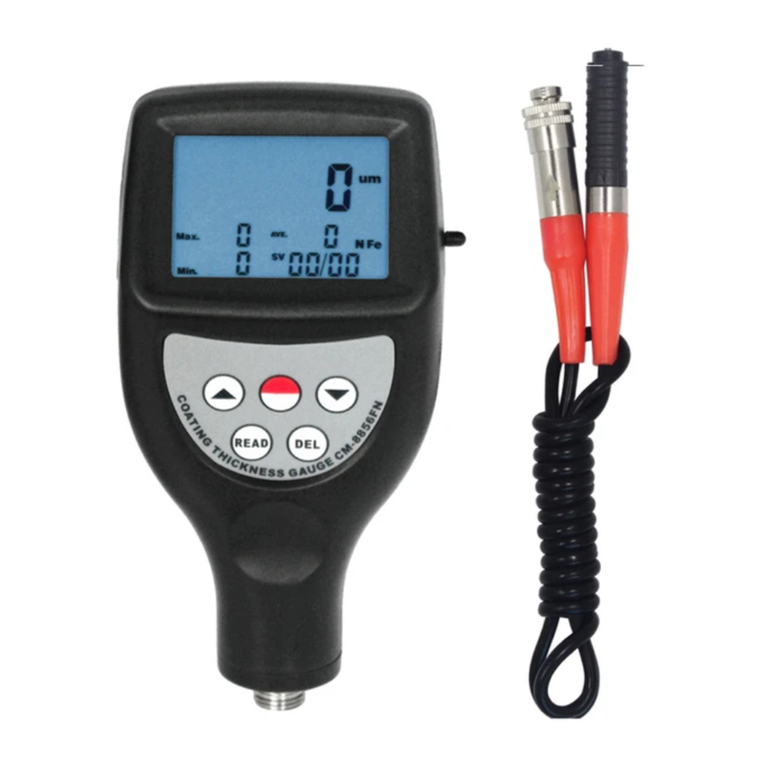
* Number of Readings taken
To clear the statistical data when starting
a new set of data, just press and release
the ZERO key. In the measurement mode
marked by SV, last value could be deleted
singly by pressing the 'DEL’ key and re-
statistics is calculated and displayed itself.
6 . S T O R I N G A N D R E C A L L I N G
READINGS
6.1 Readings taken are automatically
saved to the memory of the gauge.
The memorized data can be browsed
by pressing and releasing the 'RD'
key to enter into the browsing state
marked by 'READ' on the display.
6.2 In the browsing state, all the readings
memorized can be recalled on the
display by depressing the plus key
' ' or the minus key ' '.
6.3 To delete singly a memorized value
in the memory, just locate the reading
to be deleted by the key ' ' or ' ' ,
then press and release the key 'DEL'.
If there is an "Err0" on the display, it
indicates there is no reading to delete
a n y m o r e . 6 . 4 To q u i t t o t h e
measurement state, just depress the
'ZERO' key.
7. DELETING READINGS
7.1 To delete a reading on the display, just
press the key 'DEL' no mater in the
measurement state marked 'SV' or in
the browsing state marked by 'RD'.
Go into the browsing state by 'RD'.
Go into the browsing state by pressing
the 'READ' key while entering the
measurement state by pressing the
'ZERO' key.
7.2 To delete all the readings in the
memory, just depress the 'DEL' key in
the measurement state marked by 'SV'
on the display for about 4 seconds till
the number of readings memorized
becomes 0.
8. TRA N S F ER R I N G REA D I N GS
TO A COMPUTER
8.1 Install the RS232 software on your
PC, please always click 'the continue'
button in the installing process.
8.2 Connect your gauge to your PC
using the optional cable.
8.3 Switch on your gauge and ensure the
Reading Screen is displayed.
8.4 Start the software and follow the
instruc tions in c luded with the
software Demo.EXE.
9. CALIBRATION
9.1 Zero adjustment
Zero adjustment for 'Fe' and 'NFe'
should be carried out separately. Take
the iron substrate if 'Fe' on Display,
while take the aluminium substrate if
'NFe' on the Display. Place the probe
(3-1) on the substrate steadily. Press
the zero key (3-3) and '0' will be on
the Display before lifting the probe.
If pressing the ZERO key but the
probe is not placed on the substrate or
an unc o at ed st an d ar d. T h e z er o
adjustment is invalid.
10.4 If the instrument is not to be used for
any extended period , remove batteries.
11. CONSIDERATIONS
11.1 In order to weaken the influence of
t h e m e a s u r e d m a t e r i a l o n t h e
acc ur acy of mea su rem en t, it is
recommended that the calibrations
should be done on the uncoated
material to be measured.
11.2 Probes will eventually wear. Probe
life will depend on the number of
m e a s u r e m e n t s t a k e n a n d h o w
abrasive the coating is. Replacement
separate can be fitted by qualified
persons only.
12. RESTORE FACTORY SETTINGS
12.1 When to restore
It is recommended to restore factory
settings in the one of following cases.
A. The gauge does not measure any more.
B. Measurement accuracy is degraded
c a u s e d B y e n v i r o n m e n t a l
conditions change greatly.
12.2 How to restore?
9.2 Select an appropriate calibration foil
according to your measurement range.
9.3 Place the standard foil selected onto
the substrate or the uncoated standard.
9.4 Place the sensor (3-1) mildly onto the
standard foil and lift. The reading on
the display is the value measured. The
di sp l ay ed read in g va lu e can be
adjusted by pressing the plus key (3-4)
or minus key (3-5) while the probe is
away f rom th e subst rat e or th e
measured body.
9.5 Repeat step 9.4 until the result is correct.
10. BATTERY REPLACEMENT
10.1 When it is necessary to replace the
battery, i.e. battery voltage less than
approx. 2.2V , the battery symbol ' '
will appear on the Display.
10.2 Slide the Battery Cover ( Fig. 1 ,
3-9) away from the instrument and
remove the batteries.
10 . 3 In s ta l l th e b at t er i es (2x 1 .5 V
AAA/UM-4) correctly into the case.
Restore factory settings includes 'Fe'
setting and 'NFe' setting. You can
restore one of them or both of them
respectively. Please follow procedures
below to restore factory setting.
12.2.1 Please note the symbol on the
display is 'Fe' or 'NFe'.If 'Fe' is on the
display,the operation below is restoring
the factory setting for 'Fe' type,and if
'NFe' is on the display,the operation
below is restoring the factory setting
for 'NFe' type.
12.2.2 Depress Power key and not release
it till 'CAL' appears on the Display. It
is about 12 seconds from starting
depressing Power key.
12.2.3 when F:H or nF:H is on Display,
l i f t t h e p r o b e t o m o r e t h a n 5
centimeters,then press the Zero key
a g a i n a n d t h e g a u g e r e t u r n t o
me a s u r e m e n t s t a t e . Th e f ac t o r y
setting is restored. Remember, to
restore setting is restored. Remember,
to rest o re fact ory set ting sh ould be
done within 6 seconds at every stage. Or
the gauge will quit itself and restoration is
invalid.
13. Notes
13.1 Settings includes restoring factory
setting, unit setting, S/C setting,
whi ch sho u ld be do ne w ith in 6
seconds at every stage, or the gauge
will quit itself and keep its status
before.
13.2 It is strongly recommended that no
changes should be made to the value
of Ln (controlled by power key, It
takes about 14 seconds from starting
depressing Power key. Its value can be
changed by plus/minus key after
displaying Ln and releasing the power
key. Store its value and quit by
pr e s s i n g Z e r o k e y. ) wh i c h w i l l
seriously affect the accuracy. Its
v a l u e c a n b e a d j u s t e d b y
professional persons only under the
cases of replacing a new probe or
m a k i n g t h e g a u g e m o r e a c c u r a t e .
Generally, the larger the value of Ln,
the smaller the reading on a same
thickness . Alittle variation of value
of Ln will cause a great change in
reading at high end (e.g at 500
um/20mil).The rules to adjust the
value of Ln are as follow:
A. Reading at low end can be adjusted to
the exact value by the plus or minus
key.
B. To enlarge the Ln if reading at low end
(e.g at 51 um) is ok but reading at
high end (e.g at 432 um) is too large.
On the coutrary, to decrease the Ln if
reading at low end (e.g at 51 um)is ok
but reading at high end (e.g at 432
um) is too small.
C. Repeat procedures from A to B till the
readings on the every standard foil
are satisfying the accuracy.


