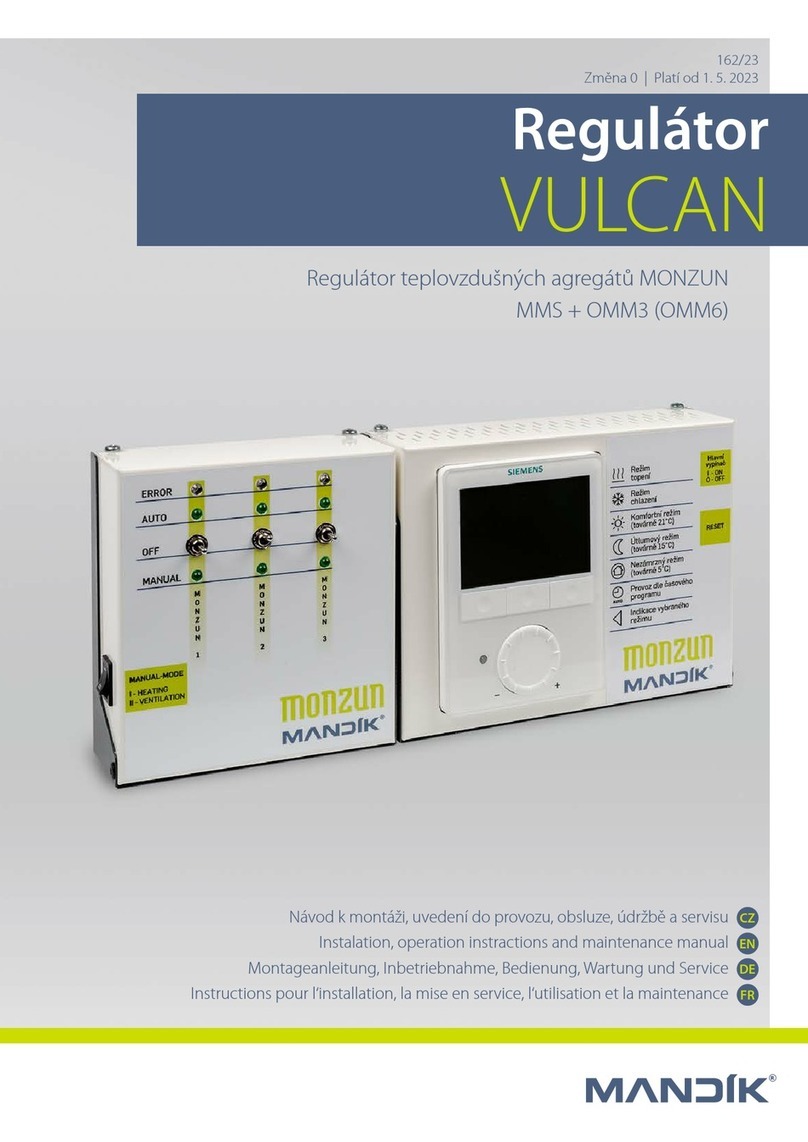
Mandik MMC User manual


2
3
4
4
1. Externí čidlo....................................................................................................................….....
5
2. Funkce proti namrznutí...............................................................................................….........
5
3. Kalibrace teploty...............……………….................................................................................
5
5
5
7
8
8
1. External sensor...............................................................................................................….....
9
2. Anti.freeze function.....................................................................................................….........
9
3. Temperature calibration....……………….................................................................................
9
9
9
11
12
12
1. Externer Senzor..............................................................................................................….....
13
2. Frostschutz Funktion...................................................................................................….........
13
3. Kalibrierung der Temperatur....………….................................................................................
13
13
13

3
1) Ovládací skříňka MMC je určena výlučně k užití v interiéru. Měla by být umístěna na vnitřní stěnu asi
1,5m nad podlahu, do prostor, kde se budou projevovat změny v celkové teplotě místnosti díky
volně cirkulujícímu vzduchu. Nemontovat nad zdroje tepla (televizní přijímač, topidlo, lednice apod.), ani
tam, kde by byla vystavena přímým slunečním paprskům, průvanu, záření od přístrojů, ani do vlhkého
prostředí.
Namontujte ovládací skříňku MMC pomocí hmoždinek a vrutů na zvolené místo.
Regulátor MMC obsahuje čidlo teploty, a proto musí být v pobytové zóně. Je možné připojit externí
teplotní čidlo. Zapojte regulátor a ohřívač Monzun dle příslušného schéma zapojení (viz. Obr. 4).
2) Po připojení kabelů vycvakneme pomocí šroubováku západky. Termostat poté do instalační krabičky
přichytíme pomocí přiložených šroubů (viz. Obr. 1, 2).
M
V
V
1) Regulátor se zapíná a vypíná stisknutím tlačítka
2) Dlouhým stisknutím obou tlačítek se přepneme do možnosti nastavení času a dnu v týdnu.
Tlačítkem přepínáme mezi nastavení hodin, minut a dnu v týdnu. Stiskem tlačítka opustíme toto
nastavení.
3) Tlačítkem přepínáme mezi vytápěním a ventilací. Pokud zvolíme ventilaci, zobrazí se na levé straně
displeje nápis FAN, a rozběhne se vzduchový ventilátor. Pokud se vzduchový ventilátor neuvede do
provozu zkontrolujte zapojení případně kontaktujte servisní organizaci nebo výrobce.
4) Pokud zvolíme režim vytápění, zobrazí se na levé straně displeje nápis HEAT, poté můžeme tlačítkem
měnit výkon hořáku. Regulátor má 8 stupňů regulace, nejmenší výkon 1 odpovídá 60% výkonu
hořáku teplovzdušného ohřívače MONZUN, nejvyšší výkon 8 odpovídá 100% výkonu hořáku. Stupňe
výkonu lze zvolit manuálně, v levém horním rohu obrazovky se objeví nápis MANUAL. Pokud přepneme
na automatický režim, v levém horním rohu obrazovky se objeví nápis AUTO. Výkon hořáku se poté
mění automaticky v závislosti na naměřené a nastavené teplotě. Pokud ohřívač topí, zobrazí se na
displeji pod požadovanou vytápěnou hodnotou symbol ventilu . Pokud se ohřívač MONZUN neuvede
do provozu a rozsvítí se červený podsvit u tlačítka RESET, stisknutím tohoto tlačítka ohřívač
restartujeme. Pokud se jednotka neuvede do provozu ani na třetí pokus, kontaktujte servisní organizaci
nebo výrobce.
5) Stisknutím jednoho z tlačítek nastavujeme požadovanou teplotu. Pod touto hodnotou je zobrazen
symbol , to znamená, že se nacházíme v manuálním módu (vytápíme na nastavenou teplotu).
6) Dlouhým stiskem tlačítka přepínáme mezi manuálním módem vytápění a mezi týdením programem.
V
V
V
V

4
1) Do týdenního programu se vstoupí dlouhým stiskem tlačítka .
2) Místo času se na dispeji objeví nápis LOOP, šipkami zvolíme požadovaný formát týdnu.
a) Nastavíme-li číslo 5, budeme 5 dní v týdnu vytápět podle nastaveného programu a teploty pro sobotu
a neděli nastavujeme zvlášť. Formát dnů v týdnu je 5+2.
b) Nastavíme-li číslo 6, budeme 6 dní v týdnu vytápět podle nastaveného programu a teploty pro neděli
nastavujeme zvlášť. Formát dnů v týdnu je 6+1.
c) Nastavíme-li číslo 7, budeme všechny dny v týdnu vytápěn stejně. Formát dnů v týdnu je 7.
3) Den v týdnu můžeme rozdělit na 6 událostí (6 úseků o různých teplotách), pokud nastavíme formát 6+1
nebo 7, použijeme pro víkend rozdělení dne pouze na dva úseky. Po zvolení formátu týdnu
přeskakujeme tlačítkem mezi jednotlivými časovými úseky a tlačítkem mezi nastavením teploty
a času.
4) Nastavování probíhá podle následující tabulky 4.1. Hodnoty teplot a časů jsou v tabulce přednastaveny.
V
V
Den v týdnu
1 06:00
Nastavení
času
20°C
Nastavení
teploty
2 08:00 15°C
3 11:30 15°C
4 12:30 15°C
5 17:30 22°C
6 22:00 15°C
Víkend 1 08:00 22°C
2 22:00 15°C
V
V
V
V
Do tohoto nastavení můžeme vstoupit když je zařízení vypnuté, podržením současně tlačítka a .
Nastavení se provádí podle následující tabulky 5.1. Tlačítkem přepínáme mezi jednotlivými nastaveními.
Stiskem tlačítka opustíme toto nastavení.
1
ADJ Kalibrace teploty 0 Upravit rozsah: -5 až +5°C
2
CTL Kontrola ventilátoru 0 Uncontrol: 0 control: 1
3
OLT Limit výstupního napětí 10 Upravit rozsah: 5-10V
4
AdH Vyšší komunikační adresa 0 0x00-0xff
5
AdL Nižší komunikační adresa 1 0x00-0xff
6
LTP Ochrana proti nízké teplotě 0 0: off 1: on
7
SEN Výběr senzoru 0 0: zabudovaný senzor
1: externí senzor
8
FAC Reset do továrního nastavení 8 Resetujeme nastavením hodnoty 0
V
V

5
Regulátor MMC umožňuje připojení externího čidla DS18B20. Externí čidlo se připojuje na kontaky označené
jako R, B, Y. Kontakt R je napájení, kontakt B je GND a Y je kontakt pro signál. Poté musíme v pokročilém
nastavení, pod symbolem 7 (SEN), nastavit hodnotu 1, tím přepneme na měření teploty pomocí externího
čidla. Pokud bychom chtěli měřit opět interním senzorem, změníme příslušnou hodnotu zpět na 0.
Pokud je zařízení vypnuto, termostat zařízení automaticky zapne, pokud teplota v místnosti klesne pod 5°C.
Pokud teplota stoupne nad 7°C termostat zařízení automaticky vypne. Tuto funkci lze vypnout v pokročilém
nastavení, pod symbolem 6 (LTP), změnou nastavené hodnoty na 0.
V pokročilém nastavení je možné kalibrovat teplotu, pod symbolem 1 (ADJ). Hodnoty můžeme upravit v
rozsahu od -5 d 5 °C.
Napájecí napětí 230 V AC, 50/60 Hz
Příkon < 1W
Max. zátěžový proud 3 A
Teplota prostředí -5 až 50°C
Typ displeje LCD
Teplotní senzor NTC
Přesnost měření teploty +- 1°C
Rozměry instalační krabičky 95 x 95 x 64 mm

6
R1
R2
Regulace MMC
L
Vent
Valve
N
B
R
Y
GND 0/10V
+
-
wago
FU
Plynový ohřívač MONZUN
CYSY 5Cx0,75
VENTILACE
CHOD
ALARM
TOPIT
PŘEHŘÁTÍ
C C
O O
A A
HH
E E
L1 L1
N N
PE PE
XS
230 V / 50 Hz
PE
CYKY 3x1,5
JYTY-O 4x1
(SYKFY 2x2x0,5)
PE
RESET
RESET
MODULACE 0/10 V
GND
N N
L L
R1 R1
R2 R2
++
- -
DC DC +24 V
PE N L
XR
XM
XP
Svorky označené , , a nejsou součástí termostatu. Jde o signalizační tlačítko RESET, na které se
připojíme přímo pomocí připravených WAGO svorek. Tlačítko má funkci signalizace poruchy (rozsvítí se
červeně) a zároveň deblokační funkci. V případě poruchy podržíme tlačítko po dobu 2-3s, zhasíná červené
podsvícení, a ohřívač MONZUN se restartuje.V instalační krabičce je umístěna pojistka na 2,5 A. Při
připojení napětí 230V z ohřívače MONZUN se namísto svorky připojuje na připravenou WAGO svorku.

7
1) Regulation MMC is designed exclusively for indoor use. It should be placed on the inner wall about 1,5m
above the floor, in areas where changes in the overall room temperature will occur due to free-circulating
air. Do not mount above heat sources (TV, heater, refrigerator, etc.), even where it would be exposed
to direct sunlight, drafts, radiation from devices, or in a humid environment.
Install the MMC regulation to the selected location using dowels and screws.
The MMC control box contains a temperature sensor and must therefore be in the residential zone. It is
possible to connect an external temperature sensor. Connect the MMC regulation and heater MONZUN
according to the wiring diagram see Pic. 4.
2) After connecting the cables, snap out the latch using a screwdriver (see Pic. 1, 2) and disconnect the
cable between the control and power board. Then fix the thermostat into the box using screws, then
reconnect the cable between the control and power board.
M
V
V
1) The controller is switched on and off by pressing the button
2) Hold down both buttons to switch to the option of setting the time and day of the week. Use the
button to change between hour, minute and day setting. Press to exit this setting.
3) Use the button to switch between heating and ventilation mode. If ventilation mode is selected, the
inscription FAN appears on the left side of the display and the air fan starts. If the air fan does not start,
check the wiring eventually contact the service organization or the manufacturer.
4) If you select the heating mode, the inscription HEAT is appears on the left side of the display, then you
can change the burner output power with the button . The controller has 8 levels of regulation, the
lowest output 1 corresponds to 60% of the burner output power of the MONZUN hot air heater, the
highest output 8 corresponds to 100% of the burner output power. These power levels can be selected
manually, the inscription MANUAL appears in the upper left corner of the screen. If you switch to
automatic mode, the inscription AUTO will appear in the upper left corner of the screen. The burner
output power then changes automatically depending on the measured and set temperature. If the heater
is heating, a valve symbol appears on the display below the desired heating value. If the MONZUN
heater does not start and the red backlight of the RESET button lights up, pressing this button will restart
the heater. If the unit does not start up for the third time, contact the service organization or the
manufacturer.
5) Press one of the buttons to set the desired temperature. Below this value, the symbol is
displayed, which means that we are in manual mode (heating to the set temperature).
6) By holding the button you can switch between manual heating mode and weekly program.
V
V
V
V

8
Day of the
week
1 06:00
Time
setting
20°C
Temperature
setting
2 08:00 15°C
3 11:30 15°C
4 12:30 15°C
5 17:30 22°C
6 22:00 15°C
Weekend 1 08:00 22°C
2 22:00 15°C
V
V
V
V
This setting can be entered when the device is switched off by holding down the button and . The
setting is done according to the following table 5.1. Use the button to jump between settings. Leave the
setting by pressing .
1
ADJ Temperature calibration 0
Adjust temperature range: -5 to +5°C
2
CTL Fan control option 0 Uncontrol: 0 control: 1
3
OLT Output voltage limit 10 Adjust range: 5-10V
4
AdH Communication address high 0 0x00-0xff
5
AdL Communication address low 1 0x00-0xff
6
LTP Low temperature protection 0 0: off 1: on
7
SEN Sensor mode 0 0: built-in sensor
1: external sensor
8
FAC Reset to factory seting 8 Reset by setting the value to 0
V
V
1) To enter the weekly program, press and hold the button
2) Instead of time the inscription LOOP appears on the screen, use the to select the week format
a) If we set the number 5, we will heat 5 days a week according to the set program and the temperature
for weekend will be set separately. The format of the week is 5 + 2
b) If we set the number 6, we will heat 6 days a week according to the set program and set the
temperatures for Sunday will be set separately. The format of the week is 6 + 1
c) If we set the number 7, all the days of the week will be heated the same way. The format of the week
is 7.
3) Day of the week can be divided into 6 events (6 sections with different temperatures), if you set the
format of the week to 6 + 1 or 7, the weekend is divided into 2 events. After selecting the week format,
use the button to switch between the individual time periods and the button to switch between
the temperature and time settings.
4) The settings is made according to the following table 4.1. Temperature and time values are preset.
V
V

9
The MMC controller allows the connection of an external DS18B20 sensor. The external sensor is connected
to the contacts marked as R, B, Y. Contact R is power supply, contact B is GND and Y is contact for signal. In
the advanced setting, under the symbol 7 (SEN), set the value 1, to switch to temperature measurement using
an external sensor. If you want to measure again with the internal sensor, change the value back to 0.
When the device is off, the thermostat automatically turns on the device when the room temperature drops
below 5 °C. If the temperature rises above 7 °C, the thermostat automatically switches the unit off. This
function can be deactivated in the advanced setting, under symbol 6 (LTP), by changing the set value to 0.
In advanced settings, it is possible to calibrate the temperature, below the symbol 1 (ADJ). The values can be
adjusted in the range from -5 d 5 °C.
Power voltage 230 V AC, 50/60 Hz
Power input < 1W
Max. load current 3 A
Ambient temperature -5 až 50°C
Display type LCD
Temperature sensor NTC
Temperature measurement accuracy +- 1°C
Installation box dimensions 95 x 95 x 64 mm

10
The terminals marked , , and are not included in the thermostat. This is the RESET signaling button,
to which we connect directly using screws. The button has a fault indication function (lights up red) and a
deblocking function. In the event of a failure, hold the button for 2-3 seconds, the red backlight turns off, and
the MONZUN heater restarts. The fuse (2.5 A) is placed in the installation box. 230V from MONZUN heater
is connected to the prepared WAGO terminal instead of terminal marked as .
R1
R2
Regulation MMC
L
Vent
Valve
N
B
R
Y
GND 0/10V
+
-
wago
FU
Gas hot-air heater MONZUN
CYSY 5Cx0,75
VENTILATION
DEVICE IN HEATING MODE
ALARM
HEATING
OVERHEAT
C C
O O
A A
HH
E E
L1 L1
N N
PE PE
XS
230 V / 50 Hz
PE
CYKY 3x1,5
JYTY-O 4x1
(SYKFY 2x2x0,5)
PE
RESET
RESET
MODULATION 0/10 V
GND
N N
L L
R1 R1
R2 R2
++
- -
DC DC +24 V
PE N L
XR
XM
XP

11
1) Die Steuerung MMC ist nur zur Innenverwendung gedacht. Sie sollte an die Innenwand in einer Höhe
von 1,5 m über dem Fußboden installiert werden auf einen Ort, wo sich die Temperaturänderung, durch
den Luftwechsel erkennbar macht. Diese Position sollte sich außerhalb von Zugluft und Einfluss von
Wärmequellen (Fernseher, Kühlschränke, usw.), an einem schattigen Ort ohne erhöhte Feuchtigkeit,
befinden.
Diese Steuerung beinhaltet einen Temperaturfühler und muss sich somit im Aufenthaltsbereich
befinden - siehe unten. Ein weiterer Temperaturfühler kann noch extern angeschlossen werden.
Befestigen sie die Steuerung durch Schrauben und Dübel an die ausgewählte Position. Verbinden sie
nun die Steuerung mit dem Warmlufterzeuger Monzun gemäß Schaltplan (siehe Abb. 4).
2) Nach Kabelanschluss, wird das Thermostat durch entriegeln der Rasthaken (siehe Abb. 1, 2) geöffnet,
um es an das Unterteil festzuschrauben.
M
V
V
1) Das Steuerung wir durch diesen Knopf Ein- und Ausgeschalten.
2) Durch ein langes drücken dieser Knopfe erscheint die Möglichkeit die Uhrzeit und den Wochentag
einzustellen. Durch diese Taste wird auf Stundnen, Minuten und Wochentage umgeschalten. Mit
dieser Taste wird dieses Menü verlassen.
3) Mit dieser Taste wird zwischen Heizen und Lüften umgeschalten. Wenn Lüften ausgewählt wird,
steht auf der linken Seite des Bildschirms FAN, und der Ventilator wird eingeschalten. Wenn der
Ventilator nicht startet, sind die Verkabelungen zu kontrollieren oder kontaktieren sie ggf. die
Serviceabteilung oder den Hersteller.
4) Wenn Heizen ausgewählt wird, erscheint auf der linken Seite des Bildschirms HEAT, anschließend kann
durch diese Taste die Leistung des Brenner geändert werden. Die Steuerung hat 8 Ebenen der
Leistungsregulierung, die niedrigste Leistung - Ebene 1 entspricht 60% der Brennerleistung des
Warmlufterzeugers MONZUN, die höchste Leistung - Ebene 8 entspricht 100% der Brennerleistung. Die
Leistungsänderung kann manuell/ automatisch stattfinden und es erscheint in der linken Ecke des
Bildschirms MANUAL/ AUTO. Wenn die MONZUN Anlage nicht startet und die rote Kontrollleuchte
leuchtet, drücken sie die RESET - Taste, falls die Anlage nach dem dritten Versuch nicht startet
kontaktieren sie die Serviceabteilung oder den Hersteller
5) Beim Drücken einer dieser Tasten wird die Soll-Temperatur eingestellt. Unter diesem Wert, wird
dieses Symbol angezeigt, das bedeutet, dass der manuelle Betrieb eingeschalten ist (es wird auf
die Soll-Temperatur geheizt).
6) Durch ein langes Drücken der Taste wird zwischen dem manuellem Betrieb und dem Wochen-
programm ausgewählt.
V
V
V
V

12
Wochentag
1 06:00
Uhrzeit
20°C
Temperatur
2 08:00 15°C
3 11:30 15°C
4 12:30 15°C
5 17:30 22°C
6 22:00 15°C
Wochenende
1 08:00 22°C
2 22:00 15°C
V
V
V
V
In diese Einstellung gelangt man, wenn das Gerät ausgeschalten ist und gleichzeitig die Tasten und
gedrückt werden. Die Einstellungen werden gemäß folgender Tabelle 5.1 durchgeführt.
Mit der Taste wird zwischen den einzelnen Einstellungen umgeschalten.
1
ADJ Temperaturkalibrierung 0 Messbereich: -5 bis +5°C
2
CTL Ventilatorkontrolle 0 Uncontrol: 0 control: 1
3
OLT Ausgangssignalgrenze 10 Messbereich Einstellung 5-10V
4
AdH
Höhere Kommunikations-adresse
0 0x00-0xff
5
AdL Niedrigere Kommunikations-
adresse 1 0x00-0xff
6
LTP Frostschutz 0 0: off 1: on
7
SEN Sensorauswahl 0 0: Interner Sensor
1: Externer Sensor
8
FAC Reset - Werkeinstellung 8 Reset durch Einstellwert 0
V
V
1) In das Wochenprogramm gelangt man durch ein langes drücken der Taste
2) Anstatt der Uhrzeit erscheint LOOP, mit den Pfeilen wird das geforderte Wochen Format gewählt
a) Wenn die Nr. 5 gemäß des Programms ausgewählt wird, wird 5 Tage geheizt und die Temperaturen
für Samstag und Sonntag werden separat eingestellt. Das Tages Format in der Woche ist 5+2
b) Wenn die Nr. 6 gemäß des Programms ausgewählt wird, wird 6 Tage geheizt und die Temperatur
für Sonntag wird separat eingestellt. Das Tages Format in der Woche ist 6+1
b) Wenn die Nr. 7 gemäß des Programms ausgewählt wird, wird 7 Tage gleich geheizt. Das Tages
Format in der Woche ist 7
3) Der Wochentag kann in 6 Sektionen aufgeteil werden (6 Ebenen mit verschiedenen
Temeperaturen).Wenn das Format 6+1 oder 7 ausgewählt wird, wird für das Wochenende die Aufteilung
mit 2 Ebenen gewählt. Nach Auswahl des Wochen Formats wird zwischen den einzelnen Ebenen mit
der Taste und mit der Taste wird zwischen der Temperatur und der Uhrzeit umgeschalten.
4) Die Einstellung erfolgt gemäß folgender Tabelle. Die Werte der Temperatur und Uhrzeit sind in der
Tabelle 4.1 voreingestellt.
V
V

13
Die Steuerung MMC ermöglicht ein Anschließen eines externen Sensors DS18B20. Dieser wird an den
gekennzeichneten Kontakten R, B, Y angeschlossen. Danach muss in der erweiterten Einstellung unter dem
Symbol 7 (SEN), der Wert 1 eingestellt werden, damit wird das Messen des externen Sensors aktiviert. Wenn
der interne Sensor aktiviert werden soll, muss der Wert 0 eingestellt werden.
Wenn die Anlage ausgeschalten ist, aktiviert das Thermostat diese automatisch, wenn die Raumtemperatur
5°C unterschreitet. Wenn eine Temperatur von 7°C erreicht wird, wird die Anlage automatisch ausgeschalten.
Diese Funktion kann in der erweiterten Einstellung unter dem Symbol 6 (LTP) deaktiviert werden, indem der
Wert auf 0 eingestellt wird.
In der erweiterten Einstellung ist es möglich die Temperatur unter dem Symbol 1 (ADJ) in einem Bereich von
-5°C bis +5°C zu kalibrieren.
Versorgungsspannung 230 V AC, 50/60 Hz
Leistungsaufnahme < 1W
Max. Stromlast 3 A
Umgebungstemperatur -5 až 50°C
Bildschirm LCD
Temperatursensor NTC
Messgenauigkeit der Temperatur +- 1°C
Abmessungen der Installationsbox 95 x 95 x 64 mm

14
Die Klemmen , , und sind nicht in der Steuerung enthalten. Es handelt sich um die Signalisierung der
RESET Taste, an die man sich direkt mittels der Schrauben anschließen kann. Die Taste dient zur
Signalisierung eines Fehlers (leuchtet rot) und gleichzeitig wird damit der Fehler quittiert. Im Falle eines
Fehlers, halten sie die Taste 2-3s gedrückt, die rote Kontrollleuchte erlischt und der Warmlufterzeuger wird
gestartet.
in dem Gehäuse ist die Sicherung mit 2,5 A untergebracht. Beim Anschluss der 230V von dem
Warmlufterzeuger MONZUN wird anstatt an die Klemme an die vorbereitete WAGO Klemme angeschlossen.
R1
R2
Steuerschrank MMC
L
Vent
Valve
N
B
R
Y
GND 0/10V
+
-
wago
FU
Flex-JZ 5x0,75
CYKY 3x1,5
JYTY-O 4x1
(SYKFY 2x2x0,5)
PE N L
Warmlufterzeuger MONZUN
BELÜFTUNG
BETRIEB
ALARM
HEIZEN
ÜBERHITZUNG
C C
O O
A A
HH
E E
L1 L1
N N
PE PE
XS
230 V / 50 Hz
PEPE
RESET
RESET
MODULATION 0/10 V
GND
N N
L L
R1 R1
R2 R2
++
- -
DC DC +24 V
XR
XM
XP

15

MANDÍK, a.s.
Dobříšská 550
26724 Hostomice
Tschechische Republik
Tel.: +420 311 706 742
E-Mail: [email protected]
www.mandik.de
MANDÍK GmbH
Veit-Stoß-Straße 12
92637 Weiden
Deutschland
Tel.: +49(0) 961-6702030
E-Mail: [email protected]
MANDÍK, a.s.
Dobříšská 550
26724 Hostomice
Czech Republic
Tel.: +420 311 706 706
E-Mail: [email protected]
www.mandik.com
MANDÍK, a.s.
Dobříšská 550
26724 Hostomice
Česká republika
Tel.: +420 311 706 706
E-Mail: [email protected]
www.mandik.cz
Table of contents
Languages:
Other Mandik Controllers manuals
Popular Controllers manuals by other brands

YASKAWA
YASKAWA GPD 515/G5 Modbus RTU Technical manual

Value Point
Value Point 3560 quick start guide

EnvironmentalLights.com
EnvironmentalLights.com touch-panel-rgb quick start guide

Hanna Instruments
Hanna Instruments BL 983329-0 instruction manual

Eurofred
Eurofred daitsu ACCD WC4 Series user manual

YORKVILLE
YORKVILLE LP-C12 owner's manual