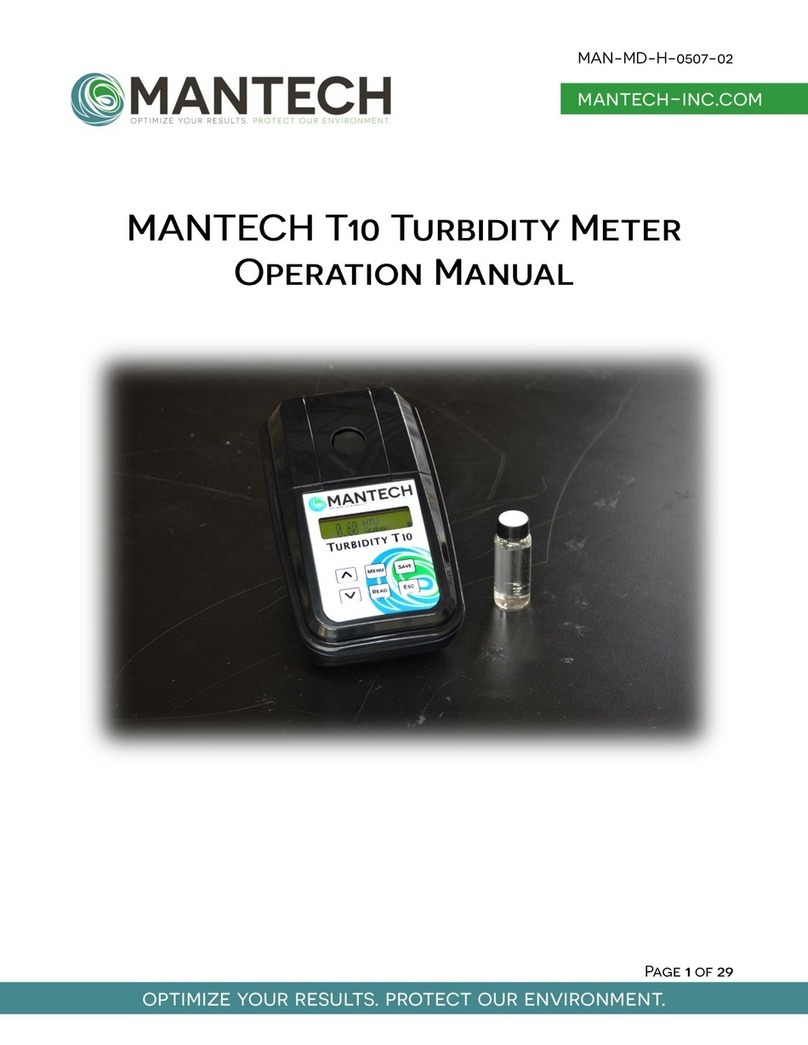
Mantech Ap2000 User manual

MAN-MD-H-0507-01
Page 1of 24
Instruction Manual
MANTECH Ap2000 Turbidimeter

MAN-MD-H-0507-01
Page 2of 24
General information
In no event will the manufacturer be liable for direct, indirect, special, incidental or
consequential damages resulting from any defect or mission in this manual.
The manufacturer reserves the right to make changes in this manual and the products
it describes at any time, without notice or obligation.
N O T I C E
The manufacturer is not responsible for any damages due to misapplication or misuse
of this product including, without limitation, direct, incidental and consequential
damages, and disclaims such damages to the full extent permitted under applicable law.
The user is solely responsible to identify critical application risks and install appropriate
mechanisms to protect processes during a possible equipment malfunction.
Please read this entire manual before unpacking, setting up or operating this equipment.
Pay attention to all danger and caution statements.
Failure to do so could result in serious injury to the operator or damage to the equipment.
Make sure that the protection provided by this equipment is not impaired. Do not use or
install this equipment in any manner other than specified in this manual.

MAN-MD-H-0507-01
Page 3of 24
1.0 Specifications
Measurement method
Ratio determination using a primary nephelometric light scatter signal
(90°) to the transmitted light scatter signal.
Reading units
NTU/ EBC
Lamp Source
Tungsten Lamp
Detector
Silicon Photocell
Measuring Range
0 to1000 NTU/ 0 to 250 EBC
Resolution
0,01 on lowest range
Accuracy
± 2% of reading: 0 to 500 NTU / ± 3% 500 to 1000 NTU
Repeatability
± 1% of reading or 0,01 NTU
Automatic Reading
With user-defined intervals 0 to 250 seconds
Maximum uncertainty
± 2% of full scale
Display
LCD 2 lines / 16 characters
Response Time
Programmable 6 to 41 sec
Data Logger
Up to 1000 data
Auto ShutOff
Programmable from 1 to 60 min
Fast Cal function
Quick Calibration for single point
Software Functions
Signal averaging, "Fast Settling", results freezing, analyst and sample
identification, calibration status, verification and calibration reminder,
calibration history, password
Sample Required
15 ml vial with lid
Sample vials
Round borosilicate glass vial with screw and caps (Φ = 24,5 mm)
Power Supply
4 AA batteries or power supply cable
Indicator
Low battery indicator / battery exchange
Serial Output
USB
Enclosure rating
IP-67, waterproof
Storage Conditions
0 to 40°C ( instrument only)
Dimensions
114 x 198 x 83 mm
Parts and Accessories - Included.
3 vials of 24,5 mm
Batteries AA e power supply cable
Instruction Manual and Carrying Case
Parts and Accessories - Optional.
Backlight Display
Silicone oil
Cleaning Cloth

MAN-MD-H-0507-01
Page 4of 24
2.0 Installation
2.0 Install the battery
1.
With an Philips screw driver, remove the battery cover.
2.
Install 4 AA alkaline or 4 AA nickel metal hydride (NiMH) batteries. Make sure that the
batteries are installed in the correct orientation.
3.
Replace the battery cover. (for optimal seal we recommend using torque screw driver with
4N.m)

MAN-MD-H-0507-01
Page 5of 24
3.0 User interface and navigation
3.1 User interface
1.DISPLAY: Displays readings, diagnostics
and operational data.
2.MENU: selects options to configure the
instrument, selects analysis and moves the cursor
to the right.
3.SAVE: Store Selections and data, saves the
result to be USB transfered and selects the
parameters.
4.ESC: Powers off the unit, aborts operations,
return to the previous screen.
5.ON/Off-Read: switches the instrument on,
confirms options, sample reading, move the
cursor to the left.
6. ▲: scroll through menus, enter numbers and
letters
7. ▼:scroll through menus, enter numbers and
letters
4.0 Operation
4.1 Startup
Push the ON/OFF key to turn the meter on of off.
If the meter does not turn on, make sure that the batteries, or that the AC power supply is properly

MAN-MD-H-0507-01
Page 6of 24
connected to an electrical outlet.
The display will show, instrument version, data log and time/date.
Note: The Auto-Shutoff option can also be used to turn off the meter.
4.2 Navigation
The instrument Menu structure is divided in 3 main functions with submenus :
-ID –Access the user ID function
-Calibrate –Access the calibration functions
-Config –Access the confifuration functions
-Serviçe- Access the Service Functions (only for certified technicians)
Please see Menu structure in the last page of this manual.
Press and hold the MENU key for 3 seconds to enter the Menu Function.
You will see ID –Identification; Use the ▲ or ▼ keys select the desired function, then press READ to
enter it.
If the menu key is pressed and released quickly the Analysis type selection will appear, select the
type of measurement using ▲ or ▼.
-0-250 EBC (special measurement for food industry)
-0-1000 NTU.
-0.0-.99.9 NTU
-0.00 to 40.0: Rapid Cal Function.
-Auto NTU: Instrument choose automatcally best measuring range in NTU. RECOMMENDED.

MAN-MD-H-0507-01
Page 7of 24
-Sensor: Measurement of the light frequency. (to be used only by certified technician)
-User1: User calibrated courve (require full calibration of this courve).
-User2: User calibrated courve (require full calibration of this courve).
Press and release save to use the desired measuring range/function.
NOTE: The 0.00 to 40.0 function can only be selected for rapid single point calibration (Rapid
cal function).

MAN-MD-H-0507-01
Page 8of 24
4.3 Sample Reading.
Before you read a sample its possible to ID the user and the Sample that will be read, If you don´t
know what to please go to 5.4.2 Taking a Measurement.
4.3.1 ID
Select the Sample ID.
Use ▲ and ▼ to choose an sample name from the list, press and hold SAVE for 3 seconds to
store the data.
4.3.1
USer
Select the User for the sample.
Use ▲ and ▼ to choose an user from the list, press and hold SAVE for 3 seconds to store the
data.
4.3.2
Taking a Measurement.
For greater precision we recommend that you calibrate the 0.10 NTU point before you start
your measurements. ( Refer to CALIBRATION for more information)
Rinse the vial with the sample;
Place sample in the vial;
Dry the tube with a thin/absorbent paper;

MAN-MD-H-0507-01
Page 9of 24
Holding the vial by the cap, gently stir the sample by inversion 3 times.
PLACE THE VIAL IN THE READING CELL.
Align the "l" mark of the sample vial forward with the arrow on the sample cup of
the instrument and close the instrument lid;
-If using Auto mode just wait for the reading to stabilize.
-If using manual mode press READ;
To turn the instrument off press and hold ESC until the display reads "Off".

MAN-MD-H-0507-01
Page 10 of 24
4.4 Sample Vials.
Before being use the vials should always be washed with with detergent to remove any dirt
or fingerprints.
Dry the outside of the tubes with a clean, lint-free cloth. Let the tubes dry in the air, in an
inverted position to prevent dust from entering the vials.
The handling of the vials has great importance. Scratch, fingerprints and water droplets in the vial or
inside the light chamber can cause interference, leading to inaccurate results.
It is very important that vials and light chamber are clean and dry constantly.
The variability in the glass geometry is the predominant cause of the variability of the results. The
position variation of the vial in the light chamber will greatly affect the results. To obtain accurate results,
the vials must be positioned exactly,
The "I" mark in the vial must be aligned with the arrow (▲) in the instrument sample chamber.
Sample Vials calibration
The turbidimeter AP 2000 vials are factory selected for optimal precision, however in low turbidity
conditions, small changes in the glass can cause different readings on the same sample.
To measure samples in the lower range, below 1NTU, for greater accuracy, a vial calibration is
recommended.
1.
Fill each vials with dilution
water *.
2.
Complete a reading of all the vials, take
note of each reading.
3.
Mark the vials with the lowest
reading with an "R", Those will
be your reference vials.
This tag should be near the
top, close to the lid, and with
permanent marker.
4.
The difference between the value of the
reference vials "R" with the other vials is the
correction factor for each of the vials.
This value may be used when
comparing the readings with different vials.
* dilution water - prepared according to Standard Methods - Method 2130 (latest edition) with membrane
filtration for retention of particles ≥ 0.1 μm - generating a nominal value of 0.02 or below 0.1 NTU.

MAN-MD-H-0507-01
Page 11 of 24
4.5 Instrument Calibration
For routine work, only the blank calibration (0.10NTU) shall be performed. The complete
calibration procedures, should be defined by the user, according to its quality program.
There are two calibrations options, guided and free cal, only one of those should be used to
calibrate the unit, in case both are used, the last one will be saved and will be the one used for readings.
To perform a full calibration you will need diluted formazin Standards in the 0.10 NTU, 20 NTU,
100 NTU and 800 NTU, or Stabilized primary Standards in the same concentrations.
NOTE: The Standard vials must be perfectly cleaned before each measurement, using a tissue
or soft absorbent equivalent paper.
4.5.1
Guided Cal
1. Press and Hold MENU key for 3 seconds.
You will see ID –Identification; Use the ▲ or ▼ keys to
select Calibrate, then press READ to enter it.
2.The display will show guided cal, press READ to enter
it.
3.the unit will request you to insert the 0,01 NTU standard and apress READ, after it reads this
standard and store its value, it will request you to insert the 20,0 NTU standard and so on, until the
1000,0 NTU standard is read.
If by acident you place the same standard or an standard with a close NTU value on the vial
chamber, the unit will alert you with the” Same Standard?' warning. In this case, replace
the standard for the correct one and proceed.
NOTE 1: Ailing the vial mark with the instrument arrow.
NOTE 2: After the calibration, perform standard readings for verification, and if needed repeat
the calibration procedure.
NOTE 5: Storing the standards:- Do not store it in high temperature, or direct sun light.

MAN-MD-H-0507-01
Page 12 of 24
4.5.2
Free Cal
1. Press and Hold MENU key for 3 seconds.
You will see ID –Identification; Use the ▲ or ▼ keys to
select calibrate then press READ, use the same ▲ or ▼
keys to select Free Cal, then press READ to enter it.
2.Place 0.10 NTU Standard vial into the instrument *.
Press READ and wait for the result;
3. If necessary use ▲ or ▼ to change the displayed value
for this standard, press and hold SAVE for 3 seconds.
"Saving" will be displayed.
4.After the value is saved, the display returns to the
"Calibrate" menu.
5.* After calibrating the 0.1 NTU standard, perform the calibration of the other standards: 20 NTU, 100
NTU and 800 NTU.Recalibrate the 0.1 NTU for better accuracy.
If you have chosen the 0.00 to 40.0 NTU function, follow the previous step for the desired
standard.
6.Recalibrate the 0.1 NTU for better accuracy.
NOTE 1: Ailing the vial mark with the instrument arrow.
NOTE 2: If an error message displays, check the standards and repeat the previous steps.
NOTE 3: After the calibration, perform standard readings for verification, and if needed repeat
the calibration procedure.
NOTE 4: After calibrating 4 points: 0,1 NTU, 20 NTU, 100 e 800 NTU. Its recommended to
recalibrate the 0,1NTU point.

MAN-MD-H-0507-01
Page 13 of 24
NOTE 5: Storing the standards:
-
Do not store it in high temperature, or direct sun light.
-
Avoid scratching the vial glass. This might affect the precision of the readings;
-
The sample and standards vial glass should be always clean.
5.0 Configuration
The AP2000 Turbidity meter has several configuration capabilities. Its menu structure its easy and
simple to operate, please folow the steps below to configurate the unit according to your needs.
Press MENU key for 3 seconds to enter the Menu Function. You will see ID –Identification; Use the
▲ or ▼ keys select the Config function, then press READ to enter it.
-ID –Acsses the user ID function
-Calibrate –Access the calibration functions
-Config –Access the configuration functions
-Service - Access the Service Functions (only for certified technicians)
Please see menu structure in the last page of this manual.
Using ▲ or ▼you can navigate between all the configurable functions. When you reach the desired
function press READ to enter it or or ESC to go ack to the previous menu.
5.1 Time/Date
When inside this configuration you can change Time and Date, use ▲ or ▼ to select between the
options and READ to enter it or ESC to go back to the previous menu.
Using ▲ , ▼ and MENU/READ (send the cursor to the right/left) adjust the numbers as desired,
press and hold SAVE for 3 seconds to store the data and ESC to return to the previous menu.
5.2 Display
When inside this configuration you can set and change Contrast, Backlight time and Backlight
brightness (Time and Contrast only on instruments with backlight optional installed), use ▲ or ▼ to
select between the options and READ to enter it or ESC to go back to the previous menu.
5.2.1
Contrast
Using ▲ or ▼ you can change the contrast to the desired level, when done, press and hold
SAVE for 3 seconds to store the data and ESC to return to the previous menu.

MAN-MD-H-0507-01
Page 14 of 24
5.2.2
Backlight Time
From 0 up to 60 minutes of backlight on.
Using ▲ or ▼ change the time to the desired backlight time, when done, press and hold SAVE
for 3 seconds to store the data and ESC to return to the previous menu.
5.2.3
Backlight Level
From 0 up to 100 (intensity level)
Using ▲ or ▼ change the level to the desired, when done, press and hold SAVE for 3 seconds
to store the data and ESC to return to the previous menu.
5.2.4
Partial Res.
Wen this mode is On, the unit will show resoults during the measurement cycle, intermediate
readings.
Using ▲ or ▼ change to select yes or no, when done, press and hold SAVE for 3 seconds to
store the data and ESC to return to the previous menu.
5.2.5
Big number
Using ▲ or ▼ change it from yes or no, when done, press and hold SAVE for 3 seconds to store
the data and ESC to return to the previous menu.
If you shoose yes, the numbers will apear larger on the display
5.3 Instrument
When inside this configuration you can set Auto off, Readings, Color compensation, courves, fast
settling, Sampling, ID, Calibratio interval, personalization, patrimony, use ▲ or ▼ to select between
the options and READ to enter it or ESC to go gack to the previous menu.
5.3.1
Auto off
The Auto off function shall be activated to save the bateryes, iit can be configurated to turn the
unit off after 0 to 60 minutes of inactivity.
Using ▲ or ▼ change the time to the desired level, when done, press and hold SAVE for 3
seconds to store the data and ESC to return to the previous menu.
NOTE: When the time is in 0 minutes the auto off will not be operational.

MAN-MD-H-0507-01
Page 15 of 24
5.3.2
Auto Reading
The Auto reading function can be activated from 1 to 250 seconds,this will set the time between
readings.
NOTE: If you configure the Auto reading for 5 seconds the unit will make readings every 5
seconds until it is turned off.
Using ▲ or ▼ change the desired time between readings, press and hold SAVE for 3 seconds
to store the data and ESC to return to the previous menu.
5.3.3
Color Compensation
The instrument can compensate for the color the sample for a more acurate reading.
Using ▲ or ▼ select yes or no, when done, press and hold SAVE for 3 seconds to store the
data and ESC to return to the previous menu.
NOTE: When activated (Yes selected) “C” will apear in the upper right corner of the display in
the reading mode screen.
5.3.4
Hab. Tests
You can define which courves will appear in the courve selection menu (when you press and
release the Menu key).
Press ESC to remove the * icon from the courves you don´t want and READ to put the * icon in
the ones you want.
Press and hold SAVE for 3 seconds to store the data and ESC to return to the previous menu.
5.3.5
Measuring Mode
Here you can select the type of measurent you want to take frmo, fast setling, Media or Normal.
Using ▲ or ▼ select yes or no, when done, press and hold SAVE for 3 seconds to store the
data and ESC to return to the previous menu.
Fast Setling -When selected, instrument will take a snpshot of the sample and display the
immediate reading before particles settle in the vial. (for high solids samples)
Normal - mediana
Media –calculates de media of the readings

MAN-MD-H-0507-01
Page 16 of 24
5.3.6
Sample
This function can be used to set the number of readings the unit will take to calculate the
average and present it as a measurement in the display.
5.3.7
ID
Here you can set up users names / passwords and when they shall be requested by the unit.
5.3.7.1
User ID
To create users and its passwords
5.3.7.1.1
edit
-Chose the user number between 00 and 50 , press READ
-Coose a name for this user using ▲ to scroll faster to letters , ▼ to scroll faster to
numbers (both can be used to go up or down) and MENU/READ (send the cursor to the
right/left), press and hold SAVE for 3 seconds to store the data.
-You will see “PIN:” on the Display, use ▲ to scroll faster to letters , ▼ to scroll faster to
numbers (both can be used to go up or down) and MENU/READ (send the cursor to the
right/left), press and hold SAVE for 3 seconds to store the data.
-Press and Hold ESC for 3 seconds to return to the previous menu.
5.3.7.1.2
Request
To define when the user ID and password will be required
-Choose between the following options using ▲ or ▼ , when done, press and hold
SAVE for 3 seconds to store the data and ESC to return to the previousmenu.
Always –ID and password will be request at everymeasurement.
On Start –ID and password will be request at Instrument Start Up.
MEMO –ID and password will be request when SAVE is pressed.
(reading mode).
Previous –ID and password will not be request, the previous user informed
will be assigned for all operations.
No –ID and password will not be request.

MAN-MD-H-0507-01
Page 17 of 24
5.3.7.2
Sample ID
Here you can set up sample names / passwords and when those informations will be
requested.
5.3.7.2.1
Edit
To create sample names.
-Choose the user number between 00 and 50 , press READ
-Choose a name for this sample using ▲ to scroll faster to letters , ▼ to scroll faster to
numbers (both can be used to go up or down) and MENU/READ (send the cursor to the
right/left), press and hold SAVE for 3 seconds to store the data.
-Press and Hold ESC for 3 seconds to return to the previous menu.
5.3.7.2.2
Request
To define when the sample name will be required
-Choose between the following options using ▲ or ▼ , when done, press and hold SAVE
for 3 seconds to store the data and ESC to return to the previous menu.
Always –Sample name will be request at everymeasurement.
On Start –Sample name will be request at Instrument Start Up.
MEMO –Sample name will be request when SAVE is pressed.
(reading mode).
Previous –Sample name will not be request, the previous user informed
will be assigned for all operations.
No –Sample name will not be request.

MAN-MD-H-0507-01
Page 18 of 24
5.3.8
Schedule Cal.
Access this funcntion to set up the time (Days/hours) before calibration is requested.
5.3.8.1
F.Scale
Choose the number of days and hours before the calibration warning graph will appear
on the display using ▲ , ▼ and MENU/READ (send the cursor to the right/left), press and
hold SAVE for 3 seconds to store the data.
NOTE: When the calibration schedule is programmded, a graph will be displayed in
the upper right corner during measurements, when the calibration date arrives, a
bar will appear in the graph and a Calibration warning will be displayed.
5.3.9
Customize
Access this funcntion to insert an Nane for the unit, this name will show up during instrument
start up and will be avaliable wen downloading the data.
-Select tha name you want to give to the unit Using ▲ to scroll to letters , ▼ to scroll to
numbers (both can be used to go up or down) and MENU/READ (send the cursor to the
right/left), press and hold SAVE for 3 seconds to store the data..
5.3.10
Pat Number
Access this funcntion to insert an Nunber for the unit, this number will be avaliable wen
downloading the data.
-Select tha number you want to give to the unit Using ▲ to scroll to letters , ▼ to scroll to
numbers (both can be used to go up or down) and MENU/READ (send the cursor to the
right/left), press and hold SAVE for 3 seconds to store the data.Language
Access this funcntion change the language of the display
Using ▲ or ▼ select from US (English) , ES (Spanish) or BR (Portuguese) when done, press
and hold SAVE for 3 seconds to store the data and ESC to return to the previous menu.
5.3.10
Instrument ID
Use ▲ , ▼ and MENU/READ (send the cursor to the right/left) to set an ID for the unit, press
and hold SAVE for 3 seconds to store the data.

MAN-MD-H-0507-01
Page 19 of 24
5.3.11
Pat. Number
Use ▲ , ▼ and MENU/READ (send the cursor to the right/left) to set an ID number for the unit,
press and hold SAVE for 3 seconds to store the data.
5.3.12
Language
Use ▲ , ▼ to select the desired language from the list below, press and hold SAVE for 3
seconds to store the data.
US –English
ES –Spanish
BR –Portuguese
5.4 Communication
Use ▲ or ▼ to select between Eco Result or Log Transmit and READ to enter it or ESC to go back
to the previous menu.
5.4.1 Eco Result
In this mode the measurement displayed is sent to the USB port, You can select to send all
measurements only part of them.
Using ▲ or ▼ select Auto, Manual and Off, when done, press and hold SAVE for 3 seconds to
store the data and ESC to return to the previous menu.
Auto –Sends all measurements to the USB (when they are performed)
Manual –Sends measurements that are selected (SAVE pressed during on
measurement mode)
Off –No measurement will be sent to the USB
5.4.2
Log Transmit
Here you can select 4 ways to send the instrument measurement log
Using ▲ or ▼ select between , New Mark, All Mark, New, All, Press and hold SAVE for 3
seconds to store the data and ESC to return to the previous menu.
Auto - Sends all measurements to the USB (when they are performed)
Manual - Sends measurements that are selected (SAVE pressed during on measurement mode)

MAN-MD-H-0507-01
Page 20 of 24
Off - No measurement will be sent to the USB
NOTE: When the time is in 0 minutes the instrument will not be shut off.
5.4.3
Serial Baud
Using ▲or ▼select between ,57600, 38400, 19200 or 9600 Press and hold SAVE for 3
seconds to store the data and ESC to return to the previous menu.
5.4.4
Header
Using ▲ or ▼ select between yes or no Press and hold SAVE for 3 seconds to store the data
and ESC to return to the previous menu.
5.5 User Test
The instrument alow users to calibrate a user courve.
NOTE: When user courve is calibrated, the instrument performance might change due to
standard and procedures adopted, factory calibrated courve is made with 100% tracable
standards and reference materials in controlled environment, use it in order to have full
confidence in instrument performance.
For more information on how to calibrate user courve please refer to the advanced operations
instructions manual for the turbidity meter AP2000.
5.6 Security/Password
Here you can set up the security level and pasword for the Calibration, configuration and service
functions.
On page (..) you will find the security level chart, use this as reference for the security levels you will
assign to each function.
The Factory pre-saved password is 9999, if this is requires during configuration or operation use ▲ to
scroll faster to letters , ▼ to scroll faster to numbers (both can be used to go up or down) and
MENU/READ (send the cursor to the right/left), press and hold SAVE for 3 seconds to store the data.
5.6.1 ID
Here you will assign a security level and password to aces all the ID functions.
Using ▲ or ▼ select the desired security level, when done, press and hold SAVE for 3 seconds to
store the data.
Table of contents
Other Mantech Measuring Instrument manuals
Popular Measuring Instrument manuals by other brands
Thermo Scientific
Thermo Scientific Nicolet iS50 AEM user guide

Thermo Scientific
Thermo Scientific Dionex IonPac product manual

DynAmp
DynAmp LKP-8024 Installation, operation and service instructions
Gigahertz Solutions
Gigahertz Solutions HF35C user guide
Chauvin Arnoux
Chauvin Arnoux AEMC 407 user manual
ICP DAS USA
ICP DAS USA PM-3133 quick start guide
Endress+Hauser
Endress+Hauser Promass 84F technical information

VWR
VWR P4 instruction manual
Spectra Precision
Spectra Precision FOCUS 2 Series user guide
Bosch
Bosch GCL 25 Professional Original instructions
Hanna Instruments
Hanna Instruments HI 83740 instruction manual
MedRx
MedRx AVANT ARC Training manual
