Mantis MA2006-1-JV User manual

Please read these instructions before attempting to
construct your newly purchased tricycle.
MA2006-1-JV
CALL 877-BIKEAID (245-3243) or visit
www.bikeaidonline.com
DO NOT RETURN
THIS TRICYCLE TO THE PLACE OF PURCHASE
If you should experience a problem with your purchase,
in most cases, a BikeAid representative can resolve
your problem over the phone. Your feedback is vital to
our success and our quality improvement program.
BIG WHEEL
SLIDER

BIG WHEEL SLIDER INSTRUCTION MANUAL
PART NO. DESCRIPTION QUANTITY
1
2
3
4
5
6
7
8
9
10
11
12
13
Main Frame
Front Fork
Front wheel assembly
Handlebar
Pedals
Rear tube
Rear axle
Rear wheels
Seat
6x30mm bolt and nut
8x50mm carriage bolts and nuts
6x25mm Allen bolts and nuts
M8 washer and nut
1
1
1
1
1 set
1
1
2
1
4 sets
2 sets
2 sets
2 sets
Thanks for your purchase. Please read this Owner’s Manual
completely before assembling or operating this product.
• Assembly of this product should be carried out by an adult.
• Please ensure you follow the assembly instructions, as some parts must be
installed before others.
• Not suitable for children under 8 years contains small parts.
• Always wear an approved safety helmet when riding.
• Always wear fully enclosed shoes.
• Never leave your child unattended on this product.
• Not permitted for use on public roads or highways.
• Don’t use at night. Don’t use on wet surfaces, uneven or unpaved roads.
• It is not recommended that slider is used on steep slopes or at high speed.
• Always check brakes before riding.
• Not designed for stunt riding.
1Front Wheel Assembly
Insert front wheel assembly (part 3) into the open
ends of the Front fork (part 2). Attach the two end
covers and secure with bolt and nut (part 11)
Repeat for the other side.
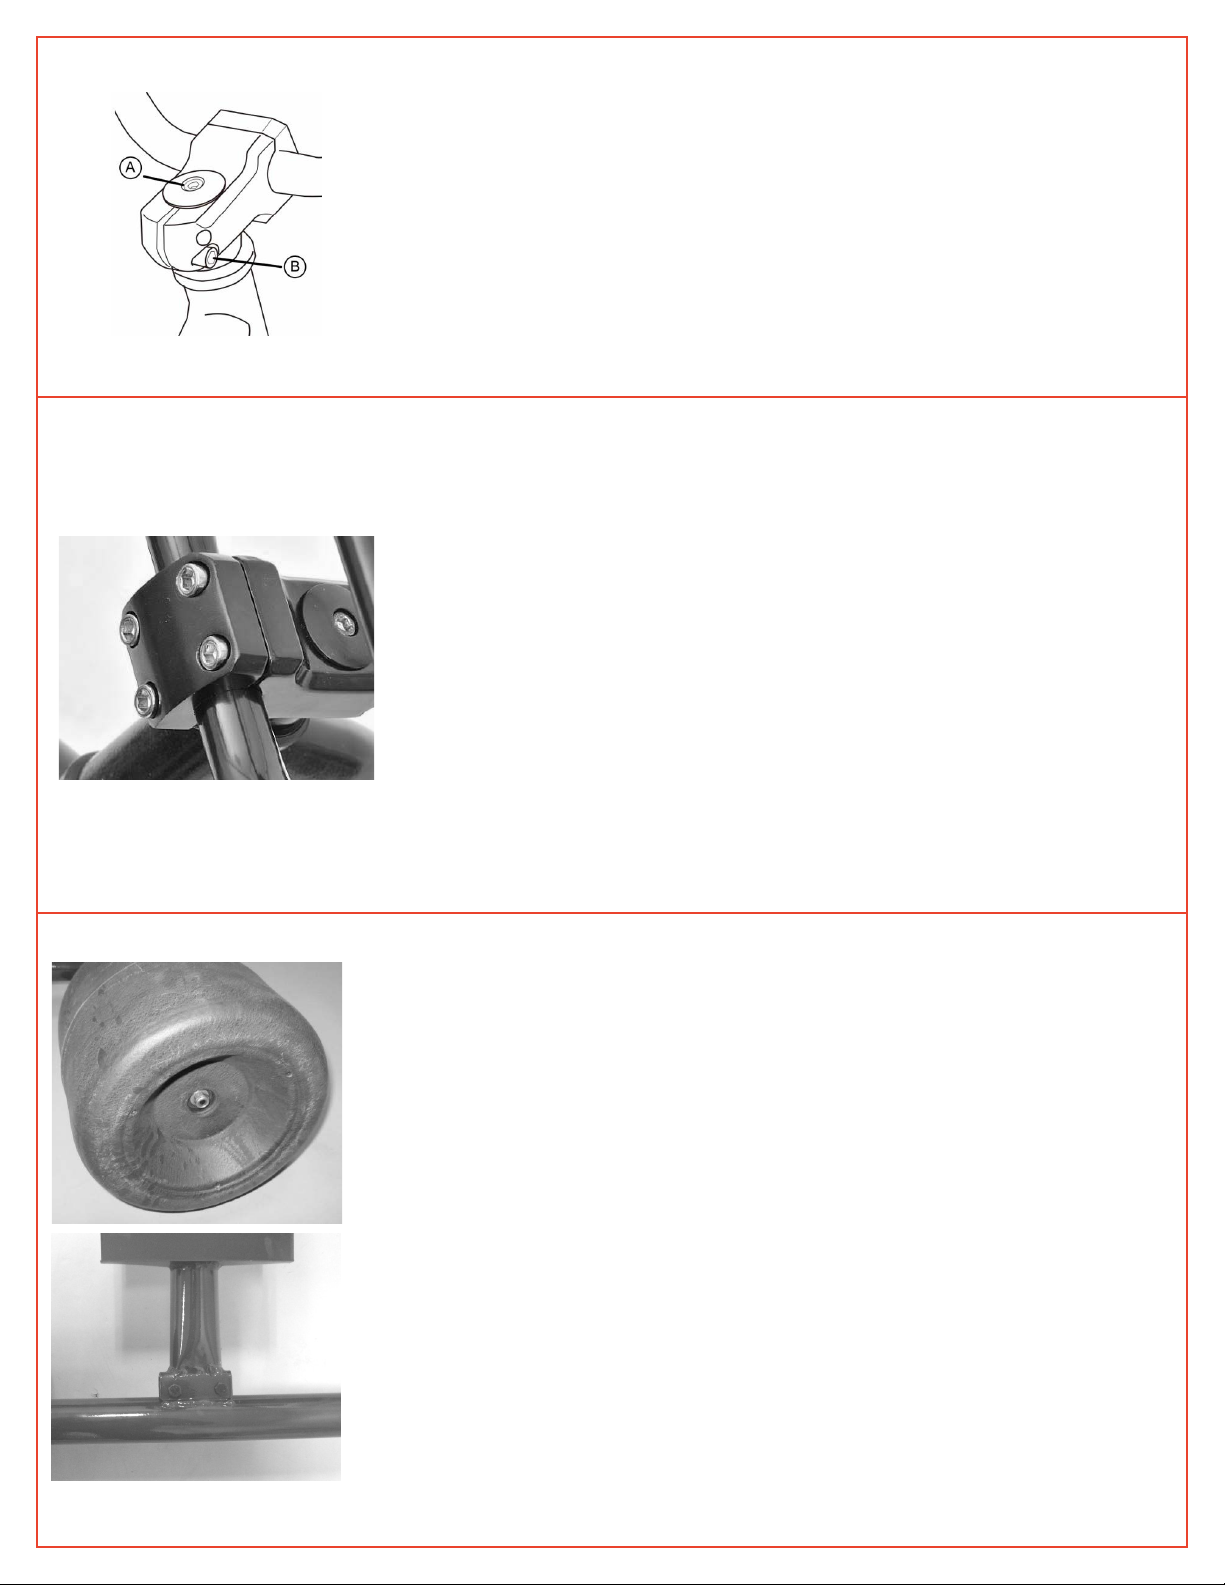
2
Stem Assembly
The stem is pre-assembled. If necessary, rotate the
stem and fork to face the forward position. Ensure
the stem is aligned with the front fork and facing the
correct direction. Tighten the top bolt (A) of the stem
and the stem bolts (B).
WARNING: If the handlebar clamp is not tight
enough, the handlebar can slip in the stem. This can
cause damage to the handlebar or stem, and can
cause loss of control.
3
Assemble The Handlebar To The Stem
Insert the handlebar (4) into the stem clamp and
secure by tightening the four Allen Bolts. Ensure
the bolts are tightened evenly.
Test The Tightness Of The Stem Bolt And
Handlebar Clamp
Brace the front wheel between your knees and
try to move the handlebars up and down and
from side to side. The handlebars are secure
within the stem and the stem within the fork
steering tube if no movement is detected when
applying turning pressure.
Rear Tube and Rear Wheels Assembly
Attach the rear tube (6) to the main frame.
Secure with two 8x50mm carriage bolts and
Nuts (12). Slide one rear wheel onto the axle
end, slide the rear axle (7) through the rear tube
and slide another wheel. Secure both ends of
axle with M8 washer and nut (14).
4

Seat Assembly
Attach the seat (10) to the main frame with the
two 6x25mm bolts and nuts (13) provided.
5
6Pedal Assembly
Attach the pedals (5) to the crank and tighten with
spanner or adjustable wrench.
CAUTION: There is a right pedal marked “R” and
a left pedal marked “L”. Please ensure you assemble
them on the correct side.
CARE AND MAINTENANCE
Routine maintenance is an essential component of riding. The condition of your slider changes
every time it is used, meaning more frequent maintenance is necessary the more you ride your
slider. Please ensure you check all nuts and bolts are tight before each time you ride, and
please check the brake before riding.
CONGRATULATIONS!
Your new tricycle is now
assembled and ready to ride!
Other Mantis Bicycle manuals


