Manttra 34111 User manual

INSTRUCTION MANUAL
MANUAL DE INSTRUCCION

1
This is a U.L listed appliance. The following safeguards are recommended by most portable appliance manufacturers
IMPORTANT SAFEGUARDSIMPORTANT SAFEGUARDS
IMPORTANT SAFEGUARDSIMPORTANT SAFEGUARDS
IMPORTANT SAFEGUARDS
To reduce the risk of personal injury or property damage when using this appliance, basic safety precautions should always
be followed. You can get total satisfaction from your Quick and Easy pressure cooker if you follow the simple instructions
given below :
1. Read all instructions, paying special attention before using your Quick and Easy pressure cooker.
2. Do not touch hot surfaces. Use handles or knobs.
3. Close supervision is necessary when the appliance is used near children.
4. Do not place the appliance in a heated oven.
5. Extreme caution must be used when moving the appliance containing hot liquids.
6. This appliance cooks under pressure. Improper use may result in scalding injury. Make certain the unit is properly
closed before operating. See inside, Section on “How to close” and “How to open” your Quick and Easy cooker.
7. Do not place a dry / empty cooker on a heat source. Always use water.
8. Do not fill the cooker to more than 2/3 of its capacity for solids like rice, meat and vegetables, which expand during
cooking and half full for liquids.
9. Do not pressure cook applesauce, cranberries, rhubarb, pearl barley, oatmeal or other cereals, split piece, or foods such
as noodles, macaroni or spaghetti. These foods tend to foam, froth and sputter and may block the vent tube.

2
10. When you release the pressure using the 3 way safety button, (refer page 8) release the steam gently when cooking
rice, lentils / beans as the liquid inside may froth over.
11. Always check the vent tube for clogging before use. Hold the lid up to light and look through the vent tube hole to
ensure it is clear.
12. For proper closure, the lid handle must be directly above the body handle.
13. Do not open the cooker until the pressure has been reduced to zero. While there is still pressure in the cooker, do not
remove the pressure regulator. Only if no steam escapes when the 3 way safety button is turned to open position, the
lid should be opened. The lid should, under no circumstances, be forced open.
14. Any servicing of the appliance should be performed by Manttra Inc. (See Warranty Card )
15. Always buy genuine spare parts.
16. Do not use this appliance for deep frying or pressure frying with oil.
17. Do not use the cooker for other than intended use.
18. Before every use, please make sure that the handles are fastened properly.
19. Always keep the space around the ZPD (refer page 7) on the inside of the lid and the ZPD itself clean, to ensure that it
functions properly.
20. This product is for household use only.
SAVE THESE INSTRUCTIONSSAVE THESE INSTRUCTIONS
SAVE THESE INSTRUCTIONSSAVE THESE INSTRUCTIONS
SAVE THESE INSTRUCTIONS

3
MANTTRA QUICK AND EASY PRESSURE COOKER is brought to you by MANTTRA INC.
PRINCIPLE OF PRESSURE COOKING :
Under normal circumstances, most foods cook at 212º F (100º C). This is because the water boils at this tempera-
ture in normal atmospheric pressure.
If the temperature of cooking is raised, foods cook much faster. For example, 36º F (20º C) increase in tempera-
ture allows food to be cooked four times faster, retaining freshness and nutritional values of the food.
By increasing the steam pressure inside a pressure cooker to 12 lbs per square inch above the atmospheric
pressure, the temperature inside the pressure cooker increases by 32ºF (18ºC) roughly. Thus, at these higher
temperatures food cooks much faster.
This is the principle of pressure cooking.
INTRODUCTION

4
DESCRIPTION OF PARTS
Due to continuing improvment, actual parts in your cooker may differ slightly from the illustration above.
Optional items may not be available in some models.
5
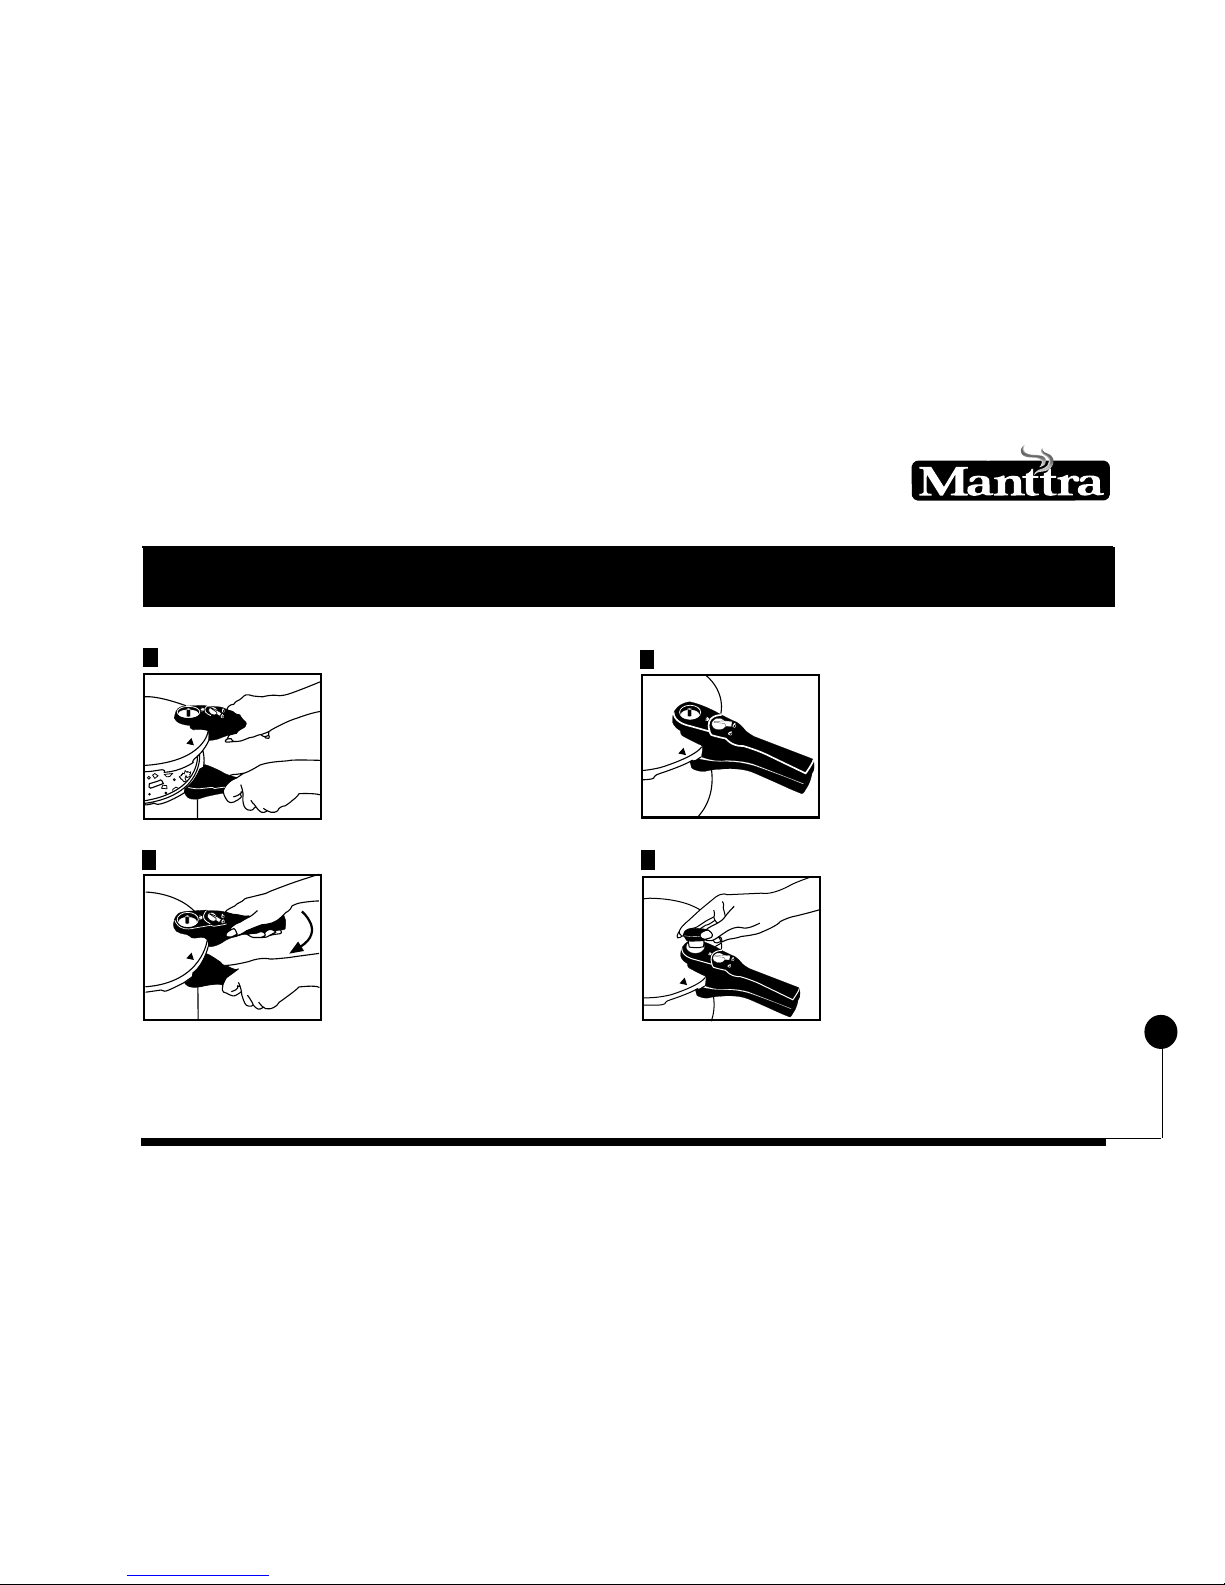
Fill the cooker with required quantity
of food and water. Turn the 3 way
safety button on the lid handle clock
wise to align the tail of the button with
the “Open” indication of the cooker
on the lid handle. Hold the body
handle and place the lid down at the
angle shown.
Place the lid on the body with the
arrow mark on the lid in line with the
arrow mark on the body handle. Press
the lid down gently. Taurn the lid
handle to your left (clockwise) till the
lid handle comes exactly above the
body handle.
Move the 3 way safety button anti-
clockwise fully to align the tail of the
button with the “Close” indication of
the cooker on the lid handle. Refer
illustration.
Place the pressure regulator on the
vent tube in the lid, in such a way that
the steam outlet on the regulator cowl
is away from the lid handle and align
the tang to the recess / notch on the
lid handle. Press down gently and
firmly till it sits on the vent tube
Note : If the 3 way safety button is not fully turned to align with the “Close” indication, the regualtor will not sit
properly and therefore there will not be any pressure build up, on application of heat.
33
33
3
11
11
1
22
22
244
44
4
HOW TO CLOSE YOUR QUICK AND EASY PRESSURE COOKER
6
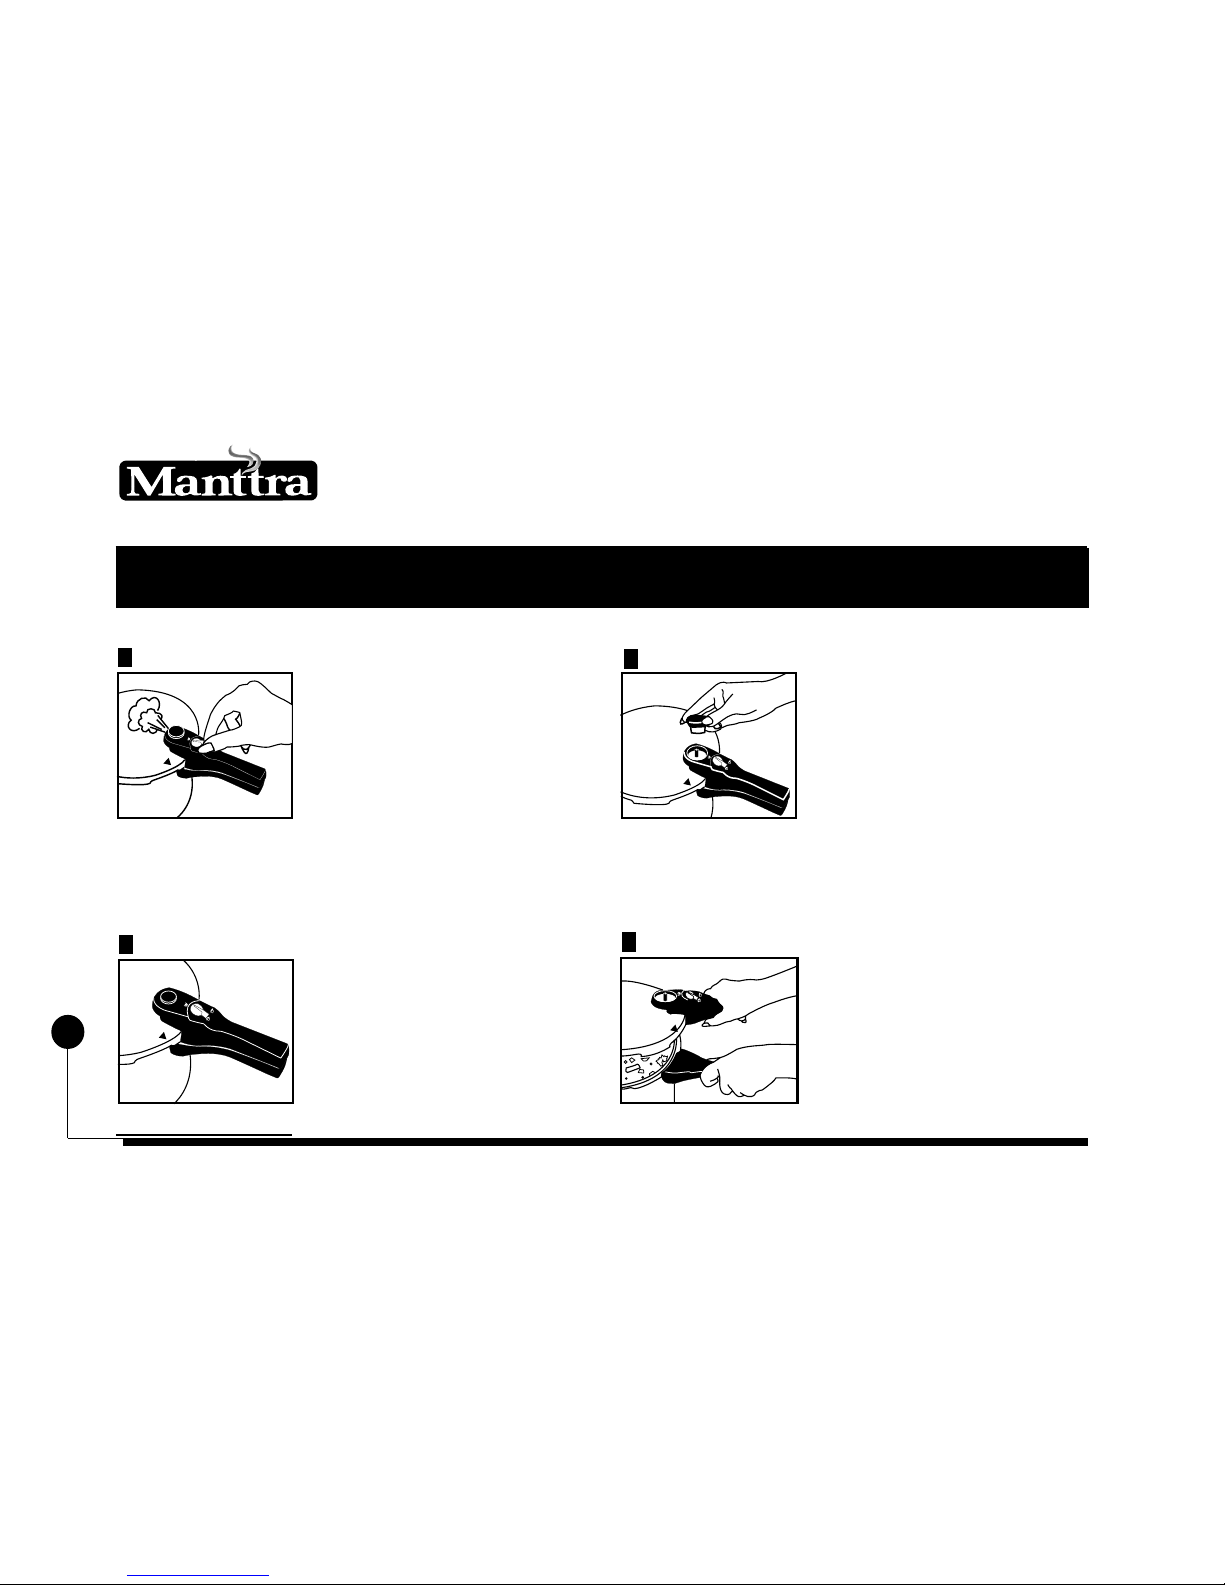
HOW TO OPEN YOUR PRESSURE COOKER
Your cooker is equipped with a “QUICK
RELEASE” mechanism to relesase
steam. Once the time for cooking is over,
turn the 3 way safety button clockwise.
It will align at the “steam release”
position. This will lift the pressure
regulator and release the steam gently
with a hiss.
After the steam stops completely, turn
the 3 way safety button anti-clockwise
and then clockwise to the “open”
position.
11
11
1
22
22
2
Once the steam issue stops completly,
remove the pressure regulater gently.
Now open the cooker by turning the lid
handle to your right (anti-clockwise). Be
careful as the pressure regulator may be
hot.
33
33
3
Take off the lid. The lid will come off
easily.
44
44
4
HOW TO OPEN YOUR QUICK AND EASY PRESSURE COOKER

7
Your Quick and EasyPressure Cooker comes with 5
safety features:
A. Zero Pressure Device (ZPD)
B. The Pressure Regulator
C. The Gasket Release System (GRS)
D. Fusible Safety Device
E. 3 Way Safety Button.
A. Zero Pressure Device (ZPD)
For your safety, your Quick and Easy
pressure cooker has a Zero Pressure
Device(ZPD) on the lid, housed under
the lid handle. The ZPD will allow the
cooker to build up pressure only when
the cooker is completely closed and locked by turning
the 3 way safety button to align with
the“Close”indication. Similarly the cooker will not
open unless the pressure drops to zero and the 3 way
safety button is turned to align with the “Open”
indication.
B. The Pressure Regulator
The pressure regulator is a device which
operates when the pressure inside the
cooker reaches 12 lbs per sq. inch ( 0.85
kg / sq. cm ) As soon as the pressure
inside the cooker reaches the normal
cooking pressure, the pressure regulator releases the
steam with a hiss safely in one direction away from
you. For the normal cooking of food, 5 minutes of hiss
is adequate to complete the cooking. The pressure
regulator acts both as an excess pressure releasing
device and a pressure controlling device.
C. Gasket Release System (GRS)
This is a re-settable safety device. If the
pressure regulator fails to function due
to overload or blockage of the vent
tube, the pressure inside the cooker
goes above the normal level. At this
stage a portion of the gasket is pushed
SAFETY FEATURES
8
out through the slot in the lid, releasing the steam
downwards safely. The stove should be immediately
switched off taking care to avoid contact with the line
steam issuing out of the slot. As there is no pressure
inside the pressure cooker you may now open the
cooker. Follow instructions given under section “How
to open your cooker” in this book. If you find any
difficulty in opening, gently push the gasket in with a
blunt instrument such as the handle of a spoon or a
fork. Please allow your cooker to cool and ensure that
there is no risk of scalding while handling the cooker.
Remove the gasket, clean it and if necessary the gasket
seating area on the lid and body of the cooker.
Reassemble the gasket on to the lid. Please check and
ensure that the vent tube is clean and clear. If your
cooker is overloaded beyond recommended capacity,
reduce quantity appropriately before resuming
cooking.
D.D.
D.D.
D. The Fusible Safety DeviceThe Fusible Safety Device
The Fusible Safety DeviceThe Fusible Safety Device
The Fusible Safety Device
A fusible safety device has been incorporated as part
of the ZPD. The non-toxic fusible alloy,
of the ZPD floating freely near the vent
tube, is a backup safety device. In the
most unlikely event of the GRS failing
to function the special non-toxic fusible
alloy of the ZPD will melt and let off the steam safely.
This could happen only when the temperature /
pressure rises beyond the normal level due to the
cooker having insufficient water or food particles
blocking / clogging the vent tube.
E. 3 way safety button
This safety feature ensures that your
cooker does not build pressure if the 3
way safety button is not in the correct
position. If the 3 way safety button is
aligned to the “open” position, the ZPD
will not allow steam build up. If the 3 way safety button
is aligned to the “steam release“ position, the pressure
regulator will be raised and will not allow steam build
up.
9
Your pressure cooker comes fully assembled and it is
ready to use.
1. WATER TO BE USED
Every recipe given in the Recipe Book (separately
enclosed) includes adequate quantity of liquid for
cooking. When you are trying other recipes, make sure
that there is adequate liquid in the recipe for cooking.
As a guideline, when you are using the pressure cooker,
minimum quantity of 2 1/2 cups (18 ozs) water must
be used for the first 15 minutes of pressure cooking.
Add one cup (7 ozs)for every 15 minutes of additional
cooking time (pressure cooking times are shown in the
recipes ). Please note the cooking time and put in
adequate water before starting to cook. These
quantities are in addition to the liquid required for
cooking.
2. Your pressure cooker should not be filled more
than 2/3rd its capacity for solids and 1/2 for liquids.
When cooking liquid foods, please use the quantity
of water as specified in the recipe. For cooking
milk dishes, start with low heat to bring the milk
to boil and then turn it upto pressure. When
cooking beans, lentils, etc. allow a few minutes
before closing the lid to avoid excess froth. Add a
spoonful of oil or any cooking medium while
cooking.
3. PROCEDURE:
a.Put adequate quantity of water in the appliance.
Then add the food to be cooked
b.Ensure the gasket is inside the lid.
c. Follow the instructions given under section
“How to close your cooker.”
d. As pressure builds up you can see emission of
steam through the lid handle as it takes a little
while for the ZPD to seal the cooker. The
pressure regulator will hiss continuously, once
GUIDELINES TO USE YOUR QUICK AND EASY PRESSURE COOKER
10
it has reached full pressure. Begin timing the
cooking period from this moment and lower the
heat sufficiently to maintain a gentle hissing
sound and the occasional escape of steam from
around the regulator.
e.After cooking, turn off the heat source, take the
appliance off the stove and allow it to cool. Do
not attempt to remove the pressure regulator
when there is pressure inside. You have the option
of releasing the steam by turning gently the 3 way
safety button to the central position. Now the
pressure regulator will get lifted and the steam
will get released.
f.Once the steam issue stops completely, turn the 3
way safety button further to your left to align to
the “open“ position of the cooker. Refer instructions
on “How to open”.
g.Now open the cooker gently.
h.After use wash the appliance in hot soapy water.
Remove the gasket, wash it and allow it to dry
till next use. Take care when washing the
pressure cooker. Like all fine cookware we
recommend that you do not place any parts in
the dishwasher.
i.Store the pressure regulator safely on a shelf.
CAUTION: Some food stuffs with a lot of liquid tend
to froth. Users are therefore advised to take adequate
care while opening the pressure to avoid scalding
injuries.
All metal surfaces of the appliance are likely to be hot
even after pressure inside the appliance drops to zero.
Therefore use handles on the appliance when moving
and take necessary care to avoid scalds / burns on
account of physical contact with hot metal surface.

11
Manttra Quick and Easy Pressure Cooker comes
in 5 versions:
a. Polished Aluminum body and lid
b. Colored Aluminum body with polished
Aluminum lid
c. Colored Aluminum body with polished
Stainless Steel lid
d. Hard Anodized Aluminum body with
polished Stainless Steel lid
e. Polished Stainless Steel body and lid
1. Stainless steel : The sparking stainless steel
body is designed to retain its lustre forever. This
is made of mirror finish food grade stainless
steel. The stainless steel helps in retention of
heat so that the food is kept warm for a longer
period of time. The cooker has a 3 ply clad base
( Stainless Steel, Aluminum and Stainless Steel )
for enhanced thermal efficiency.
2. Hard Anodized: Anodizing is a widely used
electro-chemical process for producing a
protective film on aluminum. The resulting layer
of aluminum oxide on the aluminum plate
imparts to it an amazing degree of hardness,
corrosion and abrasion resistance. In a cooker,
this translates into extraordinary stick resistance
and scratch resistance. With the anodized surface,
you still enjoy the high thermal conductivity of
aluminum, hardness, corrosion and abrasion
resistance.
3. Colored Aluminum: Coloring ensures improved
aesthetic appearance and long lasting looks. The
Pressure Cooker body is color coated and
protected by a special process.
HOW TO MAINTAIN YOUR QUICK AND EASY PRESSURE COOKER

12
d) If the cooker body has burnt food residue stuck
on it, leave a strong solution of non-alkaline detergent
powder in the cooker body over night, excepting the
Hard Anodized and Colored Aluminum Pressure
Cooker.
2. PRESSURE REGULATOR
To clean the pressure regulator, occasionally soak
it in soap water. However, clear out all traces of soap
before reuse
3. GASKET
After cooking, remove the gasket from the lid. Wash
and allow to dry till next use. If after considerable use,
the rubber gasket leaks, lightly stretch gasket
diagonally to extend its life. The rubber gasket can also
be immersed in a basin of cold water to extend its life.
After 9 to 12 months use or if the appliance is not used
for a period of time, the gasket can harden and this
4. Polished Aluminum: The cooker is made of Pol-
ished Aluminum alloy and its outer surface can
be kept shiny by just washing in hot soap water
and then drying immediately. Never leave the
cooker standing in water as it will dull.
To keep your Cooker always looking new,
please follow the instructions given be-
low:
a) Avoid leaving foodstuff in the body overnight
as it may cause difficulty in cleaning.
b) After each use, wash it with hot soapy water
rinse and dry thoroughly.
c) For stubborn stains it is recommended that you
use a nylon scrubber.

13
will prevent the appliance from sealing properly. Then
the gasket must be replaced with a new one.
4. STORING
Always put the cooker away after drying it thoroughly.
Do not store the cooker in a sealed or closed condition.
This will prevent mustiness as there will be circulation
of air. Always store the pressure regulator separately
on a shelf or drawer and not on the lid.
5. SERVING
While using the cooker for direct cooking or serving,
care should be taken to see that spoons, ladles, forks
and other utensils are not tapped against the rim of
the body as this may nick its sealing surface and allow
the steam to escape even with a new gasket. We repeat,
avoid damage to sealing rims of the lid and body.
6. DISCOLORATION
Certain properties of water and certain minerals of
food may cause discoloration of the inside of the
cooker.
This is quite harmless. This discoloration does not affect
the aluminum, anodizing, or the food cooked in it, in
any way. When this discoloration occurs, it can be
removed with any non-alkaline aluminum cleaner.
Otherwise, put a teaspoon of vinegar or a slice of fresh
lime in the water used in the cooker. This will prevent
discoloration.
7. FIXING OF SPARE PARTS
Always buy genuine spare parts.
a) If the ZPD/ Safety Plug of your cooker has fused,
do not try to repair it. Please purchase a new ZPD.
Remove the pressure regulator first. Remove the

14
ZPD by pulling it from inside the lid. Insert the new
ZPD by pushing it firmly from inside the lid. Now
ensure that the ZPD floats freely. Refix the regulator.
b) The cooker comes with lid, body and back handles.
In case you want to fix spare handles: To remove
the body handle , unscrew the handle screw under
neath the handle. Align the new handle, insert the
screw and fasten tightly.
To remove the lid handle:
•Remove the Gasket.
•Unscrew the vent tube nut and remove the vent
tube. The hold down cup will come away along with
the vent tube.
•Unscrew the lid handle screws from inside the lid.
Make sure, the square nuts inside the lid handle, do
not fall, while removing the handle.
Now to refix the handle:
• Align the handle with the square nuts in place and
tighten the screws firmly from inside the lid.
• Place the hold down cup in position, and refix the
vent tube by tightening the vent tube nut firmly.
To remove the back handle ,unscrew the handle screw
and take out the handle from the bracket. Align the
new handle with the bracket , insert the screw and
fasten tightly.
15
CUSTOMER SERVICE CELL (US)
MANTTRA INC.,
P.O.Box 5053
Virginia Beach, VA 23471
Tel: 757-318-7603
Fax: 757-318-7604
Toll Free No: 877-962-6887
Visit us at : www.manttra.com
CUSTOMER SERVICE CELL
(INDIA)
11th Floor, Brigade Towers,
Bangalore 560025
Ph:91-80-2217438/2217439/2277625
FAX:91-80-2277446.
8) ORDERING OF SPARE PARTS;
For genuine spare parts, write to the address given
below, giving name of part and SKU No.
For details on names of parts and SKU Nos., please
see“List of Spare Parts ” in this book.
16
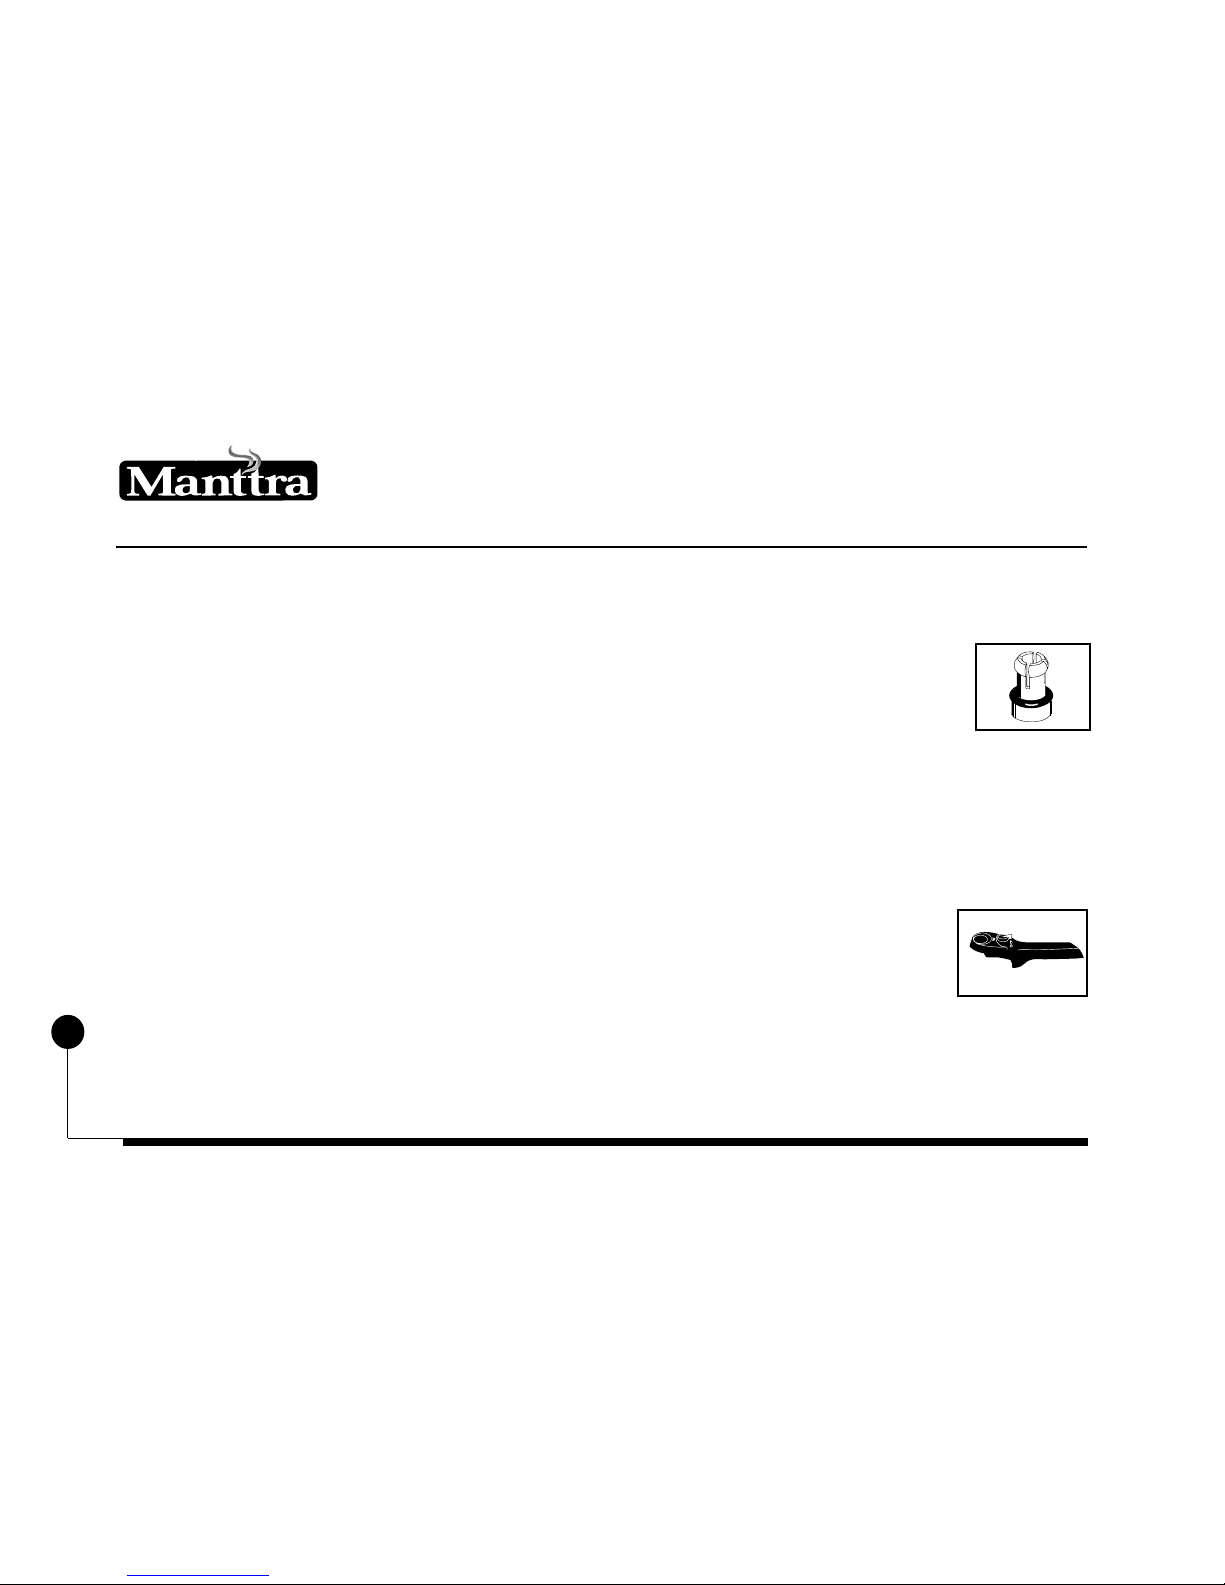
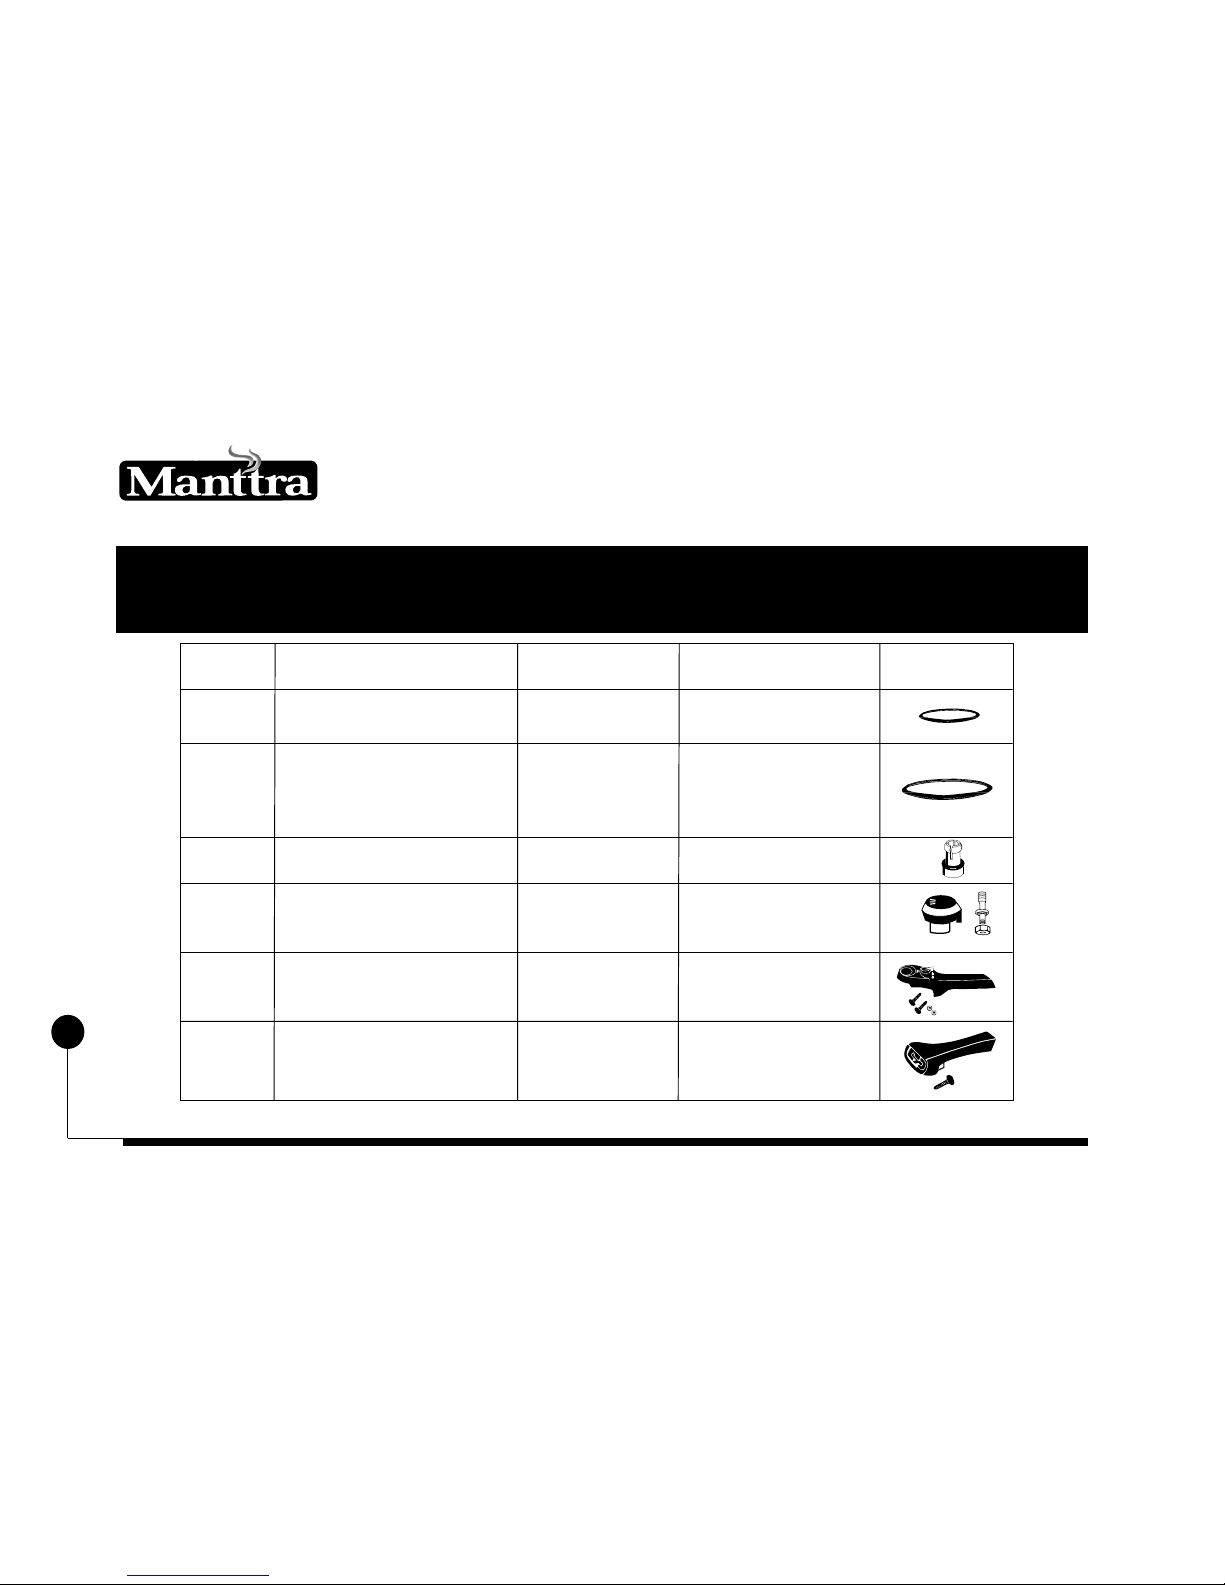
Sl. No. Name of the Part SKU No. Suitable for Models Illustration
1. Gasket 91000
2. Gasket 91002
3. ZPD / Safety Plug 91800 Common
4. Quick and Easy Cooker 91402 Common
Pressure Regulator Assembly
5. Lid Handle Assembly 90206 Common
6. Body Handle Assembly 90110 Common
LIST OF SPARE PARTS FOR STAINLESS STEEL AND DUO-METALLIC
QUICK AND EASY RANGE
33111, 34111, 35111,
36111, 36311, 36319.
78X04, 76X08, 76X19
38111, 38311, 73X05
76X05, 78X05, 76X05
76X19, 73X04, 76X04

17
Sl. No. Name of the Part SKU No. Suitable for Models Illustration
7. Back Handle with Screw 90303
8. Back Handle with Screw 90306
9. Back Handle (A Type) 90307 33111
10. Wire Trivet 91700 Common
11. Quick and Easy 90506 Common
Instruction Manual
12. Recipe Book 90509 Common
34111, 35111,
36111, 36311
73X04, 76X04, 78X04
76X08, 76X19, 76X08
38111, 38311, 73X05
76X05, 78X05, 76X19
Note: ‘X’ indicates any number between 0-9

18
Please read the following instructions very carefully
to ensure that your pressure cooker is always kept
in good working condition.
DO’s
1. Your cooker works on any type of fuel; Gas,
Kerosene or electricity. Ensure maximum heat / flame
once the cooker is kept on the stove. Reduce heat as
soon as pressure is built up. When your cooker is used
on Gas flames the back handle can get heated up.
Caution is to be exercised while handling the cooker.
2. Always use the cooker with
sufficient quantity of water. Pressure
cooking is cooking with steam, so
there must always be water in the
appliance to produce steam. The
quantity of water varies with the
model of the cooker. For the first 15 minutes of
cooking, pour 18 oz. or 2 1/2 cups of water. For every
additional 15 minutes of cooking you need to take 7
oz of additional water.
3. Always ensure that the vent tube
is completely free of any blockage
before closing the lid. This can be
easily done by looking through the
vent tube and ensuring that the light
is visible. Always keep the vent tube clean and fixed
tight.
4. Follow the proper cooking time as shown in the
recipe book.(separately enclosed)
5. When cooking lentils, beans always add a spoonful
of any cooking oil to the content of the appliance
before the commencement of cooking. Allow a few
minutes before closing the lid to avoid excess froth.
When cooking liquid foods, add adequate quantity
of water so that there is enough water even after
cooking. For cooking milk dishes, start with a low
DO’S & DONT’S
19
heat to bring the milk to boil and then turn it up to
pressure.
6. If steam escapes around the lid, a new gasket should
be fitted immediately. Otherwise, the appliance takes
a longer time to come to pressure and it will require
more heat to maintain this pressure. This may also
result in complete loss of water and subsequent dry
heating which will result in weakening of the cooker.
Always buy genuine gasket.
7. Avoid damage to sealing rim of the lid and the body
while cleaning or washing the appliance.
8. Always store the appliance with its lid open to
prevent mustiness.
9. Handle the Pressure Regulator carefully. Keep it
clean.
10. Always ensure that the handles are fully tightened
when in use.
11. Remove the gasket after use, wash in cold water
and allow to dry.
DON’Ts
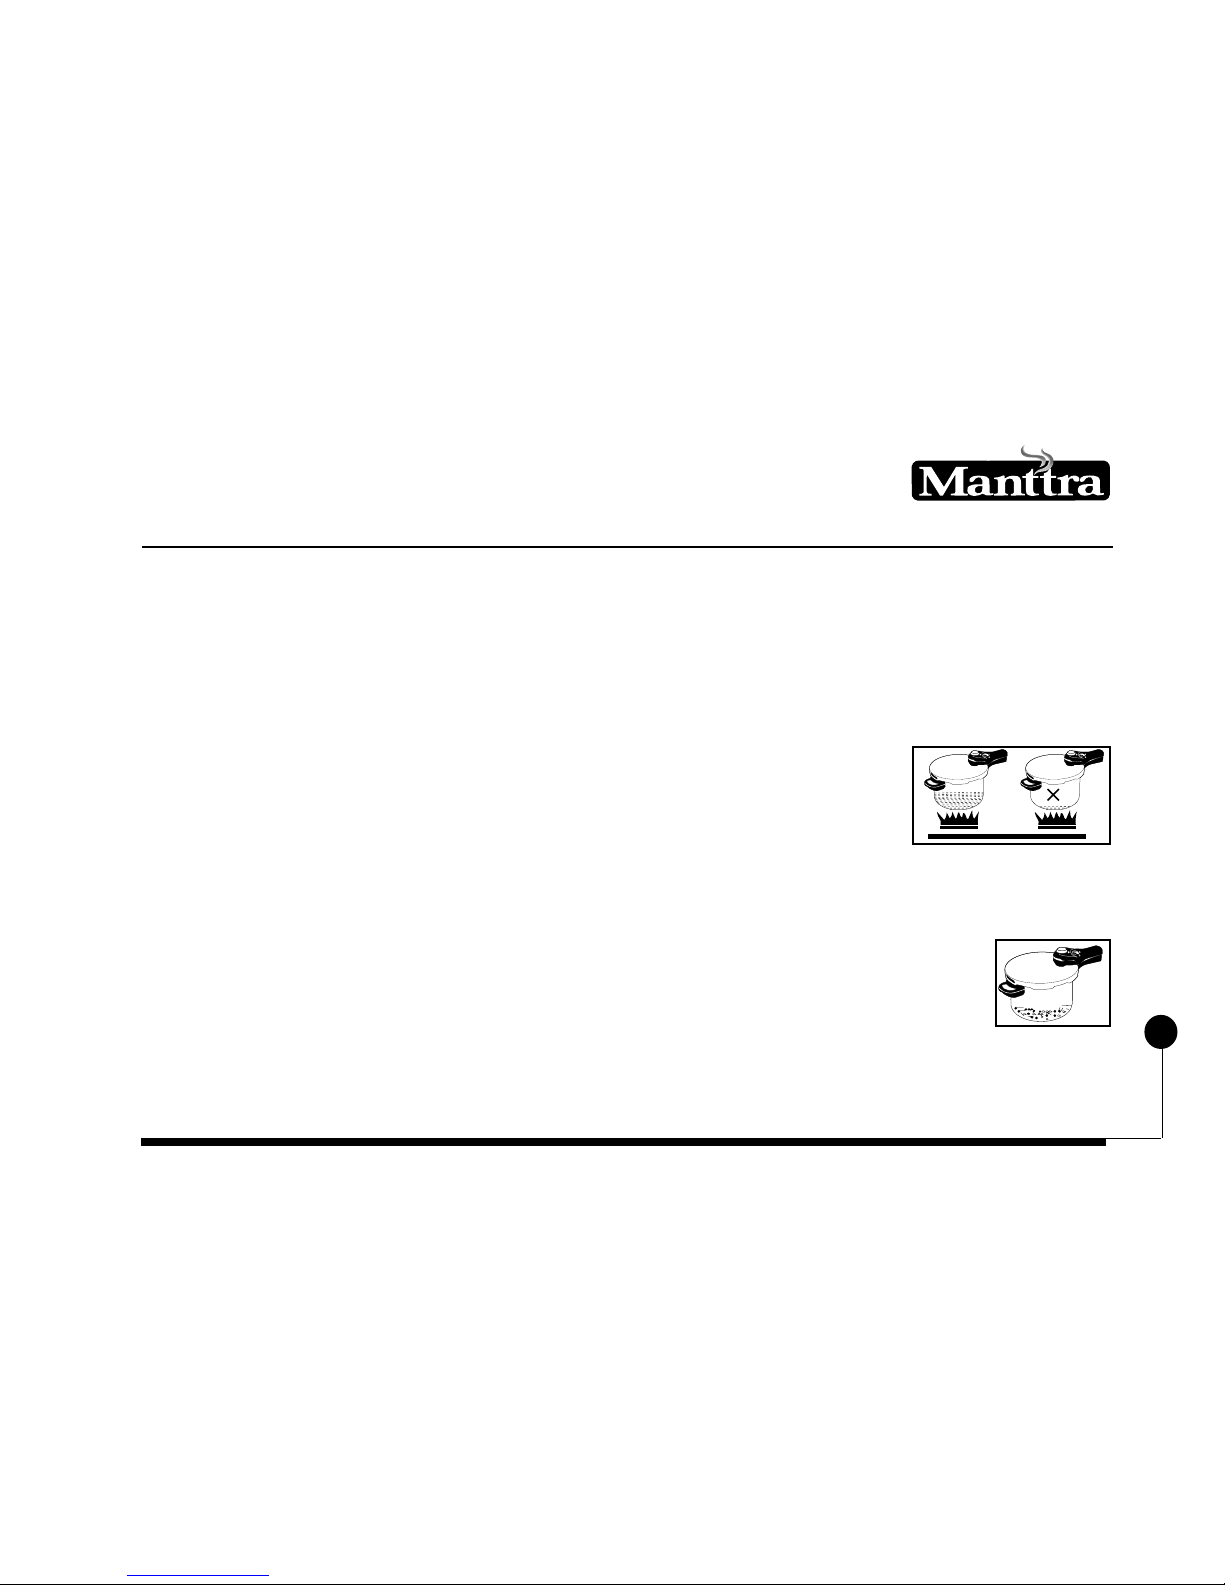
1.Never place a dry / empty
Pressure cooker on a over
heated source. If you ever use
the Pressure cooker without
water, it will get overheated,
the gasket may get burnt or
the safety plug may melt. The cooker may also get
damaged.
2. Your pressure cooker should not be
filled with more than 2/3rds of its
capacity for solids or 1/2 its capacity
for liquids. Never over load it in any
way.
3. Never attempt to force the 3 way safety button to
open indication on the lid handle. If you encounter
This manual suits for next models
13
Table of contents
Languages:
Popular Electric Pressure Cooker manuals by other brands


Cuisinart
Cuisinart CPC-600 - Electric Pressure Cooker Instruction booklet & recipe book

Philips
Philips HD2136 user manual

Martha Stewart
Martha Stewart MSEPC0010 Use and care

san ignacio
san ignacio AS2A Series user manual

PRESSURE KING PRO
PRESSURE KING PRO SC-100S user manual

Paula Deen
Paula Deen PDPC26L instruction manual


