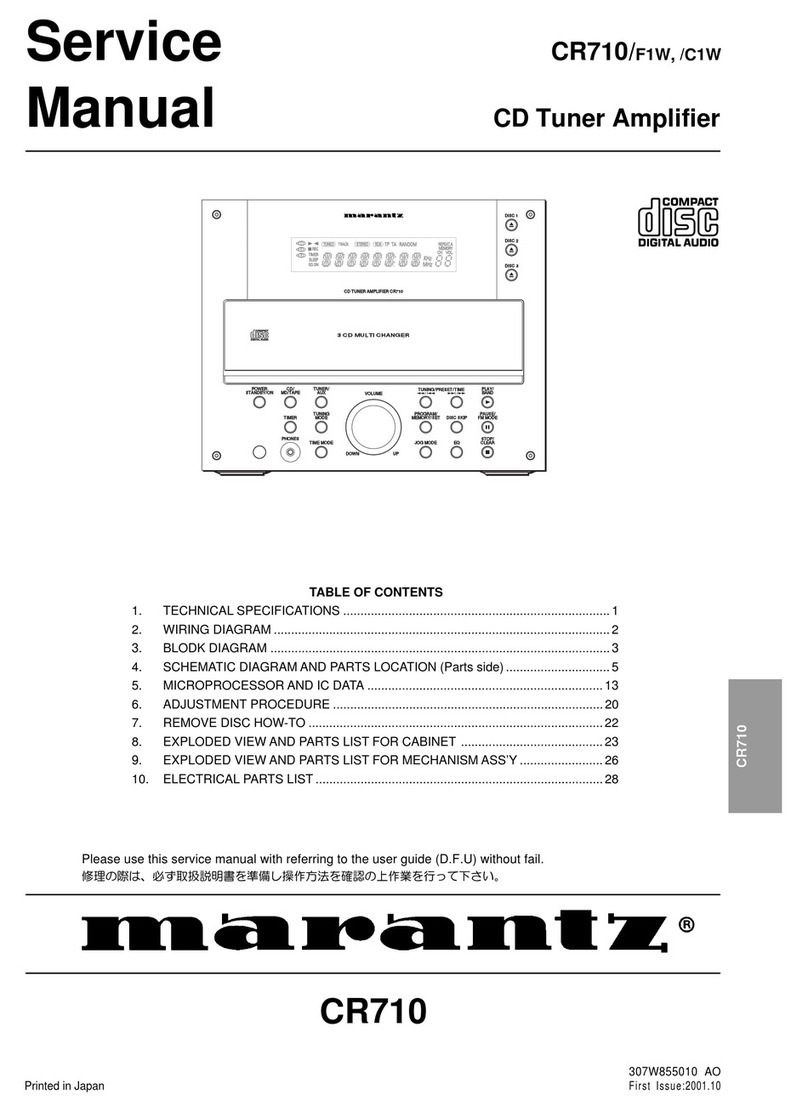
Marantz MR2020 User manual

IT
MINNN
HA
BER
en
Been
ERE
ZZ’
System
MR2020
User
Guide
——————E——————
Compact
Disc
Player
Tuner
Amplifier
COMPACT
CLASS
1
LASER
PRODUCT
LUOKAN
1
LASERLAITE
KLASS
1
LASERAPPARAT
DIGITAL
AUDIO
466

WARRANTY
For
warranty
information,
contact
your
local
Marantz
distributor.
RETAIN
YOUR
PURCHASE
RECEIPT
Your
purchase
receipt
is
your
permanent
record
of
a
valuable
purchase.
It
should
be
kept
in
a
safe
place
to
be
referred
to
as
necessary
for
insurance
purposes
of
when
corresponding
with
Marantz.
IMPORTANT
When
seeking
warranty
service,
it
is
the
responsibility
of
the
consumer
to
establish
proof
and
date
of
purchase.
Your
purchase
receipt
or
invoice
is
adequate
for
such
proof.
FOR
U.K.
ONLY
This
undertaking
is
in
addition
to
a
consumer's
statutory
rights
and
does
not
affect
those
rights
in
any
way.
FRANCAIS
GARANTIE
Pour
des
informations
sur
la
garantie,
contacter
le
distributeur
local
Marantz.
CONSERVER
L’ATTESTATION
D’ACHAT
attestation
d’achat
est
la
preuve
permanente
d’un
achat
de
valeur.
La
conserver
en
lieur
sUr
pour
s’y
reporter
aux
fins
d’obtention
d'une
couverture
d’assurance
ou
dans
le
cadre
de
correspondances
avec
Marantz.
IMPORTANT
Pour
l’obtention
d’un
service
couvert
par
la
garantie,
il
incombe
au
client
d'établir
la
preuve
de
lachat
et
d’en
corroborer
la
date.
Le
regu
ou
la
facture
constituent
des
preuves
suffisantes.
GRANTIE
Bei
Garantiefragen
wenden
Sie
sich
bitte
an
Ihren
Marantz-Handler.
HEBEN
SIE
IHRE
QUITTUNG
GUT
AUF
Die
Quittung
dient
Ihnen
als
bleibende
Unterlage
fur
Ihre
wertvolle
Anschaffung
Das
Aufbewahren
der
Quittung
ist
wichtig,
da
die
darin
enthaltenen
angaben
fur
Versicherungszwecke
oder
bei
korrespondenz
mit
Marantz
angefuhrt
werden
mussen.
WICHTIG!
Bei
Garantiefrangen
muB
der
Kunde
eine
Kaufunterlage
mit
kaufdatum
vorlegen.
Ihre
Quittung
oder
Rechnung
ist
als
Unterlage
ausreichend.
NEDERLANDS
GRANTIE
Voor
inlichtingen
omtrent
garantie
dient
u
zich
te
wenden
tot
uw
plaatselijke
Marantz-handelaar.
UW
KWITANTIE,
KASSABON
E.D.
BEWAREN
Uw
Kwitantie,
kassabon
e.d.
vormen
uw
bewijs
van
aankoop
van
een
waardevol
artikel
en
dienen
op
een
veilige
plaats
bewaard
te
worden
voor
evt.
verwijzing,
b.v.
in
verband
met
verzekering
of
bij
correspondentie
met
Marantz.
BELANGRIJK
Bij
een
evt.
beroep
op
de
garantie
is
het
de
verantwoordelijkheid
van
de
consument
een
gedateerd
bewijs
van
aankoop
te
tonen.
Uw
kassabon
of
factuur
is
zijn
voldoende
bewijs.
GARANTIA
Para
informaci6n
sobre
las
Condiciones
de
Garantia,
sirvase
consultar
el
Certificado
que
encontara
en
le
interior
del
embalaje
del
equipo.
CONSERVE
EL
COMPROBANTE
DE
LA
COMPRA
La
factura
es
el
comprobante
de
la
adquisicién
de
un
producto
valioso.
Consérvela
en
lugar
seguro
para
poder
consultarla
en
caso
necesario.
IMPORTANTE
Para
disponer
de
servicios
cubiertos
por
la
garantia,
el
usuario
debera
acreditar
la
fecha
y
el
lugar
de
adquisicién
del
equipo.
La
factura
0
recibo
de
la
compra
constituyen
un
comprobante
valido
a
tal
efecto.
CONDIZIONI
DI
GARANZIA
L’apparecchio
e’
garantito
per
365
giorni
dalla
data
di
acquisto
comprovata
da
un
documento
attestante
il
nominativo
del
rivenditore
ela
data
di
vendita.
La
garanzia
sara’
prestata
con
la
sostituzione
o
riparazione
gratuita
delle
parti
difettose.
Non
sono
coperti
da
garanzia
difetti
derivanti
da
uso
improprio,
errata
installazione,
manutenzione
effettuata
da
personale
non
autorizzato
o,
comunque,
da
circostanze
che
non
passano
riferirsi
a
difetti
di
funzionamento
dell’apparecchio.
Sono
inoltre
esclusi
dalla
garanzia
gli
interventi
inerenti
l'installazione
e
lallacciamento
agli
impianti
di
alimentazione.
Gli
apparecchi
verranno
riparati
presso
i
nostri
Centri
di
Assistenza.
Le
spese
ed
i
rischi
di
trasporto
sono
a
carico
del
cliente.
La
casa
costruttrice
declina
ogni
responsabilita’
per
danni
diretti
o
indiretti
provocati
dalla
inosservanza
delle
prescrizioni
di
installazione,
uso
e
manutenzione
dettagliate
nel
presente
manuale.
Per
informazioni
sull’abbonamento
al
servizio
Assistenza
postgaranzia
e
per
conoscere
l’indirizzo
dei
Centri
Assistenza
Marantz
rivolgetevi
al
nostro
servizio
consumatori
(telefono
1678-20026
—
numero
verde).
PORTUGUES
GARANTIA
Para
informagoes
sobre
a
garantia,
contactar
o
distribuidor
Marantz
local.
GUARDAR
O
RECIBO
DE
COMPRA
O
recibo
é
o
registo
permanente
da
compra
que
fez.
Deve
ser
guardado
num
local
seguro,
para
ser
apresentado
em
quest6es
relacionadas
com
o
seguro
ou
para
quando
tiver
de
contactar
a
Marantz.
IMPORTANTE
Quando
procurar
assisténcia
técnica
ao
abrigo
da
garantia,
é
da
responsabilidade
do
consumidor
estabelecer
a
prova
e
data
de
compra.
O
recibo
é
prova
adequada.
GARANTI
Angaende
garanti,kontakta
din
lokala
Marantz
handlare.
SPAR
KVITTOT
Kvittot
ar
din
Inképshandling
6ver
Inkép
av
en
vardefull
vara.Det
ska
placeras
pa
ett
sakert
stalle
och
hanvisas
till
vid
férsakringsfragor
eller
vid
korrespondens
med
Marantz.
VIKTIGT
Nar
garantiservice
aberopas
ar
det
konsumeniens
ansver
att
visa
datum
fér
ink6p.Ditt
kvitto
eller
din
faktura
ar
ett
tillfredsstallande
bevis.
GARANTI
Henvend
dem
til
Deres
MARANTZ-forhandler
angaende
inrformation
om
garantien.
GEM
DERES
KVITTERING
Deres
kabskvittering
er
Deres
varige
bevis
pa
et
dyrt
kab.
Den
bar
gemmes
godt
og
anvendes
som
bevis,
hvis
De
vil
tegne
en
forsikring,
eller
hvis
De
kommunikerer
med
Marantz.
VIGTIGT
Det
pahviler
forbrugeren
at
skaffe
bevis
for
kabet
og
kobsdatoen,
hvis
han
eller
hun
gnsker
garantiservice.
Deres
kobskvittering
eller
faktura
er
et
fuldgyldigt
bevis
herpa.
WARNINGS
FOR
LASER
RADIATION
CAUTION
:
INVISIBLE
LASER
RADIATION
WHEN
OPEN.
DO
NOT
STARE
INTO
BEAM.
DANGER
:
INVISIBLE
LASER
RADIATION
WHEN
OPEN.
AVOID
DIRECT
EXPOSURE
TO
BEAM.
VARO!
:
AVATTAESSA
JA
SUOJALUKITUS
OHITETTAESSA
OLET
ALTTIINANAKYMATTOMAALLE
LASERSATEIL
YLLE,
ALA
KATSO
SATEESEEN.
VARNING!
:
OSYNLIG
LASERSTRALNING
NAR
DENNA
DEL
AR
OPPNAD
OHC

CONTENTS
LIST
ENMSH
:s
vscvensceevsseusstacudeeds
sete
deeewe
tad
coca
git
teai
costa
vest
ibeundaciaveu
state
ite
oda
garesod
eines
Gi
cadlaewerh
keadacneeeeeas
page
1
FFANGCAIS
o:2.
.cs6obsceiteeaeteeeeveccee
thie
eee
etal
Tipe
nobis
ee
een
Gib
lan
alee
page
31
DG@UtS
Chisi
ives
secb
sii
teens costa
cteaute
vivehd
tata
ssaotae
dias
tews
iate
te
feet
ah
aang
cede
etal
ded
vb
astieaate
neces
Seite
61
NS
GEA
S
x
stisciinss
fiat
oli
Wuncan
Seiarits
deaths
Bad
cod
weir
sin
acon
medial
ea
ceceoteanea
i
nec
ones,
abelian
naan:
pagina
92
ESPaMOl
ciciasiees
osies
ceases
audk
ceecouatease
suds
cet
saceand
beside
esses
cataida
aan
uate
deeedig
sus
tenicansuests
tate
ets
acoae
pagina
122
WANN
estes
tgae
Baten
socch
el
sete
saa
abel
samadet
Iuehhs
sadist
ceased
dedese
annehs
ecoedtnaautehas
NigMieiavegectereaticesiacadeadees
pagina
152
CLUS
Spgs
ake
ster
tcc
asics
sa
ota
anna
a
eect
adapts
sea
Reeds
oh
Salty
ob
uawiehbasyeadehiaaeetess
pagina
182
SVENSK
aes
sera
Gi
itens
cree.
ah
atest
auctees
ae
atss
ndeuvtotedatiastantgeate
Mata
cniy
ctvhteddaachethcewestenes
sidan
212
DSK
essncesteh
esd
ol
scces
coven
eT
ace
nce
aan
cheb
bess
sea
esa
nttecedes
S¥ace
uestuu
ss
wacs
rau
Gots
Tens
uke
pa
caneeabeeeeeeie
aeearteranyeest
page
242
CE
MARKING
C
€
English
This
MR2020
is
in
conformity
with
EMC
directive
and
low-voltage
directive.
C
€
Frangais
Le
MR2020
est
conforme
a
la
directive
EMC
et
a
la
directive
sur
les
basses
tensions.
C
€
Deutsch
,
Das
Modell
MR2020
entspricht
den
EMC-Richtlinien
und
den
Richtlinien
fur
Niederspannungsgeraate.
C
€
Nederlands
De
MR2020
voldoet
ann
de
EMC-eisen
en
de
vereisten
voor
laagspanning.
C
€
Espanol
El
MR2020
esta
de
acuerdo
con
las
normas
EMC
y
las
relacionadas
con
baja
tensién.
C
€
Italiano
IL
MR2020
é
conforme
alle
diettive
CEE
ed
a
quelle
per
i
bassi
voltaggi.
C
€
Portugués
O
MR2020
conforma
com
as
diretrizes
EMC
e
de
baixa
voltagem.
C
€
Svenska
MR2020
tillverkad
i
enlighe
med
EMC
direktiven
och
direktiven
fér
{Avoltsutrusing.
C
€
Dansk
Mode}
MR2020
er
i
overensstemmelse
med
EMC-direktiveet
og
direktivet
om
lavspaending.

m
z
Q
C
77)
=
PREPARATION
.
SAFETY
CAUTIONS
issiesis
cusiicywnccaiae
dcvrcersticassecannnhoutevsdacuanesbode
cde
cacaniy
eiianonenssawepeniuauauehragusernbeshescigeetes
3
FEATURES
wcsisttc
tics
sisearataucet
aga
cdceeaelacuesnet
vacua
taneset
tanya
hntawaauaivas
neasletwtarantenseuensaeevavidcusuadesraadaraaadanac
nuns
4
CHECKING
THE
PACKAGED
CONTENTS
AND
ACCESSORIES
..........sscceesseceeeeeeeeessceeeeeeeenenneees
4
CONNEC
TIONS
ai
scsss5sSseccccicatene
decedues.
secwsiciadinn
ir
ecnces
nt
A
enced
eas
aeeesiti
anes
esa
eee
5
PREPARATION
OF
REMOTE
CONTROL
UNIT
........c.cccssscesescscessnseeseeceeeseeesneecnenseeceeeseeeseoasenseeeiienen
7
HANDEING
PRECAUTIONS
-ccicsctsessssecsssd
veces
sxnncenndeacteas
tounachcatyavencsees
casa
tuiganeshanexascesesanserdinxacsunseaneses
8
CONTROLS
AND
INDICATORS
i
vccisccsciat
nes
cntszcysiasewas
taste
caasdaviarstcncdastieadexiesnaaste
eenreas
inated
9
Top
Panel
(View
When
Close)
q.........::csssssessnersscsnsassnseresorsenecesecenraneeeesennenaresuassansenessaceseeaseqaseneneeesonseaneeseseatenaeentiomeetens
9
Front
Panel
..cscccccesccvescuverescotsenttuctsecucessstaveceuceusdscaeeaccscascanenedsieddansdeduecieynactceauaonden
cuvdedceracodidsuaccuuatetceestacasagedséancaaey
cagiepnnnae
9
Top
Panel
(View
When:
Open)
wisccnsnccccctosssocersesssncecnsnnatunsencnevacnstssnseseenssnscuancesnedsvansenttnnassdnauteeduntaxsaseuadasanadinnseesasisenieees
10
Remote
Control
Unit
iccocicieccsscésavecsaccvsdessiecdeadecsennenetceccceenesncnaanenahiecaban
cuceeacdencuesposnaeses
ava
suncusesdecentetuiyenueesiscrGcbeaisintiaaads
11
DIS
PAY
ven
cstucii
ci
acrcsiaraedscdediwacnssavjuntedcieazusndsaaacedcatcesyiusasea4svscesdnudadulsaesihesanaciavs
shai
ay
sutupaucesdeasecshenseqaseinneausuucdeasueveseuuedtsiidand
11
CD
PEAY
BAGK
oc
cscccecicn
tis
saccee
cs
aaaat
emai
Sites
Saaainepalesan
nal
ane
a
onal
eaueneded
aaa
euidaaaanaseeeaaesnpeammeuscacevvoeennete
12
RADIO
(TUNER)
RECEPTION
....c.cccsccssssesscscscssnsssssssscssssssnsesscsssesseseceeentaneseseeseneasecenuseseseseesenensseuens
13
CLOCICABIUS
TIMING
occilescsenccncc
cick
Shcecs
ceca
ztenns
cet
seceacannauce
tue
secsuniad
ences
nctaimteawsuceue
cetera
medthecnieuae
14
APPLIED:CD
PLAVER
OPERATIONS
i
vesiesencce
gt
cticitec
is
eae
cases
acendeves eutestcee
cusuts
danisineen
deniddetastucuncine
15
Basic:
Operations
is.
2iit
isin
ui
sete
a
ceed
cine
eae
nceancde
tna
sues
decade
etasteeduvesdenveveutenagvddewececend
csavsveveuseevaviapvessesapsbateudusdesse
cane
15
Display,
EXamm
ples
cc
2c.cccatessesescces
ces
seesbhtccezSrcer
ca
cetecn
salsa
veceatcnanas
caaneearsdecretssentaredivewsctvacers
sindosdvutceVssuntuaadveesecveuntesseariresse
15
PFOgrain
Playback
isi.
cccocssectabsadecetecicisaienvecacadescove
Seieteds
caves
szancursae
cde
ecess
ca
sducnshaveesonexasscaeuedevacsandesesensiveacUebesetiseseanadvessirirees
16
Clearing
the
Program
.....c.cecccenesernsssneensevsssseneresseesnnusessseeseeusunsenseeuauesoreseesausssueeuaseesoerstuaeesseusaeeuoteanausnendaneesensserersenens
16
Repeat
Playback:
so.
cic
ciccnsiccctci
vias
adicaests
ede
ncbensventnwedeedss0u5
nani
devactautues
scadnad
tl
edvenuseeusi
jachsevaadesdenaigaXenevancuscecevaues
wcetsateasavsusiaaee
16
APPLIED
RADIO
(TUNER)
OPERATIONS
.........ccsssecccceeeeeteseeneesecenneneeeeseeeceeneneeseeeeeeneneseeneaaensmeaees
17
Basic:
Operations
cis
ésccicisticccccennciescossvsvavesvunsesscscaves
veicesctnmcasecnay
suit
ceecuaeaseancndsvueavabaeesuancecieceseestsilss
sadeussdeveauhiessteeeraansrpaee’
17
Automatic
Station
Preset
........ccsecsesssesenscnscseeeessenscnnsensenssneansensseeesenssnssueccenconsnessensaduatseesscenaseeeetseeeesseeanesaaeentenanes
18
Manual
Station
Preset
........cccsecseceseevseesessorsseensseensneessnesereeseeeseueneessseeusoessenesuessssseceesaaraseeeseuacacrersaueaaeaseeneonscarteeess
19
Naming
the
Preset
Stations
......ccccccccsceessneneeeeeeeesesesseaeersnedueneescetanenaseneeseasereceeeseasnennsneeeasesutegeaneeddescaneensansertninenases
20
Clearing
the:
Preset:
Stations
aise.
sececceciietsdeecestesteseevieisvavesanenvunsendsesevanstyareasteuitevdcvsvanevuvsvenedssescsentstisesunedavaraeceedrdivreners
21
FRDSi
FUN
GCUiO
nn
oicesssceescatecs
cenbcwas
vecuvesd
leccyyisicacavedidcnccdedenssaccudvaneossdiiutevtepuce'sabashsuteessavceicuuuctharovsyenveusiseteadasguaedanceddssevarcienscd
22
APPLIED
TIMER:
OPERATIONS
wives
csctivintensccssstecinesdastnevsdnnsicnebansteeseads
comadennctncasndewsvasnsenseccdhsucnessetnads
24
SIC]
TIMOR
csisseinsasseitsesininsiscseausedeacersscevvaseceredeveunessnteudageavesunadedseevccaerevdhsiantuncvceqceysduteadse
iuguadadevesedvodecnduudssaenouuaiVeanreneae
24
Program
Timer
AGjUuStMent:...22.<.:c-c00ccchcecetcneecscecentsensitcecesustscepeodttaneeesszcnunatdaces¥siavoncenceecaceanssasusucesteersuneetabeceendesssstiades
25
Program:
Timer
EX@CUtlOM
cdsc2iscccicccecs
cinseenccazcstecdchusadacaveacescascizs
sgeveescesensdeleaigaaceanagencesiuadsesesavacisdvsestesvansbenesecaszarsdilensess
26
SOUND
CONTROL
FEATURES
win
ccccccccaceczecsec
sci
nakedeeseceectevectantesceune
dewonscecdel
descduweduanecquetgansastacheecens
27
CONNECTION
METHOD
WITH
EXTERNAL
EQUIPMENT
.........ccccceccsscnseeesesseensnnensteseeneennneescns
28
TROUBLE
SOO
TING
sisi
sa
cates
ectitensetnga
occas
ds
ctaicancge
aneen
de
toaaub
anand
ensaad
cdewfaameweseent
duadenweetavancchdecenee
29
SPECIFICATIONS
iiss
cteseate
niches
vansadutius
uated
svecccnnacicasnvpase
situeeaauunn
cep
davalantasnetoutaaia
dagualaneabacaaudacinttetennis
30
Foreword
This
section
must
be
read
before
any
connection
is
made
to
the
mains
supply.
WARNINGS
Do
not
expose
the
equipment
to
rain
or
moisture.
Do
not
remove
the
cover
from
the
equipment.
Do
not
push
anything
inside
the
equipment
through
the
ventilation
holes.
Do
not
handle
the
mains
lead
with
wet
hands.
Equipment
mains
working
setting
Your
Marantz
product
has
been
prepared
to
comply
with
the
house-
hold
power
and
safety
requirements
that
exist
in
your
area.
“/2A,/
2B”
Version
product
can
be
powered
by
230
V
AC
only.
On
the
rear
panel
of
the
“K”
Version
product,
a
voltage
selector
(2-position)
is
provided.
Be
sure
to
set
the
voitage
selector
to
the
mains
voltage
of
your
area
before
using
the
unit.
Important:
This
apparatus
is
fitted
with
an
approved
molded
13
Amp
plug.
To
change
a
fuse
in
this
type
of
plug
proceed
as
follows:
1.
Remove
fuse
cover
and
fuse.
2.
Fix
new
fuse
which
should
be
a
BS1362
5A,
A.S.T.A.
or
BSI
approved
type.
3.
Refit
the
fuse
cover.
If
the
fitted
plug
is
not
suitable
for
your
socket
outlets,
it
should
be
cut
off
and
an
appropriate
plug
fitted
in
its
place.
If
the
mains
plug
contains
a
fuse,
this
should
have
a
value
of
5A.
If
a
plug
without
a
fuse
is
used,
the
fuse
at
the
distribution
board
should
not
be
greater
than
5A.
Note:
The
severed
plug
must
be
destroyed
to
avoid
a
possible
shock
haz-
ard
should
it
be
inserted
into
a
13A
socket
elsewhere.
How
to
connect
a
plug
The
wires
in
the
mains
lead
are
colored
in
accordance
with
the
following
code:
BLUE
—
“NEUTRAL”
(“N”}
BROWN
-—
“LIVE”(“L”)
1.
The
BLUE
wire
must
be
connected
to
the
terminal
which
is
marked
with
the
letter
“N”
or
colored
BLACK.
2.
The
BROWN
wire
must
be
connected
to
the
terminal
which
is
marked
with
the
letter
“L”
or
colored
RED.
3.
Do
not
connect
either
wires
to
the
earth
terminal
in
the
plug
which
is
marked
by
the
letter
“E”
or
by
the
safety
earth
symbol
—
or
colored
green
or
green-and-yellow.
Before
replacing
the
plug
cover,
make
certain
that
the
cord
grip
is
clamped
over
the
sheath
of
the
lead
—
not
simply
over
the
two
wires.
Copyright
Recording
and
playback
of
any
material
may
require
consent.
For
further
information
refer
to
the
following:
~
Copyright
Act
1956
—
Dramatic
and
Musical
Performers
Act
1958
—
Performers
Protection
Acts
1963
and
1972
—
any
subsequent
statutory
enactments
and
orders
Precautions
The
following
precautions
should
be
taken
when
operating
the
equip-
ment.
General
precautions
When
setting
the
equipment
ensure
that:
—
the
ventilation
holes
are
not
covered
—
air
is
allowed
to
circulate
freely
around
the
equipment
—
itis
on
a
vibration
free-surface
—
it
will
not
be
exposed
to
interference
from
an
external
source
—
it
will
not
be
exposed
to
excessive
heat,
cold,
moisture
or
dust
—
it
will
not
be
exposed
to
direct
sunlight
—
it
will
not
be
exposed
to
electrostatic
discharges.
Never
place
heavy
objects
on
the
equipment.
If
a
foreign
body
or
water
does
enter
the
equipment,
contact
your
nearest
dealer
or
service
center.
Do
not
pull
out
the
plug
by
pulling
on
the
mains
lead,
hold
the
plug.
It
is
advisable
when
leaving
the
house,
or
during
a
thunderstorm,
to
disconnect
the
equipment
from
the
mains
supply.
ENGLISH

m
z
?)
a
n
=x
Do
not
install
the
unit
in
a
place
under
high
temperature
and
humidity.
Do
not
install
the
unit
ina
place
subject
to
vibrations.
Do
not
install
the
unit
ina
place
with
excessive
dust.
7
ENS
Always
install
the
unit
on
a
horizontal
surface.
Do
not
install
the
unit
on
its
side
panel.
[
Do
not
place
an
object
on
the
unit.
Do
not
place
a
heavy
Object
on
the
power
cord.
Do
not
wind
the
power
cord
around
anything.
Do
not
wipe
the
unit
with
thinner,
benzine,etc.
the
CDs.
Do
not
place
the
unit
upside
down.
Otherwise
the
top
panel
may
be
damaged.
Do
not
place
an
object
on
the
top
panel.
Otherwise
this
cannot
be
opened
and
iC
closed.
Do
not
attempt
to
open
or
close
the
top
panel
with
your
hand.
Otherwise
the
top
panel
will
be
damaged.
Do
not
install
the
unit
on
a
carpet.Otherwise
the
ventilation
holes
will
be
blocked.
Be
careful
not
to
get
your
|
finger
caught
between
the
top
panel
and
rear
panel.
<<
Be
careful
against
the
tip
of
the
lever
button.

@
Table-top
design
provides
the
unit
with
an
interior
decorating
function
that
makes
your
private
space
more
fashionable.
@
Two
timer
programs
switch
music
on
and
off
at
desired
timings.
A
sleep
timer
is
also
provided.
@
Versatile
sound
control
functions
for
enhancing
your
musical
space.
—
DSC
(Digital
Sound
Control):
Plays
music
in
a
desired
tone
such
as
Classic
and
Rock.
—
SP
(Space-Phonic
sound):
Enhances
the
sound
expansion
of
stereo.
—
DBB
(Dynamic
Bass
Boost):
Enhances
low
frequencies
for
more
powerful
reproduction.
@
FM
/AM(MW
/
LW)
synthesizer
tuner.
—
FM
stereo.
—
Preset
of
up
to
30
stations
together
with
the
station
names.
@
CD
player
with
simple
operations.
Program
playback
of
up
to
30
tracks.
—
Repeat
playback.
@
A
motorized
open/close
top
panel.
CHECKING
THE
PACKAGED
CONTENTS
AND
ACCESSORIES
—
After
unpacking
the
product,
check
that
the
following
equipment
and
accessories
are
present
—
x
”
und
©
Zz
uw
Main
unit
(MR2021)
00.0...
ee
cceeeeeeeceeseeeeeeeeecerectetnnerteaeeaes
1
Owner's:
Manual:
i:
Ascii.
etgscek
i
gadeie
dada
eeetodtancaeenestsninerede
es
1
Warranty
Cardo...
ccccseccccsesssesssecssssssssesseessesesesessnresteesietans
1
Remote
control
unit
(RCZO2ZOMR)
.........cceeeeceseeeeeetenees
1
FIM
AN
tO
a
wes
cettcvaceacces
ies
etescahathennss
teas
tistetecrsuvaieeetesets
1
Speakers
(LS2021)

LL
=z
=
a
—
Connect
the
equipment
and
accessories
correctly
as
shown
below
—
FM
antenna
(Provided)
AC
plug
Connect
to
a
230V
AC
power
outlet.
The
main
unit
display
shows
the
clock
display
when
the
AC
power
is
connected
AM
loop
antenna
(Provided)
&
~—Adapter
Speakers
(Provided)
Remove
the
adapters
and
connect
the
speaker
cables
correctly.
—
Arrangement
of
cables
by
attaching
the
cable
clampers
(provided)
—
Arrange
the
rear
panel
cables
using
the
provided
clampers
as
shown
below.
Note:
Arranging
the
cables
*
When
using
other
connection
cables
than
provided
or
other
connectors,
make
sure
that
the
top
panel
can
be
opened
and
closed
smoothly
after their
connections
and
arrangement.
Peel
off
protective
paper
and
attach
by
adhesion
Peel
off
protective
paper
and
attach
by
adhesion
Clamper

=
”
a
2)
z
ul
—
Connection
of
AM
loop
antenna
(provided)
-
—
Attachment
of
speaker
legs
—
@
Assemble
the
provided
AM
loop
antenna
as
shown
below
@
There
are
8
speaker
legs(2
sets
of
4)
included
with
the
speakers.
before
connecting
it.
To
rear
panel
ANTENNA
jack
wT
2
pe
Please
refer
to
the
diagram
below
to
attach
4
legs
to
the
bottom
of
each
speaker.
Insert
section
A
into
B
Notes:
AM
loop
antenna
*
Install
the
AM
loop
antenna
in
a
position
where
the
best
re-
o----Attachment
point
of
speaker
legs
ceiving
condition
can
be
obtained.
*
When
the
AM
loop
antenna
is
installed
near
a
TV,
the
receiv-
ing
condition
may
be
deteriorated
due
to
interference
from
the
TV.
In
this
case,
install
the
AM
loop
antenna
as
apart
as
possible
from
the
TV.
Notes:
*
Connect
the
cable
from
the
AM
loop
antenna
to
the
ANTENNA
~~
Remove
dirt
or
layer
of
oil
etc.,
before
attaching
the
legs.
jack
by
checking
the
orientation
of
the
plug.
*
Attach
legs
left
to
right,
symmetrically.
—
Connection
of
speakers
(provided)
—
*
The
provided
speakers
are
designed
magnetism-proof
so
they
can
be
installed
near
a
TV.
However,
they
may
cause
color
irregularities
on
the
screens
of
some
TV
models.
In
this
case,
install
the
speakers
at
a
larger
distance
from
the
TV.

HSIONA
~
Loading
batteries
— —
Remote
control
range
—
1.
Open
the
battery
cover
by
lifting
it
in
direction
B
while
pushing
section
A
in
the
direction
of
the
arrow.
(OSs
B
aa:
Se
t
aay
Main
unit
(MR2021)
ree
+
Approx.
5m
Remote
control
sensor
|
60°
Remote
control
unit
(RC2020MR)
@
Caution
on
batteries
=e
Improper
use
of
the
batteries
may
lead
to
battery
fluid
leak-
age
or
explosion.
To
prevent
this,
be
sure
to
observe
the
fol-
lowing.
.
When
the
remote
control
unit
is
not
to
be
used
for
a
long
period,
remove
batteries
from
it.
.
In
case
of
error
during
remote
control
operation,
remove
bat-
teries,
load
them
and
try
the
same
operation
again.
.
The
provided
dry
cell
batteries
are
not
rechargeable.
Never
attempt
to
recharge
them.
.
In
case
of
battery
leakage,
remove
the
battery
fluid
in
the
battery
compartment
completely
by
wiping
it
well.
Otherwise
rust
may
produce
in
the
battery
compartment.
When
remov-
ing
the
battery
fluid,
use
case
to
avoid
contact
with
your
hand.
M
Note
on
remote
control
operation
@
If
the
remote
control
sensor
is
exposed
to
direct
sunlight
or
other
strong
light,
the
remote
control
operation
may
not
work.
@
Battery
replacement
caution
1.
Insert
batteries
with
correct
+
and
-
polarity.
2.
Do
not
use
an
previously-used,
old
battery
with
new
one.
Also
do
not
use
batteries
of
different
types
together.
@
Battery
replacement
timing
@
When
the
remote
control
operation
seems
to
be
unstable,
replace
batteries
with
new
ones.

HANDLING
PRECAUTIONS
|
—
CD
handling
precautions
—
Notes:
1)
Handle
a
CD
carefully
so
as
not
to
damage
its
surface.
2)
Keep
the
disc
surface
always
clean.
A
disc
surface
contains
up
to
6
billion
items
of
data.
When
cleaning
the
disc
surface,
always
use
a
dedicated
Compact
Disc
cleaner
and
wipe
the
side
surface
as
shown
in
the
illustration
above.
Never
use
record
cleaner
for
use
with
conventional
analog
disks,
as
this
will
affect
the
CD
surface.
Also
do
not
use
a
detergent
or
polishing
agent.
3)
Do
not
write
anything
on
the
CD
label
surface.
4)
Do
not
use
a
CD
if
it
has
a
plastic
tape,
label,
paste
or
trace
of
paste
left
on
its
surface.
If
such
a
disc
is
played
on
the
CD
player,
other
trouble
may
result.
5)
Store
discs
correctly
by
accommodating
them
in
their
disc
cases.
6)
When
setting
a
CD,
hold
it
as
shown
in
the
following
iilustra-
tion
and
fit
it
along
the
circular
groove.
7)
When
taking
out
a
CD,
hold
the
center
part
lightly
with
a
finger
and
pick
the
disc
up
at
its
edge.
8)
When
setting
or
taking
out
a
CD,
be
careful
not
to
touch
the
pickup
lens
with
your
finger.
Otherwise
malfunction
may
re-
sult.
—When
something
is
pinched
by
the
top
panel
and
a
vibrating
sound
occurs-
=—s
.
If
an
object
is
pinched
by
the
top
panel
or
if
the
top
panel
is
forcibly
held
when
it
is
opened
or
closed,
a
vibrating
sound
may
occur.
If
this
happens,
remove
the
pinched
object,
then
press
the
Open/Close
button
again
to
open
and
close
the
top
panel
two
or
three
times.
Advice
When
performing
the
above
operation,
if
the
top
panel
sticks
out
different
than
as
shown
in
the
figure,
the
control
button
on
the
top
panel
may
not
function
properly.
If
this
happens,
fix
it
using
the
procedure
below.
1)
First,
check
whether
the
left
or
right
side
sticks
out.
2)
Press
the
Open/Close
button
on
the
top
panel.
3)
When
the
top
panel
begins
to
rise,
unplug
the
power
cord.
4)
Gently
lift
up
the
top
panel
and
fix
the
displacement.
5)
Plug
in
the
power
cord.
6)
Open
and
close
the
top
panel
and
operate
the
control
button
on
the
top
pane
to
check
that
it
has
been
fixed.
2.
If
the
top
panet
is
opened
forcibly
when
it
is
closed,
or
if
the
top
panel
is
struck
with
a
large
force,
it
could
be
displaced.
Fix
this
displacement
using
the
same
procedure.
ENGLISH

HSITONA
—
Top
Panel
(View
When
Closed)
—
@
Expressions
inside
(
)
are
used
in
the
operating
procedures
and
other
descriptions
in
this
manual.
9:
(DBB
/
SP)
button
Switches
between
DBB
and
SP.
(P.27)
(timer
ON
/
OFF
)
button
Used
to
check
or
stop
the
program
timer.
(P.26)
FUNCTION
button
Switches
the
input
function.
(PP.12,13)
_1B
(volume)
button
Turn
up
the
volume.
(PP.12,13)
4;(sleep)
button
Set
the
sleep
timer
(P.24)
©
(clock)
button
Used
to
switch
the
clock
display.
The
current
time
of
the
day
is
displayed
for
5
seconds
after
the
power
is
turned
on.
2
(DSC)
button
Switches
the
DSC.
(P.27)
_1
(volume)
button
Turn
down
the
volume.
(PP.12,13)
>/u
(CD
play)
button
DISPLAY
(radio
display)
button
Starts
CD
playback
or
let
it
pause.
CLEAR
button
Clears
a
setup.
(PP.16,21)
&(-)
button
Used
to
select
the
frequency.
(PP.13,17)
MEMO
button
Used
in
setup
operations.
(PP.16,18,19,20,21)
m3(
+)
button
Used
to
select
the
frequency.
(PP.13,17)
(PP.12,15)
Switches
the
radio
display.(P.22)
>>
(CD
track
select)
button
PS+
(station
select)
button
Selects
a
CD
track.
(P.15)
Selects
a
preset
station.
(PP.17,18,19)
&
(CD
stop)
button
PTY
button
Stops
CD
playback.(P.12)
PTY
auto
search
function
(P.23)
#4
(CD
track
select)
button
PS-
(station
select)
button
Selects
a
CD
track.
(P.15)
Selects
a
preset
station.
(PP.17,18,19)
Note:
The
buttons
on
the
top
panel
are
defeated
while
it
is
open.
—
Front
panel
—
Top
panel
Power
switch
(PP.12,13,14)
Top
panel
open
sensor
Top
panel
open/close
button
(PP.12,14)
(PP.12,14)
Remote
coniro!l
sensor
(P.7)
Headphone
jack

—
Top
Panel
(View
When
Open)
—
The
following
illustration
does
not
show
the
opened
top
panel
itself.
ENGLISH
@
Expressions
inside
(
)
are
used
in
the
operating
procedures
and
other
descriptions
in
this
manual.
@
Buttons
marked
*
function
in
a
different
way
from
the
functions
when
the
top
panel
is
closed.
9:
(DBB
/
SP)
button
Switches
between
DBB
and
SP.
(P.27)
@)
ADJ
(timer
adjust)
button
Used
to
set
the
program
timer.
(P.25)
FUNCTION
button
Switches
the
input
function.
(PP.12,13)
1
(volume)
button
Turn
up
the
volume.
(PP.12,13)
4"
(sleep)
button
Sets
the
sleep
timer.(P.24)
(DSC)
button
Switches
the
DSC.
(P.27)
©
ADJ
(clock
adjust)
button
*
Used
to
set
or
display
the
time
of
the
day.
(P.14)
The
current
time
of
the
day
is
displayed
for
30
seconds
after
the
power
is
turned
on.
1
&
(volume)
button
Turn
down
the
volume.
(PP.12,13)
|
»
(CD
play)
button
DISPLAY
(radio
display)
button
Starts
CD
playback.(P.12)
Switches
the
radio
display.
(P.20)
CLEAR
button
5
Clears
a
setup.(PP.16,21)
g
El
(-)
button
«
Used
to
adjust
the
time
or
select
the
frequency.
(PP.13,14,17,25)
MEMO
button
Used
in
setup
operations.
(PP.14,16,18,19,20,21
,25)
>>!
(CD
track
select)
button
PS
+
(station
select)
button
Selects
a
CD
track.
(P.15)
Selects
a
preset
station.
(PP.17,18,19)
m
(CD
stop)
button
PTY
button
Stops
CD
playback.
(P.12)
PTY
autosearch
function.
(P.23)
(+)
button
«
Used
to
adjust
the
time
or
select
the
frequency.
(PP.13,14,17,25)
tq
(CD
track
select)
button
PS-
(station
select)
button
Selects
a
CD
track.
(P.15)
Selects
a
preset
station.
(PP.17,18,19)
10

HSIMODNA
CONTROLS
AND
INDICATORS
-
—-
Remote
Control
Unit
—
Remote
control
transmitter
Volume
control
(down)
Volume
control
(up)
(PP.12,13)
—
(PP.12,13)
Power
=
MUTE
(PP.12,13,14)
.
(PP.15,17)
CD
track
select/
oN
eee
station
select
o~
(PP.15,17)
(>)
i
CD
track
select/station
select
DSC
select
(SOUND)
Sy
“8-7
(PP.15,17)
Weed)
Osi—.
CD
stop
—
neal
(P.15)
re
©
ae
CD
select
(CD)e—SS=~m
oO
OF!
CD
repeat
(REPEAT)
(P15)
wa
ve
(P.16)
Radio
select
(TUNER)
oo
AUX
select
(AUX)
(P.17)
(P.28)
—
Display
—
DBB
indicator
CD
player
Timer
indicator
indicator
DBB/SP
indicator
Timer
setting
Radio
tuner
Sleep
timer
indicator
indicators
indicator
DSC
indicator
Clock
setting
indicator
Repeat
indicator
®
Program
indicator
“|
PROGRAM
U
Mute
indicator
SET
CLOCK
|
hl
CD
total
time
‘PRESET:
TRACK
indicator
{
“TUNING!
Stereo
AM/PM
;
Memory
setting
Preset
station
CD
play
indicator
Bioaueae
nie
indicator
indicator
indicator
indicator
Operation
status
CD
track
CD
pause
FM/AM(MW/LW)
FM/AM
frequency
display
indicator
indicator
band
selection
indicator
indicator
11

1,9
2568247
(The
figure
indicates
the
procedure
steps)
1.Turn
power
on
Press
the
power
switch.
2.Open
the
top
panel
Press
the
top
panel
open/close
button
or
place
your
hand
above
the
open
sensor.
3.Set
a
CD
Place
it
with
the
label
side
up.
4.Close
the
top
panel
Press
the
top
panel
open/close
button.
Notes
*
CD
cannot
be
played
while
the
top
panel
is
open.
*
When
power
is
turned
off
while
the
top
panel
is
open,
it
closes
automatically.
Advice
@
In
the
following
procedure,
power
can
also
be
turned
on
by
performing
step
2
by
omitting
step
1.
@
When
the
selected
input
function
is
CD
at
the
moment
power
is
turned
on,
simply
setting
a
CD
and
pressing
the
CD
play
button
closes
the
top
panel
and
starts
playback
automati-
cally.
5.Select
the
CD
input
function
Press
the
FUNCTION
button.
\
6.Start
playback
Press
the
CD
play
button.
@
7.Adjust
the
volume
Press
the
volume
up/down
button
for
an
optimum
volume.
8.Stop
playback
Press
the
CD
stop
button.
9.Turn
power
off
Press
the
power
switch.
The
time
of
the
day
is
displayed
when
power
is
turned
off.
When
the
switch
is
in
the
OFF
position,
the
apparatus
is
NOT
disconnected
from
the
AC
supply
mains.
12
ENGLISH

HSITSNA
(The
figure
indicates
the
procedure
steps)
1.Turn
power
on
Press
the
power
switch.
2.Select
the
FM
or
AM(MW,LW)
input
function
Press
the
FUNCTION
button.
4
{(:0})
3.Select
the
frequency
of
the
desired
station
Press
the
+
or
—
button.
STEREO
4.Adjust
the
volume
| .
Press
the
volume
up/down
button
for
an
optimum
volume.
5.Turn
power
off
Press
the
power
switch.
The
time
of
the
day
is
displayed
when
power
is
turned
off.
When
the
switch
is
in
the
OFF
position,
the
apparatus
is
NOT
disconnected
from
the
AC
supply
mains.
Notes
**
In
both
FM
and
AM(MW,LW)
bands,
inter-station
noise
is
pro-
duced
from
the
speakers
at
frequencies
without
radio
sta-
tions.
To
prevent
output
of
noise
at
a
high
volume,
it
is
recommended
to
decrease
the
volume
before
varying
the
tuning
frequency.
%
When
power
is
turned
off
while
the
top
panel
is
open,
it
closes
automatically.
13

MEMO
button
ENGLISH
(The
figure
indicates
the
procedure
steps)
Example:
To
adjust
the
time
to
8:34pm
(12-hour
display)
(The
same
time
of
the
day
is
expressed
as
20:34
in
the
24-hour
display.)
1.Turn
power
on
Press
the
power
switch.
2.Open
the
top
panel
Press
the
top
panel
open/close
button
or
place
your
hand
above
the
open
sensor.
3.Display
the
time
of
the
day
Press
the
clock
adjust
button.
Time
is
displayed
for
30
sec.
PRESS
+
MEMO
Button
4.Select
the
12-hour
display
system
Press
the
+
or
—
button.
The
time
of
the
day
is
displayed
in
the
24-hour
system
when
neither
AM
or
PM
is
displayed.
(Within
30
sec.)
PRESS
MEMO
Button
5.Adjust
the
hour
Press
the
+
or
—
button.
SET
CLOCK
PRESS
|
MEMO
Button
6.Adjust
the
minute
Press
the
+
or
—
button.
SET
CLOCK
—
(aeRO)
-
7,
N
7.Now
the
time
of
the
day
has
been
set
Press
the
clock
adjust
button.The
time
of
the
day
is
dis-
played
for
5
seconds,
then
the
display
returns
to
the
pre-
vious
condition.
S
(BD
-
8.Turn
power
off
Press
the
power
switch.
The
top
panel
closes
automatically.
When
the
switch
is
in
the
OFF
position,
the
apparatus
is
NOT
disconnected
from
the
AC
supply
mains.
Notes
*
The
time
of
the
day
can
be
adjusted
only
while
the
top
panel
is
open.
*
Be
sure
to
adjust
the
time
of
the
day
before
using
the
pro-
gram
timer.
**
The
time
of
the
day
is
displayed
when
power
is
turned
off.
14

ul
z
Q)
ae
7)
x
—
Basic
Operations
—
—
Main
unit
—
(
>/i
rd
14-4
GOD
>
9
p>/if:
Starts
playback.
Pressing
during
playback
lets
it
pause
temporarily.
:
Skips
to
the
beginning
of
the
next
track.
Pressing
and
holding
searches
the
track
in
the
forward
direction.
:
Skips
to
the
beginning
of
a
previous
track.
Pressing
and
holding
searches
the
track
in
the
backward
direction.
gm
:
Stops
playback.
da!
dq
—
Remote
control
unit
—
Pm
s
Mutes
the
audio
from
the
speakers
and
headphones.
Skips
to
the
beginning
of
a
previous
track.
Or
1S
3
\
Starts
playback
_*
Play’
:
|
Stops
playback.
©O—-@
Skips
to
the
beginning
[os
|
of
the
next
track.
o=
oy
A
“Q
OF
Selects
the
CD
input
\
functtion.
To
be
pressed
when
the
CD
player
cannot
be
controlled
with
>,
mri,
w<and
m.
REPEAT
button
(See
page
16)
—
Display
—
In
stop
mode,
shows
the
total
number
of
tracks
on
the
CD.
In
play
mode,
shows
the
track
number
being
played.
CD
input
function
indicator.
Audio
muting
indicator.
MUTE
TOTAL
TRACK
CD
play
indicator.
|
CD
play
pause
indicator.
Total
time
indicator.
In
stop
mode,
shows
the
total
playing
time.
In
play
mode,
shows
the
elapsed
playing
time
of
the
current
track.(The
max.
display
is
99.59)
APPLIED
CD
PLAYER
OPERATIONS
—
Display
Examples
—
Display
when
no
CD
is
set.
|
@
Display
when
the
CD
input
function
is
selected
while
the
top
panel
is
open.
;
ae
Display
when
a
CD
is
played
upside
down,
scratched,
stained,
warped
or
otherwise
unable
to
be
played.
In
addition
to
the
above
cases,
this
message
may
also
be
dis-
played
when
ihe
unit
malfunctions.
Please
see
the
description
under
"The
unit
may
be
malfunctioning.”
in
"Troubleshooting"
on
page
29.
15

—
Program
Playback
—
@
The
programming
feature
allows
you
to
select
desired
tracks
(up
to
30
tracks)
from
a
CD
and
reordering
them
in
the
desired
order.
@
Set
a
CD,
select
the
CD
function
with
the
FUNCTION
button,
and
proceed
to
the
following.
x
@
a
Oo
Zz
ui
4.Start
program
playback
Press
the
CD
play
button.
The
programmed
tracks
will
be
played
in
the
sequence
they
are
programmed.
The
programmed
tracks
are
played
when
playback
is
started
while
the
indicator
shown
below
is
displayed.
1.Enter
the
program
mode
—
Press
the
MEMO
button.
Vs
~
,
—
PROGRAM
—
PROGRAM
2.Select
the
desired
track
Press
the
CD
track
select
button.
Advice
via
@
The
total
playing
time
is
displayed
up
to
99:59.
Longer
time
x
2
re
aes
5
than
this
cannot
be
displayed.
@
The
above
operation
is
possible
even
when
the
top
panel
is
open.
In
this
case,
if
a
track
which
does
not
exist
in
the
disc
is
programmed,
the
track
is
skipped
during
actual
playback.
—
Clearing
the
Program
—
Press
the
STOP
button
while
the
CD
player
is
in
stop
mode.
The
PROGRAM
indicator
disappears
and
the
entire
pro-
gram
is
cleared.
3.Program
the
track
Press
the
MEMO
button.
The
programmed
track
number
and
the
total
playing
time
of
the
programmed
tracks
are
displayed.
—
Repeat
Playback
—
{
Ls
x
/
va
~
PROGRAM
-
(©——eREPEAT
button
Program
other
tracks
by
returning
to
step
2
for
each
(up
to
30
tracks
can
be
programmed).
*
lf
you
program
a
wrong
track,
press
the
CLEAR
button
to
clear
the
last
programmed
track.
After
programming
all
of
the
desired
tracks,
press
the
MEMO
button.
PRESS
MEMO
Button
Each
press
of
the
REPEAT
button
of
the
remote
control
unit
switches
the
repeat
mode
between
all-track
repeat,
1-track
repeat
and
repeat
off.
REPEAT
All
tracks
are
played
repeatedly.
t
ir
The
desired
track
is
played
repeatedly.
{
|
|
Repeat
playback
is
off.

HSI1SN4
—
Basic
Operations
—
@
Automatic
station
tuning
Press
and
hold
the
+
or
-
button,
and
release
the
button
when
the
frequency
starts
to
vary
automatically.
Automatic
tuning
starts
and
the
display
shows
the
message
shown
on
the
right.
The
automatic
tuning
stops
automatically
at
a
frequency
where
a
station
is
detected.
Note
Automatic
tuning
may
not
stop
anywhere
when
the
general
receiving
condition
is
poor.
In
this
case,
check
the
antenna
location,
etc.
~
Main
unit
—
_a®p+
DISBLAY
+:
Each
press
increases
the
frequency.
pS
—
«©»
PS
+
—:
Each
press
decreases
the
frequency.
PTY
DISPLAY
:
Switches
over
the
displayed
information.
PS
+
:
Recalls
a
preset
station.
PS
-
:
Recalls
a
preset
station.
PTY
:
PTY
auto
serch.
—
Remote
control
unit
—
Mute
the
audio
from
the
speakers
and
headphones.
Recall
preset
station
Recall
a
preset
station.
Selects
the
radio(TUNER)
input
function.
Each
press
switches
the
FM
and
AM
band
alternately.
To
be
press
when
the
tuner
cannot
be
controlled
by
pressing
the
Me
or
>I,
FM
frequency
unit
indicator
AM
frequency
unit
indicator
sist
sas
Muting
indicator
ep
pe]
cE
faut
ol
Land
PUP
Pp
ry
wie
eS
PRESET
aia
MW
LW
TUNING
|
STEREO
5
sea
AM(LW)
band
indicator
—
Display
—
Radio
input
function
scaly
((10»))
Stereo
proaicatt
indicator
AM
(MW)
band
indicator
AM
or
FM
frequency
display
FM
band
indicator
17
Preset
station
number
display
Other manuals for MR2020
1
Table of contents
Languages:
Other Marantz Amplifier manuals

Marantz
Marantz MA-9S2 User manual

Marantz
Marantz PM-72 User manual

Marantz
Marantz AV7005 User manual

Marantz
Marantz AV 10 User manual

Marantz
Marantz PM7000 User manual

Marantz
Marantz PM551 User manual

Marantz
Marantz 1070 User manual

Marantz
Marantz PM5003 User manual

Marantz
Marantz PM17A/F1N User manual

Marantz
Marantz SR2100 User manual

Marantz
Marantz PM6006 User manual

Marantz
Marantz SM-80 User manual

Marantz
Marantz AV8003 User manual

Marantz
Marantz 33 User manual

Marantz
Marantz 2235B User manual

Marantz
Marantz PM-15S2 Limited User manual

Marantz
Marantz PM-11S2 User manual

Marantz
Marantz PM630 User manual

Marantz
Marantz 1300DC User manual

Marantz
Marantz PM250 User manual