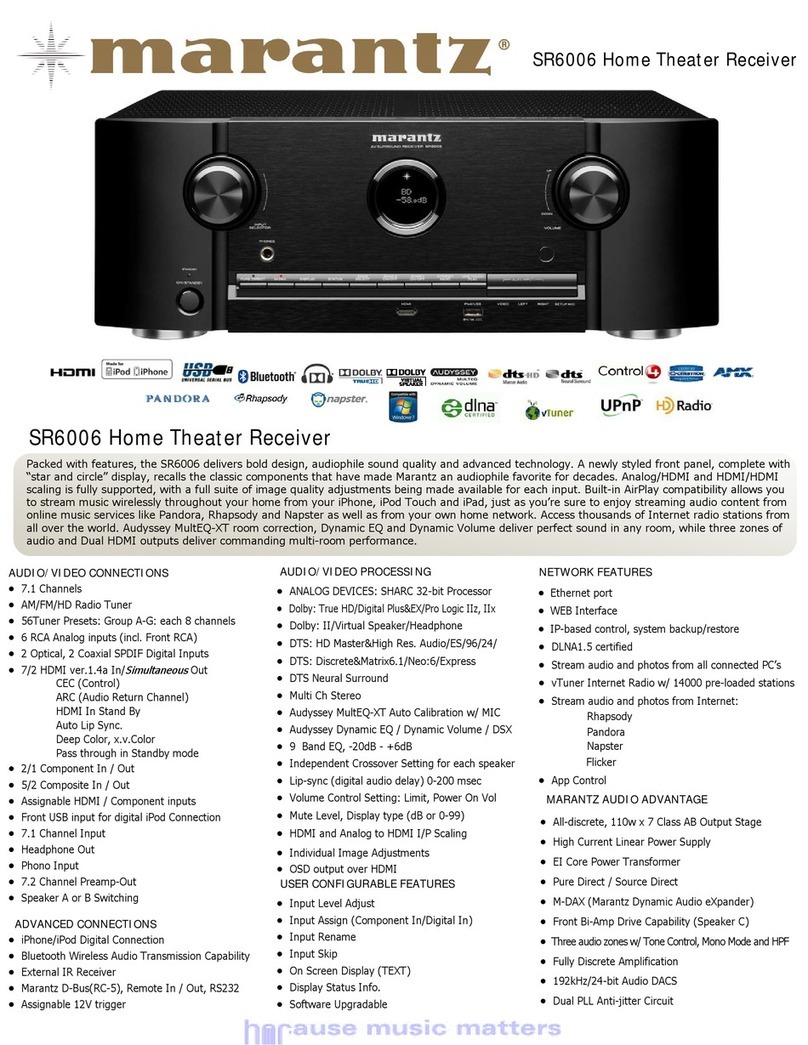
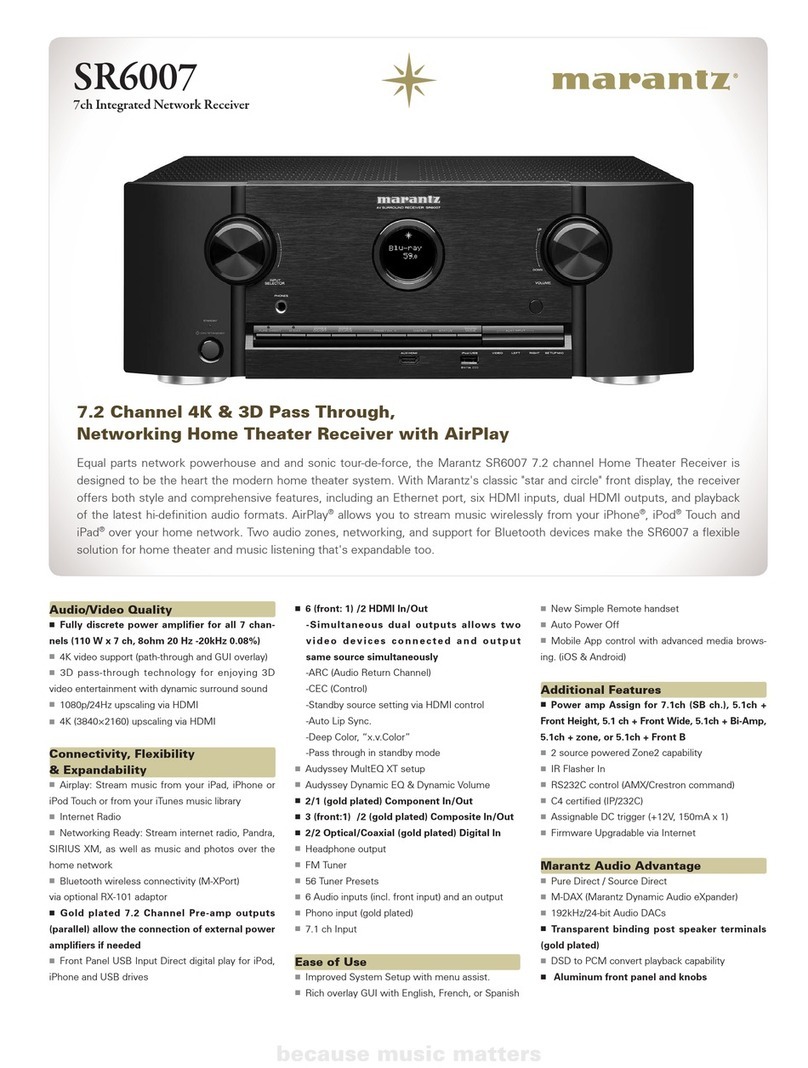
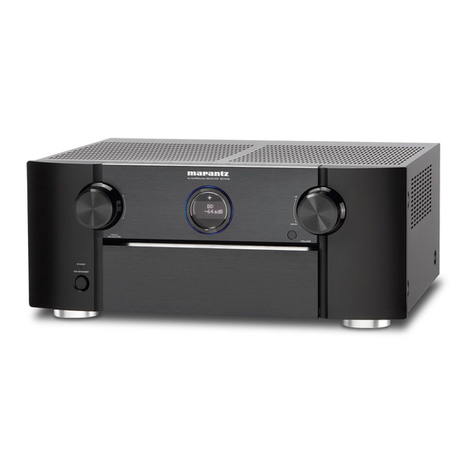
Marantz SR6006 User manual

Dl.aPantz®
Getting Started
Mise
en
route
Antes de empezar
Explai
ns
h
ow
to
easilyinstall,
co
nn
ect
an
d se
tup
a 7.1
-c
h
an
nel
home
theater system.
Explique
comme
nt installer,
co
nn
ecter et con
fi
gu
rer
facileme
nt
un systeme de h
ome
cinema
7.1
canaux.
Explica c6mo instalar, con
ec
tar y configurar facilm
en
te
un
sistema de cine en casa de 7.1
ca
nales.
• • •
ESPANOL
FRAN<;:AIS
ENGLISH
AV
Surround Receiver
SR6006
~
~
CD-ROM
• Expl
ai
ns all operations of
your
receiver. Openthe included CD
-R
OM
on
your computer
fo
r detailedopera
ti
ng instruc
ti
ons.
• Explique
tout
le fonc
ti
onnement de vo
tr
e recepteur. Ouvrez le CD-
RO
M
inclus sur vo
tr
e ordinateur pour
po
uvoir consulter
Ia
noti
ce
d'utili
sa
ti
on
detaillee.
• Explica todas l
as
operaciones del receptor. Abra el CD-ROM en el
or
denador para
ver
instruccionesdetalladas de funcionamiento.
*
D&M
Holdings is striving
to
be a paperlesscompany in or
de
r
to
help preserve the environ
me
nt. Your cooperati
on
and understanding is appreciated.
*
D&M
Holdings
s'effo
rce
d'i
ltr
e une societe "sans
pa
pier" afin
de
co
nt
ri
buer apreserver
l'e
nvironnement.
No
us sommes sensibl
es
avo
tr
e cooperation et votre comprehension.
*D
&M
Holdings
se
esf
ue
rz
a por ser
un
a e
mpr
esa sin papel para ayudar a conservar el
me
dio ambiente. Se valora
su
cooperaci
6n
y comprensi6n.

0 SAFETY PRECAUTIONS
CAUTION:
TO
REDUCE
THE
RISK
OF
ELECTRICSHOCK,
DO
NOT
REM
O
VE
COVER
(OR
BACK).
NO
USER
-SERVICEABLE PARTS INSIDE.
REFER
SERVICING
TO
QUALIFIED SERVICE
PERSONNEL
The lightning flash with arr
ow
h
ead
sy
mb
ol. within an equi
la
teral
A t
ri
angle, is intended to alert the u
se
r to the
pr
esence of
uninsulated ''dan
ge
rous
vo
ltage·· withinthe product"senclos
ur
e
that may be of sufficie
nt
magnitude to
co
nstit
ut
e a risk of
electric shockto
pe
rson
s.
AThe exclamation
po
int
within an
eq
uilateral
tr
iangle is intended
to alert
th
e user to t
he
presen
ce
of
im
porta
nt
operating
and maintenance (servicin
g)
instruc
ti
ons in the litera
tur
e
acco
mp
anying t
he
appliance.
WARNING:
TO
REDU
CE
THE
RISK
OF
FIRE OR ELECTRIC S
HO
CK,
DO
NOT
EXPOSE
THIS
APPLIANCE
TO
RAIN
OR
MOISTURE.
h\
H
ot
su
rf
ace
ma
rk
CAUTION:
HOT
SURFACE.
DO
NOT
TOU
CH.
The top surf
ace
ove
r the
in
ternal heat sink may become h
ot
wh
en
operating this product
co
ntinuously.
Do n
ot
touch hot areas. especially aro
un
d the ''Hot surface
mark'' and the top panel.
PRECAUTION:
SURFACE CHAUDE.
NE
PASTOUCHER.
La surface su
pe
rie
ur
e du di
ss
ipateur de
cha
leur peut devenir
cha
ude si
vo
us
ut
i
li
sezce prod
uit
en
co
ntinu.
Ne touchez pas les zoneschaud
es.
tout particu
li
erementvers
!'
in
scrip
ti
on " H
ot
surfacemark" etle
pa
nn
ea
u supe
ri
eur.
PRECAUCION:
SUPERFICIEC
ALIENTE.
NOT
OCAR.
La superficie superior sobre el disipador
de
calo
r inte
rn
e
podrla ll
ega
r a
ca
le
nt
arse al operar este producto
de
for
ma
continua.
No toque las areas ca
li
e
nt
es. especia
lm
e
nt
e las si
tu
adas
a
lr
ededor
de
Ia
"Ho
t surface mark" y
de
l
pa
nel superior.
IMPORT
ANT
SAFETY
INSTRUCTIONS
1.
Read
these instructions.
2. Keep th
ese
instructions.
3. Heed all
wa
rnin
gs.
4. Foll
ow
a
ll
instru
ct
ions.
5. Do notuse this apparatus near water.
6. Cl
ea
n only with drycloth.
7. Do
no
t blockany ventilation ope
nin
gs.
Insta
ll
in accordance w
it
h the m
an
uf
acture
r'
s
in
struction
s.
8. Do not insta
ll
near any h
ea
t so
ur
ces such as
rad
iators.
hea
t registers.
stoves. or other
appa
ratus (i
nc
lud
in
g amplifiers) that produ
ce
heat.
9. Donot def
ea
t the safetypurpose of the polarized or groundi
ng
-type plug.A
po
lari
zed
pl
ug
has
two blades with one wider than the other. A grounding
type plug has t
wo
bladesand a th
ir
d grounding prong. The wide blade
or
the
third
pr
ongare provided
fo
ryo
ur
sa
fety.
If
the pr
ov
ided plug doesnot f
it
into
youro
ut
let,
co
nsult an electrici
an
f
or
replaceme
nt
of
th
e obsolete outlet.
10
. Protect
th
e power cord from being walked on or pinched
pa
rticular
ly
at
plugs,
co
n
ve
nience receptacles. and t
he
point where they exit from the
apparat
us.
11. Only u
se
attach
me
nts/accesso
ri
es specified by the manufacturer.
12. Use only
wit
h
th
e
ca
rt.
stand. tripod, bracket, or table ®
specified by the man
uf
ac
tur
er.
or
so
ld withthe
appa
ratus.
tm
When a cart is used, u
se
cau
tion when moving the cart/
appa
ratus
co
mbination to avoid injury
fr
om tip-ove
r.
'<1&1
13. Unplug t
hi
s
appa
ratus during lightning storms or
whe
n l ~
unused for long
pe
riodsof time.
~""'
14.
Re
fer all servicing to qualified servi
ce
personnel.
Servicing is required when
th
e apparatus has been damaged in any way,
such as powe
r-
supply cord or p
lu
g is damaged, liquid
has
been
sp
illed or
ob
jects have fallen i
nt
o
th
e apparat
us.
t
he
apparatus has b
ee
n exposed to
rain or moisture, does not operate no
mn
a
ll
y, or has been dropped.
15
. Batteries sha
ll
not be exposed to excessi
ve
heat such as sunshine. fire or
the
li
ke.
CAUTION:
To
comple
tely di
sconnect
th
is pr
oduct
fr
om
the
mains.
disco
nn
ect
t
he
plug
from
th
e
wall
socket
ou
tl
et.
T
he
ma
i
ns
plug is u
sed
to
comple
t
ely
int
er
ru
pt
the
powe
r
supp
ly to
the
u
nit
and must
be
with
in
easy
access
by
the
u
ser.
PRECAUTION:
Po
ur
deco
nn
ec
t
er
comp
l
eteme
nt
ce
pr
od
ui
t du
couran
t
sec
te
ur
,
deb
r
anchez
Ia pr
ise
de
Ia
pr
i
se
mu
rale.
La
pr
i
se
secteu
r
est
ut
ili
see
po
ur
coupe
r
comp
l
etement
!'a
lim
en
ta
ti
on
de
l
'appa
reil et
l'utilisa
teur
do
it
po
u
vo
ir
y
accede
r
f
aci
l
eme
nt.
PRECAUCION:
Para
desco
n
ec
t
ar
comp
let
amente
es
t e pr
oducto
de
Ia al
imentaci6
n
el
ec
tri
ca,
desconecte
el
en
ch
uf
e
de
l
enc
hufe
de
Ia
pared.
El en
ch
uf
e
de
Ia ali
men
t
ac
i6n el
ec
tri
ca
se
uti
liza
pa
ra
interr
u
mp
ir
po
r
comp
lete el sum
ini
s
tr
o
de
al
imen
t
aci6n
el
ect
rica a Ia un
idad
y
debe
de
encont
r
arse
en un Iu
ga
r al
que
el
u
suar
io ten
ga
fac
il
acceso.
ESPANOL
FRAN<;AIS
ENGLISH
FCC
INFORMATION (For
US
customers)
1.
COMPLIANCE
INFORMATION
Produ
ct
Name:
AV
Surrou
nd
Receiver
Mode
l Number: SR6006
This product complies w
it
h Part 15 of the F
CC
Ru
les. Operation issubject
to the foll
ow
ing
two
conditions:
(11
this product may not
ca
use harmful
inte
rf
erence.
and
(
2)
this produ
ct
must accept any interference received,
includi
ng
interference that maycause undes
ir
ed operation
marantz America, Inc.
(a
D&M Holdings Compan
y)
1oo
Co
rp
orate Drive.
Ma
h
wa
h, NJ, 07430, U.S.A.
Tel. (630)741-0300
2.
IMP
O
RTANT
NOTI
C
E:
DO
NOT
MODIFY
THIS
PRO
DU
CT
This product, wh
en
installed as indicated in the ins
tr
uctions contained
in this manual. meets F
CC
requ
ir
ements. Modification not expressly
approved bymarantz may
vo
id yourauthority, granted bythe F
CC,
to
use
the produc
t.
3
.1MP
O
RTANT
When connect
in
g this product to network hub
or
router. use only a
shielded STP
or
ScTP
LAN cable which
is
ava
il
ab
le atr
eta
iler.
Fo
ll
ow
a
ll
installation instructions.
Fa
il
ure to foll
ow
instr
uct
ionscould void
yo
ur
au
th
or
ity, granted by the F
CC,
to
use the product.
4. NO
TE
This product
has
been tested and found to comply
wi
th
the limi
ts
f
or
a Class 8 digi
ta
l device. p
ur
sua
nt to
Pa
rt
15 of t
he
F
CC
Rul
es. These
limi
ts
are designed to provide reasonable protection
aga
in
st
harmful
inte
rf
erence in a resi
dent
ial
in
stallation.
This product generates. usesand
ca
n
rad
iate radio frequencyenergy an
d,
if
no
t installed and used in accordance wi
th
the inst
ru
ct
ions. may
ca
use
ha
rmf
ul
int
erference to radio communications. However,
th
ere is no
guar
an
t
ee
that interferencewill not occur in a
pa
rticularinstallatio
n.
If
this
pr
odu
ct
does
ca
u
se
h
ar
mf
ul interference to radio
or
television recepti
on.
wh
ich
ca
n be determined by turning the product OFF and ON,
th
e user
is encouraged to
try
to
correct
the
in
terferen
ce
by one
or
more of
th
e
fo
ll
owi
ng measures:
• Reorient or relocate the receiv
in
g antenna.
• I
nc
rease
th
e separation between the equipment
and
receiver.
•
Co
nnect the produ
ct
int
o an outlet on a c
ir
cu
it d
iff
erent
fr
om
that to
whi
ch
the receiver is
co
nnected.
•
Co
n
su
lt
the local reta
il
er a
ut
hori
zed
to di
str
ibute this type of product
or
an experienced
rad
io/TV
tec
hnician
for
help.
For Cana
di
an cus
tom
ers:
This Class8 digi
ta
l apparatus compli
es
w
it
h
Cana
di
an
ICES-003.
Cet appareil num
er
ique
de
Ia
classe 8
est
confor
me
a
Ia
norme NMB-003 du
Canada.
I
ENGLISH
FRAN<;:AIS
ESPANOL
0
NOTE
S ON
USE
I
OB
S
ERVATIONS
RELATIVE
SA
L'UTILI
S
ATI
ON I
NOTA
S
SO
BRE
EL
U
SO
WARNING
S
AVERTI
SS
EMENTS
ADVERTEN
C
IA
S
•
Avo
id hi
gh
te
mp
eratur
es.
• Eviter des tem
pe
ratures el
evees.
• Evitealtaste
mp
era
tura
s.
Al
lowforsufficienth
ea
t dispersionwhen ins
ta
ll
edin Tenir compte d'
un
e disper
sio
nde
ch
al
eu
r Permite Iasuficiente
dis
persi
on
del
ca
lor
cua
n
do
a
ra
ck. suffi
sa
ntelors de Ii
nsta
ll
at
io
nsur
un
e
etage
re. esta ins
ta
la
do enIaconsol
a.
• H
and
le
th
epower
oo
rd
ca
r
e
fu
l
~.
•
Ma
ni
pu
ler
le
co
rd
ond
'a
li
mentationavec • Man
eje
elcordon deenergfa
co
n
cu
idad
o.
Hold
th
eplug w
hen
unplugging theco
rd
. pr
eca
uti
on.
Sos
t
en
gael
enc
hufecuan
do
desconecte elcor
do
n
•
Kee
p
th
e
un
it
fr
eefrom moistur
e.
wa
ter. and
du
s
t.
Tenir Iapr
ise
lors dud
eb
r
anc
heme
nt
du
cor
do
n. de
ene
r
gfa
.
•
Un
plug the power
co
rd
whennot using
th
e unit for •
Pr
o
teg
er l
'a
ppare
il
co
ntre l'humidit
e.
l
'ea
uet Ia • Mante
ng
aelequi
po
fi
bredehum
eda
d, ag
ua
y
long
pe
ri
ods of tim
e.
pou
ssie
re
. p
olvo.
•
Do
not obstru
ct
th
event
il
ationhol
es.
•
De
br
anc
herle
co
r
do
nd'a
li
mentation lor
sq
ue •
Desco
necte elco
rd
on
de ener
gra
c
uan
do
no
utilice
• Do not let forei
gn
ob
jects into the unit. l'appa
re
il
n'est pasut
ili
se
pe
nd
ant de l
on
gu
es elequipo
po
r mucho t
ie
m
po.
• Do not let in
sec
ticid
es,
be
nz
en
e,
and
th
inner
co
me pe
ri
odes.
• No obstr
uya
los orifici
os
de
ven
t
il
a
cio
n.
in
co
nta
ct with
th
e
un
it. • Ne
pa
sobstruer lest
ro
usd'aeration. • No dejeobjet
os
ext
ra
~os
dent
ro
dele
qu
ip
o.
• Neverdi
sasse
mb
le or modify the unit inany way. • Ne
pa
s laisser
de
s objets et
ran
gersd
an
s l
'ap
par
e
il.
• No pe
rnn
i
ta
elcontacto de insecticida
s.
ga
solinay
•
Ven
til
at
ion should
no
t be impeded
by
cove
ring • Ne
pa
s me
ttr
eencontact
des
insecticid
es.
du
d
il
uyentes
oon
ele
qu
i
po.
thevent
il
ation o
pen
ingswith item
s.
suchas be
nzene
et
un
d
il
uant
avec
l'appa
rei
l.
•
Nun
ca
d
esa
rmeo modifiq
ue
elequipo
de
ni
ngu
na
newspaper
s.
ta
blecloths or c
urta
in
s.
• Ne ja
ma
isdemonter ou modifier l'appare
il
d'
un
e
ma
n
era.
• Nakedfl
am
esour
ces
such
as
li
ghted
ca
nd
les maniereou d'
un
eautre. • Lavent
il
ac
ion no
de
bequedarobstrui
da
por
should not be p
laced
on
the unit. • Ne
pa
s r
eoo
u
vr
ir les orifices de vent
il
ation
avec
d
es
haber
se
cu
bierto l
as
ape
rt
uras
oon
objetos
como
• Ob
serve
and fo
ll
ow
l
oca
l r
eg
ulat
io
ns rega
rd
ing objetstels
qu
edes jo
urnau
x.
n
ap
pes
ou
rid
ea
ux. periodi
oos,
ma
nteles ocorti
na
s.
battery disposa
l.
Ce
laent
ravera
it Ia ventilation. • No
debe
r
~n
col
oca
rse
sa
b
re
el
apara
to
fu
entes
• Do not exp
ose
the unit tod
ripp
i
ng
orspl
as
hi
ng
• Ne j
ama
isplacer defl
am
me
nu
esur l'ap
par
e
il
, inflamables sinpr
oteoc
ion.
como
velas encendida
s.
fl
uid
s. n
ota
mme
nt
des bougies a
ll
um
ees. • A Ia
ho
radedesh
acerse
de lasp
il
a
s,
respete Ia
•
Do
not pla
ce
objects filled wi
th
li
qui
ds.
such
as
•
Ve
ill
eza respecter les
lo
is envi
gu
eu
r lors
qu
e
vous
no
r
ma
tiva p
ar
aelcuidadodel
me
diaa
mb
iente.
vases.
ont
he
un
it. jetezl
es
p
il
es
us
a
gees.
• No exponer el
apa
ra
to algot
eo
o
sa
lp
i
ca
dur
as
• Do not ha
nd
le
th
e mains oordwith w
et
han
ds
. • L'appareil ne
do
it
pas
1l
treexp
ose
al'eauou a
cua
nd
o
se
utilice.
• Whenthe
sw
itch is in theOFF
!S
TANDB
Y)
l'humidite. • No colocar sabreel
apa
ratoobjetos
ll
eno
s
de
position. theequi
pm
entis not
co
mpletely switc
hed
• Ne
pa
s poserd
'o
bjet contena
nt
du
li
qu
ide. par
lr
quid
o.
como
ja
rr
os.
o
ff
from MAIN
S.
exe
mple un
vase.
sur l
'a
p
pa
reil. • No maneje elc
ab
le de a
li
me
ntaci6n
con
l
as
manos
• The
equ
i
pm
ent s
hal
l be ins
ta
ll
ed n
ea
r the • Ne
pa
s manipulerle co
rd
ond'alim
en
tation
avec
l
es
mo
jadas.
power
s
upp~
so
that the power
s
upp~
iseas
il
y mains mou
ill
ees.
•
Cu
and
o el inte
rru
pter
es
t
~
enIa
pos
ici
on
0
FF
accessibl
e.
• Lors
qu
e l'inte
rnupt
eurest surIapos
it
ionOFF
!S
TA
NDB
Y),
el
eq
uipo no
es
t
~
oo
mp
letam
en
te
ISTANDB
YI.
I'app
are
il n'est pas
com
pletement d
esoo
ne
cta
do de
Ia
a
li
men
ta
ci6n MAI
NS.
deco
nn
ectedu SE
CT
EURIMAIN
SI.
• El e
qu
ipo
se
i
ns
ta
la
ra
oe
r
ca
de Ia f
ue
ntede
• L
'a
ppareilserain
sta
ll
s presde
Ia
sou
rce a
li
men
tac
ion
de
man
era
q
ue
r
es
ulte f
ac
il
acoede
r
d
'a
li
me
nta
tion.
de
so
rt
equece
tt
e
de
rni
ere
so
it ae
ll
a.
f
ac
il
ement accessible.
n
0 CAUTIONS ON
IN
S
TALL
ATION
PRE
CAUTIONS D'INSTALLATION
EMPLAZ
AMIENT
O
DE
LA INSTALACION
*
.LJ//////ff/////hlJ
E
:
:~
*F
or
proper heat dispersal,
do
n
ot
ins
ta
ll this unit in a confined
space, such as a bookcase
or
sim
il
ar enclosure.
• More than 12 in. (0.3
m)
is r
eco
m
men
ded.
•
Do
not pla
ce
any
other e
qu
ip
men
t
on
th
is
unit.
*Pour permettre Ia dissipation de
cha
leur requis
e,
n'install
ez
pas cetteuni
te
da
ns un espace
co
nfine telqu'une bibliotheque
ou un endro
it
similaire.
•
Une
distance de pl
us
de 12 po
10,3
ml
es
t
reco
m
mandee.
•
Ne
placez aucun
mate
riel sur cet appar
ei
l.
*Para Ia dispersion del
ca
l
or
adecuadamente, no instale este
equipo en un
Iu
gar confinado
ta
l
co
mo una libreria o unidad
sim
il
ar.
• Se r
ecomiend
a
de
j
ar
mas
de
12
pu
lg. 10,3ml alrededor.
•
No
coloq
ue n
in
gun
o
tr
o equi
po
sab
re
Ia
un
i
da
d.

ENGLISH
Read
before
use
Th
ank
yo
u for purchasing
th
is marantz product.
This manu
al
expla
in
s the
Se
tu
p W
iz
ard
that
yo
u
wi
ll need to perform d
ir
ec
tl
y after removing
th
e produ
ct
from i
ts
packaging, before
yo
u sta
rt
usi
ng
th
e product.
Th
e
Se
tup
Wi
zard displays easy
to
f
ol
l
ow
gu
id
ance on your television screen that sho
ws
you
ho
w
to
connectand con
fi
gure s
pe
akers, various other d
ev
ices, and
ne
two
rk functions forfull e
nj
oyment
of
this
un
it.
Contents
Read before use 1
Accessories..............
··
...................................................................·1
About
this manual ........................................................................1
Cautions on handling....................................................................1
Preparing
the
Setup Wizard 2
SETUP WIZARD 4
Playback (Basic operation) 7
Important information .........................................................
..
......7
Selecting
the
input source .................
..
........................................7
Adjusting
th
e mas
ter
volume....................................
..
................a
Turning
off
the
soundtemporarily..............................................a
Accessories
Check t
ha
t
th
e foll
ow
in
g parts are suppli
ed
with the product.
Q)
Getting Started........................................................................1
®CD
-ROM (Owner's man
ua
l) ....................................................1
@Warra
n
ty
card (f
or
U
SA)
............................
..
..........................1
@Warranty
card (forCA
NA
DA)...................................................1
@ Power
co
rd
..............................................................................1
®Remo
te control unit (RC014SR) ..............................................1
(J) R03/AAA batteries...................................................................2
®Setup
microphone (ACM1H) ......................
..
...........................1
®AM
loopantenna.....................................................................1
®
FM
in
dooranten
na
..................................................................1
About
this
manual
0
Operation
buttons
The operations
de
scribed in this manual are based mai
nl
y
on
remote control operation.
OSymbols
Gf'
This sy
mbol
indicates a reference page on w
hi
ch
related information is described.
@ This mark
in
d
ica
tes
th
e page of the
owne
r's manual
on
th
e
CD
-ROM provided.
Th
is
symbol indicates a supplementary
in
forma
ti
on
and tips
for
operations.
4N•u•
Th
is
symbo
l.
indi
ca
tes
po
ints to remember operations
or func
ti
on
l1m1t
a
t1on
s.
0
Illustrations
No
te
th
at
th
e ill
ust
rations inthis manual is forexplanation purposes
and may differfrom the act
ua
l unit.
0
About
the
CD-ROM
(Getting
Started
I
Owner's
manual)
Get
AOOBE"
READER
'
You need
to
ha
ve
Adobe
Re
ader® install
ed
on your computer
to
view
th
e
ow
ne
r's
manuals on the
CD
-R
OM.
Click
th
e Adobe
Rea
der® banner
in
th
e CD-R
OM
menu
to
install
the Adobe Reade
r®
(for Windows).
Cautions
on
handling
• Before turning
th
e power on
Checkonce again that all connections are correct and thatthere are
no problems with the connection
cab
les.
• Power is supplied to some of the c
ir
cuit
ry
even
when
the
unit
is
set
to
the standby mode.
Whe
n
go
ing on vacation or leaving home
f
or
long periods of
time
,
be
sure
to
u
np
lug the power cord
fr
om
the
poweroutlet.
• About
co
nden
sa
tion
If
the
re
is
a major difference in temperature between the ins
id
e of
the unit and the sur
ro
un
d
in
gs, conden
sa
tion (dew) may form on
the operating parts inside
the
un
it, causing
the
unit not to operate
prope
rl
y.
If
th
is
happens, let
th
e unit sit for an hour or
two
with
the power
turned
off
and wait until
th
ere is l
itt
le difference in temperatu
re
before using
th
e unit.
• Cautions on using mobile phon
es
Using a
mob
ile phone near
th
is unit may result in noise.
If
that
occu
rs
, movethe mobilephone away
from
th
is u
nit
when
it isin use.
• Moving
the
unit
Turn
off
th
e power and unplug the power cord
from
the power
outlet. Next, di
sco
nnect the co
nn
ecti
on
cables
to
ot
he
r system units
before
mov
i
ng
the unit.
• About care
• Wipe the cabinet and control panel clean
with
a soft cloth.
• Foll
ow
the in
str
uc
ti
ons when using a chemical cleaner.
• Benzene, paint
th
inner
or
other organic solvents as
we
ll as
insecticide
rna
y cause material changesand discolorationifbrought
i
nt
o contact with
the
unit, and should therefore not
be
used.
1

ENGLISH
Preparing
the
Setup
Wizard
This
section
describes
how
to
prepare
the
Setup
Wizard
before
use.
0
Do
not plug the powerplug
of
the main unitintothe
wall
socketuntilthese preparations are complete.
0 Speakerconnections are performed using the Setup Wizard.
Do
not connectthespeakersyet.
(
2
Whatyou need
for
this step
Spe
a
ker
(sold
sepa
rately)
Subwoofer
(w
it
h built-
in
amplifier)
(so
ld
separately)
TV
(sold
sepa
rately)
t:J
Remote
control
unit
I
R03/AAA
batteries
(s
upplied)
Speaker
c
able
(sold
sepa
ratel
y)
• Pr
epa
re enough for
th
e
nu
mber of speakers
yo
u
will u
se.
Audio
cable
(sold
sepa
ratel
y)
HDMI
cable
(sold
sepa
ratel
y)
Setup
microphone
(su
pp
lied)
Power
cord
(supplied)
Place and layoutspeakers
Before i
ns
talling the speaker
s.
conn
ec
t the speaker cabl
es
to the speakers. For details
on
h
ow
to connect the speaker
cab
l
es,
seethe
speaker inst
ru
ction m
an
ua
l.
Con
n
ec
t the speaker
ca
bles
to
the
ma
in unit using the
Se
tup Wi
zard.
0
When
7.1-channel
(
Surround
back
s
peaker)
installed 0
When
5.
1-channel
installed
FR
~
gt
~~$U
'©
~
Li
s
t
en
in
g~
pOS
iti
On
SBR
FL
Front speaker (L)
FR
Fro
nt
speaker
(RJ
C
Cen
ter speaker
SW
Subwoofer
SL Surround speaker (L)
SR
Surround speaker
(RJ
SBL Surround back speaker (L)
SBR Surround back speaker (RJ
* 1 22' -
30'
*2
1
20'
• Insta
ll
the
su
rro
und
speakers
in
a position 2
to
3
ft
(60
to 90
em)
higher than
ea
r level.
f-
ront
speake
r
Surrou
nd
spea
ker
2 - 3
ft
f]-1
__
_
60 - 9
~
[Vi
ewed
from
th
e s
ide]
Surroun
d back speaker
(Wh
en
7.1-ch
an
nel
in
sta
ll
ed!
• Point sli
gh
tly d
ow
nwards

Connect
this unit
to
the
television
using
an
HOM
I cable
(sold separately)
4N•U4
If
thi
s
unit
is connec
ted
us
ing
ca
bl
es
other
than
the
HOMI cable,
th
e Setup
Wi
za
rd
w
ill
not
be
di
s
pl
ayed.
HDMIIN
(
ARC
)
l= )
ENGLISH
Turn
the
television power
on
,
and
switch
the
video input
to
this unit
(HDMI
input)
Fo
r details on
how
to
operate
th
e
te
l
ev
ision, see t
he
television in
st
ructi
on
manual.
D
/J·
CD
Power
on
®Switchthe inputtothis unit(HDMI input)
Insertthe provided batteries into
the
remote
control unit
G)
Remove t
he
rear lid in
th
e directi
on
of
the arrow and remove it.
@ Load
the
two
batte
ri
es proper
ly
as i
nd
i
ca
t
ed
by the marks in
the
batterycompartment.
® Put
the
rear cover back on.
G"'
Sta
rt
Se
tup
Wi
z
ard
onnext page >
3

ENGLISH
SETUP
WIZARD
When
preparations
are
complete,
start
the
Setup
Wizard.
Use
the
Setup
Wizard
to
perform
connections
and
settings
as
shown
in
the
following
steps.
Perform
the
operations
as
described
in
the
instructions
on
the
screen.
You
can
skip
or
cancel
at
each
section
if
necessary.
4
Language
Select
Set
the
language
for
the
instructions
on
the
television screen.
Speaker
Connection
Connect
the
speakers
for
surround
sound
.
Speaker
Calibration
Configure
the
settings
for
your
speakers,
and
for
the
optimum
surround
sound
for
your
room
.
Source
Setup
Set
the
connecting
terminals
for
each
device
to
be
set,
and
connect
to
the
terminals
.
Network
Setup
Configure
to
playback
audio
files
onto
a
computer
or
Internet
radio
.

(
Basic
operation
of
Setup
Wizard
tr
~
-
.
-&
..
"""' ~
""" -
r-.. " r-..
Move
to
the item that
yo
u
want
to
conf
ig
ure
us
in
g£:::.
\1.
yo
u
wa
nt
to
configure
us
in
g<]
1>.
1)
~
(5-
...
"""'
~
">'\ f
~
Returns
to
t
he
start of
each setting.
or
Cancels
th
e Setup
Wizar
d.
ENGLISH
Getting
Started
main
unit
power
plug
into
th
e
wall
Power co
rd
(suppli
ed)
Pre
ss
AMP
to
se
t
the
remote
contr
·ol
unit
to
AMP-
operation
mode.
Switch
the
AMP-operation
mode
• This remote control is a preset remote cont
ro
l that
ca
n be used to
cont
ro
l connected devices.
When
powerisswitched
to
standby
Press
STANDBY
(<!)).
[Power indicator status
in
standby mode]
• Normal standby :
Red
• When "HD
MI
Co
nt
rol"-
"Control"
(G'r@
page 11
0)
is set
to
"ON"
: Orange
• When
"Netwo
rk Standby"
(G'i'"@ page 11
4)
is set
to
"ON"
: Orange
•n·n•
During power standby, a minimal amount
of
power is consumed. To
totally cut
off
the
power, remove
the
power cord
from
the
powe
r
outlet.
4
Pre
ss
ON
(I)
to
the
this
unit.
The power
sw
itches on. and the Setup Wizard start screen is
displayed on the television screen.
Power
on
ll1i) • D
;it.
SETUP
WIZARD
Th
is wi
zard
ass
i
sts
l .L
aoguage
Se
le
ct
connect
i
on
and
setup
2-S,eeaker
Co
nn
ect
i
on
of
re-ceiv
er
step
by
step
us1
ng
cursor.
enter
or
3.Speaker
CaJ
i
bra
•
on
return
keys
on
re
mot
e.
4.S~urce
Se
t
up
Press
[[NTERJ
to
s
tart
. S.N;tv.tOrk
Setup
Comple
te
d
<•
::>
Enter
~~
Ex
it
Start
the
Setup Wizard.
Setup Wizard hasstarted.
Please
follow
the
message on screen.
To start t
he
Setup W
iz
ard again after
ex
iting it, select "SET
UP
WIZARD"
in
th
e
me
nu
(G'i'"@ page 87
"Menu
map").
5

ENGLISH
0 Connecting thespeakers
The speakers are
co
nnected in
"2.
Speaker Connection"
of
the Setup Wizard
but
if
you did not use or cancell
ed
th
e Setup Wizard, connect
th
e speakers as sh
own
below.
For details, see
the
i
nc
luded CD-ROM (
Owner's
manu
al).
Ca
refully check the left (L)
and
right
(R)
channels and
+
(red)
and -(black) polarities on the speakers being
connected
to
the this unit, and be sure to interconnect
the channels and polarities correctly.
Connecting
the
speaker cables
Peel o
ff
about 0.03 ft/10
mm
of sheathing
fr
om
the tip
of
the
speaker cabl
e,
th
en eith
er
t
wis
t the
co
re
wire
tightly
or
term
inate it.
c:.....
•N•Ii•
• Connect
so
that
th
e speaker cable core
wires
do
not
protrude
from
the
speaker terminal. The protection circuit
may
be
activated
if
the core
wires
touch
the
r
ea
r panel
or
if
the
+ and -
s
ides
touch each
other
(~
@
page 145 "Protection Circuit").
• Never touch
the
speaker terminals
while
the
power
supply is
connected. Doing
so
could res
ult
in
electric shock. (
Wh
en
the
Setup Wizard
is
running,
follow
th
e instructions
in
the
Setup
Wizard screen
for
making
connections.)
• Usespeakers
with
the
speaker impedanc
es
shown
below.
Speakerterminals Speaker impedance
FRONT A 6-
BO
FRONT B
FRONT
A+
B
BO
CEN
TE
R
SURROU
ND 6-
BO
SURR.
BACKI
AMP
ASSIGN
6
•
~

Playback
(Basic
operation)
Here,
we
explain
how
to
perform simple operations.
For details, see
the
included CD-ROM (Owner's manual).
Important
information
Before starting playback, makethe connectionsbetweenthe different
devices
and
the
sett
in
gs on
the
unit.
IN•
II*
Also refer
to
the
operating instru
ct
ions
of
the connected devices
when
playing them.
Selecting
the
input
source
P1
·ess the input
so
m·ce
se
lectbutton
(80,
DVD,
SAT
,
TV
,
NET/USB
,
CD
,
TUNER
or
M-XP)
twice to
be
pla
ye
d
back.
When an input source select button !
BD
,
DVD
,
SAT,
TV
.
CD
.
NET/USB
.
TUNER
or,___
~
M-XP
l is pressed once,
th
e unit
sw
i
tc
hes - -
--
~-~__,___
to
device selected by the operating mode
of
the
remote contro
l.
If
t
he
input sour
ce
select
button
is
then pressed again
tw
ice,
th
e input
source
fo
r
the
un
it is
sw
i
tc
hed.
lii~
J(
·
~
ce
e)
• When
~
..,.
is pressed,
th
e
in
put source
of
th
is unit is
sw
itched
to
"NET/USB" and the connected iPod is automatically played
traJ
@ page 31 "iPod play fun
ct
ion").
• Select inp
ut
source "AUX1"
to
play back music from an audio
system connectedto
the
AUX1 IN
co
nnector.
• The
in
put source
"GAME"
is selected
to
playback from a game
device connected
to
GAME connector
of
HDMI
IN
.
•Select the
in
put source "VCR",
"GAME",
"AUX1", "AUX2"
or
"PHONO" using one
of
the
following methods.
•
SOURCE~
f buttonon
th
e remote control unit
("Us
ing the
SOURCE
~
f button on the remote con
tr
ol
unit"
provided on
th
e right)
•INPUT
SELECTOR
knob on
th
e main unit
("Us
ing
the
knobon the main uni
t"
provided on
the
right)
• "SOURCE
SE
LE
CT" menu
("Us
ing
the
"SOURCE SELECT" menu" provided onthe
ri
g
ht
)
You can also use the following operation
to
sele
ct
an input
source.
0
Using
the
SOURCE
.!T
button
on
the
remote
control
unit
Press
SOURCE
.l
or
SOURCE
T.
• Every time you press
SOURCE
.l
or
~
-
~
:
1
~.O·=·"-"\
~
+·
~
SOURCE
T, the input source
sw
itches in _ .
-··
the
following order.
0 -
~
-
·
~;--
C
BD---D
VD
---
VC
R---
SAT
---
GAME
---
AUX
1---
AUX2
J
M-XPort
---
HD
R
adio
---
PH
ONO
----
CD
----
TV
---NET
/USB
0
Using
the
knob
on
the
main
unit
Turn
INPUT
SELECTOR.
• Every
time
you turn
INPUT
SELECTOR.
the inputsource
sw
itches
in
th
e
follow
ing order.
[
BD
---a
vo
---
VC
R---
SAT
---
GAME
---
AUX1
---
AUX2
I
M-XPort
---
HD
R
adio
---
PHONO----
CD
----
TV
----NET
/US
B
..J
•
ENGLISH
Selecting
the
input
source
!:1
SOURCE SELE
CT
Source
BD
The currently sel
ec
ted input
source is highlighted.
Recent
•1}
~ ~
t\1
~,!
[?
i;~:~
--------
~
--
i
--
@
·--
o
--
@
·-
~
------1
!
Video
I.,J. 1_1
1!11!
11"ii
~ ~
i
~
Network
.,
~
~~
~~~
6 8
~
~
!T
uner
-I
0
ca.
0,
_________________________________________________
l
0 Input Source
The name
of
the
highlighted input source is displayed.
f)
Recently used sources
The recently used input sources
(up
to
five) are displayed.
0 Icons for the input sources in
the
different categories are
displayed.
Q)
Press
11rra
.
Display
th
e "SOURCE
SE
L
ECT"
menu.
@Use£:,.
\l<ll>
to
selectthe inputsource,
th
en press
ENTER
.
~
The
in
put source is set and
the
source
selection menu isturned
off
.
• When
using~
an
iPod connected directly
to
the
USB port
of
this
unit, select
"~
(iPod/USB)"
for
the
input source.
• Inputsources
that
are notgoing
to
be used
ca
nbe setahead
of
time.
Makethis setti
ng
at "Source Delete" (Gr"@ page 117).
• To turn
off
the
source selection menu without selecting
an
input
source, press
l1rra
again.
• When
l1rra
is pressed,
the
AMP-operation mode starts
au
tomatically
!Gr"@ page 1
23)
.
7

ENGLISH
Adjusting
the
master
volume
Use
VOLUME
+, -
to
a
dju
st
the
v
olume.
0 When the "Volume Display" setting
(
n:::w'@
page
117)
is "
Rel
ative"
[Adjustable range]
---
-80.5dB
-
1B.OdB
0 When the "Volume Display" setting (
n:::w'@
page
117
)
is
"Absolute"
[Adjustable range]
0.0
-
99
.0
• T
he
va
ri
able
ra
n
ge
di
ff
ers accord
in
g to
th
e input signal and channel
level se
tt
ing.
You
ca
n alsooperate via the main unit. In th
is
case, perform the
foll
ow
ing operat
io
ns.
Turn
VOLUME
to
adju
st
th
e volume.
Turning
off
the
sound
temporarily
Pre
ss
MUTE
.
•
"M
U
TE"
indicator
on
th
e display light
s.
•
~
appea
r
s
on aTV screen.
#
• The sound is reduced
to
the
level set at
"Mute
Level" (r2tf"@
page 1
17).
• To cancel, press
MUTE
aga
in
.
Mut
ing can also be canceled by
adjusting
the
master
vo
lume.
8
( Other operations "\.
...._
_____
1
See
the
following
items
on
the
included
CD-ROM
(Owner's
manual).
0 Playing a Blu-ray Disc player/
DVD
player
0 Playing a
CD
player
0 Playing
an
iPod®
0 Playing a
USB
memory device
0 Tuning in radio stations
0 Playing a network audio
0 Selecting alistening
mode
(SURROUND
MODE)
0 Convenient functions
0 Playback in
ZONE2/ZONE3
(Separate room)
0 Howto make detailed settings
0 Operating the connected devices by remote
control unit
~
=======
~
========
~
This
completes
the
basic
settings
and
operations.
For
details
on
how
to
change
settings
or
detailed
explanations
of
operations
,
see
the
included
CD-ROM
(Owner's
manual).

www.marantz.com
You
can
find your nearestauthorized distributor
or
dealer on
our
websi
te
.
tnaPantz
®
is
a
registered
trademark.
D&M
Holdi
ng
s Inc.
Printed in Chi
na
5421 10066029M

Owner’s Manual
AV Surround Receiver
SR6006
Basic version
Advanced version
Information

I
nSAFETY PRECAUTIONS
CAUTION
RISK OF ELECTRIC SHOCK
DO NOT OPEN
CAUTION:
TO REDUCE THE RISK OF ELECTRIC SHOCK, DO NOT REMOVE
COVER (OR BACK). NO USER-SERVICEABLE PARTS INSIDE.
REFER SERVICING TO QUALIFIED SERVICE PERSONNEL.
The lightning flash with arrowhead symbol, within an equilateral
triangle, is intended to alert the user to the presence of
uninsulated “dangerous voltage” within the product’s enclosure
that may be of sufficient magnitude to constitute a risk of
electric shock to persons.
The exclamation point within an equilateral triangle is intended
to alert the user to the presence of important operating
and maintenance (servicing) instructions in the literature
accompanying the appliance.
WARNING:
TO REDUCE THE RISK OF FIRE OR ELECTRIC SHOCK, DO NOT
EXPOSE THIS APPLIANCE TO RAIN OR MOISTURE.
CAUTION:
To completely disconnect this product from the mains, disconnect the plug
from the wall socket outlet.
The mains plug is used to completely interrupt the power supply to the unit
and must be within easy access by the user.
IMPORTANT SAFETY
INSTRUCTIONS
1. Read these instructions.
2. Keep these instructions.
3. Heed all warnings.
4. Follow all instructions.
5. Do not use this apparatus near water.
6. Clean only with dry cloth.
7. Do not block any ventilation openings.
Install in accordance with the manufacturer’s instructions.
8. Do not install near any heat sources such as radiators, heat registers,
stoves, or other apparatus (including amplifiers) that produce heat.
9. Do not defeat the safety purpose of the polarized or grounding-type plug. A
polarized plug has two blades with one wider than the other. A grounding
type plug has two blades and a third grounding prong. The wide blade or the
third prong are provided for your safety. If the provided plug does not fit into
your outlet, consult an electrician for replacement of the obsolete outlet.
10. Protect the power cord from being walked on or pinched particularly at
plugs, convenience receptacles, and the point where they exit from the
apparatus.
11. Only use attachments/accessories specified by the manufacturer.
12. Use only with the cart, stand, tripod, bracket, or table
specified by the manufacturer,or sold with the apparatus.
When a cart is used, use caution when moving the cart/
apparatus combination to avoid injury from tip-over.
13. Unplug this apparatus during lightning storms or when
unused for long periods of time.
14. Refer all servicing to qualified service personnel.
Servicing is required when the apparatus has been damaged in any way,
such as power-supply cord or plug is damaged, liquid has been spilled or
objects have fallen into the apparatus,the apparatus has been exposed to
rain or moisture, does not operate normally, or has been dropped.
15. Batteries shall not be exposed to excessive heat such as sunshine, fire or
the like.
FCC INFORMATION (For US customers)
1. COMPLIANCE INFORMATION
Product Name: AV Surround Receiver
Model Number: SR6006
This product complies with Part 15 of the FCC Rules. Operation is subject
to the following two conditions: (1) this product may not cause harmful
interference, and (2) this product must accept any interference received,
including interference that may cause undesired operation.
marantz America, Inc.
(a D&M Holdings Company)
100 Corporate Drive,
Mahwah, NJ, 07430, U.S.A.
Tel. (630) 741-0300
2. IMPORTANT NOTICE: DO NOT MODIFY THIS PRODUCT
This product, when installed as indicated in the instructions contained
in this manual, meets FCC requirements. Modification not expressly
approved by marantz may void your authority, granted by the FCC, to use
the product.
3. IMPORTANT
When connecting this product to network hub or router, use only a
shielded STP or ScTP LAN cable which is available at retailer.
Follow all installation instructions. Failure to follow instructions could void
your authority, granted by the FCC, to use the product.
4. NOTE
This product has been tested and found to comply with the limits for
a Class B digital device, pursuant to Part 15 of the FCC Rules. These
limits are designed to provide reasonable protection against harmful
interference in a residential installation.
This product generates, uses and can radiate radio frequency energy and,
if not installed and used in accordance with the instructions, may cause
harmful interference to radio communications. However, there is no
guarantee that interference will not occur in a particular installation. If this
product does cause harmful interference to radio or television reception,
which can be determined by turning the product OFF and ON, the user
is encouraged to try to correct the interference by one or more of the
following measures:
•Reorientorrelocatethereceivingantenna.
•Increasetheseparationbetweentheequipmentandreceiver.
•Connect the product into an outlet on a circuit different from that to
which the receiver is connected.
•Consultthelocalretailerauthorizedtodistributethistypeofproductor
an experienced radio/TV technician for help.
For Canadian customers:
This Class B digital apparatus complies with Canadian ICES-003.
CAUTION:
HOT SURFACE. DO NOT TOUCH.
The top surface over the internal heat sink may become hot
when operating this product continuously.
Do not touch hot areas, especially around the “Hot surface
mark” and the top panel.
Hot
surface
mark
Basic version
Advanced version
Information

II
nNOTES ON USE
WARNINGS
•Avoid high temperatures.
Allow for sufficient heat dispersion when installed in a rack.
•Handle the power cord carefully.
Hold the plug when unplugging the cord.
•Keep the unit free from moisture, water, and dust.
•Unplug the power cord when not using the unit for long periods of time.
•Do not obstruct the ventilation holes.
•Do not let foreign objects into the unit.
•Do not let insecticides, benzene, and thinner come in contact with the unit.
•Never disassemble or modify the unit in any way.
•Ventilation should not be impeded by covering the ventilation openings
with items, such as newspapers, tablecloths or curtains.
•Naked flame sources such as lighted candles should not be placed on
the unit.
•Observe and follow local regulations regarding battery disposal.
•Do not expose the unit to dripping or splashing fluids.
•Do not place objects filled with liquids, such as vases, on the unit.
•Do not handle the mains cord with wet hands.
•When the switch is in the OFF (STANDBY) position, the equipment is not
completely switched off from MAINS.
•The equipment shall be installed near the power supply so that the power
supply is easily accessible.
nCAUTIONS ON INSTALLATION
z z
z
Wall
z
zFor proper heat dispersal, do not install this unit in a confined
space, such as a bookcase or similar enclosure.
•More than 12 in. (0.3 m) is recommended.
•Do not place any other equipment on this unit.
Basic version
Advanced version
Information

1
Thank you for purchasing this marantz product. To ensure proper operation, please read this owner’s manual carefully before using the product.
After reading them, be sure to keep them for future reference.
Getting started
Basic version············································································4
Connections···················································································5
Important information···································································5
Connecting an HDMI-compatible device ······································ 7
Connecting a TV··········································································10
Connecting a Blu-ray Disc player ················································ 11
Connecting a DVD player····························································12
Connecting a set-top box (Satellite tuner/cable TV)····················12
Connecting a video cassette recorder ········································ 13
Connecting a digital camcorder ·················································· 13
Connecting an iPod or USB memory device to the USB port·····14
Connecting an HD Radio receiver··············································· 15
Connecting a CD player ······························································16
Connecting a record player·························································16
Connecting a wireless receiver (RX101)·····································17
Connect a device that has a multichannel output terminal········· 17
Connecting a external power amplifier·······································18
Connecting to a home network (LAN) ········································ 19
Settings························································································20
Set up speakers (Audyssey® Auto Setup) ·································20
Making the network settings (Network Setup)···························26
Playback (Basic operation) ·························································27
Important information·································································27
Playing a Blu-ray Disc player/DVD player ····································29
Playing a CD player·····································································29
Playing an iPod············································································30
Playing a USB memory device····················································32
Tuning in radio stations·······························································34
Playing a network audio······························································37
Selecting a listening mode (SURROUND MODE) ····················55
Selecting a listening mode··························································55
Advanced version ·······························································59
Speaker installation/connection (Advanced) ···························60
Install ··························································································60
Connect ······················································································62
Set up speakers·········································································· 69
Connections (Advanced connection)·········································71
Connecting the remote control connectors································71
Connecting the RS-232C connector ··········································· 72
Connecting the DC OUT (TRIGGER OUT) jacks ························· 72
Playback (Advanced operation) ·················································73
Convenient functions··································································73
Playback in ZONE2/ZONE3 (Separate room) ·························· 84
Audio output ··············································································· 84
Video output ··············································································· 85
Playback······················································································85
Sleep timer function ··································································· 86
How to make detailed settings··················································87
Menu map ·················································································· 87
Examples of menu screen displays ············································ 88
Examples of menu······································································89
Inputting characters ···································································90
SOURCE SELECT ······································································· 92
AUDIO/VIDEO ADJUST······························································99
SYSTEM SETUP ······································································· 105
INFORMATION·········································································121
Other settings············································································122
Remote control settings ··························································· 122
Operating the connected devices by remote control unit ····123
Operating AV devices ·······························································123
Registering preset codes··························································124
Operating devices·····································································126
Operating learn function ··························································· 128
Information···········································································130
Part names and functions·························································131
Front panel················································································131
Display ······················································································132
Rear panel·················································································133
Remote control unit··································································134
Other information ····································································· 136
Trademark information······························································136
Surround ···················································································137
Relationship between video signals and monitor output·········· 141
Explanation of terms·································································143
Troubleshooting········································································146
Resetting the microprocessor ·················································· 150
Specifications ············································································151
Getting started ·············································································· 1
Accessories ··················································································2
Features························································································2
Cautions on handling ····································································3
Contents
Basic version
Advanced version
Information

2
Features
Fully discrete, identical quality and power for all
7 channels (110 W x 7ch, 8 Ω)
The unit is equipped with a power amplifier that reproduces
highfidelity sound in surround mode with equal quality and power
for all channels, true to the original sound.
The power amplifier circuit adopts a discrete-circuit configuration
that achieves high-quality surround sound reproduction.
Supports internet radio, music, and photograph
streaming
Supports AirPlay®(vpage76)
When connected to a network, this unit can play audio files and still
images such as photographs that are stored on your computer. You
can also listen to internet radio and a host of other online music
sources that use network technology. This unit also supports
AirPlay that lets you stream your music library from an iPhone,
iPad, iPod touch or iTunes.
Compatible with “Wizz App” for performing basic
operations of the unit with an iPhone or iPod
touchz1
“Wizz App” is application software that allows you to perform
basic operations with an iPhone or iPod touch such as turning the
unit ON/OFF, controlling the volume, and switching the source.
z1 Download “Wizz App” from iTunes®App Store. The unit
needs to be connected to a LAN and the iPhone/iPod touch
needs to be connected to the same network by Wi-Fi (wireless
LAN).
Setup Wizard, providing easy-to-follow setup
instructions
First select the language when prompted. Then simply follow the
instructions displayed on the TV screen to set up the speakers,
network, etc.
Easy to use, Graphical User Interface
This unit is equipped with an easy to see “Graphical User Interface”
that uses menu displays and levels. The use of level displays
increases operability of the this unit.
Direct play for iPod®and iPhone®via USB
(vpage14)
Music data from an iPod can be played back if you connect the USB
cable supplied with the iPod via the USB port of this unit, and also
an iPod can be controlled with the remote control unit for this unit.
When an iPod is connected, merely pressing 21starts playback
of music from the iPod.
Supports HDMI 1.4a with 3D, ARC, Deep Color,
“x.v.Color” , Auto Lip Sync and HDMI control
function (vpage7)
This unit can output 3D video signals input from a Blu-ray Disc
player to a TV that supports a 3D system. This unit also supports
the ARC (Audio Return Channel) function, which reproduces TV
sound with this unit via an HDMI cable used for connecting the
unit and a TVz2.
z2 The TV should support the ARC function.
7-HDMI inputs and 2-outputs
The unit is equipped with 7 HDMI input connectors for connecting
devices with HDMI connectors, such as a Blu-ray Disc player,
game machine, HD video camera, etc.
Accessories
Check that the following parts are supplied with the product.
qGetting Started ........................................................................ 1
wCD-ROM (Owner’s manual) .................................................... 1
eWarranty card (for USA) .......................................................... 1
rWarranty card (for CANADA)................................................... 1
tPower cord .............................................................................. 1
yRemote control unit (RC014SR) .............................................. 1
uR03/AAA batteries................................................................... 2
iSetup microphone (ACM1H) ................................................... 1
oAM loop antenna (for HD Radio broadcasts) ........................... 1
Q0 FM indoor antenna (for HD Radio broadcasts) ........................ 1
t y
o Q0i
Basic version
Advanced version
Information
vSee overleaf

3
Cautions on handling
•Before turning the power on
Check once again that all connections are correct and that there are
no problems with the connection cables.
•Power is supplied to some of the circuitry even when the unit is
set to the standby mode. When going on vacation or leaving home
for long periods of time, be sure to unplug the power cord from the
power outlet.
•About condensation
If there is a major difference in temperature between the inside of
the unit and the surroundings, condensation (dew) may form on
the operating parts inside the unit, causing the unit not to operate
properly.
If this happens, let the unit sit for an hour or two with the power
turned off and wait until there is little difference in temperature
before using the unit.
•Cautions on using mobile phones
Using a mobile phone near this unit may result in noise. If that
occurs, move the mobile phone away from this unit when it is in use.
•Moving the unit
Turn off the power and unplug the power cord from the power
outlet. Next, disconnect the connection cables to other system units
before moving the unit.
•About care
•Wipe the cabinet and control panel clean with a soft cloth.
•Follow the instructions when using a chemical cleaner.
•Benzene, paint thinner or other organic solvents as well as
insecticide may cause material changes and discoloration if brought
into contact with the unit, and should therefore not be used.
Simultaneous playback on two HDMI channels
This unit is equipped with two HDMI MONITOR outputs. You can
connect one output to a projector and the other output to a TV for
simultaneous signal outputs.
All sources are up-scaled to 1080p
The unit is provided with an HDMI video up-scaling function that
converts an analog video signal input to the unit to a 1080p (HD
resolution) signal and supplies it to a TV via the HDMI connector.
This enables the unit and a TV connected with a single HDMI cable
and any video source to be reproduced precisely with HD level of
quality.
High definition audio support
The unit is equipped with a decoder which supports high-quality
digital audio format for Blu-ray Disc players such as Dolby TrueHD,
DTS-HD Master Audio, etc.
Audyssey DSX™
This unit is equipped with Audyssey DSX™ processor. By
connecting front height speakers to this unit and playing back
through Audyssey DSX™, you can experience a more powerful
playback expression in the height audio range. By connecting front
wide speakers, you can experience a more powerful playback
expression in the wide audio range.
M-XPort (marantz-eXtension Port) (vpage17)
This unit is equipped with the M-XPort, a marantz original innovation
that provides outstanding expandability. You can connect the
Wireless Receiver RX101 (sold separately) to this port.
Features
Basic version
Advanced version
Information

Basic
version
4
FConnections vpage5
FSettings vpage20
FPlayback (Basic operation) vpage27
FSelecting a listening mode (SURROUND MODE) vpage55
Connection vpage8, 10 Connection vpage8, 11
Playback –Playback vpage29
Connection vpage8, 11 Connection vpage16
Playback vpage29 Playback vpage29
Connection vpage8, 13 Connection vpage8, 12
Playback –Playback –
Connection vpage14 Connection vpage14
Playback vpage30 Playback vpage32
Connection vpage8 Connection vpage13
Playback –Playback –
Connection vpage16 Connection vpage15
Playback –Playback vpage34
Connection vpage17 Connection vpage19
Playback –Playback vpage37
For speaker connections, see page62, Cpage 6 “Connecting the speakers”.
Basic version
Here, we explain the connections and basic operation methods for this unit.
Basic version
Advanced version
Information
Basic version

5
Important information
•Make connections as follows before using this unit. Select an
appropriate connection type according to the devices to be
connected.
•You may need to make some settings on this unit depending
on the connection method. Refer to each description for more
information.
•Select the cables (sold separately) according to the devices
being connected.
NOTE
•Do not plug in the power cord until all connections have been
completed (When the Setup wizard is running, follow the instructions
in the Setup wizard screen for making connections. ).
•When running the Setup wizard, turn off the power supply of
connected devices.
•When making connections, also refer to the operating instructions of
the other devices being connected.
•Be sure to connect the left and right channels properly (left with left,
right with right).
•Do not bundle power cords together with connection cables. Doing
so can result in noise.
Connections
Converting input video signals for output (Video conversion function)
This unit is equipped with three types of video input connectors (HDMI, Component video and video) and three types of video output connectors
(HDMI, Component video and video).
Use the connectors corresponding to the devices to be connected.
This function automatically converts various formats of video signals input to this unit into the formats used to output the video signals from
this unit to a monitor.
GFlow of video signals for MAIN ZONEH
HDMI connector
Component video
connectors
Video connector
Monitor (TV)
HDMI connector
Component video
connectors
Component video
connectors
Component video
connectors
Video connector
HDMI
connector
Video connector
HDMI connector
Video connector
: when 480i/576i signals are input
Video device
This unit
Output
Input
(IN)
Output
(MONITOR OUT) Input
Basic version
Advanced version
Information
Basic version
vSee overleaf
Other manuals for SR6006
4
Table of contents
Other Marantz Receiver manuals

Marantz
Marantz NR1604 User manual

Marantz
Marantz SR5010 User manual

Marantz
Marantz NR1604 User manual

Marantz
Marantz SR9300 User manual

Marantz
Marantz 2226B User manual

Marantz
Marantz NR1710AV User manual

Marantz
Marantz 2230 User manual

Marantz
Marantz NR1504 User manual

Marantz
Marantz ER3000 User manual

Marantz
Marantz SR7008 User manual

Marantz
Marantz SR4200 User manual

Marantz
Marantz M-CR611 User manual

Marantz
Marantz SR5002N1B User manual

Marantz
Marantz NR1604 User manual

Marantz
Marantz SR4023 Assembly instructions

Marantz
Marantz ER3000 User manual

Marantz
Marantz 2275 User manual

Marantz
Marantz 2218 User manual

Marantz
Marantz SR5010 User manual

Marantz
Marantz SR5012 User manual