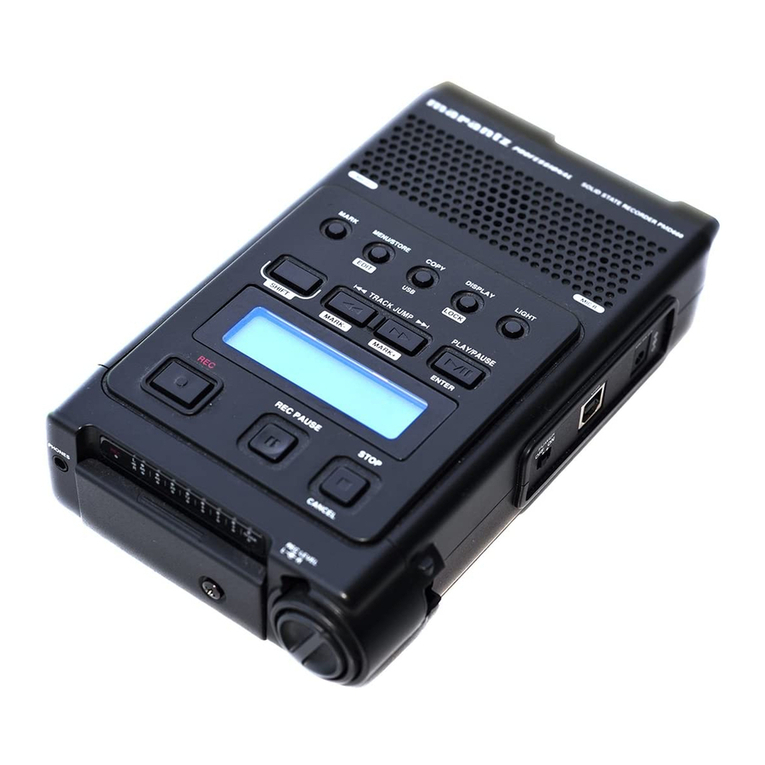
Marantz PMD660 User manual

1
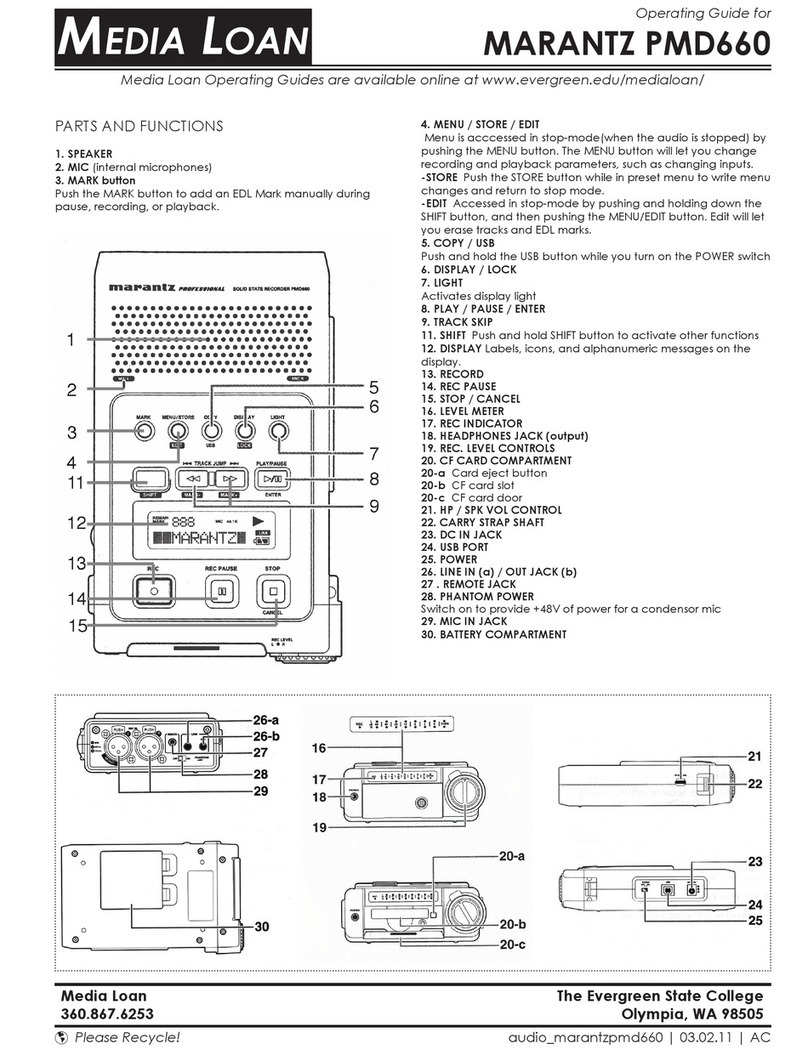
Marantz PMD660 Digital Recorder Guide
August 2005

2
Shift
Edit
Track Jump
Play/Pause
Enter
Set Up
Inserting a Compact Flash Card
The PMD660 records onto CF or Compact Flash Cards.
To insert a CF card:
1. Open the CF Card Door on the front side of the recorder. You should
see a slot that looks like a miniature disc drive.
2. Gently insert a compact ash card into the slot.
3. Close the CF card door. If the CF card door won’t latch, check that the
eject button is in the “in” position.
Powering the unit
Switch on the unit using the power switch located on the right side of the unit.
The LCD will briey indicate that the unit is loading data from the CF card.
Formating a new or previously used CF Card
If you have inserted a new ash card or want to erase all audio les on a CF card
that has been used you may need to format it. To format:
1. Press the Shift + Edit buttons. The display will read Trk Erase.
2. Press the left Track Jump button (<<) until the display reads Format.
3. Press the Play/Pause/Enter button. The LCD will ask OK?.
4. Press the Enter button again. The display will briey read: Executing and
then Completed.
The CF card is now ready to record to.
Presets:
The recorders have 3 presets than you can choose from depending on what type of audio you need to record. If your
needs go beyond these 3 presets, you’ll need to choose your own settings manually (see pgs.5-7 for more about this).
To record audio for iMovie: select preset 1
To record audio for a Cd: select preset 2
To record MP3 audio: select preset 3
Preset 1 is set up to record 16-bit stereo PCM sound at a sampling rate of 48khz.The external mic inputs are the default
inputs and the level controls are accessible on the front side of the unit.
Preset 2 is set up to record 16-bit stereo PCM sound at a sampling rate of 44.1 khz.The external mic inputs are the de
fault inputs and the level controls are accessible on the front side of the unit.
Preset 3 is set up to record MP3 mono, compressed audio.The external mic inputs are the default inputs and the level
controls are accessible on the front side of the unit.

3
Steps for selecting Presets:
1. With the PMD 660 at Stop, Push the Menu/Store Edit button
2. Push the << or >> button to choose Preset-1 (or 2, or 3)
3. When the LCD reads Preset-1 with the “1” ashing
Press the Menu/ Store Edit button.
The LCD will briey read “Executing” and then “Completed.”
Plugging in Headphones
You may plug in headphones using the 1/8 inch jack on the front of the unit.
This is a good idea before you start recording so that your microphones do
not feedback with the built in speakers.
Plugging in Microphones
You may plug a stereo microphone with Left and Right male XLR cables
into the “L” and “R” XLR Inputs on the back side of the unit.
Setting Levels:
The level meter must NEVER touch the 0dB mark. If it does the signal will be clipped.
The best record level is when the meter goes as close to it but never over it.
1. Press REC PAUSE
2. Set recording levels using the REC LEVEL controls
on the front side of the unit.
The inside control (Right Channel) and outside
control (Left Channel) turn together unless you hold
one while turning the other.
0dB

4
PLAY/PAUSE
STOP
REC
REC PAUSE
STOP
Recording
1. When you are ready to record, press the REC (record) button to
begin recording. The REC indicator will be lit and steady while
recording. The display will show the information display of recording.
2. Each time you press the REC button a new track number is
assigned to the recording. If you want to pause recording but
not increment the track number (and create a new audio le)
press REC PAUSE. When you are ready to resume record
ing press the REC button.
3. When you are nished recording press the STOP button.
This will close the audio le.
Playback
1. Push the PLAY/PAUSE button to begin playback.
The PLAY indicator will be lit and steady while in playback
2. Push the PLAY/PAUSE button again to pause playback.
3. Push the STOP button to stop playback.
T
Track Access
|<< Track Jump During playback, push |<< to jump to the previous track.
If pushed while playing the rst track, it will jump to the last track on the CF card.
>>| Track Jump During playback, push >>| to jump to the next track.
If pushed while playing the last track, it jumps to the rst track on the CF card.
Audible Search
<< During playback push and hold the << button to rewind and do a 2x speed
audible search in the reverse direction. Release to return to a normal forward playback.
>> During playback, push and hold the >> button to fast forward and to do a 2x
speed audible search in the forward direction. Release to return to normal
forward playback.
Search
<< During pause, push and hold the << button to rewind quickly. The rewind is at 10x speed for three seconds,
then it automatically speeds up to 140x speed.
>> During pause, push and hold the >> button to fast forward quickly. The fast forward
is at 10x speed for three seconds, then it automatically speeds up to 140x speed.
If the >> button is held past the end of a track, the fast forward will continue into the next track.
If the << button is held past the beginning of a track the rewind will continue into the previous track.

5
MARK + MARK
SHIFT
PLAY/PAUSE
MENU/STORE EDIT Button
<< or >> Buttons
ENTER Button
Creating your own Presets
If you want to work with settings other than the ones offered in the three
available presets (audio for iMovie, cd audio, MP3 audio - see pg.2 of this
guide-), you will need to choose your own settings and create your own pre-
sets. You will nd a description of the each parameter in the next two pages.
General Menu Procedure
1. With the PMD660 at Stop, push the MENU/STORE EDIT button.
2. Push the << or >> button to choose the Preset number.
3. When displayed, push the ENTER button to select the desired
Preset number.
4. Push the << or >> button to tab through the sub menu display.
5. When the desired parameter or value is displayed and ashing,
push the ENTER button to select it.
6. Repeat steps 2-5 as desired.
7. When nished, push the MENU/STORE/ EDIT button to store
your changes, or push the STOP/CANCEL button to cancel them.
EDL Mark
EDL (edit decision list) marks help you nd specic points in the recording. EDL marks can be created manually during
recording, pause, and playback. They can also be created automatically. Up to 255 EDL marks can be added to a CF
card. EDL marks are numbered consecutively starting at one.
Adding EDL Marks Manually
1. During recording, pause or playback press the MARK button
to manually add an EDL mark.
Searching the EDL Mark
- From Stop or Playback, push and hold the SHIFT
button while pushing the Mark+ button to tab through
the EDL marks on the CF Card.
- From Stop or playback, push and hold the SHIFT
button while pushing the Mark- button to tab through
the EDL marks on the CF Card.
- To start playback from the displayed EDL Mark, push
the PLAY/PAUSE button.

6
Preset Parameters
Display Selection Range Description Notes
1. Input INT MIC, MIC, LINE Internal Mic - The PMD660 has internal stereo micro-
phones located on the top of the unit.
MIC - The PMD660 has two XLR microphone inputs
on the back of the unit labelled ‘L’ and ‘R.’ When re-
cording in Mono the ‘L’ input is active.
LINE - The PMD660 has one 1/8” Stereo Mini Input on
the back of the unit.
The PMD660 re-
cords only from the
selected input.
2. Output LINE, SP/HP LINE - The PMD660 has one 1/8” Stereo Mini Output
on the back of the unit.
SP/HP - The PMD660 has an internal speaker and
a headphone jack accessible on the front side of the
unit.
3. Date/Time 2004-2099
Jan-Dec
1-31
AM/PM 00:00 - 11:59
4. Rec Format MP3-44.1K, MP3-
48K, PCM-44.1K,
PCM-48K
MP3-44.1K - Records using MP3 (MPEG I Layer 3)
compression
MP3-48K - Records using MP3 (MPEG I Layer 3)
compression at 48K
PCM-44.1K - Records uncompressed audio at 44.1K
Sample Rate - Appropriate for nishing on Compact
Disc
PCM-48K - Records uncompressed audio at 48K
Sample Rate - Appropriate for nishing on miniDV.
The MP3 com-
pressed formats will
yield longer record-
ing time but lower
quality audio. The
PCM (Pulse Code
Modulation) uncom-
pressed formats are
good aquisition for-
mats appropriate for
editing and mixing.
5. Rec Channel Stereo, Mono Stereo - Records to L and R channels simultaneously.
Mono - Records to L channel only.
Stereo uses twice
as much storage
space as Mono.
Only use Stereo if
you are recording
with two micro-
phones or a single
stereo microphone.
6.PreRecord On, Off On - When pre record is on and the PMD660 is in
record pause, it listens to the selected audio inputs
and continuously buffers 2 seconds of audio. When
recording begins, the 2 second pre record buffer is
written at the beginning of the new track. The 2 sec-
onds give you time to start recording without missing
the rst seconds of audio.
Off - Disables pre record.
7.Manual Trk On, Off On - Enables user to increment track number while
recording by pressing the record button.
Off - Disables this feature
8. Auto Trk Off, 1, 5, 10, 15,
30min., 1,2,6,8,12,24
hours.
Off - Disables the automatic numbering of tracks.
1min-24hours - Enables the automatic creation of new
tracks at a xed interval of recording time.

7
9. Auto Mark Off, On, -60,-54, -38,
-20dB
Off - Disables the feature
On - enables automatic placement of EDL markers
when the audio input drops below a selected thresh-
old.
Threshold options include -60,-54, -38, -20dB.
If you select ‘On’
you must press En-
ter a second time to
set the threshold.
10. Silent Skip On, Off, -60,-54, -38,
-20dB
Off - Disables the feature
On- enables Silent Skip which automatically pauses
recording when there is a period of silence and
resumes recording when the sound resumes. Some-
times referred to as ‘Voice Activated Recording’
Threshold options include -60,-54, -38, -20dB
If you select ‘On’
you must press En-
ter a second time to
set the threshold.
When Auto Mark
menu choice is
ON, resumption
of recording after
a record pause by
Silent Skip adds an
EDL mark.
11. Level Cont. Manual, ALC Manual - enables manual input level control using ‘Rec
Level’ dials on the front of the unit.
ALC - Automatic Level Control - Automatic Gain Con-
trol. You should Never use this!
12. Meter Mode Normal, Peak Only Normal - all the level meters are displayed
Peak Only - the level meter(s) display only a peak
level.
13. Mic Atten. 0, -20db 0 - disables this feature
-20dB - Attenuates input from Mic/XLR inputs by -
20dB. This is typically called a ‘Pad.’
14. AutoPowoff On, Off On - If the PMD660 is not used for 15 minutes during
stop or play-pause, power can be automatically shut
off to conserve battery life.
Off- disables this feature.
Could be annoying
either way.
15. Battery Alkaline, NiMH Alkaline - select this if you are using 4 standard AA
batteries.
NiMH - select this if you are using rechargeable Ni-MH
batteries.
16. Beep On, Off On - When battery charge is depleted the PMD660 will
beep.
Off - disables this feature.
17. Machine ID 5 digit ASCII code An audio track (le) has Machine ID information. This
information is included in the le name. For example
if the machine ID is ‘ZZZZZ’ the rst le is numbered
‘ZZZZZ001.wav’ or ‘ZZZZZ001.mp3.’
18. Default --- The Default menu choice resets all Menue (not Edit
menu) items in the Preset to their default values.
Be careful not to
accidently press
enter while Default
is selected.
19. Version --- Displays the rmware version for the PMD660
8
This description assumes that you have recorded sound onto the PMD660 Flash
RAM and are ready to transfer it to your Powerbook.This process is essentially a le
transfer from the PMD660 to a Macintosh hard drive and then an import.The process
is as follows:
1 • Plug the PMD660 into the wall • You may use the DC 9v power supply provided with the unit.
Do not turn the unit on yet.
2 • Plug the PMD660 into the USB port of your Powerbook • Plug the supplied USB cable into the
USB Port on the PMD660 and the other end into the USB port on the left side of your Powerbook.
3.• While pressing and holding the Copy/USB Button on the top of the PMD660, switch
the power switch on the side of the PMD660 into the ON position • The LCD should read ‘USB.’
4 •A new drive will show up on the desktop • In this case the drive is called ‘NO NAME’
This is the lash RAM card inside of the PMD660. Double click it.
Importing Audio onto a Powerbook from a Marantz PMD660 Digital Recorder:
Marantz
PMD660
Mac OSX
Power Switch
Copy/USB Button
USB Port
DC In 9v
LCD
5 •Open the MPGLANG1 folder • Double click the ‘MPGLANG1’ folder. This is the folder that contains
the audio you have recorded on the PMD 660.
The ‘MPGLANG1’ Directory

9
6 •Click and drag to select the contents
of the MPGLANG1 directory • You will
notice that these are *.WAV audio les.
8 •Eject the Marantz PMD660 recorder drive • Go back to the desktop, select the USB drive and drag it
to the trash or press Apple/Command + E. Both actions will eject the USB drive. You may now turn off the
PMD660 and disconnect the USB cable.
7 •Drag the les you want to work with
into a directory on the Users Drive •
In this case we have chosen Users > Student >
That’s it! You may now import this audio into iTunes, iMovie, iDVD, or Audacity.
Other manuals for PMD660
4
Table of contents
Other Marantz Voice Recorder manuals

Marantz
Marantz PMD570 User manual

Marantz
Marantz PMD620 User manual

Marantz
Marantz Professional PMD661 User manual

Marantz
Marantz PMD650/N1B User manual

Marantz
Marantz PMD660/F User manual

Marantz
Marantz PMD660 User manual

Marantz
Marantz PMD680 User manual

Marantz
Marantz PMD620 User manual

Marantz
Marantz PMD561 User manual

Marantz
Marantz PMD671 User manual