05/2011 - REV. B PAGE 4 0F 10
102
s
9
8
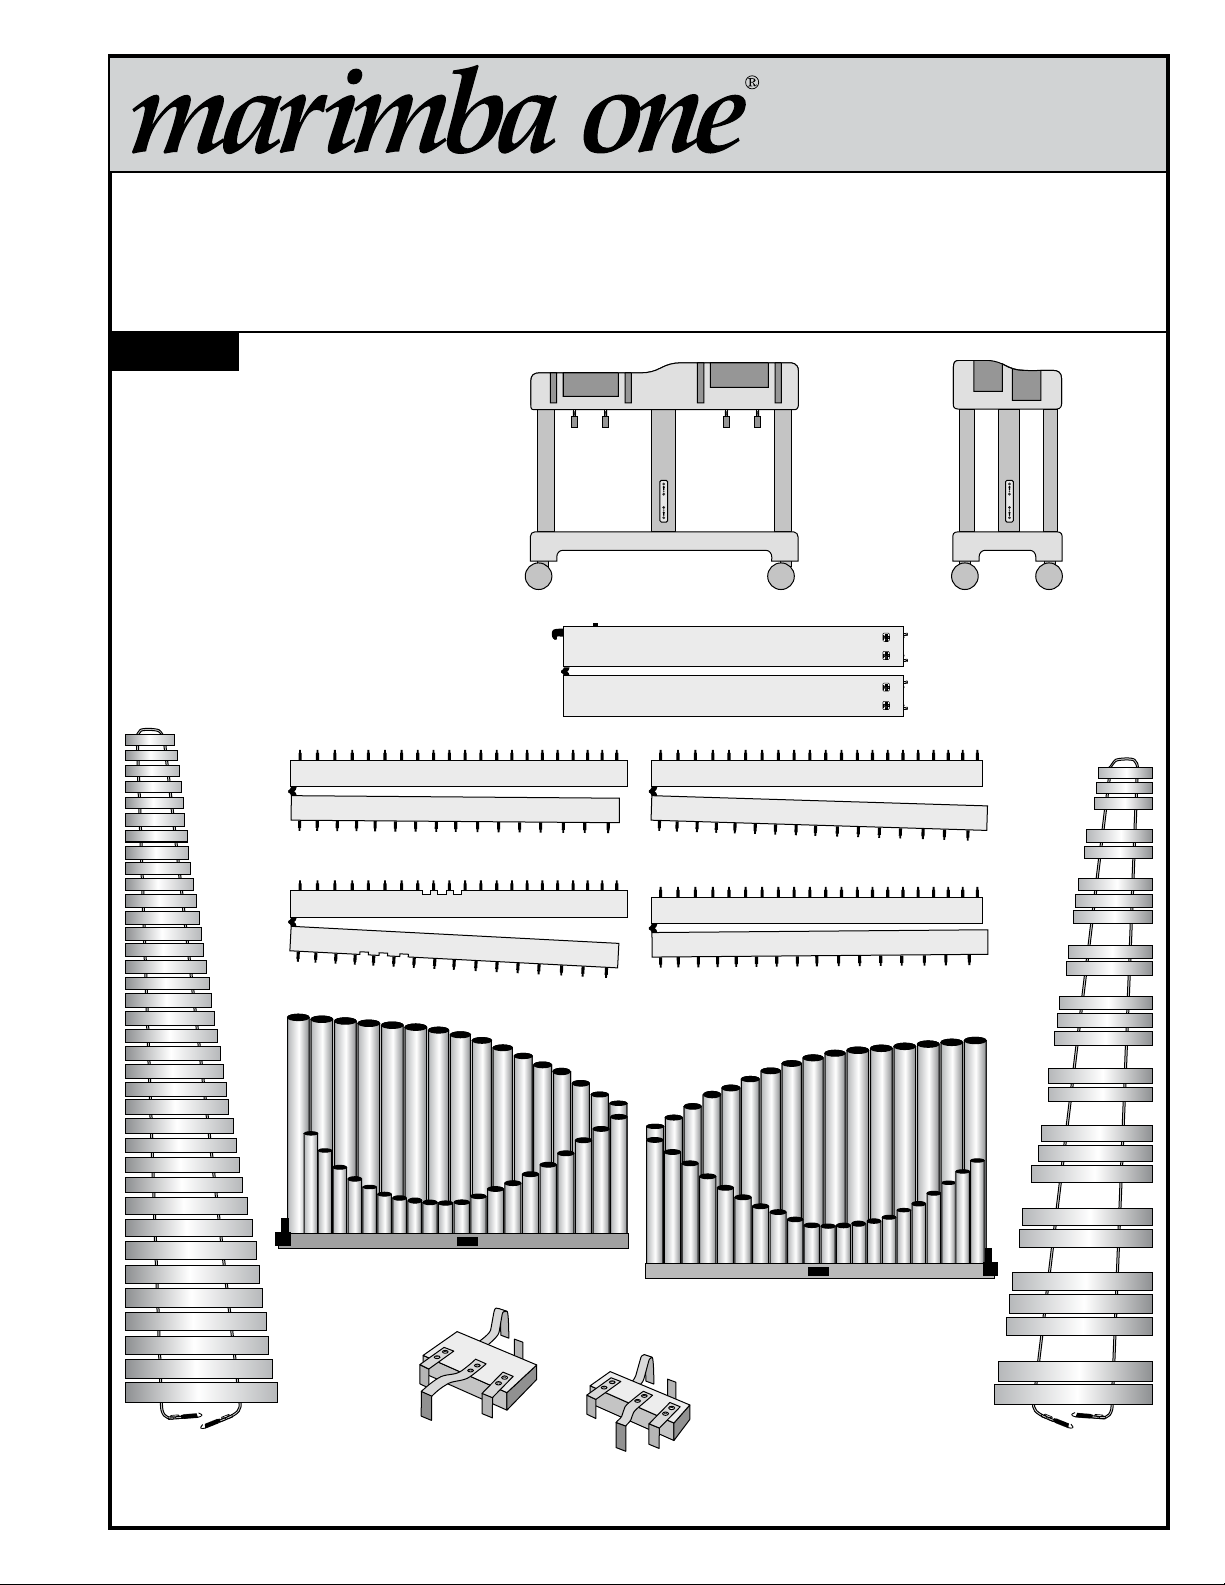
natural
accidental
bass
treble
treble
bass
s
INSTALL RAIL #2.
7LOCATE RAIL #2
With your assistant, unfold the rail
while supporting each end.
support the natural bars and resonators.
supporting the accidental bars and resonators.
Note that the bass ends of the
rails have larger gaps between
the rail jacks than the treble end.
Inside the natural resonator bank, you will see a
plug in every tube. The accidental resonators are
missing a plug in every 3rd or 4th tube.
CAUTION: The resonators are heavy. You will need an
assistant to help move the resonators into place.
\
CLOSE THE SAFETY LOCK
OPEN THE RESONATORS IN THEIR
NORMAL VERTICAL POSITION.
The rails are numbered in two places.
-Player side of the bass end.
-When folded, in the cross grain of the wood
on the treble side.
Position yourself with the bass
end on your left and treble end
on your right.
number
number