Marmitek CK13 User manual


2
Marmitek ActiveHome
Congratulations on your purchase of ActiveHome, the PC based home automation
system!
Make your lights and appliances go to work for you....
GETTING STARTED
Because we know that you are eager to get started, we've kept this introduction as
short as possible, but it contains very valuable information, so you should read
through it very carefully.
The first thing you need to understand is that there are two different devices you
need to control your house; Controllers and Modules. Any light or appliance that you
want to control is plugged into a Module and that Module is then plugged into a
standard AC outlet. Modules receive commands from Controllers.
Controllers are also plugged into standard wall outlets and send commands to the
Modules over your existing electrical wiring in your house without effecting your
electricity in any way. With your ActiveHome Home Automation Interface and
software, your PC becomes a very intelligent Controller for all of your home
automation tasks. Here is how it works:

3
The ActiveHome Interface connects to your computer's serial port and then plugs
into a wall outlet. The ActiveHome software tells the Interface what to do. The
Interface then sends digital signals over your existing house wiring to a Module
which receives the signals and executes the command sent by the Controller, in this
case your PC.
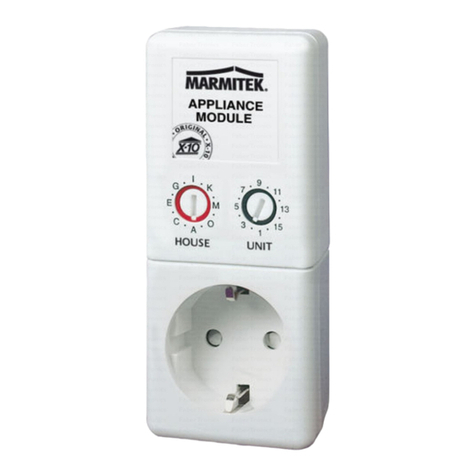
Each Module has a specific address made up of a Housecode (red dial on the face
of the Module) and a Unit Code (black dial on the face of the Module). The
Controller first sends an address and then a command on the AC power lines. Only
the Module with a matching address will execute the command. If more than one
Module has the same address, both Modules will execute the command. Addresses
are set on the Module by turning the two dials on the front of the Module to the
desired letter and number (using a small screwdriver or a coin). The Housecode is
selected from the letters A through P, and the Unit Code is selected from the
numbers 1 through 16.

4
SOFTWARE INSTALLATION INSTRUCTIONS
Please read through these installation steps completely before you start to
install your ActiveHome software.
Installation from CD ROM for Windows:
1. Insert ActiveHome CD in your CD ROM drive.
2. If you have AutoRun enabled the Marmitek Home Screen will appear on your
screen after a short time. If you do not have AutoRun enabled, use Explorer to
open your CD drive and double-click on Setup.exe. (Win 3.1 →311.exe).The
Marmitek Home Screen will appear on your screen after a few seconds.
3. Select your language
4. Check out the Home Control Assistant to see how Marmitek X-10 Controllers
and Modules work together.
5. Take a look at the Product Catalog to see what accessories are available to add
to your ActiveHome system.
6. When you’re ready to install ActiveHome, click on the Install ActiveHome button
at the bottom right hand corner of the Home Screen.
7. Follow the on-screen prompts to install ActiveHome.
8. Remember to re-boot your computer before running ActiveHome.
9. To get back to the Home Screen at any time, to look at the Home Control
Assistant or Product Catalog, go to your CD drive from the Explorer and
double-click on Setup.exe (Win 3.1 →311.exe).

5
HARDWARE INSTALLATION INSTRUCTIONS
Please read through these installation steps completely BEFORE you start to
install your ActiveHome hardware.
1. Before starting, make sure your system is powered off.
2. Take the cable that came with your ActiveHome Starter Kit and plug the large
end into an unused COM port on the back of your computer.
3. Locate the Interface that came in your ActiveHome Starter Kit.
4. Plug the small end of the ActiveHome cable into the connector on the bottom of
the Interface. The cable connector just snaps into the Interface.
5. Plug the Interface into an AC electrical outlet that can not be turned on/off. This
could either be a wall outlet or a power strip (without a surge protector).
Extension cords are not recommended.
6. Now power on your computer and double click on the ActiveHome icon. This
will start the ActiveHome software. Select Tools from the menu bar and then
View Connections. You will then see a series of pictures on your computer
screen that shows you how to install the Interface (see Hardware Installation
Instructions above). Look these over, when you are sure that you have installed
it correctly, click anywhere on the picture and it will disappear.
7. Select Preferences from the File menu and select which COM port you
connected your Interface to.

6
Your computer portion of the hardware is now set-up to control the lights and
appliances in your home! To complete the hardware setup, you need to install
Modules for the devices that you wish to control.
The first time you run ActiveHome it will load a file called MYHOUSE.x10.
MYHOUSE will show a graphical representation of a Lamp Module and Appliance
Module. The Lamp Module has been named "My Lamp Module" and the Appliance
Module is named "My Appliance."
"My Lamp Module" is already set to address A2 (Housecode A, Unit Code 2 located
on the bottom center of the "on screen" module). This should correspond to the
setting of the physical Lamp Module that you will install.
The "My Appliance" on screen module is set to Housecode A and Unit Code 1 to
correspond to the setting of the physical Appliance Module that you will install.
Make sure the Address Dials on the face of the Modules are set correctly. The red
dial should be set to A on both Modules. The black dial on the Lamp Module should
be set to 2 and the black dial on the Appliance Module should be set to a 1. If they
are not set correctly, you can reset the dials with a small screw-driver or coin.

7
To control a lamp using the ActiveHome program, follow these steps:
Please read through these installation steps completely before you start to
install a Lamp Module.
1. Select a nearby lamp (40-300W), one that uses a standard light bulb, and
make sure its on/off switch is switched on.
2. Unplug the lamp from the wall outlet and plug it into a Lamp Module.
3. Plug the Lamp Module into a nearby AC outlet. If this outlet is controlled by a
wall switch, make sure the wall switch is turned on.
4. If you have not already done so, start your ActiveHome software by double
clicking on the ActiveHome icon.
5. Using your mouse, click the switch of "My Lamp" as shown on your computer
screen. There may be a delay of one or two seconds from the time you click the
"on screen" module switch and when the light actually turns on. You can also
dim the lamp by moving the slide switch up and down.

8
Controlling an appliance is just as easy!
1. Select a small appliance, such as an AC powered radio, and make sure its
on/off switch is switched on.
2. Unplug the appliance from the wall outlet and plug it into an Appliance Module.
3. Plug the Appliance Module into a nearby AC outlet. If this outlet is controlled by
a wall switch, make sure the wall switch is turned on.
4. If your ActiveHome software is not running, start it by double clicking on the
ActiveHome icon.
5. Using your mouse, click the switch of "My Appliance" as shown on your
computer screen. There may be a delay of one or two seconds from the time you
click the "on screen" module switch and when the appliance actually turns on.
You can schedule each of your Modules to turn on or off any time by clicking on the
large black areas of your "on screen" modules. If you have trouble scheduling
modules, check the on-line helps for details on how to schedule events (turning
Modules on or off).
ActiveHome for Windows includes detailed on-line help for almost every aspect of
its operation. If you ever have questions about how to do something in ActiveHome,
you can reference the on-line help via your F1 key, or the Help item in the toolbar.
Table of contents
Other Marmitek Home Automation manuals
