manuals.online logo
Brands
  1. Home
  2. •
  3. Brands
  4. •
  5. Vimar
  6. •
  7. Home Automation
  8. •
  9. Vimar 00801 User manual

Vimar 00801 User manual

Istruzioni
Instruction sheet
Notice technique
Viale Vicenza, 14 - I 36063 Marostica VI
Tel. +39 0424 488 600 - Fax (Italia) +39 0424 488 188 - Fax (Export) +39 0424 488 709
www.vimar.com
49400418A0 01 1206
VIMAR - Marostica - Italy
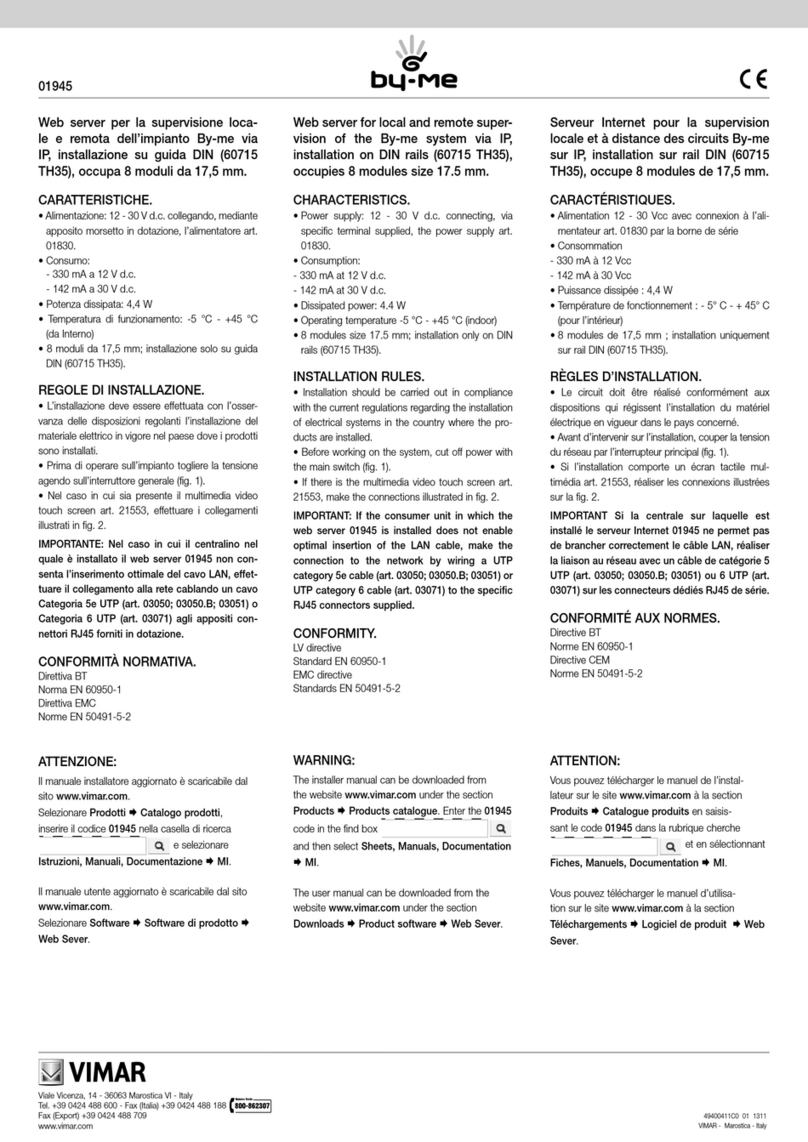
00801
00802
00801: Supporto orientabile 1 modulo Eikon, Arké e Plana,
bianco.
00802: Supporto orientabile 2 moduli Eikon, Arké e Plana,
bianco
Sono indicate di seguito le modalità di installazione dei supporti
orientabili 00801 e 00802 e dei seguenti accessori:
•00805:adattatoreperl’agganciodeisupportiorientabili
•00800:corniceperfissaggiodeisupportiorientabiliaparete
•16897.S:kitantitamper
Isupportiorientabiliconsentonol’installazioneadincasso(inscatole
rettangolari o rotonde ø 60 mm) o a parete di rivelatori di presenza
per impianti d’allarme 20485, 19485, 14485 o dell’interruttore
consensoredipresenzaadinfrarossiper accensioneluci20181,
20181.120,20184,19181,14181,148181.120,14184.
Seutilizzatiinimpiantiantifurtoconappositokit16897.Sgaran-
tisconolaprotezionecontrol’aperturaelarimozione.
Apparecchidautilizzareinluoghiasciutti.
REGOLE DI INSTALLAZIONE.
L’installazione deve essere effettuata con l’osservanza delle
disposizioni regolanti l’installazione del materiale elettrico in
vigorenelpaesedoveiprodottisonoinstallati.
Installare il supporto orientabile in posizioni non facilmente
raggiungibili in modo da evitare urti accidentali.
L’apparecchio deve essere installato ad almeno 2 m dal
piano di calpestio.
CONFORMITÀ NORMATIVA.
DirettivaBT.
NormaEN60669-2-1.
30
20
1
135
135
2
20
30
3
INSTALLAZIONE • INSTALLATION • INSTALLATION
1
1
2
2
ORIENTABILITÀ.
Verticalmentecomeindicatoinfigura1eorizzontalmentecome
indicatoinfigura2.
Senecessariopossonoessereinstallatianchecapovolti(figura3).
Perlacopertura volumetrica vedereil foglio istruzioni dell’ap-
parecchioutilizzato.
Aprireilcoperchiosuperiore.
Opentheuppercover.
Ouvrir le couvercle supérieur.
Allentare la vite di blocco dello snodo
finoaliberareilcoperchioportaappa-
recchio.
Unscrew the screw blocking the joint
until the cover designed to accomodate
theequipmentisreleased.
Dévisserlavisquibloquelejointjusqu’au
déga gement du porte-appareil.
00801: Orientable support 1 module Eikon, Arké and
Plana, white.
00802: Orientable support 2 modules Eikon, Arké and
Plana, white.
Thisinstructionsheetprovidesmountinginstructionsoftheorient-
ablesupports00801and00802andofthefollowingaccessories:
•00805:adaptorforthefixingoftheorientablesupports
• 00800:frameforthesurfacemountingoftheorientablesupports
•16897.S:setofaccessoriesfortamperproofuse
Theorientablesupportsallowtheflushinstallation(on3-mod-
ulerectangularmountingboxesorø60mmroundboxes)oron
frameforthesurfacemountingofpresencedetectors20485,
19485,14485forburglaralarmsystems,orofautomaticlight-
ingswitchIR motionsensor20181,20181.120,20184,19181,
14181,148181.120,14184.
Usedinburglaralarmsystemswiththekit16897.S,theyguarantee
tamperproofuseandprotectionagainstunauthorizedremoval.
Theequipmentshallbeusedindrylocation.
INSTALLATION RULES.
The installation must be done according to rules for electri-
calinstallationsof buildings in forcein the country wherethe
productsareinstalled.
Install the adjustable bracket in positions not easily acces-
sible in order to avoid accidental impact.
The device must be installed at least 2 m from the floor.
CONFORMITY TO STANDARDS.
LVdirective.
StandardEN60669-2-1.
POSSIBILITY OF ORIENTATION.
Maybeeitherverticallyorhorizontallyoriented(seerespectively
figure1andfigure2).
Ifnecessary,theyarealsopossibletoinstallthemupsidedown
(seefigure3).
Forthedetection ranges, refertotheinstruction sheet of the
installedequipment.
00801: Support orientable 1 module Eikon, Arké et Plana,
blanc
00802: Support orientable 2 modules Eikon, Arké et Plana,
blanc.
Cette notice technique contient les instructions pour l’ins-
tallation des supports orientables 00801 et 00802 et des
accessoires suivants:
• 00805:adapteurpourlafixationdessupportsorientables
• 00800:cadrepourmontageensailliedessupportsorientables
•16897.S:dispositifsanti-vandale
Lessupportsorientablespermettentl’installationd’encastrement
(enboîtesrectangulaires3modulesouenboîtesrondesø60
mm) ou en saillie des détecteurs de présence 20485, 19485,
14485poursystèmesd’alarmeetdel’interrupteuràinfrarouge
pourallumagedel’éclairage20181,20181.120,20184,19181,
14181,148181.120,14184.
Utilisésdanssystèmesd’alarmeaveclekit16897.S,ilsassu-
rentlaprotectionanti-vandaleetanti-arrachage.
Lesappareilsdoiventêtreutilisésdanslocauxsecs.
REGLES D’INSTALLATION.
L’installationdoitêtreeffectuéeselonlesnormespourlesinstal-
lations électriques des bâtiments en viguer dans le Pays oú les
produitssontinstallés.
Installez le support réglable en positions difficilement
accessibles, afin d’éviter les chocs accidentels.
L’appareil doit être installé à au moins 2 m du sol.
CONFORMITE AUX NORMES.
DirectiveBT.
NormeEN60669-2-1.
POSSIBILITE D’ORIENTATION.
Ils peuvent être orientés verticalement ou horizontalement,
commeindiquérespectivementàlafigure1etàlafigure2.
Silecas,ilspeuventêtreorientésmêmerenversé(figure3).
Se référer à la notice technique de l’appareil utilisé pour les
champsdedétection.
BUS
MODALITÀ INSTALLAZIONE DA INCASSO • FLUSH INSTALLATION MODALITY • CONDUITE D’INSTALLATION D’ENCASTREMENT
120485-19485-14485
Agganciare l’adattatore 00805 al sup-
portoe,soloper20485-19485-14485,
la staffa antimanomissione 16897.S
inclusanelkit.
Fix the adaptor 00805 to the suppor-
tingframeand,onlyfor20485-19485-
14485 the stirrup for tamperproof use
includedin16897.S.
Fixer l’adaptateur 00805 au support
demontageetseulementpour20485-
19485-14485 et le dispositif anti-van-
daleinclusdans16897.S
2Fissare il supporto alla scatola da incas-
so,montarelaplaccaefissareilsuppor-
toorientabileconlevitiindotazione.
Fix the supporting frame to the flush
mounting box, apply the cover plate
andfixtheorientablesupportusingthe
delivered screws.
Fixerlesupportdemontageàlaboîte
demontaged’encastrement,appliquer
la plaque de recouvrement et fixer le
support orientable avec les vis livrées.
3Cablareilrivelatoree,soloper20485-
19485-14485, la scheda microswitch
inclusanelkit16897.S(24V1A).
Connect to the line the microswitch
card (24 V 1 A) included in 16897.S
onlyfor20485-19485-14485.
Connecter en série à la ligne la carte
microswitch (24 V 1 A) incluse dans
16897.S seulement pour 20485-
19485-14485.
4Agganciare il rivelatore al coperchio
porta apparecchio del supporto orien-
tabile.
Fixthedetectortothecoverdesigned
toaccomodatetheequipment.
Fixerledétecteurauporte-appareildu
supportorientable.
1
2
5Agganciare corpo e coperchio del sup-
portoorientabile.
Fixthebodyandcoveroftheorientable
support.
Fixercorpsetporte-appareildusupport
orientable.
6Orientare il rivelatore nella posizione
desiderata,quindifissarelavitedibloc-
codellosnodo.
Orient the detector as desired and
fastenthescrewblockingthejoint.
Orienter le détecteur comme désiré et
visserlavisquibloquelejoint.
720485-19485-14485
Infilare ed agganciare la scheda
microswitch nel coperchio superiore del
supporto orientabile (solo per 20485-
19485-14485).
Insert and fix the microswitch card-
insidetheuppercoveroftheorientable
support(onlyfor20485-19485-14485).
Inséreretfixerlacartemicroswitchdansle
couvercle supérieur du support orientable
(seulementpour20485-19485-14485).
8Agganciare il coperchio superiore del
supportoorientabile.
Fix the upper cover of the orientable
support.
Fixerlecouverclesupérieurdusupport
orientable.
MODALITÀ INSTALLAZIONE DA PARETE • SURFACE INSTALLATION MODALITY •
CONDUITE D’INSTALLATION EN SAILLIE
Fissarelabasedellacornice00800allaparete.
Fixthebaseofframe00800tothewall.
Fixerlabaseducadre00800àlaparois.
40 Tassello per protezione
contro la rimozione
Dowel against
unauthorized removal
Cheville
anti-arrachage
60
= =
Agganciarelacorniceallabase.
Fixtheframetoitsbase.
Fixerlecadreàlabase.
Fissareilsupportoorientabileconlaviteindotazione.
Fixtheorientablesupportusingthedeliveredscrew.
Fixerlesupportorientableaveclavislivrée.
N
L
Carico
Charge
Charge
Linea antitamper
Tamperproofline
Ligne anti-vandale
Procedere come descritto nell’installazione da incasso (3-8) • Proceed as describe in the flush installation modality (3-8) • Procéder comme la conduite d’installation
d’encastrement (3-8)
Viale Vicenza, 14 - I 36063 Marostica VI
Tel. +39 0424 488 600 - Fax (Italia) +39 0424 488 188 - Fax (Export) +39 0424 488 709
www.vimar.com
Anleitungen
Instrucciones
Οδηγίες
00801: Einstellbare Halterung - 1 Modul Eikon, Arké und
Plana, weiß.
00802: Einstellbare Halterung - 2 Modul Eikon, Arké und
Plana, weiß.
Nachstehend folgen die Installationsanleitungen für die die
ausrichtbarenHalterungen00801,00802unddieZubehörteile:
•00805: Adapter zur Unterputzeinbau der ausrichtbaren
HalterungenaufEikon-Rahmen
• 00800:RahmenzurAP-MontagederausrichtbarenHalterungen
•16897.S:BausatzAntitamper
DieausrichtbarenHalterungen ermöglichen dieUP-Einbau (in
rechteckigenoderrundenDosenø60mm)bzw.dieAP-Einbau
von Anwesenheitsmeldern für Alarmanlagen 20485, 19485,
14485 oder des Schalters mit IR-Anwesenheitssensor für die
Lichteinschaltung 20181, 20181.120, 20184, 19181, 14181,
148181.120,14184.
BeimEinsatzinAlarmanlagenmitdemBausatz16897.Sistder
SchutzgegenÖffnungundEntnahmegewährleistet.
GerätefürdenEinsatzintrockenenRäumen.
ANWEISUNGEN FÜR DIE INSTALLATION.
Die Installation muß entsprechend den am Ort der Installation
geltendenVorschriftenfürElektrogeräteausgeführtwerden.
Installieren Sie die verstellbare Halterung in den Positionen
nicht leicht zugänglich, um versehentliche Stöße zu vermeiden.
Das Gerät muss mindestens 2 m über dem Boden instal-
liert werden.
NORMKONFORMITÄT.
NS-Richtlinie.
Normen EN 60669-2-1
123
INSTALLATION • INSTALACIÓN • Εγκατάσταση
1
1
2
2
AUSRICHTUNG.
Senkrecht(vgl.Abb.1)undwaagrecht(vgl.Abb.2).
DieGerätekönnenbei Bedarfauchumgekehrtinstalliertwer-
den(Abb.3).
Bzgl.derVolumenabdeckungsieheAnleitungendesjeweiligenGeräts.
DenoberenDeckelöffnen.
Abrirlatapasuperior.
Ανοίξτε το πάνω καπάκι.
Die Sicherungsschraube des Gelenks
lockern,bisderGerätehalterungsdeckel
geöffnetwerdenkann.
Aflojar el tornillo de bloqueo de la
articulación hasta liberar la tapa base
delaparato.
Λασκάρετε τη βίδα ασφάλισης της
άρθρωσης έως ότου ελευθερωθεί το καπάκι
τοποθέτησης της συσκευής.
00801: Soporte orientable 1 módulo Eikon, Arké y Plana,
blanco.
00802: Soporte orientable 2 módulos Eikon, Arké y Plana,
blanco.
A continuación se describe la instalación de los soportes orien-
tables 00801 y 00802 y de otros accesorios:
• 00805:adaptadorparalafijacióndelossoportesorientables
•00800: marco para la fijación de superficie los soportes
orientables
•16897.S:kitantimanipulación
Los soportes orientables permiten instalar los detectores de
presencia para sistemas de alarma 20485, 19485, 14485 o
el interruptor con sensor de presencia por infrarrojos para
encendido de las luces 20181, 20181.120, 20184, 19181,
14181,148181.120,14184,empotradosencajasrectangulares
oredondasø60mmoaplicadosenlasuperficiedelapared.
Siseutilizanenunsistemaantirroboconelkit16897.S,garan-
tizanproteccióncontralaaperturaylaextracción.
Estosaparatosdebenutilizarseenlugaressecos.
REGLAS DE INSTALACIÓN.
Efectúelainstalacióncumpliendocontodolopreceptuadoen
lasnormativas,enmateriadeinstalacióndelmaterialeléctrico,
que estén en vigor en el país donde se propone Usted instalar
losartefactos.
Instale el soporte ajustable en posiciones de difícil acceso
con el fin de evitar impactos accidentales.
El dispositivo debe ser instalado por lo menos 2 m del suelo.
CONFORMIDAD A LAS NORMAS.
DirectivaBT.
Norma EN 60669-2-1
ORIENTACIÓN.
Ensentidoverticalcomoilustralafigura1,uhorizontalcomo
enlafigura2.
Tambiénpuedeninstalarseinvertidos(figura3).
Paralacoberturavolumétrica,verlahojadeinstruccionesdelaparato.
00801: Βάση προσανατολισμού - 1 θέσεως Eikon, Arké
και Plana, λευκό.
00802: Βάση προσανατολισμού - 2 θέσεων Eikon, Arké
και Plana, λευκό.
Ακολουθούν οι οδηγίες εγκατάστασης των ρυθμιζόμενων
υποστηριγμάτων 00801 και 00802 και των ακόλουθων εξαρτημάτων:
• 00805: αντάπτορας για σύνδεση των ρυθμιζόμενων
υποστηριγμάτων σε υποστηρίγματα Eikon
• 00800: κορνίζα για επίτοιχη στερέωση των ρυθμιζόμενων
υποστηριγμάτων
• 16897.S: κιτ προστασίας
Τα ρυθμιζόμενα υποστηρίγματα επιτρέπουν την εντοιχισμένη (σε
ορθογώνια ή στρογγυλά κουτιά ψ 60 mm) ή επίτοιχη εγκατάσταση
ανιχνευτών παρουσίας για εγκαταστάσεις συναγερμού 20485, 19485,
14485 ή του διακόπτη με αισθητήρα παρουσίας υπερύθρων για το άναμμα
των φώτων 20181, 20181.120, 20184, 19181, 14181, 148181.120,
14184. Εάν χρησιμοποιηθούν σε αντικλεπτικές εγκαταστάσεις με το
ειδικό κιτ 16897.S εξασφαλίζουν την προστασία από το άνοιγμα και την
αποσύνδεση. Συσκευές για χρήση σε στεγνούς χώρους.
ΚΑΝΟΝΕΣ ΕΓΚΑΤΑΣΤΑΣΗΣ.
Η εγκατάσταση πρέπει να εκτελείται σύμφωνα με τις ισχύουσες
διατάξεις σχετικά με το ηλεκτρολογικό υλικό στη χώρα χρήσης των
προϊόντων.
Εγκαταστήστε το ρυθμιζόμενο στήριγμα σε θέσεις που δεν είναι
εύκολα προσβάσιμα, ώστε να αποφευχθεί η κατά λάθος αντίκτυπο.
Η συσκευή πρέπει να τοποθετούνται σε απόσταση τουλάχιστον 2
m από το δάπεδο.
ΚΑΝΟΝΙΣΜΟΊ ΑΝΑΦΟΡΆΣ.
Οδηγία ΧΤ.
Πρότυπα EN 60669-2-1
Ρύθμιση προσανατολισμού.
Κατακόρυφα όπως στην εικ. 1 και οριζοντίως στην εικ. 2.
Εν ανάγκη μπορούν να χρησιμοποιηθούν και ανεστραμμένα (εικ. 3).
Για ογκομετρική κάλυψη συμβουλευθείτε τις οδηγίες της
χρησιμοποιούμενης συσκευής.
00801
00802
30
20
135
135
20
30
BUS
UP-EINBAU • INSTALACIÓN DE EMPOTRAR • Εντοιχισμένη εγκατάσταση
120485-19485-14485
DerAdapter00805andemEikon-Rahmen
befestigen (und nur für 20485-19485-
14485– den imBausatz16897.Senthal-
tenenEntnahmeschutzbügel)montieren.
Enganchareladaptador00805alsoportey,
sólo en el caso de 20485-19485-14485,
la protección antimanipulación incluida en
elkit16897.S.
Στερεώστε τον αντάπτορα 00805 στο
υποστήριγμα Eikon και, μόνο για το 20485-
19485-14485, το στήριγμα ασφαλείας που
περιλαμβάνεται στο κιτ 16897.S
2Der Eikon-Rahmen an der UP-Dose
befestigen,derRahmenmontierenund
die ausrichtbare Halterung mit den bei-
gestelltenSchraubenarretieren.
Fijar el soporte a la caja de empotrar,
montarlaplacayfijarelsoporteorienta-
bleconlostornilloscorrespondientes.
Στερεώστε το υποστήριγμα Eikon στο
εντοιχιζόμενο κουτί, τοποθετήστε την πλάκα
και στερεώστε το ρυθμιζόμενο υποστήριγμα
με τις βίδες του εξοπλισμού.
3Den Melder (und nur für 20485-19485-
14485,dieimBausatz16897.Senthaltene
Mikroschalterkarte,24V1A)verkabeln.
Cablear el detector y, sólo en el caso
de 20485-19485-14485, la tarjeta de
microinterruptores incluida en el kit
16897.S(24V1A).
Καλωδιώστε τον ανιχνευτή και, μόνο για
το 20485-19485-14485, την πλακέτα
μικροδιακοπτών που περιλαμβάνεται στο
κιτ 16897.S (24 V 1 A)
4DenMelderaufdenGerätehalterungsdeckel
derausrichtbarenHalterungmontieren.
Enganchar el detector a la tapa base
delaparatodelsoporteorientable.
Συνδέστε τον ανιχνευτή στο καπάκι
στήριξης της συσκευής του ρυθμιζόμενου
υποστηρίγματος.
1
2
5Gehäuse und Deckel der ausrichtbaren
Halterungbefestigen.
Enganchar el cuerpo y la tapa del
soporte orientable.
Συνδέστε το σώμα και το καπάκι του
ρυθμιζόμενου υποστηρίγματος.
6DenMelderindiegewünschteRichtung
ausrichten und die Sicherungsschraube
desGelenksarretieren.
Situar el detector en la posición desea-
da y fijar el tornillo de bloqueo de la
articulación.
Προσανατολίστε τον ανιχνευτή στην
επιθυμητή θέση και στη συνέχεια βιδώστε
τη βίδα ασφάλισης της άρθρωσης.
720485-19485-14485
Die Mikroschalterkarte in den oberen
Deckel der ausrichtbaren Halterung
einsetzen und befestigen (nur für
2048520485-19485-14485).
Sólo en el caso de 20485-19485-
14485, insertar y enganchar la tarjeta
de microinterruptores en la tapa supe-
rior del soporte orientable.
Τοποθετήστε και συνδέστε την πλακέτα
μικροδιακοπτών στο πάνω καπάκι του
ρυθμιζόμενου υποστηρίγματος (μόνο για
20485-19485-14485).
8Den oberen Deckel der ausrichtbaren
Halterungbefestigen.
Enganchar la tapa superior del soporte
orientable.
Συνδέστε το πάνω καπάκι του ρυθμιζόμενου
υποστηρίγματος.
AP-EINBAU • APLICACIÓN A LA PARED •
Επίτοιχη εγκατάσταση
DasRahmenunterteil00800anderWandbefestigen.
Fijarlabasedelmarco00800alapared.
Στερεώστε τη βάση της κορνίζας 00800 στον τοίχο.
40 Dübel für
Entnahmeschutz
Taco de protección
contra la extracción
Βύσμα για προστασία
από την αφαίρεση
60
= =
DenRahmenaufdasUnterteilmontieren.
Enganchar el marco a la base.
Συνδέστε την κορνίζα στη βάση.
Die ausrichtbare Halterung mit der beigestellten
Schraubebefestigen.
Fijarelsoporteorientableconeltornillocorrespondiente.
Στερεώστε το ρυθμιζόμενο υποστήριγμα με τη βίδα του
εξοπλισμού
N
L
Last
Carga
Φορτίο
Antitamper-Leitung
Línea antimanipulación
Γραμμή προστασίας
Die restlichen Schritte gemäß den Anleitungen (3-8) für die UP-Montage ausführen • Proceder como se describe para la instalación de empotrar (3-8)
Ακολουθήστε τις οδηγίες εντοιχισμένης εγκατάστασης (3-8)

This manual suits for next models

1

Other Vimar Home Automation manuals

Vimar SMART HOME 03975 User manual

Vimar

Vimar SMART HOME 03975 User manual

Vimar LINEA 30801 User manual

Vimar

Vimar LINEA 30801 User manual

Vimar Elvox 805N Assembly instructions

Vimar

Vimar Elvox 805N Assembly instructions

Vimar SMART HOME 30815 Series User manual

Vimar

Vimar SMART HOME 30815 Series User manual

Vimar BY-ME User manual

Vimar

Vimar BY-ME User manual

Vimar LINEA 30805.120 User manual

Vimar

Vimar LINEA 30805.120 User manual

Vimar BY-ME User manual

Vimar

Vimar BY-ME User manual

Vimar 03975 User manual

Vimar

Vimar 03975 User manual

Vimar By-me 01945 User manual

Vimar

Vimar By-me 01945 User manual

Vimar 01420.B User guide

Vimar

Vimar 01420.B User guide

Vimar BY-ME PLUS 32031.G User manual

Vimar

Vimar BY-ME PLUS 32031.G User manual

Vimar BY-ME PLUS 32041 Series User manual

Vimar

Vimar BY-ME PLUS 32041 Series User manual

Popular Home Automation manuals by other brands

BleBox wLightBox v2 user manual

BleBox

BleBox wLightBox v2 user manual

Hamlet HIOT-SPL16M user manual

Hamlet

Hamlet HIOT-SPL16M user manual

GEENI SMART WI-FI WATER SENSOR Start guide

GEENI

GEENI SMART WI-FI WATER SENSOR Start guide

ZooZ 700 user manual

ZooZ

ZooZ 700 user manual

EVA Logik ZW97 manual

EVA Logik

EVA Logik ZW97 manual

Gewiss Chorus GW 10 311 quick start guide

Gewiss

Gewiss Chorus GW 10 311 quick start guide

Vivint SkyControl manual

Vivint

Vivint SkyControl manual

urmet domus Bitron Home 902010/25 Quick start manual

urmet domus

urmet domus Bitron Home 902010/25 Quick start manual

Win O2 FLS 2000 operating instructions

Win O2

Win O2 FLS 2000 operating instructions

DSC WS900-19UL Reference manual

DSC

DSC WS900-19UL Reference manual

SEBSON AC WIRELESS 4R1S user manual

SEBSON

SEBSON AC WIRELESS 4R1S user manual

Trust WIRELESS POWER 300 Series quick start guide

Trust

Trust WIRELESS POWER 300 Series quick start guide

Houseper GMB-HAR-PL1-M02 user guide

Houseper

Houseper GMB-HAR-PL1-M02 user guide

Orcomm ORC-WC-8 manual

Orcomm

Orcomm ORC-WC-8 manual

Terraillon HOMNI user manual

Terraillon

Terraillon HOMNI user manual

Commax CDP-1020IB user manual

Commax

Commax CDP-1020IB user manual

SOMFY Linkeo 2 Use and installation  manual

SOMFY

SOMFY Linkeo 2 Use and installation manual

IDS VX Pro 64 Series Installation

IDS

IDS VX Pro 64 Series Installation

manuals.online logo
manuals.online logoBrands
  • About & Mission
  • Contact us
  • Privacy Policy
  • Terms and Conditions

Copyright 2025 Manuals.Online. All Rights Reserved.