manuals.online logo
Brands
  1. Home
  2. •
  3. Brands
  4. •
  5. Martec
  6. •
  7. Heater
  8. •
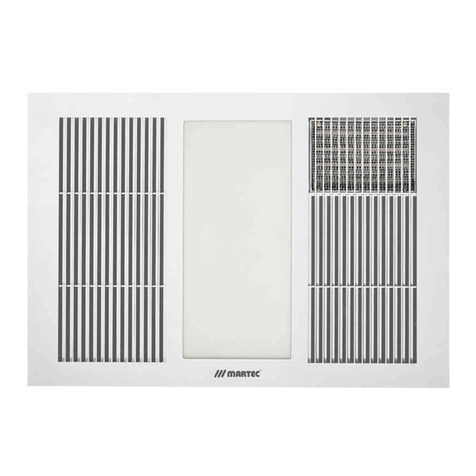
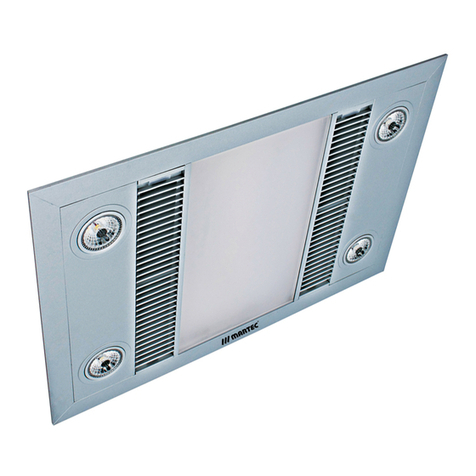
  9. Martec ASPIRE User manual

Martec ASPIRE User manual

www.martecaustralia.com.au | 02 8778 7500 | sales@martecltd.com.au
Installaon Instrucons
Please read these instrucons carefully before installing and using the product. Keep the instrucons handyfor future reference. Electrical
wiring mustonly be doneby a licensed electrician and a“Cerficate of Compliance” mustbeissued on compleon of the installaon.
WHAT’S IN THE BOX
•Bathroomunit
•Operang and Installaon Instrucons.
•Wall plate and switch.
•1x LED Light Panel
•Cutout Template
SAFETY INSTRUCTIONS
During useof the product, it is necessary to observe some precauons. Improper operaon with disregard of precauons may resultin
inflicon of harm to health of the user and other people, as well as in inflicon of damage to their property.
•Use only the voltage specified on the rang plate of the heater.
•This item should onlybeinstalled by a licensed tradesperson.
•Theheater should be connected to the electric mains equipped with an automac circuitbreaker.
•Theunit mustbehandled with care avoiding any sudden impacts or vibraons.
WARNING: FIRE RISK EXISTS IF THE HEATER IS COVERED BY OR POSITIONED CLOSE TO CURTAINS OR
OTHER COMBUSTIBLE MATERIALS.
•Do notuse the appliance areas where gasoline, paint orother flammable liquids are used orstored.
•Do notuse the appliance in parcularly in dusty or where explosives are stored.
•Do notuse the appliance in abuilding site, green house, barn or in animal stables.
•Do notuse the appliance as asaunaheater.
•Do notuse this unit in the place of animal propagang and rising.
•Warming: To avoid burns, do not touch the appliance surface byhand and other bodyparts. It is also necessary to avoid touching the heater
whilst the appliance is switched on, as severe burns may result. The appliance can take up to 1hour to cool down aer switchingit off.
•Do notplace any items of clothing, hand towels orsimilar over the heater to dry. Riskof overheang and fire hazard.
•Do notleave the heater unaended whilst in use.
•Do notuse this heater on a wet surface, or where it can fall orbepushed into water.
•Do not reach for an appliance that has fallen into water. Switch off at supply and unplugimmediately.
•If the heater is defecve, it mustbe checked and repaired by the manufacturer, its service agent orsimilarly qualified persons for repair.
•Do notoperate appliance with wet hands.
•Use this appliance only as described in this manual. Any other use is not recommended by the manufacturer and may cause fire, electric shock
or injury.
•Do notuse abrasive cleaningproducts on this appliance. If the bodybecomes dirty, wipe off dust with a cloth. Always remove plug from the
mains supplybefore cleaning.
Page 1 of 5
ASPIRE
Aspire Lux 3-in-1 Heater, Light and Exhaust
ASPIRE
Aspire 3-in-1 Heater, Light and Exhaust
Installaon Instrucons
•Theheater mustbeinstalled at least 1.8 m above the floor.
•Theheater mustnotbelocated immediately below a socket outlet. Theheater mustnotbelocated in frontof asocket outlet. They should be
located outside the physical footprintof the units to minimizeheat build up behind the heater.
•Thestandard power point mustbeinstalled byalicensed electrician.
•If the heater is to be mounted on an incline(eg. Slopingor angled ceiling), ensure the electrical connecon is located at that lowest point of the
heater.
•Do not connect the appliance to the mains source unlithas been installed in its final locaon and adjusted to the posion it will beused in.
•Do notoperate with the cord coiled up as this could causeabuildup of heat, which could pose a hazard.
•Theuseof an extension cord with this appliance is not recommended.
•Do not allow cord to come in contact with heated surfaces duringoperaon.
•Do not run cord under carpeng, throw rugs or runners etc. Arrange cord away from areas where it is likely to be tripped over.
•This appliance is not intended forusebypersons (including children) with reduced physical, sensory or mental capabilies, orlack of experience
and knowledge, unless they have been given supervision orinstrucon concerninguseof the appliance by a person responsible for their safety.
•Children should besupervised to ensure that they do notplay with the appliance
•The appliance is only intended for the purposedescribed in user manual.
•Do notuse appliance or any part of the appliance outof the intended use to avoid risk.
•Theuseof aachments which are not recommended orsold by the appliance manufacturer may cause a riskof injury to persons
•CAUTION — some parts of this product can become very hotand causeburns. Parcular aenon has to be given where children and
vulnerablepeople are present.
•Install and operate the heater in strictly horizontal posion on the ceiling or ceiling structural surface. The thermal resistance of the ceiling
coang and ceiling material should be at least 80 °C.
•WARNING: This heater is not equipped with adevice to control the room temperature. Theheater mustnotbe within reach from the floor, as
severe burns may occur due to high surface temperatures. Do notuse this heater in small rooms or where the roomor area is occupied by
persons not capable of leaving the roomon their own, persons who are unable to operate the heater safely and with the guidelines of the use
manual, unless constant supervision is provided.
•When the appliance is not in use and before cleaning, unplug the appliance from the outlet.
•To protect against the riskof electrical shock,do not immerse the unit, cord or plugin water orother liquid.
•Household indoor/covered outdooruseonly.
www.martecaustralia.com.au | 02 8778 7500 | sales@martecltd.com.au Page 2 of 5
28cm
20cm
ASPIRE
Aspire 3-in-1 Heater, Light and Exhaust
Installaon Instrucons
LOCATION
•Theunit mustbe located and installed in accordance with AS/NZS 3000 and localbuilding codes relang to damp situaons.
•This may mean that no part of the Module may belocated directly above any part of abath orshower recess or enclosure.
•Theunitshould beinstalled in flat ceilings with a minimum height on 2 meters. At leas 200mm height clearance in the ceiling cavity is required
to ensure sufficient venlaon for moisture to disperse. Theunit must also beinstalled at least 250mm away from walls.
•Ensure adequate air intake into the room exists through windows, vents orunder the door to replace the displaced air from the exhaustfan.
•Regulaons concerning the discharge of air mustbefulfilled.
POWER
AC220-240V ~50Hz electrical supplyis required. Theunit can be connected to a lighng orpower circuitif loading permits. All electrical work
mustbe carried out in accordance with AS/NZS 3000 or latest edion thereof, and local building codes and regulaons. A fourswitch wall plate
is included for all kinds of wiring combinaons. Ensure the power supplyis isolated before commercing installaon. Electrical wiring mustonly
be donebyalicensed electrical and a“Cerficate of Compliance” mustbeissued at compleon of the installaon.
INSTALLATION
1. Use the cut out template card as a template. Place in the required locaon
and mark out the hole cung size: 523mm x 345mm. Before commencing
cung ensure that the area behind the intended locaon is clear of all
cables, pipes and joists. Once clear, cut out the secon along the previously
marked lines.
2. Prise up the edge of fascia then take off the fascia. Remove cover of the
terminal and connect the wires according to the diagram. Connect the
ducng to the unit if required. Insert the unit into he ceiling cavity, ensuring
the clips are resng against the bodyof the unit.
3. Tighten the screws to ensure the unit is fixed securely.
5. Push the edge of fascia towards the housing then let clips on fascia fix on the housing.
www.martecaustralia.com.au | 02 8778 7500 | sales@martecltd.com.au Page 3 of 5
4. Take out the glass,insertonesideof the glass into the slot,and push the
opposite sideof glass in. When the glass is at horizontal posion,
it will be seized by boom slot.
Aspire 3-in-1 Heater, Light and Exhaust
Installation Instructions
CONNECTIONTO ELECTRIC MAINS
•Locate the heater in accordance with the requirements of the current Australian/New Zealand Wiring Rules AS/NZS 3000 relating to
damp situations.
•The heater is designed for connection tothe single-phase 220-240V~ 50HZ electric mains equipped with a earth wire.
•Before connection, make sure that specifications of the electric mains at the connection point meet the single-phase
220-240V~50Hz voltage.
•The electric mains should be equipped with an automatic circuit breaker with rated current not less than 10A.
•Switches and other controls must not be located where they can be touched by a person in the bath or shower.
•The heater must not be located immediately below a power point. Power point should not be located at the back of the heater. The
power point needs to be located outside the physical footprint of the heater to minimize heat build-up behind the heater.
•If the heater is to be mounted on an incline (eg. Vaulted ceiling), ensure the power point located at that lowest point of the heater.
•WARNING: The installation must be equipped with an all-pole disconnection mechanism with a break contact distanceof at least
3mm.
•WARNING: The All-pole disconnection mechanism must be installed on the height less than 1.8m from the floor.
ELECTICAL WIRING
1. Connect the wiring tothe four-gang switch according tothe below electrical diagram.
2. Remove the terminal cover on the heater unit and wire according tothe label adjacent tothe terminal block. Make sure all cables
are securely connected and refit the terminal cover.
3. Clean the fascia and lighting panel with a soft moist cloth.
4. Turn on the power and check the switch operation.
Model No:MBHA800W
Rated Voltage: 220-240V~
Rated Frequency: 50Hz
Total Power: 875W
Heat Wattage:Max 800W
Exhaust Power:55W
LED Light:20W
IPX2
ASPIRE
www.martecaustralia.com.au | 02 8778 7500 | sales@martecltd.com.au Page 4 of 5 www.martecaustralia.com.au | 02 8778 7500 | sales@martecltd.com.au
θ
IN θ
IR
C
K
M:Motor C:Capacitor IR:Heat lamp IN:Light lamp
K:All-pole disconnection switch Θ:Heat protector
Customer Details
Surname.......................................................................................... Given Name............................................................
Address.............................................................................................................................................................................
Email.................................................................................................................................................................................
Warranty Details
Store........................................................................................... P.O. No.........................................................................
..........................................................................................................................................................................................
..........................................................................................................................................................................................
..........................................................................................................................................................................................
I, the Customer, hereby acknowledge that I have read and agree with the Martec Pty Ltd warranty statement and
I, the Customer, acknowledge that Martec Pty Ltd reserves the right to charge me, labour and material cost of
a case by case basis by the authorised Martec Service Agent dispatched to my premises. The current minimum
charge will be $190+GST.
I, the Customer, acknowledge that I will be liable for this charge should the authorised Martec Service Agent
determine this to be the case. Failure to pay warranty recovery charges issued by Martec Pty Ltd will result in the
I, …………………………………………………………..............................., do her
Print Name:......................................................................................................................................................................
Signature:.........................................................................................................................................................................
Date:...........................................
WARRANTY STATEMENT:
Martec Pty Ltd warrants this product for a period of 2 years “In Home” warranty from the original date
of purchase for residenal situaons:
MARTEC PTY LTD: 2 YEAR IN HOME WARRANTY STATEMENT*
Martec Pty Ltd
IMPORTANT NOTICE: MARTEC PTY LTD WARRANTS THIS PRODUCT FOR 2 YEARS WITH “IN
HOME” WARRANTY. MARTEC PTY LTD ONLY WARRANTS THE MARTEC PRODUCT AGAINST
FAULTY WORKMANSHIP AND SUBJECT TO THE CONDITIONS AND PROVISIONS SET OUT BELOW:
1. The 2 year “In Home” warranty applies only if the product was purchased in Australia and does not transfer
from the original purchaser. All Martec Products replaced under warranty are only warranted for the balance
of the warranty period.
2. The 2 year “In Home” warranty does not extend to the Martec Product accessories such as remote controller
kits and/or light fings (including glass light shades) that have been fied during or aer the original Martec
Product installaon. Globes are not covered under warranty.
3. All remote controllers, wall controllers, ballasts, and light fings included in the Martec Products original
packaging have a 1 year warranty only. Remote controllers, wall controllers and light kits must be Martec
approved and Martec branded products. The use of remote controllers, wall controllers and/or light kits
which are not Martec approved and branded will subsequently void the warranty.
4. Any changes to plated and/or painted finishes due to climate condions or other circumstances deemed
to be beyond the control of Martec Pty Ltd or their authorised agent are not covered under this warranty.
Outdoor use of Martec ceiling fans is not recommended or covered under this warranty; proceed at your own
risk as outdoor use will void the warranty.
5. Threaded components such as blade nuts and screws may loosen during normal operaon; these should be
ghtened regularly to ensure the fan does not develop noises during operaon. If noises do develop, check
this aspect before requesng service, as this is not covered under warranty.
Aspire 3-in-1 Heater, Light and Exhaust
Installation Instructions
CARE AND MAINTENANCE
•During the installation of this fan heater, please make sure that the person in the bathtub or shower can’t touch the electrical
switches and other electrical controllers.
•This fan heater must not be installed below the electrical outlet.
•This fan heater must not be installed near curtains or other combustible materials.
•The appliance must under no circumstances be covered with insulation material or similar material.
•Joists, beams and rafters must not be cut or notched to install the appliance.
•This unit must cool before cleaning. To clean the facia, wipe with a dampened cloth. This appliance is not intended for use by
persons (Including children) with reduced physical, sensory or mental capabilities, or lack of experience or knowledge, unless
they have been given supervision or instruction concerning use of the appliance by a person responsible for their safety.
Young children should be supervised to ensure that they do not play with the applian
STORAGE AND DISPOSAL
If you do not plan to use the heater for extended periods of time, it is recommended that it is cleaned and stored (preferably in its
original packaging) in a cool, dry place.
WARNING: Please do not attempt to open or repair the heater yourself. Doing so could void the warranty and cause damage or
personal injury.
Do not dispose of electrical products with household waste. Please check with your local council for advice on disposal or recycling.
If electrical appliances are disposed of in landfills or dumps, hazardous substances can leak into the groundwater and get into the
food chain, damaging your health and well-being.
ASPIRE
www.martecaustralia.com.au | 02 8778 7500 | sales@martecltd.com.auwww.martecaustralia.com.au | 02 8778 7500 | sales@martecltd.com.au Page 5 of 5
www.martecaustralia.com.au | 02 8778 7500 | sales@martecltd.com.auwww.martecaustralia.com.au | 02 8778 7500 | sales@martecltd.com.au
IMPORTANT NOTICE:
ALL CLAIMS FOR WARRANTY MUST BE ACCOMPANIED WITH THE FOLLOWING THREE DOCUMENTS:
considered a fault and will not be covered under this warranty.
Martec Pty Ltd only covers manufacturing faults associated with said Martec Product per the above warranty
product are not covered under this
of or defect of or failure of the product other than stated in this warranty.
NOTE: Stainless steel requires regular cleaning; “Tea Staining” is a common occurrence with all types of stainless
steel. This is not considered a fault of the product and is not covered under warranty. Martec’s Precision 316,
while made from Marine Grade 316 stainless steel, should only be used in a covered or enclosed outdoor
Precision Stainless Steel 316 ceiling fan, none of Martec’s Ceiling Fans are meant for outdoor use, and will either
rust or encounter problems which are not covered within this warranty.
1.
installed the Martec productat your address along with a scanned copy of the electricians licence. Please note
2. Copy of the Purchase Receipt/store Tax Invoice for the Martec Ceiling Fan.
3.
can be located on the top motor housing above the Ceiling Fan Blades.
This warranty will become void and a service fee will be invoiced to the individual that lodged the warranty claim,
if one or more of the following is found:
¯ The product is deemed to be a non Martec product.
¯ A manufacturing fault is not detected by the Service Agent.
¯
¯
IMPORTANT: PLEASE DO NOT PHONE THE RETAILER FOR WARRANTY WORK. INSTEAD PHONE THE
CUSTOMER SERVICE NUMBER FOUND ABOVE.
MARTEC PTY LTD | 6 AUSTOOL PL, INGLEBURN NSW 2565 | PH: 02 8778 7500 | FAX: 02 8778 7555
CUSTOMER SERVICE LOCAL NUMBER
(PHONE) 02 8778 7500
CUSTOMER SERVICE
(FAX) 02 8778 7555
CUSTOMER SERVICE OPERATES BETWEEN
8AM TO 5PM EST MONDAY THROUGH FRIDAY
6.
and labour of the authorised service agent approved by Martec Pty Ltd. No parts/products are to be disposed
of prior to the Service Agents “In Home” warranty visit. No acceptance of other liability for incidental or
where service is requested by the purchaser outside of the Martec Pty Ltd service network. The Martec Pty
Travel outside of the city limits by the Martec Pty Ltd authorised service agent will incur commercial costs
to be paid for by the purchaser at a rate calculated by the number of kilometres travelled beyond the city
limits. Any service required outside of the service network will be provided in the following manner Per
warranty claim, a full replacement will be sent to the customer’s residence and a maximum of $80AUD plus
GST plus freight will be covered by Martec Pty Ltd. All other costs over and above the $80AUD, including but
not limited to, labour and travel costs are to be paid for by the purchaser. Please Note: it is the responsibility
of the purchaser to call Martec customer service number (1300 730 064 or 02 8778 7500) prior to any
electrician leaving the job site if any problems occur. Any installing electrician costs and/or fees invoiced to
Martec.
7.
due to improper use, normal wear and tear, accident damage, product abuse, and/or failure to use the
8.
9.
control are not covered under this warranty. Any damage caused to walls, ceilings, furniture, carpet and/or
not covered under this warranty.
10.
does not apply to loss or damage caused by abnormal or excessive force of any kind from internal or external
sources.
11.
12.
13.
ceilings higher than 3 metres from the ground, will not be covered by this warranty. These costs will be borne
by the customer not Martec Pty Ltd.
BE ADVISED: All ceiling fans will emit some audible noise; and said noise will be most apparent at night or
50Hz AC power supply. Typically, the ripple control is used to control and manage peak power loads on electrical
control, please visit our website at:
NOTE:
PURCHASER PLEASE NOTE:

Other Martec Heater manuals

Martec UNO Series User manual

Martec

Martec UNO Series User manual

Martec VAPOUR MBHV2000W User manual

Martec

Martec VAPOUR MBHV2000W User manual

Martec MBHL1000W User manual

Martec

Martec MBHL1000W User manual

Martec Thermo Series User manual

Martec

Martec Thermo Series User manual

Martec MBHL 1000W User manual

Martec

Martec MBHL 1000W User manual

Martec Linear MBHL 1000W User manual

Martec

Martec Linear MBHL 1000W User manual

Martec Phoenix Mini User manual

Martec

Martec Phoenix Mini User manual

Popular Heater manuals by other brands

Jaga IGUANA VISIO Mounting instructions

Jaga

Jaga IGUANA VISIO Mounting instructions

Minib KT 110 installation manual

Minib

Minib KT 110 installation manual

Shinerich 11875013 manual

Shinerich

Shinerich 11875013 manual

Zephir ZMW4000V instruction manual

Zephir

Zephir ZMW4000V instruction manual

Emil Lux 370163 Original instructions

Emil Lux

Emil Lux 370163 Original instructions

Frico IHC Series user manual

Frico

Frico IHC Series user manual

Hach 48685 user manual

Hach

Hach 48685 user manual

Bergstrom H617 Instructions for use

Bergstrom

Bergstrom H617 Instructions for use

cecotec READYWARM 1500 MAX CERAMIC DESIGN WHITE instruction manual

cecotec

cecotec READYWARM 1500 MAX CERAMIC DESIGN WHITE instruction manual

Desa RLP30SP owner's manual

Desa

Desa RLP30SP owner's manual

DeLonghi DL2401TF instructions

DeLonghi

DeLonghi DL2401TF instructions

VONROC EH516AC instruction manual

VONROC

VONROC EH516AC instruction manual

Vortice ELECTRIC HEATER 2250 Instruction booklet

Vortice

Vortice ELECTRIC HEATER 2250 Instruction booklet

Atlantic Nefertiti manual

Atlantic

Atlantic Nefertiti manual

Panasonic FV-0511VH1 Service manual

Panasonic

Panasonic FV-0511VH1 Service manual

Polaris PCDH 1115 Manual instruction

Polaris

Polaris PCDH 1115 Manual instruction

Master MH-09SLN-A instruction manual

Master

Master MH-09SLN-A instruction manual

Herschel PULSAR 1800W White Installation & operating instructions

Herschel

Herschel PULSAR 1800W White Installation & operating instructions

manuals.online logo
manuals.online logoBrands
  • About & Mission
  • Contact us
  • Privacy Policy
  • Terms and Conditions

Copyright 2025 Manuals.Online. All Rights Reserved.