TP2402 • Master Equipment
FlashDry Control Stand Dryer
Assembly Instructions
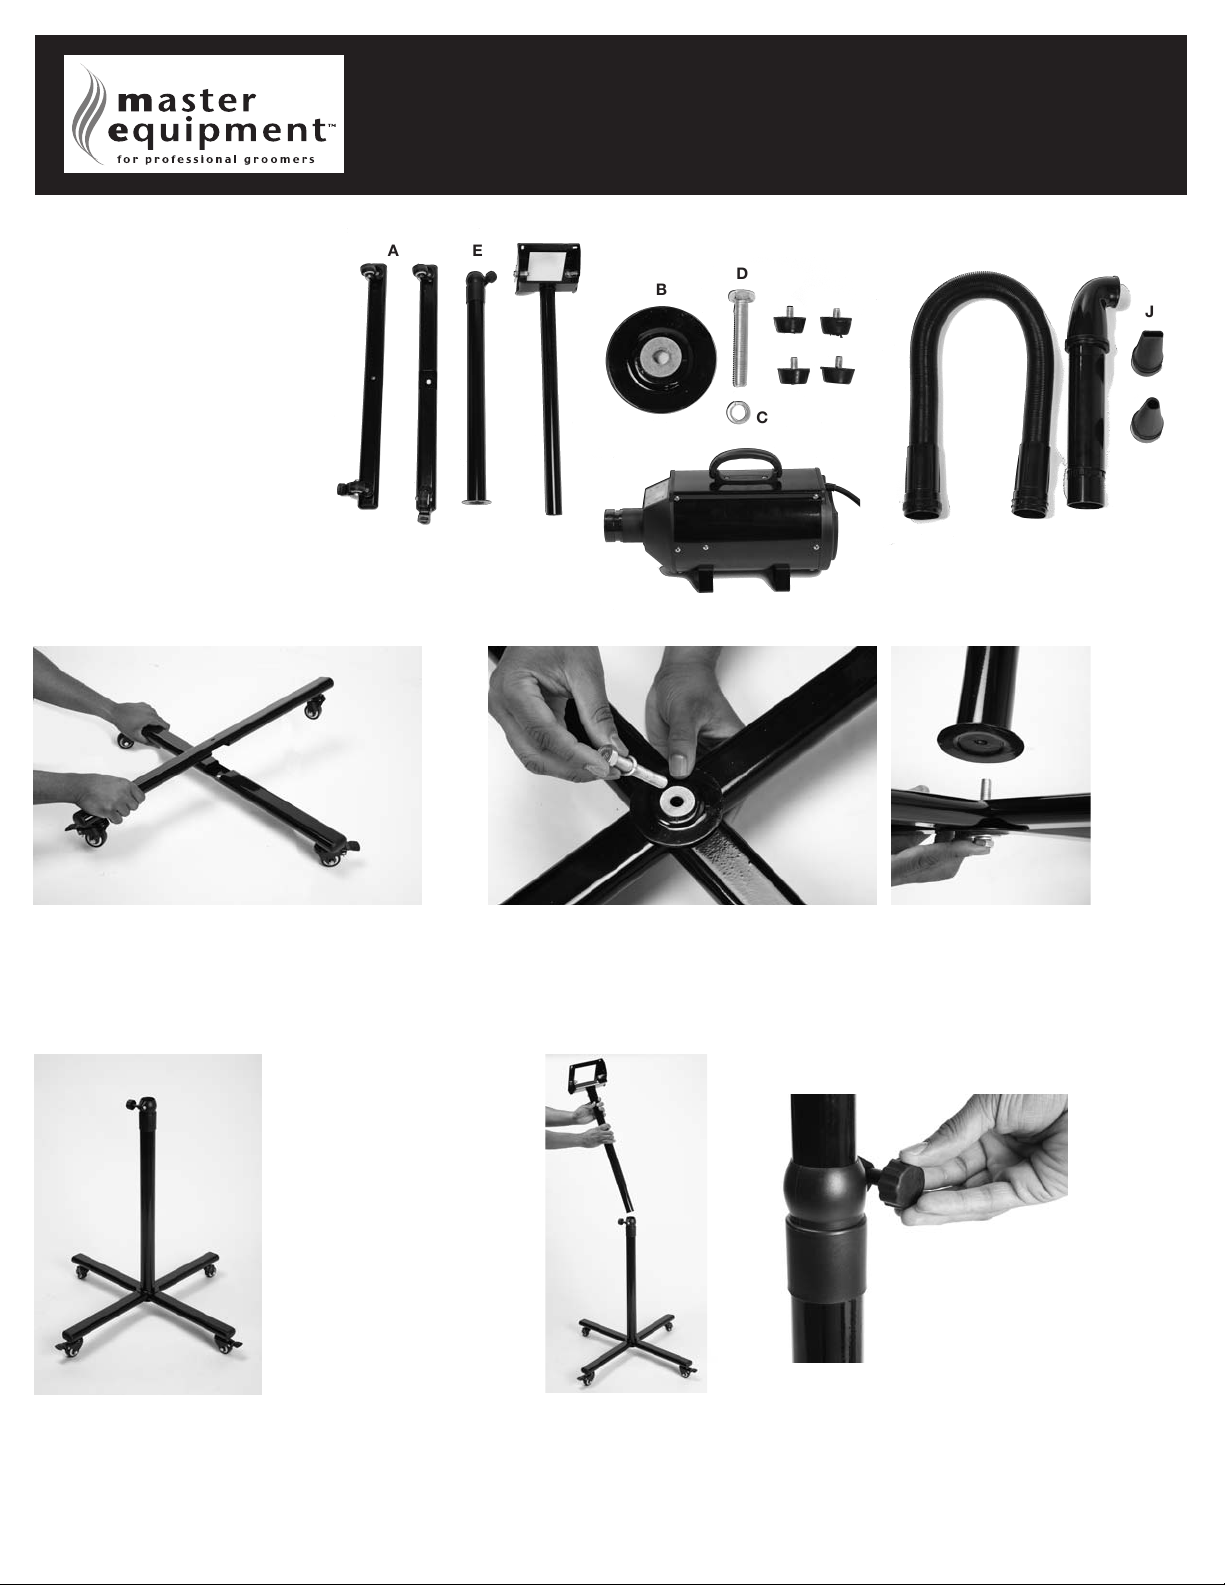
Parts List
(A) Base Bars with Wheels (2)
(B) Large Round Washer Plate (1)
(C) Lock Washer (1)
(D) Twist Bolt (1)
(E) Bottom Pole (1)
(F) Top Pole (1)
(G) Dryer Body (1)
(H) Rounded Screws with Rubber Feet (4)
(I) Hose (1)
(J) Concentrator Nozzles (2)
(K) Hands-Free Nozzle (1)
Tools Required (Not Included):
Wrench
Phillips Screwdriver
A
B
C
D
E
F
I
J
K
G
H
1). Assemble the base by interlocking the two base bars (A).
4. Screw the bottom pole (E) onto the large twist bolt. The
end of the bottom pole with the large flat round plate is
the end that screws onto the base.
5. Use a wrench (not included) to tighten the large twist bolt.
2. Holding the two interlocked base bars together, carefully turn base upside down. Place the large round
washer plate (B) at the intersection of the two base bars, aligning the holes. Next, place the lock
washer (C) on the twist bolt (D). Insert the large twist bolt into the aligned holes.
3. Holding the base bars together, turn the base rightside up. Be sure the large
twist bolt is visible.
6. Insert the top pole (F) into the bottom pole. Secure the two poles together at
desired height by tightening the knob on the side of the bottom pole.


