TP4180 • Master Equipment
PolyPro SpaTub
Assembly Instructions
LIMITED WARRANTY
_______________________________
Date Purchased: TP4180 42 11 Master Equipment™ PolyPro SpaTub
This Master Equipment™ PolyPro SpaTub is warranted against defective material or workmanship for one year from the date of purchase. Any Master equipment™ product that is
determined to be defective in material or workmanship during the warranty period will be replaced without cost to the purchaser for parts or labor. Please contact PetEdge Customer
Service at 1-800-638-5754 regarding any defective product. PetEdge will not be liable under this warranty for any defect, failure, or malfunction of this product caused by normal
wear, abuse, misuse, or unauthorized adjustments or repairs. PetEdge will not be liable for any incidental or consequential damages of any type. Any implied warranty is limited to the
one-year period provided in this express warranty. Some states do not allow limitations on how long an implied warranty lasts or exclusion or limitation of incidental or consequential
damages, so the above limitations or exclusions may not apply to you. Warranty is void if product has been modified in any manner, repaired by anyone other than PetEdge, or has
been subject to unreasonable use. Warranty is valid in the United States.
Manufactured for / Fabricado para / Fabriqué pour
©Tops Pet Products, Beverly, MA 01915
Manufactured in / Fabricado en China / Fabriqué en Chine
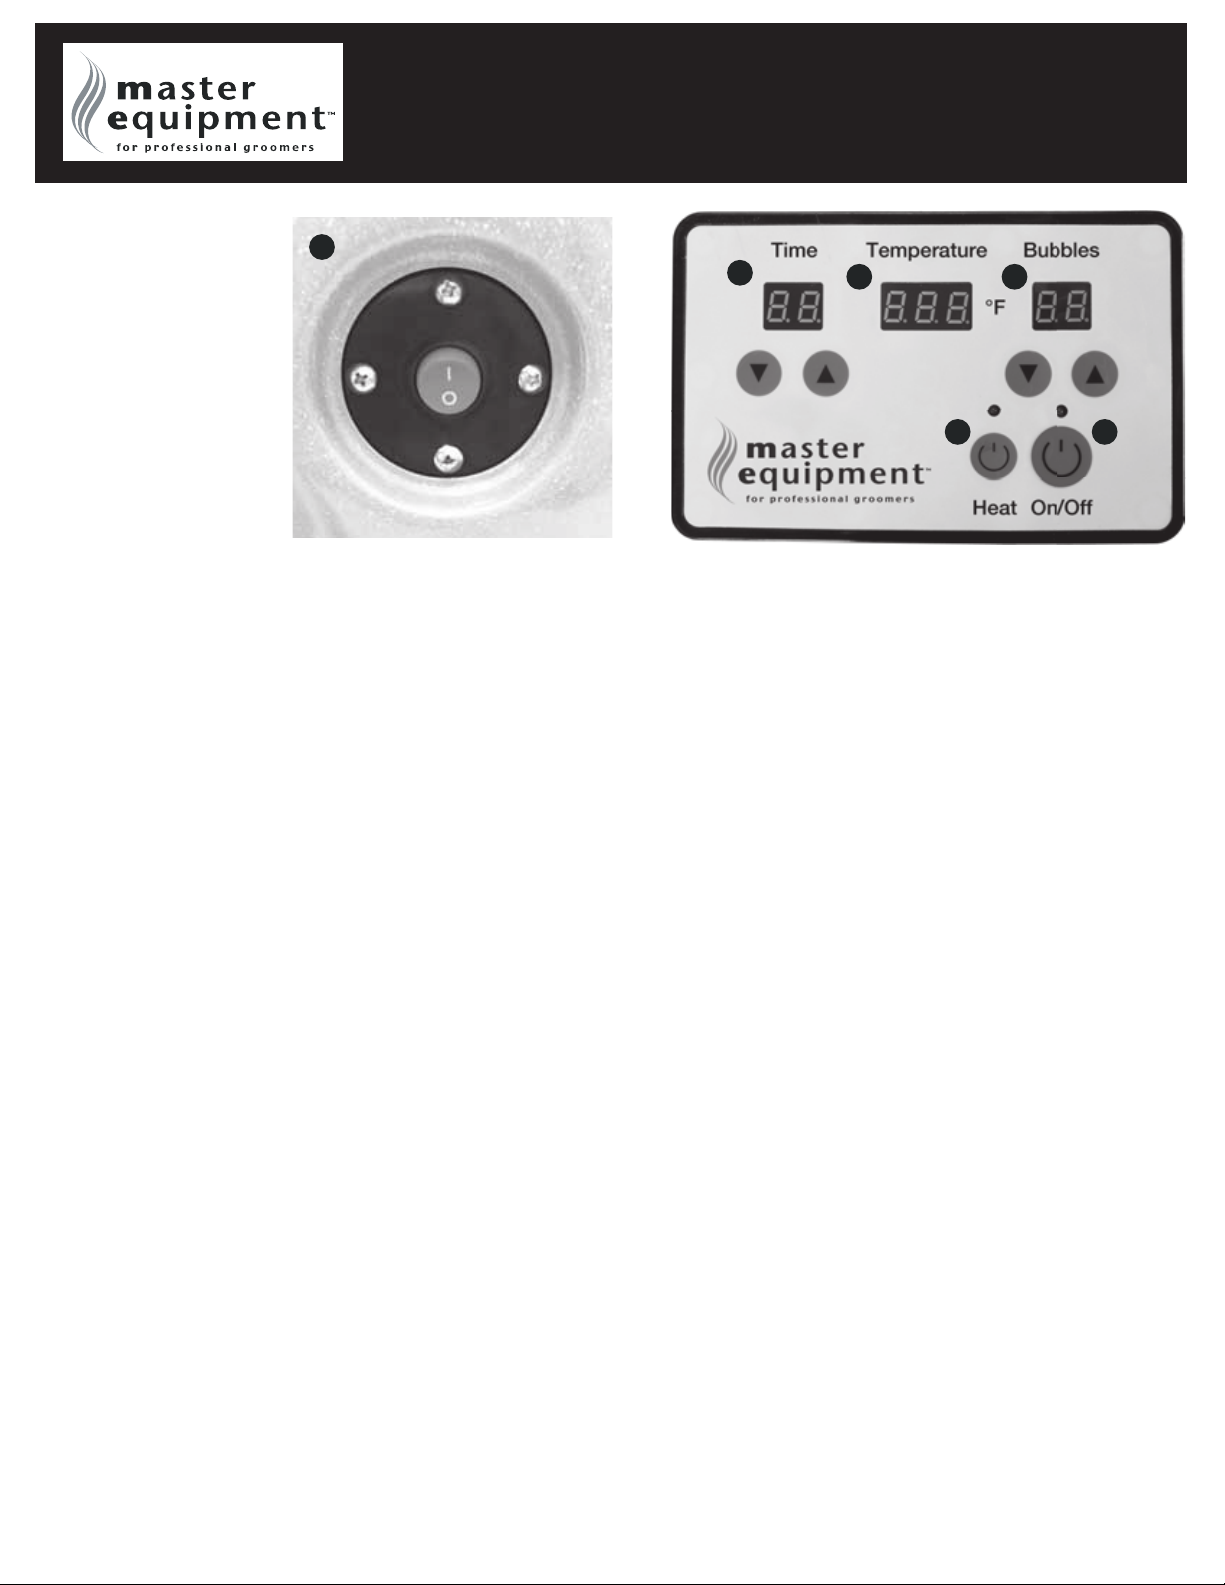
Control Panel:
J) Power Switch
K) Timer
L) Temperature Control
M) Bubble Control
N) Heat Control
O) On/Off
Hydrotherapy Instructions:
1. Before beginning hydrotherapy, push the drain-lock switch on the Tub Basin Floor (A) to ensure drainage system is closed.
2. Help pet enter SpaTub Basin (A) and secure in place by attaching lead to one of the Leash Hooks (G).
3. Activate the sprayer and adjust temperature as desired. Water temperature should not exceed 113ºF (45ºC). Water level should not exceed height of pet's belly.
4. Connect Power Cord (I) to power supply, activate the Power Switch (J), followed by the On/Off Switch (P), and set the Timer (K) to desired time. Hydrotherapy
sessions should not exceed 20 minutes.
5. Use Bubble Control (M), to adjust bubbles as desired.
6. Activate Heat Control Switch (N) if additional heat is desired for hydrotherapy. Water temperature should not exceed 113ºF (45ºC).
7. After use, shut off Bubble Control (M) and Heat Control Switch (N) before hitting On/Off Switch (O).
8. Press the Power Switch (J) to completely shut down SpaTub.
9. Unplug Power Cord from power supply and clean SpaTub Basin (A) thoroughly. Do not use harsh or abrasive cleaners, bleach, or tools with metal or textured
parts, as these can scratch or damage the tub—clean using mild soap or cleanser.
Warning:
Consult a pet-care professional before bathing/hydrotherapy, especially for older or ailing pets. PetEdge is not responsible for any injuries that may occur.
1. The SpaTub can only connect to a ground 110V–240V power source.
2. DO NOT connect to power source with wet hands.
3. Carefully inspect tub before using, and clean out any debris before each use.
4. Please remove all accessories (bandanas, bows, barrettes, etc.) from dog before bathing, as accessories can cause damage to tub.
5. Recommended for adult use only—closely supervise children while tub is in use.
6. During the bathing process, a knowledgeable pet-care professional should be on-hand to supervise at all times.
7. Designed for indoor use only. Keep surrounding areas clean and dry.
8. Designed for pet bathing and hydrotherapy only—not intended for human use.
9. Operator is discouraged from adding extra wire to extend the power cable, changing the plug, stacking anything on top of the power cable, keeping the power cable
close to a high-temperature source, and using a porous plus socket—a bad connection may result in fire or electric shock, and any user modifications or damage
not caused by defective material or workmanship will void warranty.
10. When SpaTub is not in use, unplug from power source. When unplugging from power source, operator should hold plug firmly and pull. DO NOT unplug by pulling
on power cord.
11. Keep surrounding areas dry at all times while SpaTub is in use.
12. Regularly inspect plug, power cable, and electrical components for signs of wear and/or damage, and contact PetEdge Technical Support if any damage is found.
13. Water temperature should not exceed 113ºF (45ºC), and hydrotherapy sessions should not exceed 20 minutes.
J
KL M
N O


