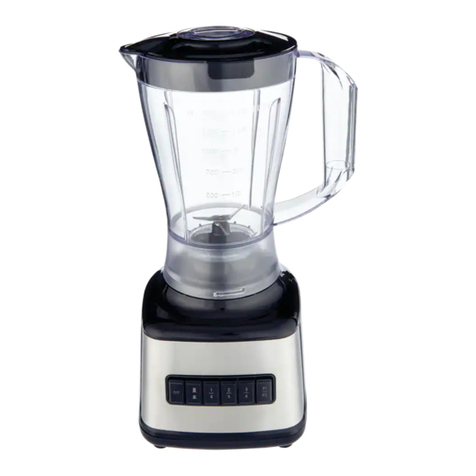
MasterChef MCBL600 User manual

PRO POWER BAR BLENDER
Use and Care Guide
MCBL600
TM
TM

2
READ AND SAVE
THESE INSTRUCTIONS
IMPORTANT SAfEgUARDS
When using electrical appliances, basic safety precautions should
always be followed including the following:
Read all instructions before using appliance.1.
To protect against risk of electrical shock, do not put cord, plug, or2. appliance in water or other liquid.
Close supervision is necessary when any appliance is used by or3. near children.
Unplug from outlet when not in use, before putting on or taking off4. parts, and before cleaning.
Avoid contacting moving parts.5.
Do not operate any appliance with a damaged cord or plug or after6. the appliance malfunctions or is dropped or damaged in any
manner. Contact Consumer Service for examination, repair or
mechanical adjustment.
The use of attachments, including canning jars, not recommended7.
or sold by the manufacturer may cause re, electric shock or injury.
Do not use outdoors.8.
Do not let cord hang over edge of table or counter.9.
Do not let cord contact hot surface, including the stove.10.
Keep hands and utensils out of Plastic Jar when blending to reduce11.
the risk of severe injury to persons or damage to the Bar Blender. A
scraper may be used, but must be used only when the Bar Blender
is not running.
Blades are sharp. Handle carefully.12.
To reduce the risk of injury, never place cutting assembly on base13.
unless the Blender Jar is properly in place.
Be certain Lid is securely locked in place before operating appliance.14.
Always operate blender with cover in place.15.
When blending hot liquids, remove center piece of two-piece cover.16.

3
SAVE THESE INSTRUCTIONS
ADDITIONAL IMPORTANT SAfEgUARDS
All users of this appliance must read and understand this Owner’s1. Manual before operating or cleaning this appliance.
The cord to this appliance should be plugged into a 120V AC electri-2. cal outlet only.
Do not leave this appliance unattended during use.3.
If this appliance begins to malfunction during use, immediately turn4. the unit OFF by Pressing the STOP button and unplug the cord. Do
not use or attempt to repair the malfunctioning appliance.
If this appliance falls or accidentally becomes immersed in water,5. unplug it immediately. Do not use
this appliance after it has fallen into or becomes immersed in water.
To reduce the risk of injury to persons or property, never use this6. appliance in an unstable position.
Do not use this appliance for other than its intended use.7.
Do not blend hot liquids.8.
Do not use if the Plastic Jar is cracked or chipped.9.
Always inspect for broken, bent, or loose cutting blades; if cutting10.
blades are damaged do not use.
POLARIzED PLUg
This appliance has a polarized plug (one blade is wider than the other). To
reduce the risk of electric shock, this plug is intended to t into a
polarized outlet only one way. If the plug does not t fully in the outlet,
reverse the plug. If it still does not t, contact a qualied electrician. Do
not attempt to modify the plug in any way.
SHORT CORD INSTRUCTIONS
A short power supply cord is provided to reduce the risk resulting from
becoming entangled in or tripping over a longer cord. Do not use an
extension cord with this product.

4
BEfORE fIRST USE
Carefully unpack the Bar Blender and wash the Jar, Measuring Cup,1. Lid, Rubber Gasket and Blade Assembly in warm soapy water. Rinse
and dry thoroughly.
Wipe the Blender Base with a soft, moistened cloth.2.
ADDITIONAL IMPORTANT SAfEgUARDS (CONT.)
ELECTRIC POWER
If the electrical circuit is overloaded with other appliances, your appli-
ance may not operate. It should be operated on a separate electrical
circuit from other appliances.
PLASTICIzER WARNINg
CAUTION: To prevent Plasticizers from migrating from the nish of the
counter top or table top or other furniture, place NON-PLASTIC
coasters or place mats between the appliance and the nish of the
counter top or table top.
-

5
gETTINg TO kNOW yOUR
®PRO POWER BAR BLENDER
PRODUCT MAY VARY SLIGHTLY FROM ILLUSTRATIONS
Measuring Cup (P/N MCBL600-RP-MC)1.
Lid with Ring Pull Tab (P/N MCBL600-RP-L1)2.
Plastic Jar (P/N MCBL600-RP-JA)3.
Blade Assembly (P/N MCBL600-RP-BL)4.
Rubber Gasket (P/N MCBL600-RPGS)5.
Drive Shaft6.
Motor Base7.
Control Panel8.
Cord Storage9.
1.
2.
3.
4.
5.
6.
7. 8.
9.

6
1
2
3
4
5
6
7
8
9
10
11
CAKE
SMOOTHIE
PUREE
DIPS
SHAKES
ICE CRUSH
+ and -
CHOP
BLEND
PULSE
STOP
Pancakes, batter, crepes, light cake mixes
Fruit/Vegetable drinks (fruit/vegetables should be soft
or precooked)
Baby food/fruit and vegetable juice
Mayonnaise, salad dressing, salsa
Milked Base Drinks
Crushed Ice cubes for all kinds of drinks
Manually adjust the blending speed.
Coffee beans, nuts (shelled), crackers, bread crumbs
Processes foods for a smooth consistency
Processing for coarse to ne results
Press STOP to stop Bar Blender at any time.
1.
2.
3.
4. 9.
5.
6.
7.
8.
10.
11.
To change a program during operation, select STOP rst. 1.
The PULSE function is not to be used with the 8 pre-programmed functions.2.
The “+” and “-” Buttons may be used with the 8 pre-programmed functions.3.

7
ASSEMBLy INSTRUCTIONS
Before assembling the Bar Blender, make sure the Cord is un-1. plugged.
With the control Panel facing you, place the Blender Base on a dry,2. level surface.
Turn the Blender Jar upside down, and place it at on a sturdy 3. surface.
Position the Rubber Gasket on Blade Assembly so Rubber Gasket4.
ts securely. Note: Blades are Sharp… handle carefully.
Turn the Blade Cutting Assembly upside down and place the blade5. end in the Blender Jar opening.
Turn the Blade Cutting Assembly clockwise until tightened. Once6. assembled, turn the Blender Jar right-side up.
Push the Lid on to the top of the Blender Jar. Lid Ring Pull Tab7. will be positioned over the Bar Blender handle. See page 8, Figure 1.
Insert the Measuring Cup into the Lid and either turn clockwise or8. counter-clockwise to lock in place. See page 8, Figure 2.
Place the Blender Jar on the motor base so that the jar markings9. are facing you and the handle is positioned to the right side of the
Control Panel. See page 8, Figure 3.
Plug the Cord into a 120 Volt AC outlet.10.
The Bar Blender is now ready for use.11.
CAUTION: DO NOT ATTEMPT TO OPERATE WITHOUT BLADE

8
PRO POWER BAR BLENDER OPERATION
Before turning the Bar Blender on, make sure the Blender Base is1.
placed on a at, dry surface and the power cord is plugged into an
120V AC electrical outlet.
Make sure the Blender Jar is properly positioned on the base2.
making sure it is rmly seated.
Add the required ingredients to the Blender Jar. If you are blending3. both liquid and solid ingredients, liquid ingredients should be added
rst. It provides more consistent blending and reduces the stress
placed on the motor. Solid ingredients can be added by dropping
them through the lid with the Measuring Cup removed. NEVER PUT
YOUR HANDS IN THE BLENDER JAR WHILE THE BAR BLENDER
IS PLUGGED IN.
Small amounts of liquid ingredients can be measured in the Measur-4.
ing Cup, which holds up to two uid ounces.
Always place the lid on the Blender Jar before blending.5.
ASSEMBLy INSTRUCTIONS (CONT.)
Figure 1 Figure 2 Figure 3

9
To start blending, press and release the desired function button. A6. corresponding red indicator light will illuminate while the Bar Blender
is in operation. The red indicator light will go out when the program
has nished. To choose a different program, simply press a different
program button. Note: Depending on the selected program, your
Bar Blender may operate at different speeds or stop and start
during use.
You can also stop blending by pressing the OFF button. In this case,7. all blending power will be turned off and blending cannot begin again
until you activate the unit by pressing a program button
PULSE mode allows you to create a quick burst of power for fast,8.
efcient blending. For pulse blending, turn the Bar Blender off by
pressing the STOP button and then press the PULSE button. The
red light above PULSE will illuminate . Blending will continue at that
speed until you release the button. Repeat as desired in PULSE. To
exit pulse mode, simply release the PULSE button again and press
the STOP button to turn the Bar Blender off.
CRUSHING ICE. Add 1 cup of ice cubes, about 9, to the Blending9. Jar. Place the Lid on Blending Jar then repeatedly press and release
the Ice Crush button until the cubes are reduced.
When you are nished blending, turn the Bar Blender off by pressing 10.
the STOP button twice. Remove the plug from the electrical outlet,
and lift the Blender Jar off the Blender Base. Lift straight up, using
a gentle rocking motion if necessary. Do not use a twisting motion.
NEVER REMOVE THE BLENDER JAR WHILE THE MOTOR IS ON.
To dislodge food, use a rubber or plastic spatula to loosen food11.
lodged around the blade assembly. DO NOT INSERT SPATULA UNTIL
BAR BLENDER IS TURNED OFF AND UNPLUGGED. Be sure
spatula is not in jar when you resume blending.
CLEANINg yOUR PRO POWER
BAR BLENDER
Always unplug your Bar Blender from electrical outlet before cleaning
any part of it.
Remove Blender Jar from Blender Base.1.
Remove Blade Assembly from bottom of Blender Jar.2.
10
CLEANINg yOUR PRO POWER
BAR BLENDER (CONT.)
Set the blade assembly and rubber gasket aside.3. HANDLE BLADE ASSEMBLY CAREFULLY. BLADES ARE SHARP!
Wash the jar, lid and cap in warm, soapy water and rinse and dry it4. thoroughly before the next use. They can also be washed in a
dishwasher if you prefer.
Wash the retaining ring, blade assembly and gasket by hand in5. warm, soapy water. Do not soak. DO NOT PLACE THE BLADE
ASSEMBLY OR RUBBER GASKET IN THE DISHWASHER. Always
handle the blade assembly with extra caution when washing. Make
sure the blade assembly and rubber gasket are dried thoroughly
before the next use.
To clean the Blender Base and Control Panel, use a damp sponge or6. cloth to remove any residue. Stubborn stains can be removed with
a mild, non-abrasive cleaner. Dry carefully before next use. NEVER
IMMERSE THE BAR BLENDER BASE IN WATER.
STORAgE
Unplug and clean the unit. Push the cord into the Cord Storage area
located on the underside of the appliance. Never wrap the cord around
the appliance. The appliance should be stored in a clean, dry place.

11
IMPORTANT CARE & SAfETy NOTES
Before use, make sure that the Blade Assembly and Rubber Gasket1.
are properly assembled and are rmly screwed onto the bottom of
the Blender Jar.
NEVER place the Blade Assembly and Rubber Gasket onto the2. Blender Base unit without the jar attached.
NEVER put your hands in the Blender Jar while the Bar Blender is3. plugged in. If you wish to add liquids or food to the Blender Jar while
the motor is running, remove the Measuring Cap from the Bar
Blender lid and add the additional ingredients through the opening.
NEVER insert metal utensils into the Bar Blender. Use a rubber4. spatula to dislodge food if necessary, but NEVER do so while the
Bar Blender is turned on.
Place the Bar Blender cover on rmly. NEVER operate the Bar 5. Blender without the cover on.
NEVER place the Blender Jar on the base unit while the motor6. is running.
NEVER remove the Blender Jar from the base unit while the motor7. is running.
Do not run the Bar Blender continuously for more than 2 minutes.8. Doing so may damage the motor.
Do not overload the Bar Blender. If the motor stalls for any reason,9. turn the motor off, unplug the Bar Blender and remove a portion of
the Bar Blender contents before resuming.
Do not add boiling liquids to the Blender Jar. Boiling liquids should be10.
cooled for at least 5 minutes before being poured into the jar.
Do not overll the Blender Jar. Do not use this Bar Blender to mix 11.
thick dough, mash potatoes, or grind raw meat. Do not use it to
extract juices from fruits and vegetables.
Do not store foods in the Blender Jar. Keep the jar clean when not12.
in use.
Do not use any part of your Bar Blender if chipped or cracked.13.

12
RECIPES
1 large egg
1 teaspoon extra-virgin olive oil
1 teaspoon coarse salt
1 cup safower oil
1/3 cup extra-virgin olive oil
1 tablespoon fresh lemon juice
Using the DIPS button, combine egg, 1 teaspoon olive oil and salt in
Blender Jar (about 15 seconds). Combine safower oil and 1/3 cup olive
oil. Remove Measuring Cup from Lid. With Bar Blender running, add oil,
1 drop at a time, until beginning to thicken, then very slowly pour in
remaining oil. Add in 1 tablespoon fresh lemon juice. Replace Measuring
Cup. Your Bar Blender will stop automatically and the red indicator light
will go out when the program has nished. Refrigerate until ready to
use (up to 2 days). Makes 1 1/2 cups.
1 cup fresh cilantro, lightly packed
1 cup fresh parsley, lightly packed
2 tablespoons fresh basil, lightly packed
2 tablespoons fresh chive, coarsely chopped
1/4 cup chicken broth
2 tablespoons extra-virgin olive oil
1 clove garlic, chopped
1/2 to 1 whole jalapeño chili, seeded and chopped
1/4 cup grated parmesan cheese
1/4 teaspoon salt

13
Place all ingredients in Blender Jar. Cover and process using the DIPS
button, stopping to scrape sides if needed. Your Bar Blender will stop
automatically and the red indicator light will go out when the program
has nished.
Great with grilled pork, poultry or sh. Makes 1/2 cup.
2 cups our
2 cups skim milk
1 teaspoon basil leaves, dried
1/2 teaspoon onion salt
2 whole eggs
4 egg whites
Heat oven to 450°F. Spray 12 – 6 oz. custard cups or 2 – 6 cup
popover pans with cooking spray.
Add all ingredients to Blender Jar. Cover, blend using the PULSE button
for about 15 seconds. Stop Bar Blender to scrape sides if needed.
Mixture should be smooth.
Fill prepared cups/pans about 1/2 full. Bake for 20 minutes. Reduce
oven temp to 350°F and bake 15 to 20 minutes longer. Popovers should
be deep golden brown. Immediately remove from cups. Serve hot.
Makes 12.

14
1 1/2 cup black olives
1/4 cup walnuts, chopped
3 tablespoons extra-virgin olive oil
3 tablespoons capers, drained
1 1/2 teaspoons fresh rosemary leaves
1 teaspoon Italian seasoning
2 garlic cloves
Red bell pepper, chopped, optional
Assorted crackers
Place all ingredients, except bell pepper and crackers, in Blender Jar.
Cover and process using the PULSE button until coarsely chopped.
Spoon into serving dish. Sprinkle with bell peppers if using. Serve with
crackers. Makes 14 – 2 tablespoon servings.
2 cups vanilla ice cream
8 tablespoons frozen grape juice concentrate
1 cup milk
1 cup crushed ice
Place all ingredients in Blender Jar. Use SMOOTHIE button, Bar Blender
will stop when program is nished. Pour in to chilled glasses.
Serve immediately.

15
Recipe courtesy of MasterChef Kitchen
1 ripe mango, peeled, pitted and cubed, about 1/2 cup
1/2 cup nonfat vanilla yogurt
1/2 ripe papaya, peeled, seeded and coarsely chopped, about 3/4 cup
1 ripe banana, sliced
6 strawberries, stemmed and halved, about 1 1/2 cups
Juice of 1/2 lime
6 ice cubes, coarsely crushed
In Blender Jar, combine the mango and yogurt. Purée until completely
liqueed. Add the papaya, banana, strawberries, lime juice and ice. Use
the SMOOTHIE button. Bar Blender will stop when program is nished.
Pour into chilled glasses. Serves 4.
2 cups vanilla yogurt
1 – 10 oz. bag frozen strawberries
2 tablespoons orange juice
1 tablespoon honey
Place all ingredients in Blender Jar. Use the SMOOTHIE button. Bar
Blender will stop when program is nished. Add more honey to taste if
desired. Pour in to chilled glasses. Serve immediately. Makes 3 – 1 cup
servings.

16
1 cup mayonnaise
1/2 cup sour cream
3 tablespoons fresh tarragon leaves, chopped
3 tablespoons fresh chervil leaves, chopped
3 tablespoons fresh chives, chopped
3 tablespoons fresh parsley, chopped
2 tablespoons shallot, minced
1 tablespoon lemon juice
1 tablespoon tarragon vinegar
2 teaspoons capers
3 anchovy llets, rinsed and patted dry
1 dash Tabasco
1/4 teaspoon salt
Combine all ingredients in the Blender Jar and purée, using the PUREE
button, until smooth. Refrigerate for 1 hour before serving. Yields 2
cups.

17
2 lbs. medium asparagus (about 2 bunches), cut in half
1 tablespoon plus 1 teaspoon kosher salt
6 tablespoons butter
1 medium onion, chopped
1 celery stalk, chopped
1 carrot, chopped
7 tablespoons our
3 fresh parsley sprigs
3 fresh thyme sprigs
1 bay leaf
1/2 cup heavy cream
Bring a large pot of water to a boil, about 8 cups. Fill a large bowl with
ice water. Place half the asparagus in the boiling water, cook until
tender, about 4 minutes. Transfer to ice water. Drain. Repeat with the
other half of asparagus. Reserve 7 1/2 cups of the cooking liquid. Thinly
slice 18 of the asparagus tips diagonally and reserve for garnish. Chop
the remaining spears into small pieces.
Melt the butter in a large pot over medium heat. Add the onion, celery
and carrots, cover and cook, stirring occasionally, until soft. Add the
our and cook, stirring with a wooden spoon for about 2 minutes. Add
the reserved cooking liquid and bring to a boil, whisking constantly. Tie
the parsley, thyme and bay leaf together and add to the soup. Lower
the heat and simmer for 10 minutes. Stir in the chopped asparagus
(not the tips) and bring to a boil. Remove from heat and allow to cool.
Remove the herbs and discard.
Working in batches, transfer the mixture to the Bar Blender and purée,
using the PUREE button, until smooth. Using a sieve over a large bowl,
strain the asparagus soup. Return the purée to the pot and reheat.
Whisk in the heavy cream and salt. Season with pepper. Serve in warm
bowls and garnish with asparagus tips.

18
2 large vine-ripe tomatoes, seeded and coarsely chopped
1/2 onion, coarsely chopped
1/2 English cucumber, coarsely chopped
1/2 red or yellow bell pepper, cored, seeded and coarsely chopped
1 clove garlic, minced
Juice of 1/2 lemon
1 1/2 teaspoons sugar
1 teaspoon smoked paprika
Kosher salt and freshly ground black pepper
1/2 cup extra-virgin olive oil
Combine the tomatoes, onion, cucumber, bell pepper, garlic, lemon juice,
sugar, paprika, salt and pepper in the Blender Jar. Purée, using the
PUREE button, until smooth. With the motor running, drizzle in the oil.
Strain the gazpacho through a ne-mesh strainer into a bowl, pressing
the solids with a wooden spoon to extract as much liquid as possible.
Serves 4.

19
1 cup cantaloupe or honeydew, cut up
1 cup pineapple, cut up
1 cup mango, cut up
1 cup strawberries, cut in halves
1 cup orange juice
2 tablespoons sugar
10-12 ice cubes
Place half of all fruit except pineapple in Blender Jar. Add 1/2 ice cubes.
Cover and blend using ice crush button for about 30 seconds until
smooth. Repeat with remaining fruit except pineapple and remaining ice
cubes. Garnish with pineapple. Serve at once. Makes 4 servings.
1 cup pineapple juice
1/2 cup blue curacao
1/2 cup cream of coconut
1/2 cup light rum, optional
10 to 12 ice cubes
Maraschino cherries to garnish, optional
Place all ingredients in Blender Jar and cover. Using the ICE CRUSH
button blend until smooth, about 45 seconds. Pour into chilled glasses
and garnish with cherry. Serves 4.

20
Recipe courtesy of Sharone Hakman, contestant on
MasterChef – Season 1
10 oz. good silver tequila
4 oz. orange liquor (Grand Marnier or Cointreau)
1 cup frozen chopped mangos
2 teaspoons sugar
1 cup ice
4 sprigs fresh mint
Slice of lime for garnish
Combine all ingredients in blender jar, except the lime slice, and cover.
Using the ICE CRUSH button blend until smooth. Garnish with lime.
Serve up and enjoy. Serves 4.
Table of contents
Other MasterChef Blender manuals

MasterChef
MasterChef 525493 User manual

MasterChef
MasterChef HB5006E-UL User manual

MasterChef
MasterChef TV Series User manual

MasterChef
MasterChef TV Series User manual

MasterChef
MasterChef TV Series User manual

MasterChef
MasterChef AMZ919101839 User manual

MasterChef
MasterChef 525498 User manual

MasterChef
MasterChef TV Series User manual

MasterChef
MasterChef 525495 User manual

MasterChef
MasterChef TV Series User manual