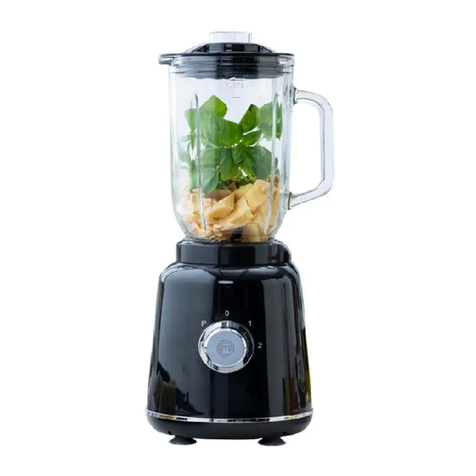
MasterChef 043-1325-0 User manual

BLENDER
Model no. 043-1325-0
Read this manual thoroughly before using this product and save it
for future reference.
TM
INSTRUCTION MANUAL
043-1325_MC-71356_MasterChef_Blender_ENG_BW REV4-2019.indd 1 2019-03-27 9:50 AM

Model no. 043-1325-0 | Contact us: 1-855-803-9313
2
Table of Contents
Important Safeguards 2-3
Know Your Blender/Replacement Parts 4
Before First Use 5
Assembling Your Blender 5-6
Using Your Blender 7
Mixing Hot Foods or Liquids 8
Crushing Ice 8
Blending Tips 9
Cleaning and Maintenance 10
Warranty 11
When using electrical appliances, basic safety precautions should always be followed to reduce
the risk of re, electric shock and/or injury to persons, including the following:
1. READ ALL INSTRUCTIONS CAREFULLY.
2. Do not immerse the motor end of the appliance in water or any other liquids.
3. Unplug appliance from power outlet when not in use, before attaching or removing parts, and
before cleaning.
4. Avoid contact with moving parts.
5. Do not operate any appliance with a damaged cord or plug, or aer the appliance malfunctions
or has been damaged in any manner. Return appliance to the nearest authorized service facility
for examination, repair or adjustment.
6. Close supervision is necessary when appliance is used near children. Not recommended for use
by children.
7. KEEP HANDS AND UTENSILS OUT OF BLENDING JAR WHILE BLENDING to reduce the risk
of severe injury to persons or damage to the blender. A scraper may be used, but only when the
blender is not running.
8. Do not use attachments that are not recommended by the
manufacturer. These may cause re, electric shock or injury, and will void the warranty.
9. Do not use outdoors.
10. Do not let cord hang over the edge of a table or counter, or touch hot surfaces, including the stove.
11. Blades are sharp. Handle carefully.
Important Safeguards
043-1325_MC-71356_MasterChef_Blender_ENG_BW REV4-2019.indd 2 2019-03-27 9:50 AM

3
TM
12. Never place cutter assembly blades on blender base without blending jar properly attached.
13. Always operate blender with jar lid in place.
14. When blending hot liquids, remove ller cap from the centre of the two-piece jar lid.
15. Do not use this appliance for anything other than its intended use.
16. Never leave appliance unattended while it is plugged into a power outlet.
POWER CORD INSTRUCTIONS
1. A short power-supply cord is provided to reduce the hazard resulting from
entanglement or tripping over a long cord.
2. Extension cords may be used if care is exercised. If it is necessary to use
an extension cord, it should be positioned so that it does not drape over the
counter or table top where it can be pulled on or tripped over by children.
3. The electrical rating of the extension cord must be equal to or greater than
the rating of this appliance. The label with the electrical rating is located on
the underside of the appliance.
4. Avoid pulling or straining the power cord at power outlet or appliance
connections.
POLARIZED PLUG
1. This appliance has a polarized plug (one blade is wider than the other).
2. To reduce the risk of electric shock, this plug will t in a polarized outlet only
one way.
3. If the plug does not t fully into the outlet, reverse the plug. If it still does
not t, please contact a qualied electrician. Do not attempt to modify the
plug in any way.
WARNING: Improper use of the power cord may result in the risk of electric
shock. Consult a qualied electrician if necessary.
SAVE THESE INSTRUCTIONS
HOUSEHOLD USE ONLY
Important Safeguards
043-1325_MC-71356_MasterChef_Blender_ENG_BW REV4-2019.indd 3 2019-03-27 9:50 AM

Model no. 043-1325-0 | Contact us: 1-855-803-9313
4
Know Your Blender / Replacement Parts
1
2
3
NOTE: Assemble with gasket (rubber sealing ring) between blade assembly and blending jar.
RATING: 120 V, 60 Hz, 700 W, AC ONLY
4
5
6
7
8
1 * Blending Jar
2 * Collar
3 * Jar Lid with Filler Cap
4 Blender Base
5 3-Speed Power Switch
6 * Rubber Feet
7 * Gasket (Rubber Sealing Ring)
8 * Blade Assembly
* These parts are available for replacement. Call 1-855-803-9313 for ordering details.
043-1325_MC-71356_MasterChef_Blender_ENG_BW REV4-2019.indd 4 2019-03-27 9:50 AM

5
TM
Assembling Your Blender Before First Use
Carefully unpack the blender and remove all packaging materials. Be sure to handle the blade
assembly carefully; it is sharp. Set the blender base on a clean, dry countertop or table. Wash the
blade assembly, blending jar, collar, and jar lid in warm, soapy water. Rinse and dry thoroughly.
Wipe the blender base with a clean, damp cloth. This will remove any dust that may have settled
during packaging.
1. Place the blender on a at, level surface. Always operate blender on a clean, dry surface.
2. Place the blade assembly gasket on the rim of the blade assembly (g. 1).
CAUTION: DO NOT LOSE THE GASKET WHEN WASHING.
WARNING: Do not immerse the blender base, cord, or plug in water or any other
liquid. Do not use harsh detergents or abrasive cleansers on any part of the
blender.
g. 1
043-1325_MC-71356_MasterChef_Blender_ENG_BW REV4-2019.indd 5 2019-03-27 9:50 AM

Model no. 043-1325-0 | Contact us: 1-855-803-9313
6
IMPORTANT: Do not twist jar on blender base.
Assembling Your Blender
3. Insert the blade assembly with gasket into the collar (g. 2).
4. Carefully place the blade assembly into the jar opening (g. 3) and align it evenly with the jar.
Turn counter-clockwise to engage the threaded collar with the jar. Continue to turn counter-
clockwise until tight. Your blender jar is now sealed (g. 4).
5. Insert into blender base by aligning tabs on collar with tab slots on blender base (g. 5).
g. 2
g. 3 g. 4
g. 5
043-1325_MC-71356_MasterChef_Blender_ENG_BW REV4-2019.indd 6 2019-03-27 9:50 AM

7
TM
IMPORTANT: Blade assembly must be securely tightened to the jar before adding
food or liquid to the blending jar.
NOTE: Most food and liquid can be blended or processed to your desired
consistency with short bursts of power. Once you have reached the desired
consistency, you only need to blend contents for a few seconds. To avoid
overheating and wear on the motor and blades we recommend blending
foods for no longer than 1 minute on a low or high setting.
1. Before starting, make sure that the blender cord is unplugged and that the power switch on
the blender base is in the OFF (O) position.
2. Check blending jar assembly to ensure that the blade assembly, rubber sealing ring and collar
are in the proper positions.
3. Place blending jar assembly on the blender base so that it is rmly seated and not tilted to
one side. Never place the blade assembly on the blender base without the blending jar being
completely assembled and securely tightened.
4. Be sure the power switch is still in the OFF (O) position, and plug the blender into a convenient
120 V~60 Hz AC-only power outlet.
5. Add ingredients to be processed into blending jar, and place jar lid on blending jar. Be sure jar
lid is fully seated. Always hold blending jar while blending. Do not operate the blender with an
empty blending jar.
6. Your blender has four settings:
PULSE, OFF, LOW, HIGH (P, O, 1, 2).
7. For REGULAR BLENDING (continuous blending action), set the power switch to either the
LOW (1) or HIGH (2) position. LOW (1) is best suited for light blending with liquids. HIGH (2)
is suited for mixing liquids with solids or thicker liquids. The blender will run at the selected
speed until another speed is selected. The power will stop when the OFF (O) position is
selected.
8. For PULSE BLENDING (short bursts of high-speed blending action), turn the power switch to
PULSE (P). The switch will return to the OFF (O) position as soon as you release it. (See “To
Crush Ice.”)
9. Always be sure to switch the power switch to the OFF (O) position when you are not blending.
Using Your Blender
043-1325_MC-71356_MasterChef_Blender_ENG_BW REV4-2019.indd 7 2019-03-27 9:50 AM

Model no. 043-1325-0 | Contact us: 1-855-803-9313
8
Mixing Hot Foods or Liquids
The PULSE (P) setting is ideal for crushing ice, since it allows for bursts of high-speed operation
separated by short rest periods that allow the ice to settle around the blades before the next pulse.
Before operating the blender, make sure the blending jar is properly assembled and in place on the
blender base. Put ice and/or ingredients in the blending jar and rmly attach the jar lid.
Turn power switch to the PULSE (P) position and hold for a few seconds. Release, then repeat until
the ice is crushed to your liking. If ice becomes clumped, turn the power switch to OFF (O) and use
a rubber spatula to redistribute the ice ONLY when the power switch is in the OFF (O) position.
Never use any utensils, including spatulas, in the blending jar while the blender is running.
Crushing Ice
CAUTION: To avoid personal injury or damage to the glass blending jar, allow
cooked vegetables and broth to cool before pouring into the blending jar for
processing.
IMPORTANT: Do not use boiling water. The blade assembly bearings have been
designed with a lifetime lubricant; exposure to boiling water may damage these
bearings and shorten the life of the blender. Use of boiling water could also cause
excessive steam buildup, which may result in personal injury.
CAUTION: Do not crush more than 6 ice cubes or approximately 2 cups (500 ml)
of ice at one time.
IMPORTANT: A small quantity of water must be added to the ice when crushing
ice alone. For best results, add 1/2 cup (125 mL) of water for every 1 1/2 cups
(375 mL) of ice. Most store-bought blender drink mixes and/or other recipes will
note a requirement for water or other liquids. Ice will not crush without some form
of liquid. Be sure to drain any excess water aer blending if you require ice alone.
043-1325_MC-71356_MasterChef_Blender_ENG_BW REV4-2019.indd 8 2019-03-27 9:50 AM

9
TM
Blending Tips
• Always keep the lid on the blending jar while blending.
• Never place the following items in your blender as they may cause damage: bones, large pieces
of solid frozen foods or tough foods such as turnips.
• Certain tasks are not performed eciently with a blender, such as: Beating egg whites,
whipping cream, mashing potatoes, grinding meats, mixing dough, and extracting juices from
fruits and vegetables.
• If desired, remove the ller cap from the centre of the jar lid to add small ingredients while the
blender is operating.
• Remove the ller cap while blending hot liquids; this will release any steam and condensation
that could build up on the inside of the blending jar.
• Do not place any utensil (spatula, fork, etc.) in the blending jar while the blender is operating.
Ensure all speed buttons are in the OFF (O) position and unplug the blender.
• Screw the blade assembly collar onto the bottom of the jar before placing onto the top on the
blender base.
• When blending solid foods, such as raw vegetables or cooked and uncooked meats and fruits,
always cut them into pieces no larger than 3/4" (1.8 cm) before placing them into the glass
jar. Blend no more than 1/2 cup (125 mL) of these foods at a time. This will speed the blending
process and reduce wear on the blending blades and motor.
• Smaller ice cubes can be chopped or crushed faster than large ones.
• If too much food is blended at one time, the motor may stall. If this happens, turn the blender
o, and unplug from power outlet. Once blades have come to a stop, remove a portion of the
food and repeat the blending process.
• To add foods while the blender is operating, remove the ller cap from the centre of the jar lid
and insert the ingredients through the opening. Remember to cut the food into 1" (2.5 cm)
pieces to t through the opening. Always replace the measuring cap when you have nished
adding the ingredients.
• Always place liquid ingredients in the jar rst, unless recipe specically states otherwise.
• Avoid over-blending. You will usually only need to blend for a few seconds, not minutes. Over-
blending may cause food to be mushy.
• Be sure the blades are completely stopped and base is unplugged before removing the
blending jar from the base.
• NEVER blend carbonated beverages. Released gases can cause pressure to build up and the
container to burst, resulting in possible injury.
• To add ice cubes to mixtures while blender is operating, add one ice cube at a time through the
opening in the jar lid. Wait a few seconds before adding the next ice cube so that the blender
can properly blend the ice.
043-1325_MC-71356_MasterChef_Blender_ENG_BW REV4-2019.indd 9 2019-03-27 9:50 AM
Model no. 043-1325-0 | Contact us: 1-855-803-9313
10
Cleaning and Maintenance
To Hand Wash
To Quick Clean
IMPORTANT: Always unplug blender before cleaning.
IMPORTANT: “QUICK CLEAN” is not a substitute for the Hand Wash cleaning
described above. It is important to disassemble and thoroughly clean your blender
before storing or aer processing milk, dairy products, meats, seafood and eggs.
CAUTION: Before removing the blending jar from the blender base aer use, be
sure it is in the OFF (O) position. Ensure blades have stopped spinning and base is
unplugged before removing the blender jar or lid.
1. Disassemble the blender container parts and wash the lid and ller cap, collar, gasket and
blade assembly in warm, soapy water. Use caution when washing the blade assembly, as
blades are sharp.
2. Wipe the base with a warm, damp cloth and dry thoroughly with a clean cloth.
All components of the jar assembly are dishwasher safe; however, the lid and gasket
should be placed only in the top rack of the dishwasher.
The interior of the blender jar can be conveniently cleaned by blending a mixture of soapy water
directly in the jar.
1. Remove jar assembly from blender base and rinse with warm water to remove any large food
particles.
2. Place jar assembly back into the blender base and ll with 1 to 1 1/2 cups (250 mL – 375 mL)
of warm, soapy water.
3. Ensure the speed buttons are all in the OFF (O) position, and plug the blender into a
convenient 120 V~60Hz AC-only outlet.
4. Replace the lid and turn dial to PULSE (P) for a few seconds.
5. Remove the jar assembly from the base and rinse well. Repeat procedure as necessary.
043-1325_MC-71356_MasterChef_Blender_ENG_BW REV4-2019.indd 10 2019-03-27 9:50 AM

11
TM
IMPORTANT: Do not use boiling water. The blade assembly bearings have been
designed with a lifetime lubricant; exposure to boiling water may damage these
bearings and shorten the life of the blender. Use of boiling water could also cause
excessive steam buildup, which may result in personal injury.
WARNING: Do not immerse the blender base in water or other liquid. Do not use
abrasive cleansers on any part of the blender.
Store the blender fully assembled and in an upright position in a clean, dry cabinet or cupboard.
With proper care, your blender will last for many years.
1-Year Limited Warranty
This product carries a one (1) year warranty against defects in workmanship and materials. Trileaf
Distribution agrees to replace a defective product free of charge within the stated warranty period,
when returned by the original purchaser with proof of purchase. This product is not guaranteed
against wear or breakage due to misuse and/or abuse.
Made in China
Imported by
Trileaf Distribution Trifeuil Toronto, Canada M4S 2B8
For assistance regarding this appliance, please call 1-855-803-9313.
Cleaning and MaintenanceWarranty
043-1325_MC-71356_MasterChef_Blender_ENG_BW REV4-2019.indd 11 2019-03-27 9:50 AM
043-1325_MC-71356_MasterChef_Blender_ENG_BW REV4-2019.indd 12 2019-03-27 9:50 AM
Table of contents
Other MasterChef Blender manuals

MasterChef
MasterChef VRD919102040 User manual

MasterChef
MasterChef 043-5773-8 User manual

MasterChef
MasterChef TV Series User manual

MasterChef
MasterChef 525494 User manual

MasterChef
MasterChef TV Series User manual

MasterChef
MasterChef 525493 User manual

MasterChef
MasterChef 525495 User manual

MasterChef
MasterChef 525498 User manual

MasterChef
MasterChef MCBL600 User manual

MasterChef
MasterChef AMZ919101839 User manual