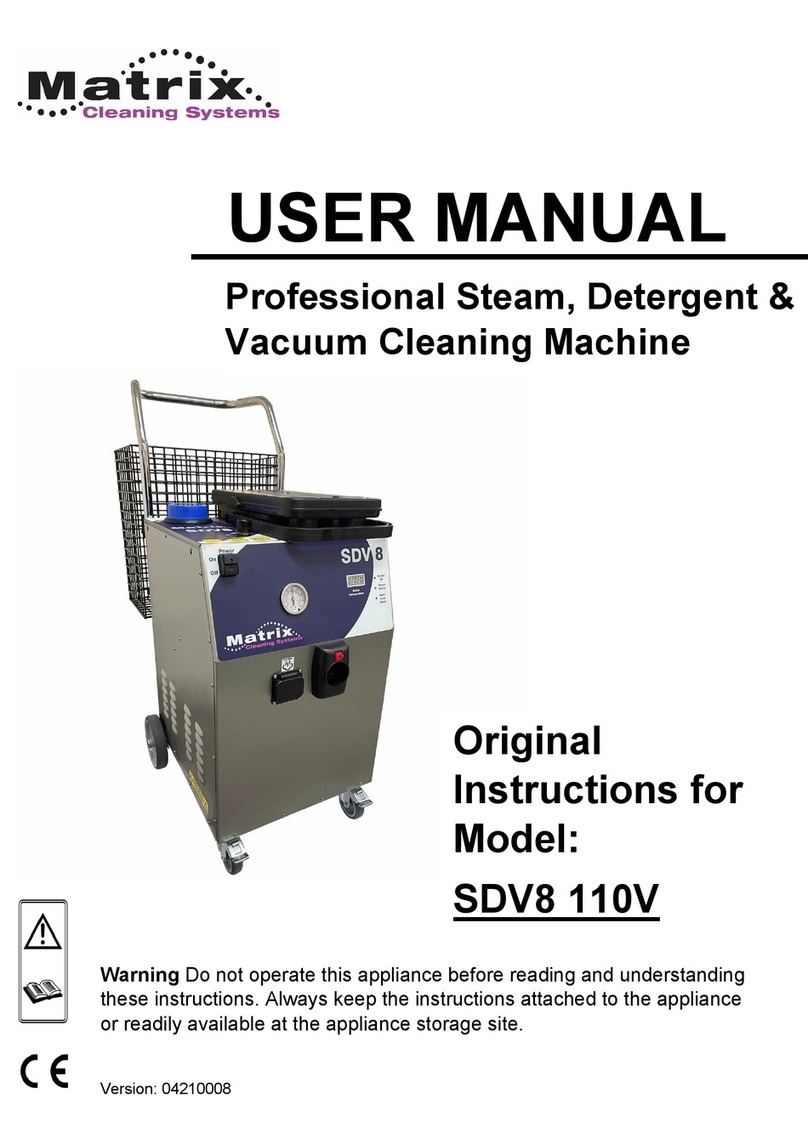
Matrix Cleaning Systems 4x4SD10KW User manual

1
4x4SD10KW
User Instructions
Steam & Detergent
10 Bar

2
Warning Do not operate this appliance before reading and understanding these
instructions. Always keep the instructions attached to the appliance or readily available at
the appliance storage site.
Serial Number Label
Modified August 2013

3
CONTENTS
Introduction page 2
Description page 2
Safety warnings page 3
Technical specifications page 4
Instructions for use page 5
Accessories page 10
Maintenance page 13
Troubleshooting page 15
INTRODUCTION
ATTENTION! Before performing any operation with the machine, carefully read this
manual.
It contains all the information necessary for accident-free operation, ensuring the safety of the
operator and all persons working nearby, and respect for the environment. Correct use of this
manual enables the user to keep the machine in good condition, reduces breakdowns and
consequently repair costs and machine down time.
Keep the manual in a suitable place where it can be easily accessed by the operator whenever
required.
DESCRIPTION
The product is indicated for removing anything ranging from simple dirt and grease all the way
to organic material. It uses different levels of moisture in the steam to effectively respond to
different requirements or detergents in very low dosage.
This machine is a steam generator designed only for the following functions:
Cleaning with steam
Cleaning with steam plus added moisture
Cleaning with steam plus compatible detergents
Cleaning with the above options plus vacuum (optional)
ATTENTION! The vacuum function is to be used exclusively as a means of removing
solids and liquids that are a result of the steam cleaning activity. Do not use the
vacuum for general vacuum cleaning!

4
SAFETY WARNINGS
The manufacturer declines all liability for:
1. Incorrect use of the machine or use for purposes other than those for which it has been
designed.
2. All modifications made without manufacturer authorization.
3. Replacement of original parts with parts produced by other manufacturers.
4. Use by untrained personnel or without having entirely read the instruction manual.
5. Inappropriate electrical supply.
6. Inappropriately grounding of the electrical supply.
7. The use of detergents other than those supplied and validated by the manufacturer.
8. Use of the machine without protective clothing, shoes, gloves and safety glasses.
9. Use of the vacuum for general purpose vacuum cleaning.
10. Use of the machine with electric generators
ATTENTION! Before connecting the machine to the power supply, make sure that
your supplied voltage corresponds to the declared voltage on the machines label at
the rear of the machine!
1. Never direct steam and/or hot water against persons, animals or yourself.
2. Do not use the equipment near persons if the latter are not wearing protective clothing.
3. Caution! Hot accessories can lead to injuries, do not touch with bare skin.
4. Make sure that the water you fill into the water tank is clean. Avoid the use of buckets
or canisters to fill the tank unless these are completely free of dirt or foreign objects.
5. Do not drag the machine by pulling the hose, this can damage the hose.
6. Never pull the plug out of the mains socket by pulling at power cord, pull holding plug.
7. Do not vacuum up flammable substances (petrol, solvents, paints etc.), welding fumes
or ignited material: danger of explosion or fire!
8. Check the power supply cable before use for any damage.
9. In the event of damage of the power supply cable, have it immediately replaced by the
manufacturer or qualified personnel.
10. Over length of extension (longer than 25m) may lead to insufficient voltage supply and
malfunction.
11. CAUTION: inadequate extensions can be dangerous. Make sure that your extension is
correctly dimensioned and constructed according to national legislation!
12. Never immerse any part of the machine in water or other liquids.
13. Check the steam hose and all accessories for damage before use and replace or have
them repaired immediately.
14. In the event of leakage of steam or liquid, switch off and disconnect immediately.
Contact the manufacturer or service center.
15. The equipment must not be used by children or untrained personnel.
16. To guarantee safety of the equipment, only original spare parts must be used supplied
by the manufacturer or approved by it.
17. Never use the machine in a tilted position, all 4 wheels must stand on a plane surface.
18. Do not clean heat sensitive materials with steam, the heat of the steam could cause
damage.
19. Operate the machine only wearing appropriate protective clothing, gloves and safety
goggles or glasses.

5
TECHNICAL SPECIFICATIONS
4x4SD10KW
Maximum Pressure 10BAR
Maximum Temperature 180°C
Max. Steam Output Dry 13,2lt./hour –220gr./min.
Max. Steam Output Wet 18lt./hour –300gr./min.
Water Tank Volume 20lt./Stainless Steel Internal
Electric Heating Power 9000 Watt (16 Amp 3P)
Boiler Volume 4,5lt.
Heat up time 5 minutes
Voltage 400V~ 50Hz
Boiler Material Stainless Steel AISI 304
Dimensions LxWxH mm 880 x 600 x 1100
Net Weight 68kg
Dry Steam Regulation Manual 0 –maximum
Wet Steam Regulation 4 Levels approx. 20/40/60/80 gr/m
Detergent Function 4 Levels approx. 20/40/60/80 gr/m
Detergent Tank Volume 2 x 5lt. PET Canisters
Vacuum Optional Function
Vacuum Power 1200 Watt
Vacuum Container Volume 20lt.
Continuous Feeding Inlet YES - 3/4" BSP Rapid Lock
Machine safety devices:
PED certified overpressure Safety Valve
2 Pressure Switches –operating pressure & overpressure with manual reset
Safety thermostat with manual reset
12V low voltage controls in the Grip
Emergency OFF switch
Internal Fuses
Water-resistant control elements on the front panel
The Boiler and all thereon(in) fastened components have been tested and certified as a
complete technical assembly according to the European PRESSURE VESSEL SAFETY
STANDARD 97/23CE (PED) by the international testing institute TÜV RHEINLAND.

6
INSTRUCTIONS FOR USE
CAUTION
The machine is supplied with a power supply cable suitable for its absorption. Check
that the electrical system on site complies with the current national regulations.
This instruction manual may include information about functions or accessories
which are not part of the product you have purchased. This manual gives
instructions for all of the versions available. Please ignore all information which
does not pertain to your machine. Contact your dealer or distributor for further
information.
FRONT PANEL
1. POWER ON/OFF SWITCH
2. BOILER CONTROL PANEL
1. T2 –SERVICE FUNCTION*
2. TEMPERATURE DISPLAY
3. T1 –SERVICE FUNCTION*
4. BOILER ON/OFF BUTTON
5. BOILER HEATING LED
6. BOILER PUMP LED
7. WATER TANK LOW LED
8. POWER ON LED
* see chapter “Maintenance”
3. WET STEAM/DETERGENT PANEL
1. WET STEAM BUTTON (BLUE)
2. +/- LEVEL BUTTONS
3. DETERGENT BUTTON (YELLOW)
4. LEVEL INDICATION LED
4. PRESSURE GAUGE
5. WATER MAINS ON/OFF BUTTON
6. STEAM REGULATOR +/- (MANUAL)
7. HOSE CONNECTION SOCKET
8. EMERGENCY KILL SWITCH
Pic. 1

7
Boiler Control Panel
Wet Steam/Detergent Panel
Top Inlet Water Tank D. 160mm
Hand-grip
Pic. 2
Pic. 3
Pic. 4
Pic. 5

8
MACHINE START :
Steam only function :
Connect the machine to the electrical mains.
Turn the mains switch 1 (Pic. 1) to the ON position.
LED 2.8 goes on to signal that the machine receives voltage.
Remove the water tank cover 9.1 (Pic. 4) and fill the tank 9 with plain tap water until
the
LED 9.2 lights up, this is possible only if the machine is turned on, or you see that the
tank is full. Close the water tank.
Push the boiler ON button 2.4 (Pic. 2) and the pump starts filling the boiler. LED 2.6
lights up. Filling is automatically performed when requested by the water level sensor
inside the boiler.
When the pump stops, LED 2.6 (Pic. 2) goes out and the heating phase begins, lasting
approx. 5 minutes. During the heating phase, LED 2.5 will continue to blink.
When LED 2.5 (Pic. 2) stops blinking and stays on, the machine is ready for use. (During
use this light will often blink to show that the heating elements are on).
Insert the hose into the hose connection socket 7, ensuring that it is securely fitted.
Fasten accessories to lances by firmly pushing them on to the tip (nozzle) 10.2 (Pic. 5).
Pull the trigger 10 (pic. 5) on the hand-grip to start steam output and direct the steam
jet towards the area to be cleaned.
Regulate steam output by turning the manual output regulator 3.2 +/- (Pic. 3) to the
desired output quantity.
CAUTION
Before beginning steam cleaning operations, evacuate the condensation left inside the steam
hose into a bucket or other suitable place.
Always wear gloves and protective glasses when working! Ear protection is recommended!
WARNING! In case of danger, injury of the operator, leakage of steam or
anything that makes it difficult to regularly turn the machine off, immediately hit
the Emergency OFF Button 5 (Pic. 1). The switch will remain in the OFF position
until manually reset by turning the switch so that it pops back up! Reset ONLY
after having removed the cause of malfunction. See chapter “Troubleshooting”..
Wet steam or detergent :
To optimize the cleaning action of the steam, water from the internal tank 9 or detergent from
one of the external canisters can be injected into the steam.
Enable the wet steam feature by pressing the blue button 3.1 (Pic. 3) and then choose
the level required with the +/- buttons 3.2. Levels 1 & 2 are indicated for most jobs in
which dry saturated steam is to dry, making cleaning slower than necessary. Levels 3 &
4 allow for a strong rinsing action of the steam but the steam temperature still stays
above 120°C at the lances tip.
Now enable switch 10.1 (Pic. 5) on the top of the hand-grip to activate the injection of
water into the steam while also pulling the steam trigger. The water pump will run only
while pulling the trigger.

9
To use the detergent feature press the yellow button 3.3 (pic. 3). First fill one or both of
the external canister on top of the machine with 5 liters of water and detergent and
make sure that the transparent hose is connected properly to the chassis. You have 2
canisters available which you can fill as required for a total of 10lt.
Choose the desired level of detergent required with +/- buttons 3.2 and if necessary do
tests to find the best level of detergent to inject.
Again, enable switch 10.1 (Pic. 5) on the top of the hand-grip to activate the injection of
detergent into the steam while also pulling the steam trigger. The detergent pump will
run only while pulling the trigger.
Priming the detergent pump: if the detergent canister runs empty the pump may take a
while to suck up the detergent and purge the air in the hose. Observe the transparent
hoses on the canister for visual feedback.
ATTENTION! Remnants of detergent in the transparent hose or pump can cause blockage and
or damage the pump, please flush the detergent circuit when not used regularly.
WARNING! This machine has been designed for use with non-foaming
and noncorrosive detergent. Use of foaming and/or corrosive detergent
will damage the machine! You are advised to use only the detergent
specified by the manufacturer.
Water refill :
When the water in the tank finishes, the machine emits an acoustic signal and LED 2.7 (Pic. 2),
signaling “water tank low” lights up along with 9.2 (Pic. 4). After a little more time the steam
outlet is blocked until the tank is refilled.
Perform the following operations:
Press button 2.4 (Pic. 2) to turn off the boiler.
Open the plug 9.1 (Pic. 5) and refill the tank with clean tab water. Close tank.
Press button 2.4 and the pump will start filling up the boiler, LED 2.6and 2.5blink.
Since the boiler is already under pressure, LED 2.5 light up steady after a few seconds
and the machine is ready to resume work.
Continuous water refill
The internal water tank can be refilled with water automatically and continuously. Connect the
machine to a water hose by using the supplied 3/4” BSP quick release connector. Fasten the
male part to the water inlet at the rear of the machine, fasten the female to the hose and then
connect both.
Open the water from the tap.
Push the green button 5 (Pic. 1).
The tank will now fill itself. Sensors ensure the correct water level.

10
ATTENTION! Pressure of water supply for the continuous refill must not be greater than 16
Bar
or less than 0,1 Bar.
WARNING! Never push the green button if the machine is not connected to the
water hose. This would cause water to flow out of the tank and onto the floor.
When done working, turn the green button 5 OFF and disconnect the water hose.
HOSE-GRIP STEAM & VACUUM
11 HOSE-GRIP STEAM & VACUUM 11.1 STEAM TRIGGER
11.2 DETERGENT BUTTON 11.3 VACUUM ON/OFF BUTTON
11.4 WHITE LEVER
11.3
11.12
Kit Vacuum: (see optional accessories below)
The vacuum kit contains :
1 vacuum cleaner
1 support cage to attach the vacuum cleaner to the machine
1 steam & vacuum hose and accessory kit
Instructions to mount the vacuum kit:
Fit both ends of the vacuum support into the holes between the back wheels and fix it
with the two supplied screws.
Put the vacuum cleaner on the support
Connect the vacuum cleaner to the vacuum socket behind the cleaner using the special
short vacuum hose.
Plug the vacuum into the receptacle on the rear, near to the vacuum socket.
Enable the main ON/OFF switch located on the vacuum cleaner head.
Connect the steam & vacuum hose to the steam socket.
Start the steam machine as explained above.
Determine the required steam output by regulating manually with valve 6 (Pic. 1).
Press the trigger 11.1 (Pic. 6) on the hose grip 11 to enable steam output.

11
For suction, press and release micro-switch 11.3 on the hose-grip. Press once to switch
ON, and a second time to switch OFF.
The detergent/hot water function is enabled by persistently pressing micro-switch 11.2
and release to stop.
Follow the instructions above as for steam only!
WARNING! Do not use the vacuum without its filter element, this will
damage the vacuum and cause dirt and contaminants to come back
out of the exhaust! This vacuum is not suitable for collecting
dangerous waste!
AFTER USE
Turn switch 1 OFF and disconnect from the mains voltage supply.
Disconnect the hose, check for damage and clean it externally with a cloth, warm water
and detergent (rinse the vacuum hose inside by vacuuming up 2 –3lt. of water).
Clean all accessories with hot water and detergent or with steam.
Dry all accessories and store them in a dry environment.
Clean the machine with a cloth, warm water and if necessary use a neutral detergent.
Clean the vacuum tank after every use. Open the 2 lateral hinges of the vacuum tank
and pull the vacuum head upwards. Dispose of the contaminants inside and rinse the
tank until clean. Inspect and if necessary wash the filter element that is attached to the
vacuum head. This filter must be washed regularly to maintain a high level of vacuum
efficiency.
STANDARD ACCESSORY SET
KIT9800/2
LANCE IDROVAP 6M HOSE
Ø 2.25mm NOZZLE
*Also available in lengths of 10/15/20 meter. Specify
length when ordering!
KIT0814/I
6 BIG ROUND BRUSH STAINLESS BRISTLES
KIT0814/N
6 BIG ROUND BRUSH NYLON BRISTLES
KIT0814/O
6 BIG ROUND BRUSH BRASS BRISTLES

12
KIT0815/I
3 ROUND BRUSH STAINLESS BRISTLES
KIT0815/N
3 ROUND BRUSH NYLON BRISTLES
KIT0815/O
3 ROUND BRUSH BRASS BRISTLES
KIT0816/I
2 SMALL ROUND BRUSH STAINLESS BRISTLES
KIT0816/N
2 SMALL ROUND BRUSH NYLON BRISTLES
KIT0816/O
2 SMALL ROUND BRUSH STAINLESS BRISTLES
KIT0020
SAFETY GLOVES
KIT0021
SAFETY GLASSES
KIT0720
MULTI-BRUSH TOOL

13
MAINTENANCE
ATTENTION! Maintenance should be done every 6 to 12 months or more often if
used very heavily and/or if the water is very hard. Make arrangements with your
dealer or distributor for professional maintenance and assistance.
The amount of carbonates in the water (chalk, salts and other minerals) determine the
hardness of the water you use with this machine. When water is heated up these carbonates
will “fall out”, that is they will become small particles that in the worst case can encrust you
boiler, the heating element and other components. Please clean your boiler as described below
regularly, more so if you have hard water from the tap. Do not use completely demineralized or
distilled water withyour machine because such water contains no minerals and carbonates and
could lead to malfunction!
DANGER! Wear protective clothing, gloves and glasses while operating the below
procedure, the hot water can cause injuries!
Cleaning the boiler :
Perform this task every 3 to 6 months!
· Switch the machine ON at pressure “0” and let the temperature reach approx. 100° C
(212°F) temperature in the boiler.
· Push button 2.4 to turn the boiler off and release all steam by pressing the trigger 10.
· Now turn off the main switch 1 and unplug the machine from the socket on the
electrical panel.
· Gently rock the machine to agitate carbonate deposits in the boiler.
· Lift the machine and place a container below to collect the dirty water from the boiler.
· Using an 8mm Allen key, partially unscrew the boiler plugs under the machine (see
picture below! The number of plugs will vary according to the machine model from 1 to
4).
· Wear protective gloves when you remove the plugs to avoid scalding yourself and
empty the content of the boiler while gently shaking the machine.
· Re-tighten the plug securely but without over-tightening.
ATTENTION! If the water collected is very dirty, you
are advised to repeat the operation.
To restart the machine, follow the instructions above in
“Machine start”.
Function of the T1 and T2 Buttons
The buttons are used to read out the total hours run by the
machine. To read out do as follows:
press T2 (2.1) to visualize the hours run up to 999- the
display shows 3 digits
press T1 (2.3) to visualize the hours up to 99000 –the display shows 2 digits
now sum up both, for example if you press T2 and read 317 and then press T1 and read 04
then you have a sum of 4317 hours which the machine has run.

14
CAUTION
Check for any water leaks from the plug below the machine and tighten the plug if
necessary.
ATTENTION! At regular intervals of 6 month the internal water filter should be cleaned and
the
anti-calcification filter exchanged. This filter inhibits the aggregation of calcium into a crust
leaving the calcium particles present in the water to deposit at the bottom of the boiler and to
be removed as above described. To avoid the formation of encrusted calcium in the boiler,
solenoid, pressure switch etc. it is absolutely vital to exchange the filter which is situated inside
the machine. This is to be done only by trained service personal. On that occasion all
components should be checked for proper function and all cables be visually inspected for
eventual damage and if necessary exchanged! If a deep descaling of the boiler should be
required this can be done with an appropriate lime/chalk deposit remover.
TROUBLESHOOTING
All LED and the display of the front panel
start blinking and the display shows letters or
numbers that blink and the machine no
longer works.
The voltage is insufficient or to high to run
the machine. Measure the voltage with the
machine on. Check the correct
dimension/gage of the mains and the length
of an eventual extension cable.
Steam leaks from accessories due to dirt,
wear or breakage of gaskets or it is difficult
to disconnect these.
Replace the gaskets on the connections
making sure you do not cut or mark the
gasket and that it is securely fitted in its
housing. Clean and place a light film of
silicone grease on the gaskets.
Hose plug hard to insert in the machine
socket.
Do not force it in; lubricate the steam socket
connection with some silicone grease.
No steam output but machine is in pressure.
Make sure the manual output valve is open.
Machine heating time too long.
Remove the scale from the boiler as
described above.
The pressure drops rapidly during operation.
Remove the scale from the boiler as
described.
The pressure rises rapidly and the pump
continues to fill the boiler with water.
The machine needs to be serviced! Please
contact your service center.
Vacuum does not turn on when enabled on
the hose-grip.
Check that the Vacuum is plugged into the
230V ~ socket on the rear of the machine and
make sure that the vacuum is turned ON on
the vacuum itself.
The vacuum does not effectively suck up dirt.
Clean or exchange the filter element and
check the hose and accessories for blockage.
Leakage of steam or water into the machine.
Push the Emergency OFF Button 8 and
unplug the machine.
Contact your service partner for instructions!
ATTENTION! If the above solutions do not resolve your problem please contact your
dealer or distributor.

15

16
Manufactured in the UK to the highest quality standard by:
Leyland Business Park,
Centurion Way, Farington
Leyland Preston PR25 3GR
Tel: 0044 (0) 1772 431906
Fax: 0044 (0) 1772 431902
E-mail: [email protected]
Other Matrix Cleaning Systems Cleaning Equipment manuals
Popular Cleaning Equipment manuals by other brands

Streamline
Streamline Filterplus MOBI SK instruction manual

GreenWorks
GreenWorks SSF405 Operator's manual

Auto Care Products
Auto Care Products Park Smart Clean Park quick start guide

RIDGID
RIDGID K-750R 5/8 Instructions for installing

Kärcher
Kärcher Puzzi 10/2 ADV manual

SCANMASKIN
SCANMASKIN Stripper 250 World Series instruction manual

Sumake
Sumake Air Twister SA-4011 instruction manual

EINHELL
EINHELL 34.140.25 Original operating instructions

Aztec
Aztec S2H-200 owner's manual

Kinetronics
Kinetronics KSE-250 operating instructions

Safran
Safran ULV 650 AKROBAT Technical Specifications and Instructions

Streetwize
Streetwize Blaster Brush SWCWB5 manual