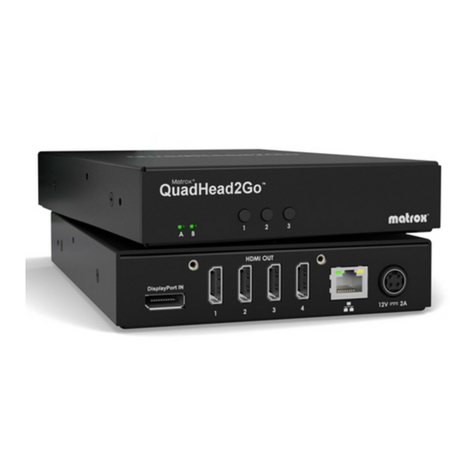
Matrox QuadHead2Go Q185 User manual

User Guide
20278-301-0110
February 27, 2020
Matrox
®
QuadHead2Go
™
Series
QuadHead2Go Q185 •QuadHead2Go Q155

2 Matrox QuadHead2Go Series – User Guide
Contents
Matrox safety information ...................................................................................... 5
Installation and operation .......................................................................................................................5
If a power supply (internal or external) was included with your product ............................................5
If your product includes laser-based technology ...................................................................................6
If your product includes a battery ...........................................................................................................6
Repair ....................................................................................................................................................... 6
Overview ................................................................................................................. 7
Hardware supplied ................................................................................................................................... 7
Software available .................................................................................................................................... 7
Hardware required (sold separately) ...................................................................................................... 7
Optional hardware (sold separately) ......................................................................................................7
Installation overview ...............................................................................................................................8
More information .................................................................................................................................... 8
Getting started ........................................................................................................ 9
Configuration guide ................................................................................................................................9
Before you begin ......................................................................................................................................9
Installing your QuadHead2Go card ..................................................................... 10
Before you begin .................................................................................................................................... 10
Preventing damage to your hardware ....................................................................................10
Step-by-step installation ........................................................................................................................10
Installing multiple cards ........................................................................................................................11
Connecting your QuadHead2Go Q185 card ....................................................... 12
Before you begin .................................................................................................................................... 12
Connection overview ............................................................................................................................. 12
Description of supported connectors ................................................................................................... 13
Step-by-step connection setup ..............................................................................................................13
Connecting your QuadHead2Go Q155 card ....................................................... 15
Before you begin .................................................................................................................................... 15
Connection overview ............................................................................................................................. 15
Description of supported connectors ................................................................................................... 16
Step-by-step connection setup ..............................................................................................................16

Matrox QuadHead2Go Series – User Guide 3
Connecting your QuadHead2Go Q185 unit ......................................................... 18
Before you begin .................................................................................................................................... 18
Connection overview ............................................................................................................................. 18
QuadHead2Go Q185 – Back ..................................................................................................18
Description of connectors .....................................................................................................................19
Step-by-step connection setup ..............................................................................................................19
Connecting your QuadHead2Go Q155 unit ......................................................... 22
Before you begin .................................................................................................................................... 22
Connection overview ............................................................................................................................. 22
QuadHead2Go Q155 – Back ..................................................................................................22
Description of connectors .....................................................................................................................23
Step-by-step connection setup ..............................................................................................................23
Validating your QuadHead2Go setup .................................................................. 25
Connection checklist ............................................................................................................................. 25
Description of status LEDs ....................................................................................................................25
QuadHead2Go unit ................................................................................................................25
Network connector .................................................................................................................26
Validating network discovery ................................................................................................................ 26
Multiple subnet support .........................................................................................................26
Updating your Matrox QuadHead2Go firmware ................................................. 27
Supported operating systems ................................................................................................................27
Obtaining the Matrox QuadHead2Go firmware updater package .....................................................27
Before you update your firmware ......................................................................................................... 27
Step-by-step instructions ......................................................................................................................28
Matrox PowerWall software ................................................................................. 30
Before you begin .................................................................................................................................... 30
Obtaining Matrox PowerWall software ................................................................................................30
Installing your software .........................................................................................................................30
Accessing Matrox PowerWall software .................................................................................................30
Running Matrox PowerWall .................................................................................................................. 31
More information .................................................................................................................................. 31
Using control buttons on your QuadHead2Go device ........................................ 32
Product information .............................................................................................. 34
Specifications .........................................................................................................................................34
QuadHead2Go Q185 card ......................................................................................................34

4 Matrox QuadHead2Go Series – User Guide
QuadHead2Go Q155 card ......................................................................................................35
QuadHead2Go Q185 unit ......................................................................................................36
QuadHead2Go Q155 unit ......................................................................................................37
External power supply ...........................................................................................................................38
Environmental .......................................................................................................................................38
Appendix A – Matrox secure cable solution ........................................................ 39
QuadHead2Go card ............................................................................................................................... 39
Mini DisplayPort™ .................................................................................................................39
Mini HDMI® ...........................................................................................................................40
QuadHead2Go unit ............................................................................................................................... 41
Appendix B – Mounting your Matrox unit ............................................................ 43
Mounting guidelines ..............................................................................................................................43
Mounting your QuadHead2Go unit .....................................................................................................44
Mounting your units horizontally .........................................................................................44
Mounting your units vertically ...............................................................................................44
Using your angled bracket kit ...............................................................................................................45
Mounting to a 75 or 100 mm mounting space ......................................................................45
Mounting to a 200 mm mounting space ...............................................................................45
Customer support ................................................................................................. 46
Matrox web ............................................................................................................................................ 46
Technical support .................................................................................................................................. 46
Information we need ..............................................................................................................46
Program specific problems .....................................................................................................47
Software package download ..................................................................................................................47
View your warranty information ..........................................................................................................47
View the third party software notices ...................................................................................................47
Register your Matrox product ...............................................................................................................47

Matrox QuadHead2Go Series – User Guide 5
Matrox safety information
To ensure safe and reliable operation of your Matrox product, to avoid personal injury, and
to prevent damage to your computer or Matrox hardware, read the following guidelines.
Installation and operation
Read and retain all instructions. Only use your Matrox product according to the
instructions, operating ranges, and guidelines provided in the Matrox user guide and
other related Matrox documentation. Failure to follow these instructions could result in
damage to your product or injury to the user or installer.
Don’t expose your Matrox product to rain, water, condensation, or moisture.
Your Matrox product (card or unit) can become hot while operating. Always
turn off your computer, unplug it, then wait for it to cool before touching any
of the internal parts of your computer or installing your Matrox card. Allow
hot surfaces to cool before touching your Matrox unit.
Static electricity can severely damage electronic parts. Before touching any electronic
parts, drain static electricity from your body (for example, by touching the metal frame
of your computer).
When handling a card, carefully hold it by its edges and avoid touching its circuitry.
Don’t stack devices or place devices so close together that they’re subject to recirculated
or preheated air.
Don’t operate your system or Matrox product near a heat source or restrict airflow to
your system, and make sure the ambient temperature doesn’t exceed the maximum
recommended temperatures. Don’t block ventilation holes on your unit or system.
If a power supply (internal or external) was included with your
product
Don’t place the external power supply directly on top of the device.
Only use power supplies originally supplied with the product or use a replacement that’s
approved by Matrox. Don’t use the power supply if it appears to be defective or has a
damaged chassis.

6 Matrox QuadHead2Go Series – User Guide
Don’t defeat the safety purpose of the polarized or grounding-type plug. A polarized
plug has two blades with one wider than the other. A grounding-type plug has two blades
and a third grounding prong. The wide blade or the third prong are provided for your
safety. If the provided plug doesn’t fit into your outlet, consult an electrician to replace
the obsolete outlet.
Make sure that nothing rests on the power cables and that the cables aren’t located where
they can be stepped on, pinched, or tripped over.
Don’t use damaged power cables.
Unplug your system or device during lightning storms or if unused for long periods of
time.
If your product includes laser-based technology
The device contains a Class 1 laser product for use only under the recommended
operating conditions and guidelines. For more information, see your Matrox user guide.
Invisible laser radiation may be emitted from disconnected fibers or connectors. Don’t
stare into beams or view directly with optical instruments.
Only use optical transceivers originally supplied with the product or use a replacement
that’s approved by Matrox.
For more information on laser support and compliance, see your Matrox user guide.
If your product includes a battery
The battery is non replaceable.
To dispose of your product, see www.matrox.com/environment/weee.
Repair
Don’t attempt to open or repair a power supply unit (if one was supplied).
Don’t attempt to open or repair your Matrox product.
If there’s a fault with your Matrox product, review your Matrox warranty for more
information.

Matrox QuadHead2Go Series – User Guide 7
Overview
Thank you for purchasing a Matrox QuadHead2Go Series product. Matrox QuadHead2Go products
are multi-monitor controllers capable of driving a single video source on up to four displays. These
controllers available as standalone appliances and PCI Express
®
cards provide complete video wall
scalability and flexibility to power video walls of any type and size.
Hardware supplied*
Depending on your QuadHead2Go Series product, the following hardware is supplied:
QuadHead2Go Q185 card – PCIe
®
card.
QuadHead2Go Q155 card – PCIe
®
card.
QuadHead2Go Q185 unit
– Device, 1 power supply.
QuadHead2Go Q155 unit
– Device, 1 power supply.
Software available
Matrox QuadHead2Go Firmware Updater
Matrox PowerWall
Matrox QuadHead2Go REST API
Hardware required (sold separately)
DisplayPort cable or active adapter (for your monitor type)
†
Network cable (CAT 5, 5e, 6, or 7)
Certified HDMI® cables
‡
Optional hardware (sold separately)
Matrox secure cable solutions
Matrox rack mount kit
* The hardware supplied with your Matrox product may vary depending on the SKU or part number of your product. For more
information, contact your Matrox representative.
† Only active adapters (sold separately) are supported. Passive adapters aren’t supported.
‡ Make sure your HDMI cables and adapters can support your maximum resolution.

8 Matrox QuadHead2Go Series – User Guide
Matrox angled brackets
To purchase optional hardware, contact your Matrox representative.
Installation overview
To install your Matrox product:
1
Install your QuadHead2Go card
–
see “Installing your QuadHead2Go card”, page 10.
2
Connect your product
–
See “Connecting your QuadHead2Go Q185 card” on page 12.
See “Connecting your QuadHead2Go Q155 card” on page 15.
See “Connecting your QuadHead2Go Q185 unit” on page 18.
See “Connecting your QuadHead2Go Q155 unit” on page 22.
3
Validate your setup
–
see “Validating your QuadHead2Go setup”, page 25.
4
Install the software
–
see “Matrox PowerWall software”, page 30. For more information
on PowerWall software, see the help file included with your PowerWall software.
More information
Your Matrox user guide provides information on installing and connecting your Matrox hardware.
For information on other Matrox software features and options, see the documentation for that
software.
For information on how to use and configure Matrox PowerWall software, see the PowerWall help file.
Be sure to check for any last-minute release notes included with your product. Also, check the Matrox
web site (www.matrox.com/graphics) for the latest Matrox software, technical support, and product
information.

Matrox QuadHead2Go Series – User Guide 9
Getting started
Your QuadHead2Go product has one (1) input connector (DisplayPort, Mini DisplayPort, HDMI, or
Mini HDMI) and four (4) HDMI or Mini HDMI output connectors to allow you to receive a signal
of up to 8K by 8K and output on up to four (4) HD HDMI monitors.
Configuration guide
For information on the possible display wall setups, see the Matrox QuadHead2Go Configuration
Guide (www.matrox.com/quadhead2go/support).
Before you begin
We recommend you have the following:
DHCP (Dynamic Host Configuration Protocol) server
DNS (Domain Name System) server

10 Matrox QuadHead2Go Series – User Guide
Installing your QuadHead2Go card
This section describes how to install your Matrox card. If your Matrox card is already installed in your
system, skip to “Connecting your QuadHead2Go Q185 card”, page 12 or “Connecting your
QuadHead2Go Q155 card”, page 15. For information specific to your system, like how to remove its
cover, see your system manual.
Before you begin
To avoid personal injury and to prevent damage to your system or Matrox hardware, read the
following guidelines before installing and connecting your Matrox hardware.
Preventing damage to your hardware
While your system is turned off but still plugged in, some electrical current is supplied
to the motherboard. This current may prevent newly installed hardware from working
properly. Always try to insert or remove your card as straight as possible.
Whenever you change your connection setup, make sure you’re using the correct
connectors and that all connectors are properly fastened.
When connecting devices, make sure the connectors are properly fastened.
Review the safety information provided. For more information, see “Matrox safety
information”, page 5.
Step-by-step installation
1Choose an expansion slot
Most systems have different types of
expansion slots. Choose a PCI Express®
(PCIe®) slot. Your system manual should
identify the location of each type of
expansion slot in your system.
(Back of system)
(×16)
(×8)
PCI
slots PCI Express
slots
(×4)
(×1)

Matrox QuadHead2Go Series – User Guide 11
2Insert your Matrox card
a
Position your Matrox card over the
expansion slot you’ve chosen.
b
Push the card in firmly and evenly until
it’s fully seated in the slot.
c
Secure the bracket of your Matrox card
to the frame of your system.
Your Matrox card is now installed. If you’re installing more than one card, see “Installing multiple
cards”, page 11.
Before restarting your system
, connect your devices (see “Connecting your
QuadHead2Go Q185 card”, page 12 or “Connecting your QuadHead2Go Q155 card”, page 15).
After
connecting
, restart your system and install your Matrox software.
Installing multiple cards
Your system may support the installation of multiple QuadHead2Go cards in your system.
WARNING:
To avoid damaging your
cards, always insert your card as straight as
possible into the slot. Don’t rock the card
from side to side. If you meet resistance,
don’t force the card into the slot.

Matrox QuadHead2Go Series – User Guide 12
Connecting your QuadHead2Go Q185
card
This section describes how to connect your Matrox QuadHead2Go Q185 card.
Before you begin
To avoid possible problems that could damage your monitors or prevent you from using your Matrox
product, read the following guidelines before connecting your devices.
Whenever you change your connection setup, make sure you’re using the correct
connectors and that all connectors are properly fastened.
Review the safety information provided. For more information, see “Matrox safety
information”, page 5.
Connection overview
LAN
(Network)
Mini HDMI OUT
(Monitors)
Mini DisplayPort IN
(Audio/video source)

Matrox QuadHead2Go Series – User Guide 13
Description of supported connectors
Step-by-step connection setup
This section guides you through the step-by-step connection setup of your QuadHead2Go card. For
more information on connectors, see “Description of supported connectors”, page 13.
1Connect your DisplayPort source
Connect your DisplayPort source to the mini
DisplayPort connector on your
QuadHead2Go card.
2Connect your digital monitors
Connect your monitors to the mini HDMI
connectors on your QuadHead2Go card.
Connector Description
Mini DisplayPort IN Connect your mini DisplayPort cable to your Matrox card. Connect the
other end of the cable to your audio/video source.
Mini HDMI OUT Connect a digital monitor to this connector.
LAN Connect a network cable to this connector.
Note:
To connect to the bracket of your Matrox product, the overmold (or boot) of the
mini HDMI connectors must respect the maximum width (0.551 inches/14 mm) and
thickness (0.331 inches/8.4 mm) stated in the HDMI specifications.
For the mini HDMI connectors, we recommend you use certified HDMI cables that
support your maximum resolution.

15 Matrox QuadHead2Go Series – User Guide
Connecting your QuadHead2Go Q155
card
This section describes how to connect your Matrox QuadHead2Go Q155 card.
Before you begin
To avoid possible problems that could damage your monitors or prevent you from using your Matrox
product, read the following guidelines before connecting your devices.
Whenever you change your connection setup, make sure you’re using the correct
connectors and that all connectors are properly fastened.
Review the safety information provided. For more information, see “Matrox safety
information”, page 5.
Connection overview
2
1
3
4
1234
LAN
(Network)
Mini HDMI OUT
(Monitors)
Mini HDMI IN
(Audio/video source)

Matrox QuadHead2Go Series – User Guide 16
Description of supported connectors
Step-by-step connection setup
This section guides you through the step-by-step connection setup of your QuadHead2Go card. For
more information on connectors, see “Description of supported connectors”, page 16.
1Connect your HDMI source
Connect your HDMI source to the mini
HDMI connector on your QuadHead2Go
card.
2Connect your digital monitors
Connect your monitors to the mini HDMI
connectors on your QuadHead2Go card.
Connector Description
Mini HDMI IN Connect your mini HDMI cable to your Matrox card. Connect the other
end of the cable to your audio/video source.
Mini HDMI OUT Connect a digital monitor to this connector.
LAN Connect a network cable to this connector.
Note:
To connect to the bracket of your Matrox product, the overmold (or boot) of the
mini HDMI connectors must respect the maximum width (0.551 inches/14 mm) and
thickness (0.331 inches/8.4 mm) stated in the HDMI specifications.
For the mini HDMI connectors, we recommend you use certified HDMI cables that
support your maximum resolution.
2
1
3
4
2
1
3
4
123 4

Matrox QuadHead2Go Series – User Guide 18
Connecting your QuadHead2Go Q185
unit
This section describes how to connect your Matrox QuadHead2Go Q185 unit.
Before you begin
To avoid possible problems that could damage your monitors or prevent you from using your Matrox
product, read the following guidelines before connecting your devices.
Whenever you change your connection setup, make sure you’re using the correct
connectors and that all connectors are properly fastened.
Review the safety information provided. For more information, see “Matrox safety
information”, page 5.
Connection overview
QuadHead2Go Q185 – Back
DisplayPort IN
(Audio/video
source)
HDMI OUT
(Monitors)
LAN
(Network)
12V DC power

19 Matrox QuadHead2Go Series – User Guide
Description of connectors
Step-by-step connection setup
This section guides you through the step-by-step connection setup of your QuadHead2Go unit. For
more information on connectors, see “Description of connectors”, page 19.
1Connect your DisplayPort source
Connect your DisplayPort source to the
DisplayPort IN
connector on your
QuadHead2Go unit.
Connector Description
12V DC power Connect the 12V DC power supply included with your product to this
connector. While the power supply is connected to the device and
electrical socket, the power LED ( ) is active (not black). For more
information on LEDs, see “Description of status LEDs”, page 25.
DisplayPort IN Connect your DisplayPort cable to your Matrox unit. Connect the other
end of the cable to your audio/video source.
HDMI OUT Connect a digital monitor to this connector.
LAN Connect a network cable to this connector.
Note:
To connect your monitors, the overmold (or boot) of the HDMI connectors must
respect the maximum width (0.823 inches/20.9 mm) and thickness (0.452 inches/11.5
mm) stated in the HDMI specifications.
For the HDMI connectors, we recommend you use certified HDMI cables that support
your maximum resolution.

Matrox QuadHead2Go Series – User Guide 20
2Connect your digital monitors
Connect your monitors to the
HDMI OUT
connectors on your QuadHead2Go unit.
3Connect to your network
Connect a network cable to the
LAN
()
connector on your QuadHead2Go unit.
4Connect your power supply
Connect the 12V power supply included with
your product to the
12V
connector on the
QuadHead2Go unit.
While the power supply is connected to the
unit and electrical socket, the power LED
()
is active (not black).
WARNING:
To avoid damaging the
DisplayPort connector on your DisplayPort
monitor cable or on your Matrox product,
carefully remove the DisplayPort cable by
pressing the latch on the top of the DisplayPort
connector while removing the connector.
This manual suits for next models
4
Table of contents
Other Matrox Controllers manuals
Popular Controllers manuals by other brands

Emerson
Emerson FD113 instruction sheet

Monte Carlo Fan Company
Monte Carlo Fan Company ESSWC-3-WH/AL-ENG Installation & operating instructions and washing guidance

Osram
Osram DALIeco Installation and operation

Raypak
Raypak 240692 Installation and operating instructions

Boca Systems
Boca Systems Complete IDE Series manual

CBS ArcSafe
CBS ArcSafe RSA-138A Installation and operation