Matsui MATCR515D User manual

MATCR515D DigitalDAB&FMRadio
1
Safety Warnings
Pleasenote: Because DAB digital radiois a developing technology, station
availabilitycanchange without notice. As new multiplexes and transmitters
are turned on, newstationswillbegin transmittingandnew postcodes will be
able to receive DAB digitalradio. Conversely, someDABradiostationsmay
disappearwithout notice.
Covers - Do not remove any fixed covers as this mayexpose dangerous
voltages.
Weather - Itis advisable to unplug an external aerial duringa thunderstorm.
Ventilation - The ventilation holes onthe casingpreventyourproduct from
over heating. Do not blockor cover theseholes, especiallywith clothor paper.
Itis recommended youleave a 10cm gap all around theunit.
Damage - Never usethe product if it is damaged in any way. Always place the
unitonaflat levelsurface avoiding anywhere whichmay be subject to strong
vibration.
Temperature - Avoid extremesof temperature, either hot or cold, place your
productwellaway fromheat sources suchas radiators or gas/electric fires.
Dontuse thisunit in tropical climates.
Moisture - Do not allow your product to be exposed to rain, moisture ordust.
Ifanyliquidis spilt into this product it cancause serious damage. If you spill
anyliquid switchtheunit off at the mainsimmediately.Contact your store
immediately.
Naked Flames- Naked flames suchascandles andnight lights should not be
placed on ornear the unit.
Accessibility - ensure that any mains plugiseasily accessible.
Protect Fine Furniture - Use protective materialundertheunitwhenplacing
itona surface witha natural or lacquer finish.

2
Table ofContents
LocationofControls.................................................3
GettingStarted........................................................4
Restoring theFactorySettings..................................4
Listening toDAB Radio............................................5
Secondaryservices..............................................5
Listening toFMRadio..............................................6
Storing and RecallingPresetStations.......................6
StoringPresetStations.........................................6
SelectingPresetStations......................................6
SettingtheClock.....................................................7
Using the AlarmFunction.........................................8
Setting anAlarm..................................................8
When theAlarmTurnsOn....................................9
Deactivating andReactivating anAlarm.................9
Changing theSnoozeTime.................................10
UsingtheSleepFunction....................................10
Specifications........................................................11
3
LocationofControls

4
Getting Started
1. Connect the ACadapter tothe mainssupply andthenconnect
the adapter plug to the DC connector.
2. Carefully extend the antenna wire.
3. Press the STANDBY button to switch on yourradio.
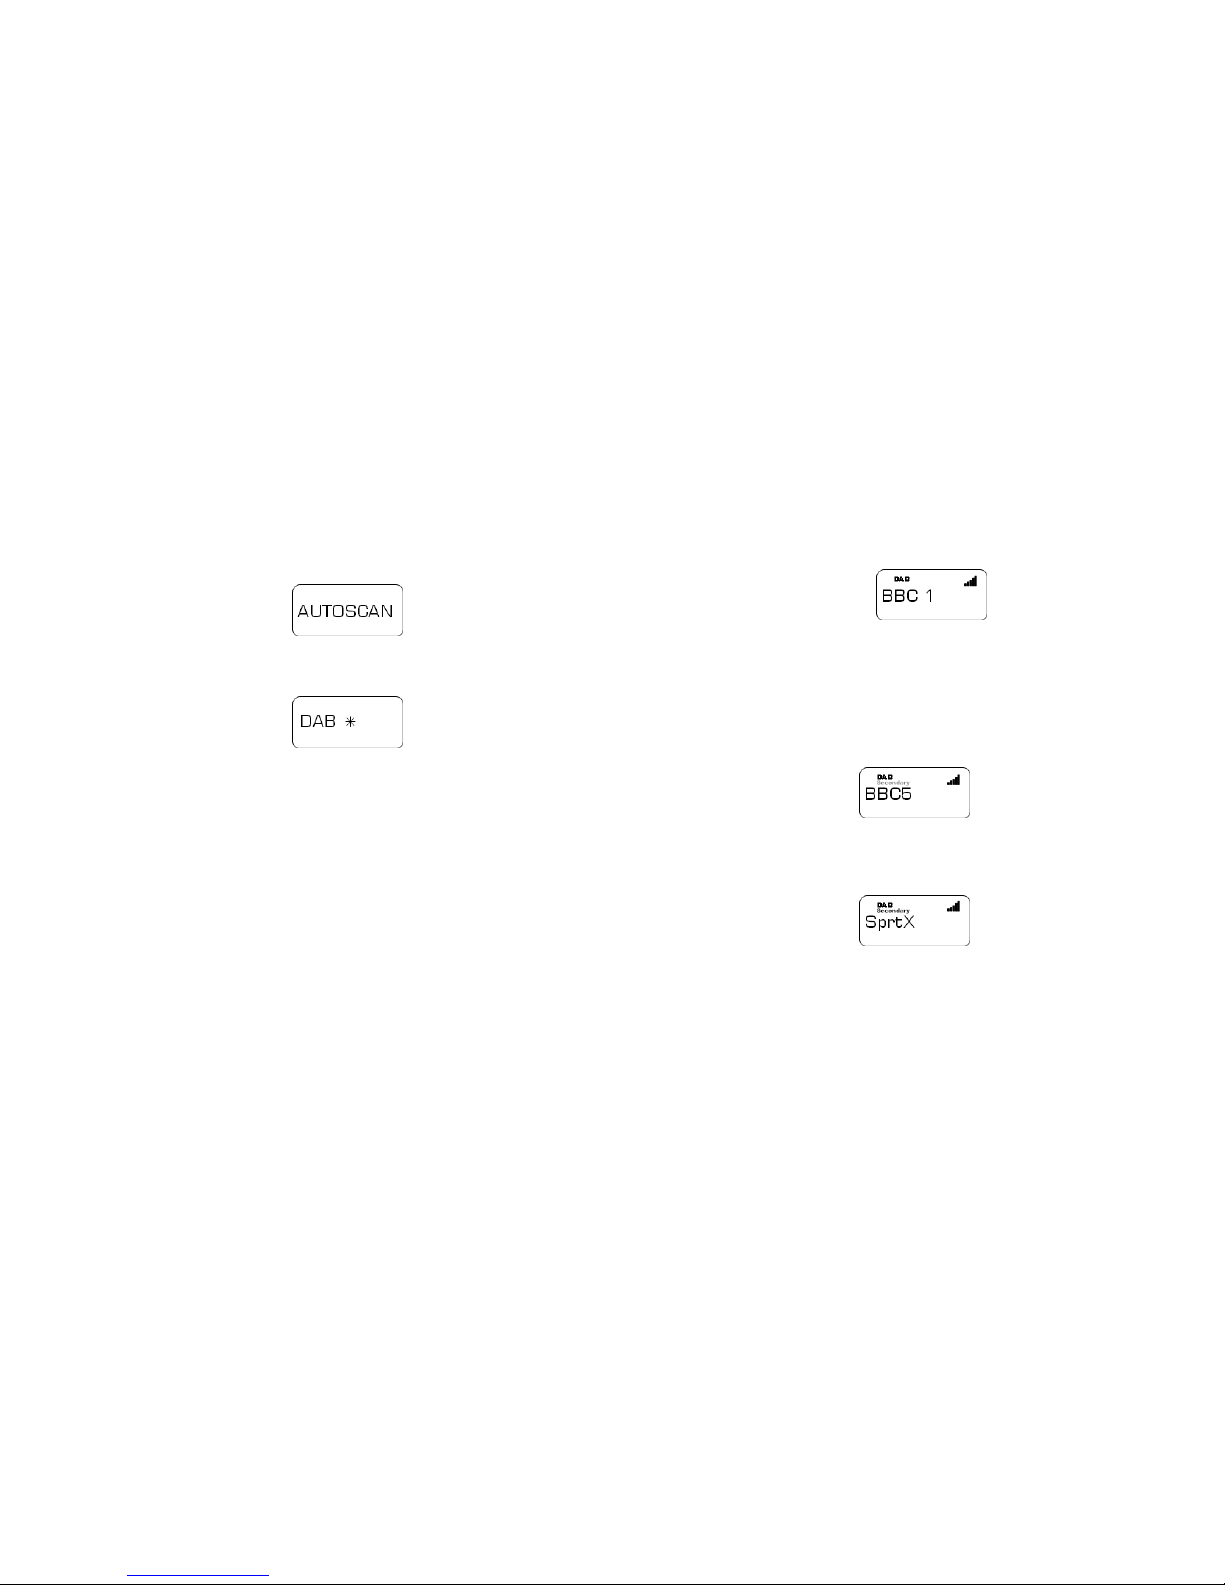
The radio willperformaquickscanof UK Band III DAB
channels. The display will show "AUTOSCAN".
The radiothenstarts scanningfor stations and the display
shows “DAB *”.
Whenautoscanfinishes, the unit switches tostandby.
Ifno stationsarefounditmay be necessary to relocateyour
radio to a position givingbetter reception.
4. Press the STANDBY button to switch on yourradio.
5. Press the VOLUME+or VOLUME-buttonsto adjustthevolume
level.
RestoringtheFactory Settings
Ifyou movetheradio toanotherpartofthe country, your pre-tuned
DAB stations may not beavailable. Tomaketheradio autoscan for
newDAB stations,pleasedothefollowing:
1. Press andhold the STANDBY button untilthe display shows
"RESET***", thenreleasetheSTANDBYbutton.
2. Whenthe display shows "RESETOK",pressthe STANDBY
buttonagain. The radio will start scanningforDABstationsas
described in "Getting Started".
5
ListeningtoDAB Radio
1. Press theTUNE+or TUNE-buttonstoscrollthroughthelist of
availablestations. Thedisplayshowsthenameoftheselected
station.
2. Position the antenna wireto givethebest reception, using the
signal strengthdisplay as a guide.
Ifthe selected station isunavailable,thedisplaywill flash “NO
SIGNL”.
Secondaryservices
1. Some DAB radiostations haveone ormore secondaryservices
associated withthem.Ifastationhas asecondary service, the
display willflash"Secondary"for4 seconds eachminute.
2. Tolistenthesecondaryservice,press theTUNE+ button. The
display shows “Secondary”.

6
ListeningtoFMRadio
1. Press the DAB/FMbutton to select the FMband.
2. Press and holdthe TUNE+ or TUNE-button,release when the
radio startstuning.The radio willstopautomaticallywhenit
finds thenext station.
3. To tunetheradiomanually, press the TUNE+ orTUNE- buttons
to change the frequencyin 0.05MHz steps.
Storing and Recalling Preset Stations
Storing PresetStations
Youcanstoreupto5DABand5FMstations asfollows.
1. Select theDABor FMstation that you want tostore inpreset
memory.
2. Press and holdthe PRESET button until displaystarts flashing
the firstpreset number and shows thestation currentlystored in
thepreset (if no station has been stored, the display shows
“EMPTY”).
3. Press the PRESETbutton to scroll throughthe presets(1-5).
4. To store the station, wait a couple of seconds. The station will
be stored in the selected preset and the displaywillshow “P#
SAVED”.
SelectingPresetStations
Torecall apresetstation:
1. Press the DAB/FMbutton to choose the DAB or FMband.
2. Press the PRESETbutton to scroll throughthe storedstations.
7
SettingtheClock
Theclock isnormally set automatically fromthe DAB signal. If the
clockdoes notshowthecorrect time, follow the steps below:
1. Press and hold the ALARM SET(clockset)button untilthetime
display startsflashing.
2. Press the TUNE+(minute)buttontoset theminutes.
3. Press the TUNE-(hour) buttontosetthe hour and AM/PM.
4. Press the ALARM SETbutton againtoset theyear.
5. Press the TUNE+/TUNE-buttonstoselectthecurrentyear.
6. Press the ALARM SETbutton againtoset the month.
7. Press the TUNE+/TUNE-buttonstoselectthecurrent month.
8. Press the ALARM SETbutton againtoset thedate.
9. Press the TUNE+/TUNE-buttonstoselectthecurrentdate.
10. Press theALARM SETbutton to finish.
NOTE: Ifnobutton is pressed,after5 seconds the radio willfinish
clocksettingautomatically.
Toview thetimewhentheradiois on,press the DISPLAY button.

8
UsingtheAlarm Function
Yourradioprovides3independentalarms. Eachalarmcaneither
sounda buzzerorplay apreset DAB/FMradio station. You must
store thepresetstationsbefore settingthe alarm.
SettinganAlarm
1. Press theALARM SETbutton to scroll through the 3alarms.
The display shows the status of each alarm.
2. Whenthe alarmyou want isdisplayed,press the TUNE+ button
to set the minute. Press the TUNE- buttonto set the hour and
AM/PM.
3. Press the DISPLAY button to set the days when the alarm is
active: every day, weekdays only, weekendsonly, Mon, Tue,
Wed, Thu, Fri, Sat, Sun.
9
4. Press the PRESETbutton to choose the alarm type(buzzeror
radio).
5. Ifyou choose the radio, press DAB/FM to switch between DAB
and FM radio, then press PRESETto scrollthroughthepreset
stations. If there are no preset stations, thedisplayshows
"EMPTY".
6. Press the VOLUME+ and VOLUME- buttonstosetthealarm
volume.
7. Wait 5 seconds. The radio then saves the alarmsettings.The
display shows the alarmicon .
WhentheAlarm TurnsOn
1. Press theALARM SETbutton to turn off the alarm
2. Press the SNOOZE button to pause the alarm for 9 minutes
Deactivating and Reactivating anAlarm
1. Press theALARM SETbutton to scroll through the alarms.
2. Whenthe alarmyou want isdisplayed:
•Press the SLEEP buttonto deactivate the alarm. The display
shows "OFF".
•Press the SNOOZE button to reactivate thealarm. Thedisplay
shows the original alarm settings.

10
ChangingtheSnoozeTime
1. Switchtheradiotostandby.
2. Press andholdtheSNOOZEbuttonuntil thedisplayshows
"ADJUST".Thedisplaythenshows"SNOOZE"followedby
"SNZ-#"where "#"isthecurrentsnooze timeinminutes.
3. Press theTUNE+/TUNE-buttonstochangethesnooze time.
4. Whenthedisplayshowsthetimeyouwant,waitafewseconds.
Thedisplayshows"SAVED"andthentheradioswitches to
standby.
UsingtheSleepFunction
Toturnofftheradioafterasetnumber of minutes, press theSLEEP
buttontoscrollthroughthe options: 5,15, 30,45, or60 minutes.
Toturnoffthesleepfunction,press the SLEEP button until the
display shows "SLEEP --".
11
Specifications
•Power Requirements
•ACAdapter230V ~50Hz
•DC Input6V,700mA
•Frequency Coverage
•FM87.5-108MHz
•DAB174.928-239.200MHz
•Speaker outputpower 0.6W(10%THD)

12
VisitPartmaster.co.uktodayforthe easiest way tobuyelectrical
spares andaccessories.
Withover 1 million spares andaccessoriesinstockwecan deliver
direct to your door the verynext day.
Visit www.partmaster.co.uk
orcall
08706001338
(UK customers only)
Calls chargedatNationalRate.
This symbolon the product orin the instructionsmeans thatyour
electrical and electronic equipment shouldbe disposedatthe endof
its life separately fromyour household waste. Thereare separate
collectionsystems forrecycling inthe EU.
For moreinformation, please contact the localauthority or your
retailer where you purchased the product.
Table of contents
Other Matsui Radio manuals