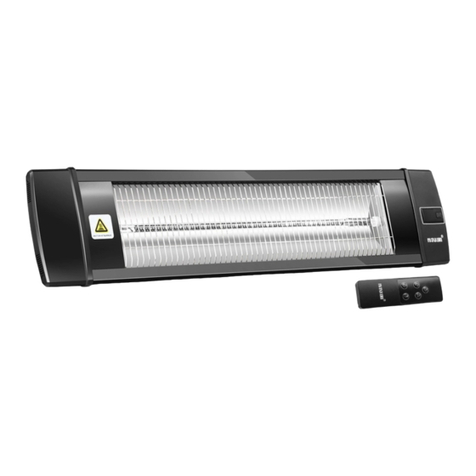
Maxkon STAR 2000 Manual

STAR 2000 & STAR 2500
Ceiling or Wall-mounted Infrared Heaters
INSTALLATION & OPERATING INSTRUCTIONS
TECHNICAL INFORMATION:
Rated Power:
Voltage:
2000W 2500W 3000W
220-240V
Heating Element:
Ultra long life Carbon heating lamp (10,000 hours)
Reflector:
Mirror Aluminium (98% reflection preventing rearward heat loss)
Dimensions:
900 x 130 x 90 mm
Remote control (2600R
only):
4 power levels (25% power increments) & 24 hour time (24x1 hour
increments)
Warm-up time:
5-10 seconds
Useful wavelength range:
2 - 5μm
Weight:
2.9 kg
Warranty:
1 Years (excludes lamp & remote control)
Protection:
IP55
Waste electrical products should not be disposed of with household waste. Please recycle where
facilities exist.
The product complies with Safety Standards EN60335-2-30, RoHS and EMC EN 50336 and EN 62233. These cover the
essential requirements of EEC Directives 2006/42/EC, 2011/65/EC and 2004/108/EC.

IMPORTANT SAFETYPRECAUTIONS
READ THESE INSTRUCTIONS CAREFULLY AND RETAIN FOR FUTURE REFERENCE.
Failure to observe these instructions will invalidate the
warranty.
This unit may be a source of possible shock.
Disassemble only to replace lamp. No user-serviceable
parts inside.
Source of possible ignition.
WARNING
TO REDUCE THE RISK OF FIRE, ELECTRIC SHOCK OR INJURY:
1.
Fragile Glass Lamp. Use care when unpacking, handling and installing .
2.
This appliance must be disconnected from its power source during installation or service activities and when
replacing.
3.
DO NOT use this heater below an installation height of 2.4m with a programmer, timer or any other device
that switches the heater on automatically.
4.
When mounted on a stand (available separately) DO NOT use this heater in the immediate surroundings of a
bath, shower
or swimming pool.
5.
In order to avoid overheating and potential fire hazard, DO NOT cover the heater. DO NOT cover the heater with
insulating
material or a similar material under any circumstances.
6.
DO NOT install the heater pointing directly downwards and maintain at least 500mm from ceiling or other
objects.
7.
DO NOT touch the heater when in use. The heater rises to very high temperatures in use. After the heater has
been switched off let the heater completely cool down before touching it.
8.
DO NOT use the heater if the power cord is damaged. This must be replaced by the manufacturer, its
service agent or similarly qualified persons in order to avoid a hazard.
9.
DO NOT use the heater to ignite materials.
10.
This heater must only be used for the heating of people outdoors or indoors in an unenclosed space. The
STAR is not to be used by children or persons with reduced physical, sensory or mental capabilities, or lack of
experience or knowledge, regardless of whether they have been given instruction or are under supervision.
Children should be kept away and should
not be left unsupervised around the unit.
11.
All operators shall only switch on/off the appliance provided that it has been placed or installed in its
intended normal operating position and they have been given supervision or instruction concerning use of
the appliance in a safe way and
understand the hazards involved. Children shall not plug in, switch on or
regulate the appliance or perform user maintenance
including cleaning.
12.
IMPORTANT: Ensure supply voltage does not exceed 245 volts.
13.
The appliance is not to be used by persons (including children) with reduced physical, sensory or
mental capabilities, or lack of experience and knowledge, unless they have been given supervision or
instruction .
14.
children being supervised not to play with the appliance
15.
Statement: heater is not located immediately below a socket-outlet
16.
The heater must not be used if the glass (or ceramic or similar material) panels are damaged
17.
WARNING: This heater is not equipped with a device to control the room temperature. Do not use this
heater in small rooms when they are occupied by persons not capable of leaving the room on their
own, unless constant supervision is provided.

SAVE THESE INSTRUCTIONS.
WATER INGRESS PROTECTION:
STAR is rated to a standard IP55 enabling it to be mounted outdoors and exposed to occasional rainfall. To prolong
the life of the heater we recommend installing it where it will be sheltered from the effects of weather. The
heater is not intended for installation in locations that are permanently wet or humid.
Installation in potentially wet or humid rooms such as bathrooms must be carried out by a suitably qualified
installer and comply with local electrical safety requirements. Installation must be such that:
the heater must not be able to become detached from the fittings and fall into a bathtub, shower,
swimming pool or other water container;
Switches and other controls cannot be touched by a person in a bath or shower.
If in doubt, do not install. AUSWAY PACIFIC PTY LTD shall not be liable for any loss, damage or injury caused
or resulting from inadequate fitting or incorrect placement of heaters close to water sources.
ELECTRICAL INFORMATION:
Installation must only be carried out by competent persons or a qualified electrician according to national
regulations.
Table 1. Electrical Specification
Model
Rated Power
Voltage
Current
Frequency
Fuse (Minimum)
STAR 2000
2000W
220-
240V
8.7A
50/60Hz
13A
STAR 2500
2500W
220-
240V
10.9A
50/60Hz
13A
STAR 3000
3000W
220-
240V
13A
50/60Hz
13A

MOUNTING POSITION:
Diagram 1: STAR heated area and applications
Heating area 18m²-21m²
Mediumwave Infrared
heat is characterised by a
strong
central beam that
dissipates to
a gentler
intensity heated area
outside the central beam.
The zone heated by STAR
will
increase in size the higher
the heater is installed from
the floor, but the warmth
experienced from the
heater will be lower.
The mounting height and
intensity should reflect
the intended use of the
heater.
Mount the heater at a
lower
height in areas
intended for low physical
activity (for example a
seating area) or areas
subject to stronger airflow
(outside or near open
doors).
Mount STAR higher where
less intense warmth is
needed (for example
warehouses where workers
are
active or wear warm
clothing).
For permanent installation
(i.e. not using a stand), the
STAR
must be located in
a
position to allow proper
and efficient use but one
that ensures hot parts are
not touched accidental
The recommended installation height of the STAR is 2.4m to 3.5m (95”-138”) from the floor.
IMPORTANT: DO not mount STAR below 2.4m if any kind of automated on/off controller is to be used
Under no circumstances is the STAR to be installed at less than 1.8m (71”) from the floor. Consideration should be
given to any temporary or occasional additions such as stages or platforms and adjusted accordingly. For outdoor
use, or other areas with
air movement/wind the directional Infrared spread may reduce by 1/3 to 1/2.
Wall/ceiling mount swivel brackets are provided with the heater which has been specifically designed to allow this
product to be
fitted to a wall or ceiling with adequate clearances at the back of the unit. Do not mount the heater
with any other bracket except those provided. The sides and ends of the heater must always be at least 500mm
(19.6”) away from the nearest wall, ceiling or other structure.

INSTALLATION:
Diagram 2: Correct Wall
/
Ceiling Position

IMPORTANT: Correct install position
CAUTION:
Ensure mains power is OFF before commencing installation.
The supplied mains cable must not contact the top surface of the heater during operation.
Heater must not be located immediately below a socket outlet. Electrical connections must be made outside
of the footprint
of the unit to avoid heat build-up. If the heater is to be mounted on an incline (e.g.
sloping roof), ensure the electrical connection is located below the lowest end of the heater.
Joists, beams and rafters shall not be cut or notched to install the appliance.
This heater is not intended for ceiling-recessed installation. Do not install pointing directly downwards.
The identification mark and model reference should be visible after installation.
The STAR must not be attached facing or close to any combustible material (eg, wood or PVC cladding, fascia
or soffit)
or other materials that could blow onto the heater.
The fixed wiring insulation coming into contact with parts with a temperature rise of greater than 50°C must
be protected, for example, by sleeving having an appropriate temperature rating.
Exercise caution when siting the heater stand that the heater cannot accidentally be touched, knocked-over
or that the wire
causes a tripping hazard.
Never place the stand and heater next to a swimming pool, pond or other water source.
INITIAL USE:
The unit may emit odour or vapour on initial use or if heater has not been used for an extended period.
This is norma

OPERATION BY REMOTE CONTROLLER:
The STAR is operated from the remote control supplied with the heater.
Insert 2 x AAA Alkaline batteries into the
remote control.
1.
P
OWER BUTTON: Turns heater on or off.
2.
UP BUTTON: Increases the temperature and timer level.
3.
DOWN BUTTON: Decreases temperature and timer level.
4.
LEVEL BUTTON: Use to adjust heat levels (L1-L4). Press the Level button
then use the
up and down buttons (2 and 3) to increase or decrease the
heating level.
5.
TIMER BUTTON: Use to set the timer from 00–24(o-24 hours). Adjust using
buttons 2
& 3 to the number of hours you would like to set.
All remote controls have the same frequency, so it is possible to control several heaters with just one
remote.
With working time limitation function: End users can set up the running procedure within a week(7days)
With black bulb sensor: During a certain period of time, the temperature of the sensor will be induced to a
sudden drop in temperature (for example, the temperature will drop by 3 degrees within 1min), and the product
will be turned on automatically.
USER MAINTENANCE:
The heater may be wiped-down with a soft damp cloth. Do not use abrasive detergents to clean the unit. In marine
environments, the unit may be gently sprayed clean with clean water with the POWER TURNED OFF and
completely cool. After cleaning, it is
advisable to warm the heater for 10 –20 minutes to dry the unit and
prevent staining.
The lamp used in the Herschel STAR is Ultra long life (10,000 hours). Changing the lamp should only be carried out
by suitably
qualified personnel using the instructions available on Herschel’s website.
TROUBLESHOOTING:
E1 Error on Display:
Control unit overheat. Check installation clearances.
Let heater cool for 15 minutes and restart heater.
L1,2,3,4 shows in display, but no heat:
Bulb is damaged. Arrange for replacement bulb with local Dealer.
RECYCLING
At the end of the electrical products useful life it should not be disposed of with household waste.
Please recycle where facilities exist. Check with your Local Authority or retailer for recycling advice in your
county
Remote Control Function
Butto
n
Function (Heater On)
Function (Heater
Off)
LED Display on
Heater
1
Turns heater on or off
2
Increase Heat Level or
Timer hours
Turns heater on to
Level 1 (minimum)
L1
3
Decrease Heat Level or
Timer Hours
Turns heater on to
Level 4 (Maximum)
L4
4
Enable Heat Level
adjustment
L [n]
5
Enable Timer
adjustment
00-24
[00]-[24]

This manual suits for next models
2
Table of contents
Other Maxkon Heater manuals
Popular Heater manuals by other brands

Webasto
Webasto Air Top 2000 STC Workshop manual

dreo
dreo DR-HSH002 user manual

Haul-All Equipment
Haul-All Equipment SURE FLAME S100 Service and maintenance manual

ARDES
ARDES AR4U80 Instructions for use

Dickinson
Dickinson NEWPORT EXPLORER Installation & operating instructions

Kermi
Kermi TBV10 Instructions for installation