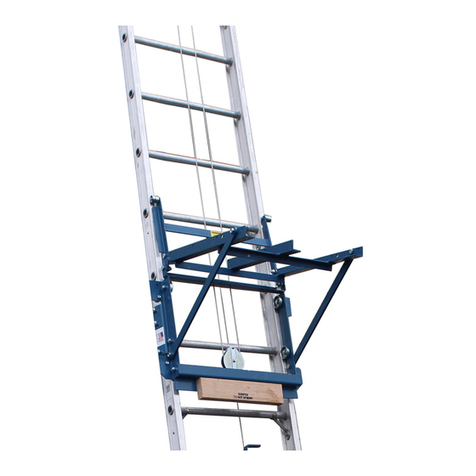
Maxxhaul 70233 User manual

Read and understand this entire manual before assembling,
installing, operating, or servicing this product.
SAVE THIS MANUAL
Copyrightc2016 by MAXXHAUL. All rights reserved. No portion of this manual or any artwork contained
herein may be reproduced in any shape or form without the express written consent of MAXXHAUL. Due
to continuing improvements, actual product may dier slightly from the product described herein. Tools
required for assembly and maintenance may not be included.
Instruction Manual
&
Parts List
Heavy-Duty
Ladder Rack
Model 70233

IMPORTANT SAFETY
INFORMATION
This is a SAFETY ALERT symbol.
It is used to alert you to
potential personal
injury hazards. Obey all
safety messages that follow
this symbol to avoid possible injury or death.
DANGER indicates a
hazardous situation which, if not avoided,
will result in death or injury.
WARNING indicates a
hazardous situation which, if not avoided,
could result in death or serious injury.
CAUTION indicates a
hazardous situation which, if not avoided,
could result in minor or moderate injury.
NOTICE indicates
important information which, if not followed,
may cause damage to equipment.
SAVE THIS MANUAL
Keep this manual for the safety warnings
and precautions. The manual oers impor-
tant information on how to assemble, use
and maintain this product.
Write the product’s model number and
purchase date on the cover page of this
manual.
Keep this manual (and your purchase re-
ceipt) in a safe place.
UNPACKING
The shipment should be thoroughly inspected as
soon as it is received. The signed “bill of lad-
ing” is acknowledgement by the carrier of receipt
in good condition or shipment covered by our
invoice. For your own protection, if any of the
goods called for on the bill of lading are shorted
or damaged, do not accept them until the carrier
makes a notation on the freight bill of the shorted
or damaged goods.
Notify MAXXHAUL immediately if any hidden
loss or damage is discovered after receipt.
DANGER
WARNING
CAUTION
NOTICE
INSTRUCTION
MANUAL
WARNING concerning Risk of Eye
Injury. Wear ANSI approved eye
protection.
WARNING concerning Risk of
Hearing Loss. Wear hearing pro-
tection.
Denition of Symbols
IMPORTANT SAFETY
INSTRUCTIONS
1. Read and understand all
safety warnings and in-
structions. Failure to follow the warnings
and instructions may result in serious injury
or death. Save all warnings and instructions
for future reference.
2. Personal and Work Area Safety
A. Always wear ANSI approved
safety goggles.
B. Always wear hearing protec-
tection when working in
noisy environments. Prolonged exposure
to high intensity noise can cause hearing
loss.
C. Use safety equipment. Safe-
ty shoes, hard hat and work
gloves must be used for applicable condi-
tions.
Model 70233 Page 2
D. Dress appropriately. Never wear loose
tting clothing or jewelry when working.
Contain long hair, and keep hair, clothing
and gloves away from moving parts.
E. Use common sense when working.
Stay alert and concentrate when setting up
and using the Ladder Rack. Never work
while under the inuence of alcohol, drugs or
medications.

Model 70233 Page 3
Personal and Work Area Safety (continued)
F. While assembling and using the Lad-
der Rack keep work area clean and well
lighted. Keep spectators and children
out of the work area.
3. Use of the Ladder Rack
A. Do not modify the Ladder Rack and do
not use this product for purposes that it was
not designed for.
B. This Ladder Rack is designed to carry
ladders, lumber, piping, rebar, sports equip-
ment and other long materials.
C. Never exceed the maximum weight ca-
pacity of 250 Lbs. (this is front and back rack
combined capacity).
D. Be aware of the danger of “dynamic
loading”. This situation arises when a load is
dropped onto the Ladder Rack, resulting in a
short term excessive load. Dynamic loading
can result in damage and failure of the Lad-
der Rack, damage to the truck, and personal
injury to the person loading the Ladder Rack.
E. Never load people or animals onto the
Ladder Rack. Keep children and spectators
well clear when loading unloading and using
this product.
F. Adhere to all Department of Transporta-
tion (D.O.T.) requirements when using this
product. Always use ropes and tie downs to
securely hold all cargo in place.
G. For the vehicle that will support the Lad-
der Rack, read all pertinent vehicle instruc-
tions and warnings provided in the owner’s
manual. Make sure the vehicle is in a safe
location, away from trac. with engine
OFF, and parking brake set, before assem-
bly, set-up, and while loading or unloading
the Ladder Rack.
H. The load on the Ladder Rack should be
evenly distributed.
I. Before installing and drilling holes in the
truck bed, verify that no electrical lines or
gas tanks are in the drilling path. After drill-
ing mounting holes and installing the Ladder
Rack, recheck electrical lines and braking
system to insure proper operation.
J. The Ladder Rack must be securely bolted
into the rail and bed of the truck.
K. Maintain labels and nameplates on the
Ladder Rack. They contain important infor-
mation and must always remain readable.
Contact MAXXHAUL for replacements.
Keep in mind that the warnings previous-
ly discussed cannot cover all possible
conditions or situations that could occur.
It is important that the person setting up
and using this product understand that
common sense and caution are factors
which cannot be built into this product,
and must be supplied by the person(s)
using this product.
Limited Warranty
MAXXHAUL warrants to the original retail
purchaser that the product is free of defects
in material and workmanship at the time of
shipment. This Ladder Rack is warranteed
for 90 days from the date of purchase. This
warranty is expressly in lieu of all other war-
ranties, express or implied.
Proof of purchase is required for warranty
transactions; a copy of the original invoice
or sales receipt is required.

Model 70233 Page 4
Assembling and Setting Up
the Ladder Rack
Always wear ANSI approved
safety goggles.
Setting up and mount-
ing the Ladder Rack to the truckbed requires
some complex assembly steps. Holes have
to be drilled into the truckbed and compo-
nent parts are heavy. If you are not expe-
rienced and capable of doing this type of
setup work, the installation of the Ladder
Rack should be done by a qualied service
technician.
1. Refer to photo on cover page of this
manual of an already set-up Ladder Rack,
and to photo on opposite column of this
page. Also see Assembly Diagram at end of
this manual.
2. Carefully lay out the major components
of the Ladder Rack as shown in photo above
right.
3. The front and rear Ladder Racks are
identical and can be set up on either the left
or right side of the truck bed. For purposes
of this manual, instructions are written for left
hand side of truck bed installation.
4. Note how the Mounting Bracket (2)
slides over the top of the Base Bracket
(14). Hand tighten the Set Screw (9) for
now to hold the Mounting Bracket
in place. Plan the location of the
Base Brackets (one in front, left
hand side of the truck bed and
the other in back, left hand side
of truck bed.
The top of Base Bracket will be
attached to the vehicle’s upper
bed rail with Bolt (10), Spring
Washer (12), Flat Washer (11)
WARNING
and Lock Nut (13A) through each of
the 2 mounting holes on top of Mounting
Bracket.
The foot of the Base Bracket must rest
at on a rib of the truck bed and is at-
tached with one Bolt (10A), Spring Washer
(12), Flat Washer (11) and Lock Nut (13A).
After adjusting the Mounting Bracket for
proper height, tighten the Set Screw (9).
Mark the 3 drill holes for
each Mounting Bracket/Base Bracket and
carefully drill the holes.
Make sure that there are no obstructions
in the drilling path.
Using the hardware previously described,
securely attach the Mounting Brackets/Base
Brackets to the truck bed.
Extended Boom (5)
Support Bar (3)
Post (1)
Mounting
Bracket
(2) Base Bracket (14)
Boom (4)
Base
Bracket
(14)
Mounting
Bracket
(2)
Bolt (10)
Hardware
Bolt (10A) Hardware
WARNING

Model 70233 Page 5
5. Assembling upper portion of Ladder
Rack:
A. Assemble Boom (4) and Support Bar (3)
to Post (1) using 2 sets of Bolt (6), Washer
(7) and Lock Nut (7) - see photo below.
B. Slide Extended Boom (5) into end of
Boom (4) and secure in place with Set
Screw (9).
C. Repeat the above two steps to assembly
the upper portion of the other Ladder Rack.
6. Assembling upper Ladder Rack to
Base Bracket (14):
A. Place lower portion of Post (1) through
Mounting Bracket (2) and slide Post (1) into
bottom of Base Bracket (14); secure in place
with Set Screw (9). See photo below.
B. Repeat the above steps
to assemble the other upper
Ladder Rack to a Base Bracket.
WARNING
7. Using the Ladder Rack
A. Adhere to all Department of Transporta-
tion (D.O.T.) requirements when using this
product. Use ropes and tie downs to secure-
ly hold all cargo in place.
B. When assembly is complete, check and
test all vehicle systems including lights and
brakes; make sure no damage occured dur-
ing product installation.
C. When adjusting the Extended Boom (5)
for varying load widths, always leave at least
3” of the end of the Extended Boom inside
the Boom (4).
D. Before and after each use, check to
make sure that all hardware is tightly se-
cured.
E. Make sure the vehicle is in a safe place
for loading ladders and other cargo. Make
sure the vehicle’s engine is OFF, with park-
ing brake set, before loading or unloading
the Ladder Rack.
F. Do not overload the
Ladder Rack. Never exceed the maximum
weight capacity of 250 Lbs. (this is front and
back rack combined capacity
8. Maintaining the Ladder Rack
A. Frequently check the condition of the
Ladder Rack. Make sure all components are
in good condition. If the Ladder Rack be-
comes damaged through accident, or if any
weld damage is noted, the product should be
replaced.
Boom (4)
Extended
Boom (5)
Support Bar (3)
Post (1)
Bolt (6)
Hardware
Set
Screws
(9)

Model 70233 Page 6
Note: The Parts List and Assembly Diagram is provided as a reference tool only. Some parts are listed and shown
for illustration purposes only, and are not available as replacement parts. All repairs to this tool (including replacing
parts) should only be done by a qualied service technician.
Manufactured and Distributed by:
Maxx Group, LLC, 1500 E. Wooley Rd., Unit C, Oxnard, CA USA 93030
Telephone: 1-855-6299869
Maximum Weight
Capacity
250 Lbs. (front and back
rack combined capacity)
Adjustable Arms adjust from 19” to
34” to hold most ladders
Construction All steel construction
with powder coated nish
Hardware Installation hardware
included
Built-in cleats Included to aid in safely
securing cargo
SPECIFICATIONS
Parts List
Assembly Diagram
Note: Some truck models oer a “deep” truck
bed that requires a taller Base Bracket than the
version included in this kit.
Contact MAXXHAUL for Model #70479 “Adjust-
able Legs” - available at an additional cost.
With the addition of “Adjustable Legs”, the Ladder
Rack described in this manual will adjust for truck
beds ranging in height from 17-1/4” to 22-1/4”.
Table of contents