manuals.online logo
Brands
  1. Home
  2. •
  3. Brands
  4. •
  5. Confer Plastics
  6. •
  7. Ladder
  8. •
  9. Confer Plastics 8000 Setup guide

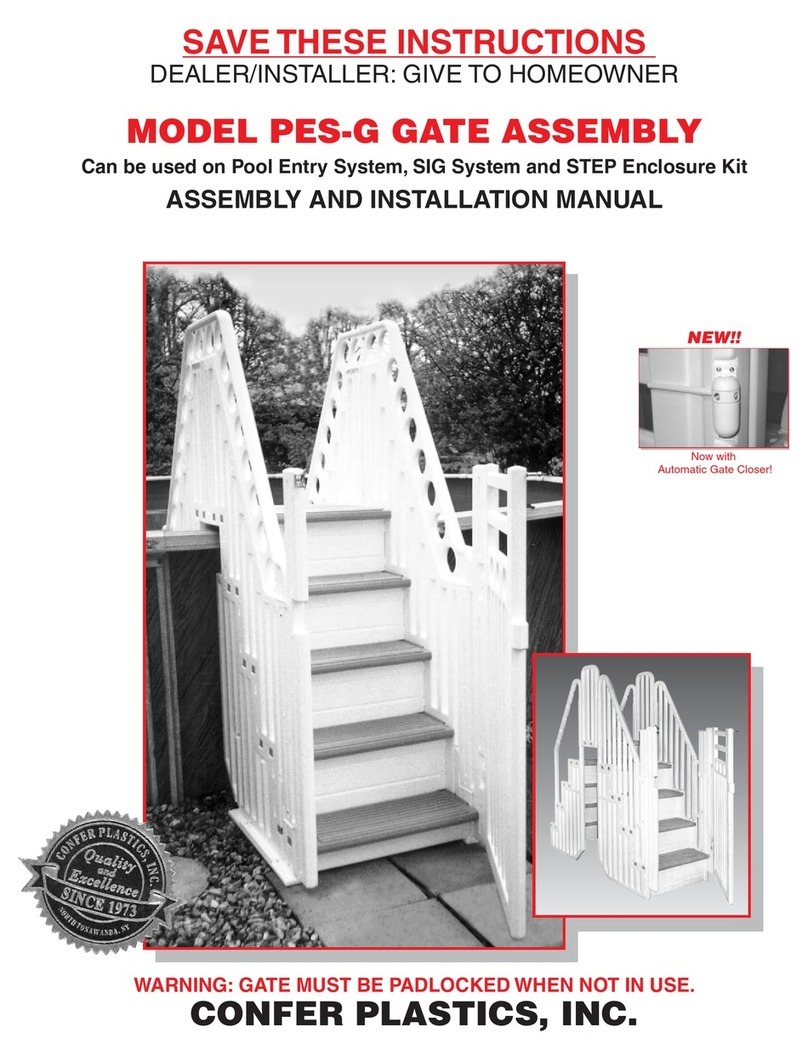
Confer Plastics 8000 Setup guide

SAVE THESE INSTRUCTIONS
DEALER/INSTALLER: GIVE TO HOMEOWNER
MODEL #8000
GROUND TO DECK LADDER
(FOR USE ONLY WITH CONFER PLASTICS’ ITEM #STEP-1)
FITS 48”TO 54” POOLS
ASSEMBLY AND INSTALLATION MANUAL
Made in U.S.A. by
www.conferladders.com
Step 4.
Detach the 4 wedges from the end
of the protrusions by twisting them
off and save for use in step 5. (It
may be necessary to use a utility
knife to assist in removal).
Detach
Wedges
Step 1.
Force
stringers into
bottom tread
pockets so
they lock into
place.
Make sure the
single row of
tread lugs are
facing forward.
Tread Lugs
Step 2.
Two sets of Lug
locations are provided on
each of the stringers. Slide
the four treads into the
upper set of lugs on each
of the stringers. Secure the
uppermost tread only, by
driving a #10 x 1-1/4”
screw through the pre-
drilled end of the tread.
Position all 4
treads in upper
lug locations only.
Do not
position
tread in lower
location.
x4
Secure the
uppermost
tread only to
stringers
Step 3.
Secure tread connectors to
stringers using 1/4-20 x 3-1/2”
bolt washer and nylon nut
Do NOT secure
tread connectors
to uppermost step
Secure Tread connectors to
Treads. Note: Treads should
be in position on ladder before
connecting.
Stringers
Position the tread
connectors (One left,
one right) on the ends of
the treads and fasten to
the stringers using the
1/4-20 x 3-1/2” bolt,
washer and nylon nut.
Do not over-tighten.
Fasten the tread
connectors to the
ends of the treads,
except the uppermost
tread, by driving two
#10 x 1-1/4” screws
through the pre-formed
holes in the tread
connector and into
the end of the treads.
Wedges
Protrusion
Stringers
Tread Lugs
Model # 8000 Ground-to-Deck Ladder
Note: Assemble this ladder before assembling the #Step-1 Confer Step.
If you have already assembled the Confer-Step it will be necessary to
remove the handrails (see step #10).
2
PARTS LIST HARDWARE PACK TOOLS REQUIRED
FOR ASSEMBLY:
Qty. Description Qty. Description
2- Handrails
2- Stringers / Legs
4- Upper Treads
1- Bottom Tread
2- Shields
2- Tread Connector (RH & LH)
1- Platform (wedges attached)
see Step #2.
38- #10 x 1-1/4” Screw
2- 1/4-20 x 3-1/2” Bolt
2- 1/4” Washer
2- 1/4-20 Nylon Nut
2- Adjustable Tubes
2- Mounting Blocks
1- Cable Lock
* Cordless Drill Motor
* 1/8” Drill Bit
* Utility Knife
* Liquid Soap or
Spray Lubricant
* Phillips Screwdriver
or screwdriver bits
Platform
Handrail
Stringer / leg
Upper
Tread
Bottom
Tread
Tread Connector
Mounting
Block
Adjustable
Tube
Shield
Step 5.
Assemble the platform to
the handrails by laying
one of the handrails on a
clean hard surface. Push
the protrusion of the plat-
form into the openings of
the handrail making sure
that the legs of both
handrails are facing in the
same direction. Tap the
4 wedges (from step 4)
into the sides of the
handrails to secure the
platform to the rails.
After platform is in
position, tap in the
supplied wedges at
the bottom of each
opening to ensure a
secure fit.
Match
Platform
protrusions
to Handrail
openings
Push
down
Step 6.
Coat the adjustable
tubes with liquid soap
or spray lubricant and
slip the mounting
blocks all the way
down over the
protruding nubs.
Slide mounting
blocks over nubs
Mounting Block
Adjustable tube
Step 7.
Push the
adjustable tubes
with mounting
blocks into
handrails.
x2
Step 8.
Attach the handrails to
the ladder assembly,
making certain that the
treads face correctly.
Note: Coat the ends
of the stringers with
liquid soap or spray
lubricant before
sliding handrails
into postion.
Step 9.
Attach the shield by
sliding the shield
opening over the top
of each handrail.
Push down into
position and rotate
90° outward as
appears in step 10.
Note: Carefully
spread open
shield to slide
over handrail.
Step 10.
Slide the shields down
over the upper handrail
posts of the Step 1 until
the mounting blocks
rest on the top step of
the Confer-Step as
shown in diagram.
Replace handrails as
shown in diagram #4
of the Confer-Step
instructions.
Shield
Remove the
Confer Step
handrails so
shields can be
slid over the
handrail posts.
Handrail posts
3
x2
CP-8000 01/08
SAFETY RULES
• Locate ladder on a solid base
• One person on the ladder at a time
• Ladder MUST be installed per
manufacturer’s instructions
•
DANGER: No jumping or Diving from ladder.
• Face ladder when entering and leaving pool
• To prevent entrapment or drowning -
DO NOT swim through, behind or
around ladder
• Ladder to be used as a swimming pool
ladder only
• Weight Limit - 350 lbs. maximum
•WARNING: Exceeding the maximum
weight restriction may cause ladder to fail.
• Consult your local Building Department be-
fore installation of your pool and equipment.
•DANGER:
Use a cordless drill for assembly and
installation. NEVER use an electric drill in
or around the pool.
CONFER PLASTICS, INC.
LIMITED, PRO-RATED WARRANTY
Confer Plastics, Inc. warrants their swimming pool ladders to be free
from defects in workmanship for one year from date of purchase. After
the first year the cost to replace a part is as follows:
4
DO NOT RETURN DEFECTIVE PART TO DEALER
The defective part should be returned, postpaid, to:
Confer Plastics, Inc.
97 Witmer Road
North Tonawanda, N.Y. 14120-2421
Enclose proof-of-purchase (receipts, etc.) showing date purchased, your name,
address, and daytime phone number. You will be notified of cost to replace part.
This warranty gives you specific legal rights, and you may also have other rights
which may vary from state to state.
MODEL 8000:
2nd Year - 20%
3rd Year - 40%
4th Year - 60%
5th Year - 80%
Plus shipping/handling charges
Step 11.
Secure the 8000 ladder to the
platform using four #10 x 1-1/4”
screws per mounting block (8 total).
Fasten the handrails to the stringers
using two #10 x 1-1/4” screws at
the pre-marked locations on each
handrail (4 total).
Secure the tubes to the handrails
using two #10 x 1-1/4” screws at the
pre-marked locations on each
handrail (4 total).
Fasten the shields to the handrails
using four #10 x 1-1/4” screws per
shield (8 total).
Using a cordless
drill, secure the
8000 mounting
blocks to Confer
Step top step
before securing
the 8000 handrail.
Always make sure that steps
are in the upright position
and Locked when pool is
not in use.
Note: always swing up and secure outer steps when not in use.
of current parts
list price
Mounting blocks
97 Witmer Road
North Tonawanda, New York 14120-2421
Toll Free U.S. 866-396-2968
716-283-1826/ FAX 716-283-3249
www.conferladders.com
Printed in U.S.A.
MADE IN THE U.S.A. by:

Other Confer Plastics Ladder manuals

Confer Plastics 7100X Setup guide

Confer Plastics

Confer Plastics 7100X Setup guide

Confer Plastics 6000 Setup guide

Confer Plastics

Confer Plastics 6000 Setup guide

Confer Plastics EVOLUTION 7100 Setup guide

Confer Plastics

Confer Plastics EVOLUTION 7100 Setup guide

Confer Plastics ROLLGUARD 7200 Setup guide

Confer Plastics

Confer Plastics ROLLGUARD 7200 Setup guide

Confer Plastics PES-1X User manual

Confer Plastics

Confer Plastics PES-1X User manual

Confer Plastics CCX-IG Setup guide

Confer Plastics

Confer Plastics CCX-IG Setup guide

Confer Plastics ROLLGUARD 7200 Setup guide

Confer Plastics

Confer Plastics ROLLGUARD 7200 Setup guide

Confer Plastics PES-G Setup guide

Confer Plastics

Confer Plastics PES-G Setup guide

Confer Plastics STEP-ENC User manual

Confer Plastics

Confer Plastics STEP-ENC User manual

Confer Plastics 8100X User manual

Confer Plastics

Confer Plastics 8100X User manual

Confer Plastics 7000 User manual

Confer Plastics

Confer Plastics 7000 User manual

Confer Plastics 635-52X Setup guide

Confer Plastics

Confer Plastics 635-52X Setup guide

Confer Plastics 635-52 User guide

Confer Plastics

Confer Plastics 635-52 User guide

Confer Plastics 7100X User manual

Confer Plastics

Confer Plastics 7100X User manual

Confer Plastics CK7100-X User manual

Confer Plastics

Confer Plastics CK7100-X User manual

Confer Plastics 6000B User guide

Confer Plastics

Confer Plastics 6000B User guide

Confer Plastics 6000 User manual

Confer Plastics

Confer Plastics 6000 User manual

Confer Plastics 6000X Setup guide

Confer Plastics

Confer Plastics 6000X Setup guide
Confer Plastics 7000X User manual

Confer Plastics

Confer Plastics 7000X User manual

Confer Plastics 8100X User manual

Confer Plastics

Confer Plastics 8100X User manual

Confer Plastics 8000X User manual

Confer Plastics

Confer Plastics 8000X User manual

Popular Ladder manuals by other brands

FACAL SL-07 Use and maintenance handbook

FACAL

FACAL SL-07 Use and maintenance handbook

Hailo ProfiStep Duo INSTRUCTION FOR ERECTION AND USE

Hailo

Hailo ProfiStep Duo INSTRUCTION FOR ERECTION AND USE

OYPLA DIY 3397 user manual

OYPLA DIY

OYPLA DIY 3397 user manual

Manutan 570003 user manual

Manutan

Manutan 570003 user manual

HSS Hire 86312 Operating & safety guide

HSS Hire

HSS Hire 86312 Operating & safety guide

Hailo 8050 Series Instructions for use

Hailo

Hailo 8050 Series Instructions for use

Penguin ICE LADDER instructions

Penguin

Penguin ICE LADDER instructions

Alto Industrial Aluminium Towers Assembly instructions

Alto

Alto Industrial Aluminium Towers Assembly instructions

Power Step PSA-EX2500-FRS manual

Power Step

Power Step PSA-EX2500-FRS manual

Westfalia 67 87 89 instruction manual

Westfalia

Westfalia 67 87 89 instruction manual

GORILLA LADDERS GLMPXA-14 Operating/safety instructions

GORILLA LADDERS

GORILLA LADDERS GLMPXA-14 Operating/safety instructions

Berner TOPline 144787 Instructions for use

Berner

Berner TOPline 144787 Instructions for use

Hudora 65264 INSTRUCTIONS ON ASSEMBLY AND USE

Hudora

Hudora 65264 INSTRUCTIONS ON ASSEMBLY AND USE

Westward 44YY09 Operating instructions & parts manual

Westward

Westward 44YY09 Operating instructions & parts manual

GSI Group PNEG-1451 installation manual

GSI Group

GSI Group PNEG-1451 installation manual

Main Access 200400T Assembly instructions

Main Access

Main Access 200400T Assembly instructions

INNOVAPLAS BILTMOR 5015 quick start guide

INNOVAPLAS

INNOVAPLAS BILTMOR 5015 quick start guide

G21 GA-TZ7-2M user manual

G21

G21 GA-TZ7-2M user manual

manuals.online logo
manuals.online logoBrands
  • About & Mission
  • Contact us
  • Privacy Policy
  • Terms and Conditions

Copyright 2025 Manuals.Online. All Rights Reserved.