3. FITTING THE CARRIER TO YOUR VEHICLE
Clean the bodywork before fitting the cycle carrier, this will help to avoid scratches, further protection may be advisable for certain
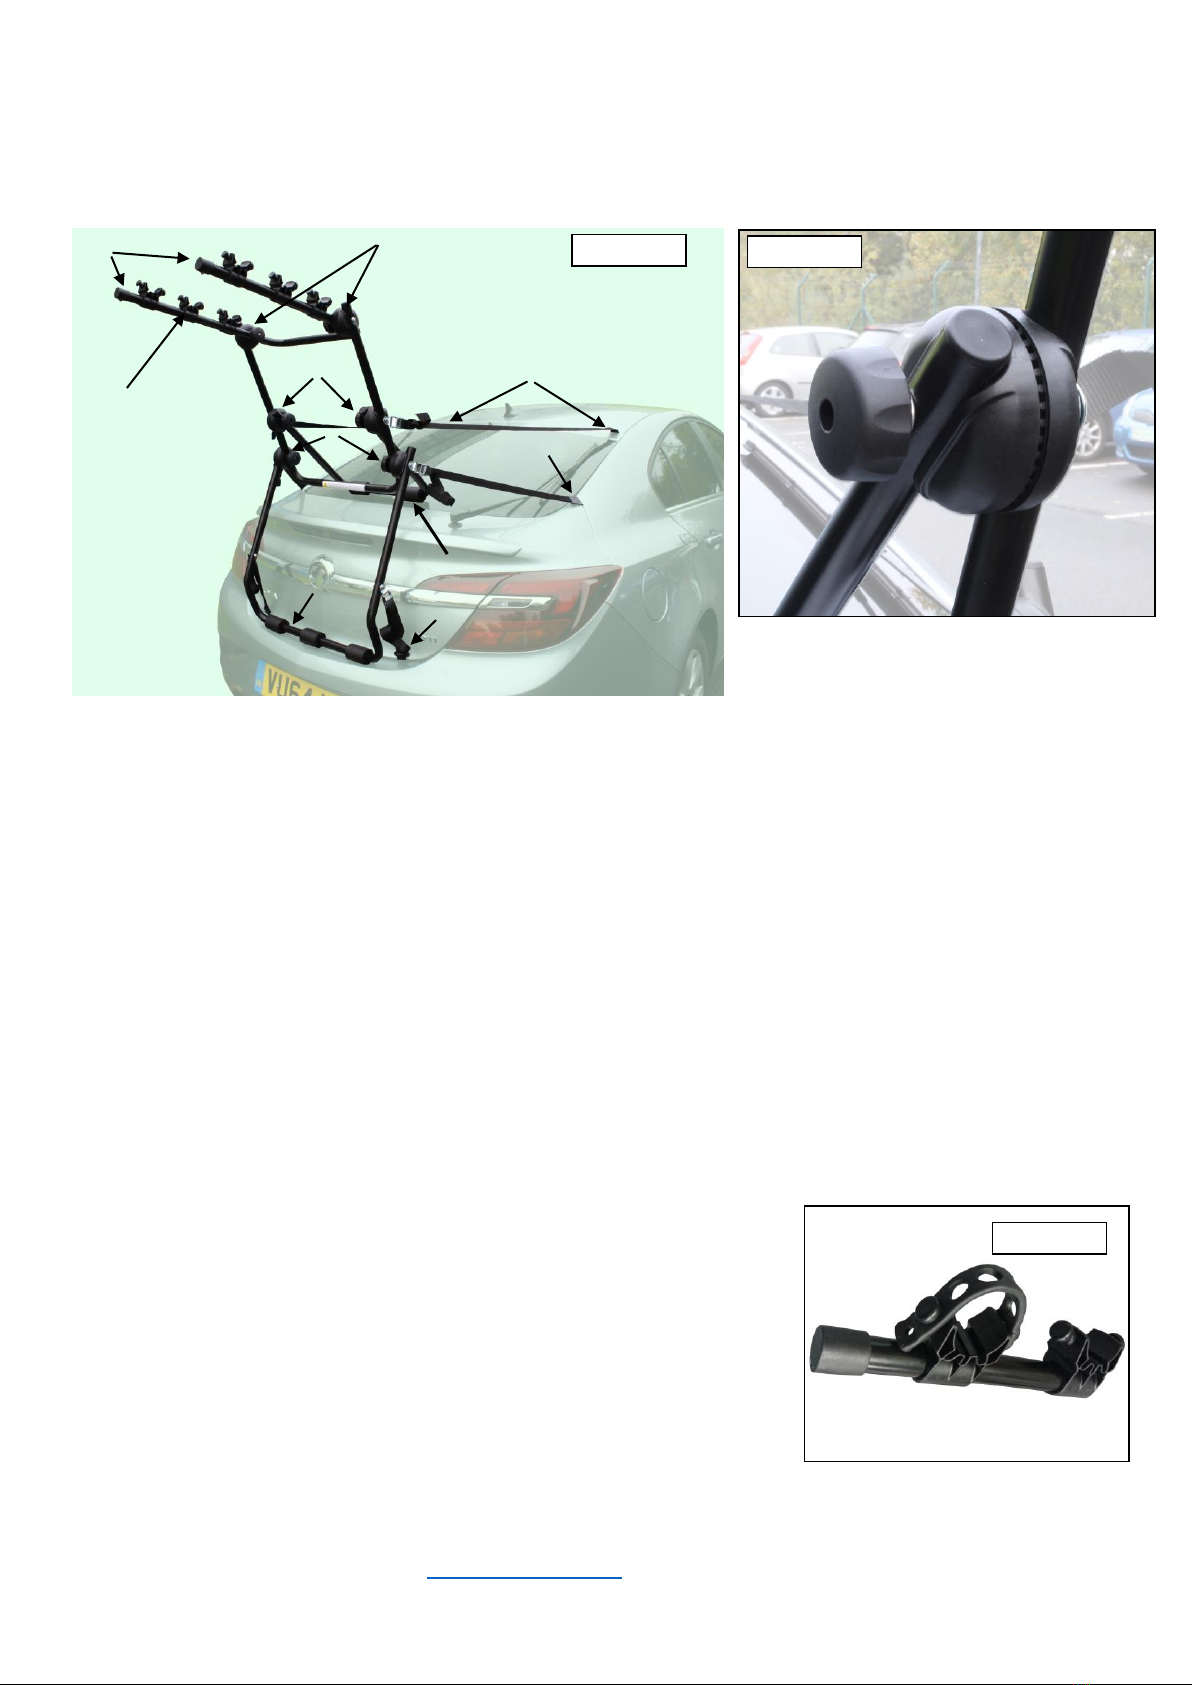
paint finishes. Adjust the angle of cycle carrier frame to suit the vehicle, using the adjusting knobs (1and 2) in (Diagram 2) to
release and to clamp the clam joints (Diagram 3) in a suitable position. The feet on tubes (3and 4) in (Diagram 2) should be in
contact with the vehicle. Avoid placing these feet on large or unsupported panels, or areas of bodywork, which may be liable to
damage due to the pressure applied by the loaded carrier.
4. FIXING THE STRAPS TO THE VEHICLE
The straps should always be attached to metal parts of the vehicle, never to glass hatch backs, rubber seals, thin plastic bumpers
or trim.
Position the Carrier on the rear of your vehicle and fit the two hooks of the upper straps (5) (Diagram 2) onto the top edge of the
boot lid, hatch or door, tighten the straps in order to hold the Cycle Carrier in place.
Attach the lower straps (6) (Diagram 2) to the lower edge of the boot lid, hatch, door or a secure position on the vehicle
bodywork, (tow bar or chassis use “J” hooks if necessary) and tighten equally.
Attach the side straps (7) (Diagram 2) to a suitable position on the side of the boot lid, hatch or door.
Straps must be as straight as possible and not twisted, progressively tighten each strap alternately and equally, ensuring the
carrier is firmly and centrally positioned.
If a secure fixing cannot be achieved using the hooks provided, you will need to use special foam covered puller bars (adapter kit
part number BC2001 not included). The foam covered bars are placed inside the boot lid or hatch and their straps are fed through
the rubber seal and fitted to the carrier. As the straps are tensioned the bars are pulled against the inside of the hatch or boot lid,
securely retaining the carrier.
5. Adjust the straps to position the carrier ensuring that the rubber pads (on tubes 3and 4) are firmly in contact with the vehicle
bodywork.
Adjust the carrier arms (10) as shown in (Diagram 2), the tips of the arms should be raised at an angle of between 10 and 20
degrees above the horizontal. When the arms have been adjusted to the correct angle, tighten the clam joints securely. (Diagram
3)
Check and tighten all straps again - Fit the cycle protector pads in suitable positions.
6. LOADING CYCLES ONTO THE CARRIER
When placing the cycles (max. of 3) onto the carrier support arms, place them in
opposite directions. Avoid positioning them directly next to the vehicle exhaust.
Position the cross bar of each cycle into a pair of easy-fit cradles on the cycle support
arm (10) on (Diagram 2).
Secure cycles to the cradles using the rubber cycle securing straps provided, these can
be pulled down over the cross bar and clipped onto the cradles (Diagram 4).
Using suitable ties or straps (not provided), ensure that cycle steering, wheels and
pedals are secured and will not come into contact with the vehicle bodywork. Cycle
Protector Pads are provided to protect the cycles from rubbing against the cycle carrier.
After placing the cycles on the carrier, re-tension all of the straps and tie off the surplus
lengths of strap at the base of the buckles for extra security and to prevent the loose ends
flapping.
Remember: The driver of the vehicle is responsible for the security and safety of the
load carried, check frequently during your journey.
If your lights or number plate are obscured, you must use an auxiliary lighting board.
www.maypole.ltd.uk - BIRMINGHAM
11/14


