MDS 4790 Series Original operating instructions

Installation & Operation Guide
MDS 05-3438A01, Rev. E
AUGUST 2005
400 MHz/900 MHz
Multiple Address System
Master Station Radio
MDS 4790/9790 Series
(Including MDS 4790A/C/E/S, MDS 9790A)

QUICK START GUIDE
1. Install and connect the antenna system to the radio (page 8).
• Use an appropriate antenna aimed at the associated station.
• Use low-loss feedline suited for 400/900 MHz.Keep the feedline as short as possible.
2. Connect the backup battery (page 15).
3. Connect the host computer to the
DATA
connector on the rear panel (page 22).
4. Verify proper input voltage level and connect power to the radio.
Set the power switch(es) to ON.
5. Observe front panel indicators for proper operation.
Invisible place holder
ACTIVE
(green)—This transceiver board (A or B) is the selected unit.
STBY
(yellow)—This transceiver board (A or B) is the standby unit (redundant version only).
ALARM
(red)—General fault not covered by the other alarm categories (RX ALR, TX ALR, I/O ALR).
RX ALR
(red)—Difficulty receiving.May be due to an antenna problem, receiver fault, or other
condition causing a low received signal level.
TX ALR
(red)—Fault with the transmit circuitry.
I/O ALR
(red)—The data rate or format of data at the data interface connector is incompatible with the
radio settings.
A
B
ACTIVE STBY ALARM RX ALR TX ALR I/O ALR

MDS 05-3438A01, Rev. E MDS 4790/9790 Series™ I/O Guide i
TABLE OF CONTENTS
1.0 INTRODUCTION.....................................................................................1
2.0 PRODUCT DESCRIPTION.....................................................................1
2.1 Network-Wide Diagnostics ...............................................................2
2.2 Redundant versus Non-redundant Operation ..................................2
2.3 Applications ......................................................................................3
Basic MAS Master Station Operation ...............................................3
Repeater and Polling Remote Operation..........................................3
2.4 Features ...........................................................................................4
2.5 Accessories ......................................................................................5
2.6 Model Number Codes ......................................................................6
3.0 INSTALLATION PLANNING....................................................................6
3.1 General Requirements .....................................................................6
Site Selection....................................................................................7
A Word About Interference................................................................8
3.2 Antenna and Feedline Selection ......................................................8
Antenna System................................................................................8
Feedline Selection ............................................................................9
4.0 INSTALLATION PROCEDURES...........................................................10
4.1 Unpacking and Inspection ..............................................................10
4.2 Mounting the Radio ........................................................................11
Rack Mounting................................................................................11
Tabletop Mounting...........................................................................11
Remote Front Panel Mounting—Optional Configuration.................12
4.3 Primary Power ................................................................................13
AC-Powered Units...........................................................................14
DC-Powered Units ..........................................................................14
4.4 Backup Battery ...............................................................................15
Location of Battery Backup Switch.................................................15
Low-Voltage Disconnect Feature....................................................16
Battery Reset Switch (SW1/LVD PCB)...........................................16
4.5 Antenna Installation ........................................................................16
Feedline Installation........................................................................17
4.6 Interface Wiring Connections .........................................................17
TX, Antenna and RX Coaxial Connectors (Type-N)........................18
Ground Connection.........................................................................20
Diagnostics Connector—J1 ............................................................21
4-Wire Audio Connector—J2..........................................................21
Data Interface Connector—J3 ........................................................22

ii MDS 4790/9790 Series™ I/O Guide MDS 05-3438A01, Rev. E
Orderwire Connector—J9...............................................................23
Alarm Contacts—J10......................................................................23
4.7 Post Installation Checks .................................................................24
5.0 START-UP AND OPERATION...............................................................24
5.1 Initial Startup ..................................................................................24
Normal Indications..........................................................................24
Maximizing RSSI.............................................................................24
Coordinating Activities by Orderwire...............................................25
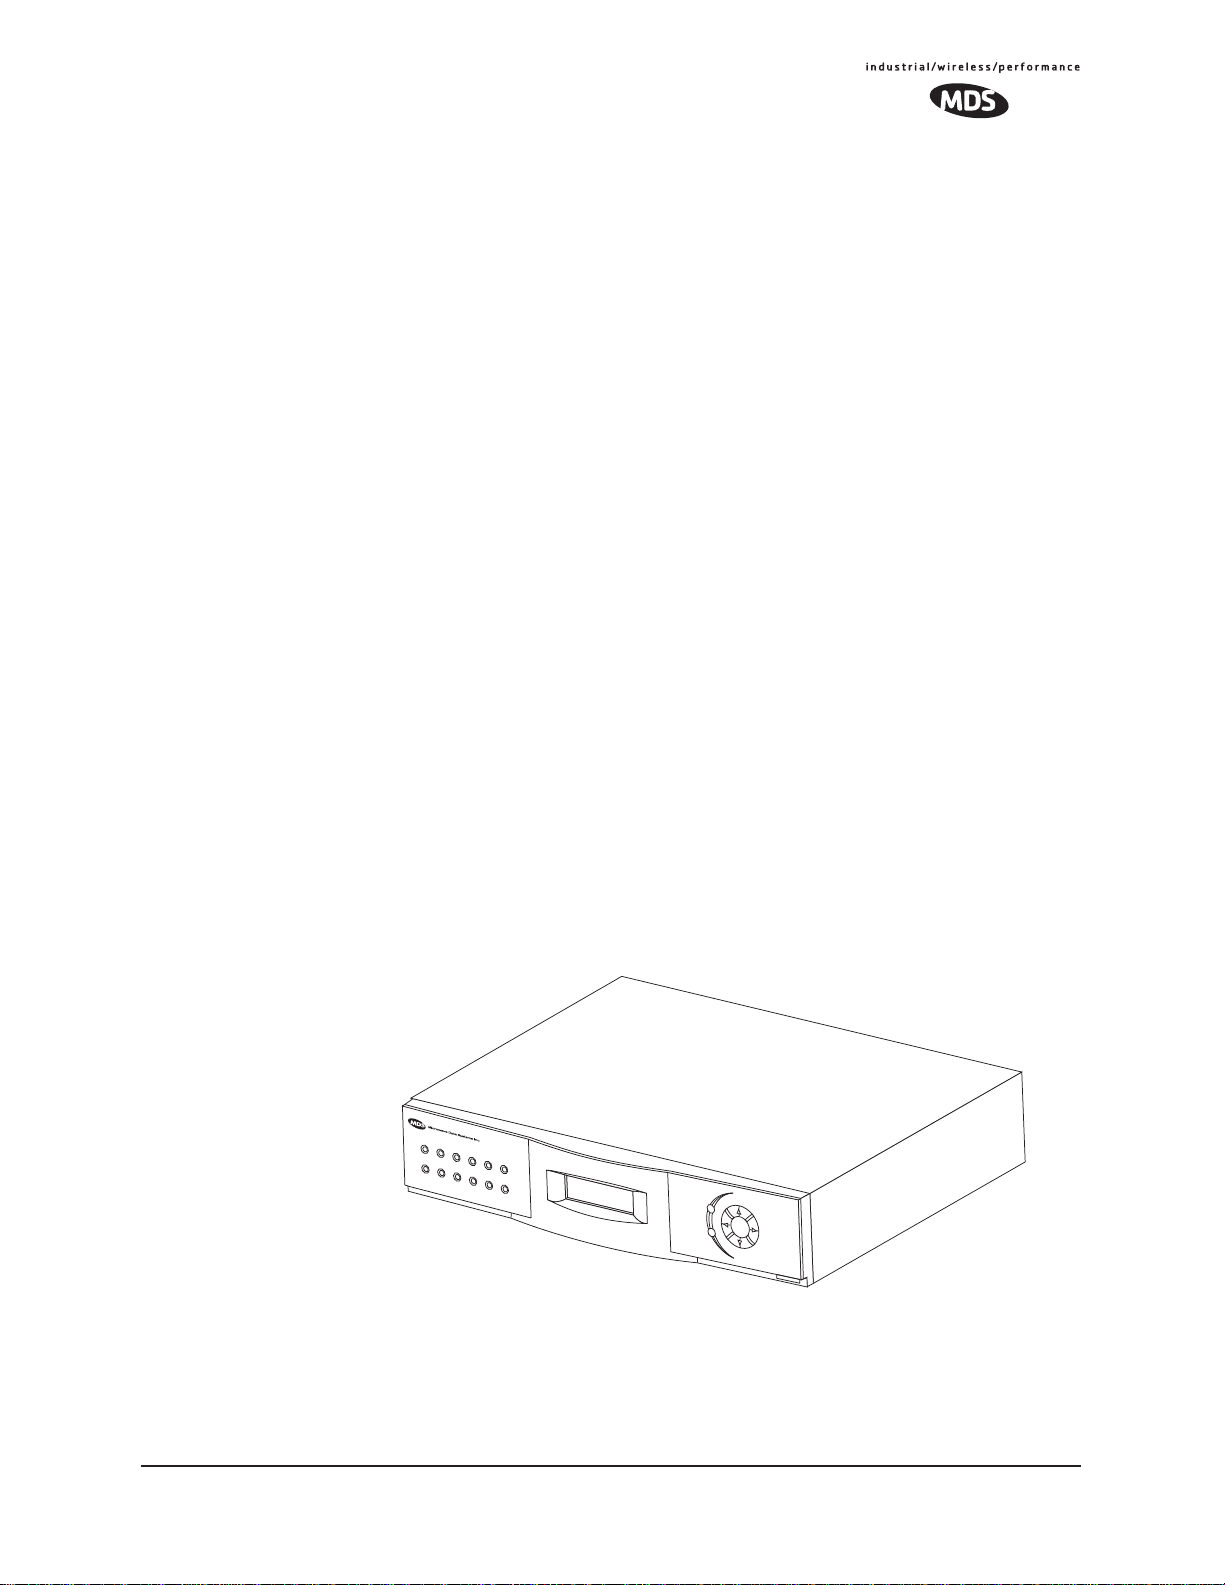
5.2 Front Panel Indicators ....................................................................25
LED Indicators ................................................................................26
Front Panel Display.........................................................................27
6.0 DIAGNOSTICS AND CONTROL ..........................................................28
6.1 PC Connection ...............................................................................28
6.2 PC Command Summaries .............................................................30
Commands and Command Parameters..........................................31
6.3 Detailed Command Descriptions ...................................................35
ALARM............................................................................................35
AMASK [0000 0000–FFFF FFFF]...................................................37
ASENSE [HI/LO].............................................................................38
BATT(ery) [ON/OFF].......................................................................38
BAUD [xxxxx abc] ...........................................................................38
BUFF [ON/OFF]..............................................................................39
CKEY [ON/OFF]..............................................................................40
CTS [0-255].....................................................................................40
DATAKEY [ON/OFF]........................................................................40
DATE [mmm dd yyyy]......................................................................41
DKEY..............................................................................................41
DLINK [ON/OFF/xxxx].....................................................................41
DMGAP [xx]....................................................................................42
DTYPE [NODE/ROOT/GATE/PEER]..............................................42
EMP [ON/OFF]................................................................................42
HREV..............................................................................................43
INIT.................................................................................................43
KEY.................................................................................................44
LOG [CLR]......................................................................................44
MADDR [NONE, 1–255] .................................................................44
MODEL...........................................................................................45
MODEM [NONE/4800/9600/19200/DEFAULT]...............................45
NMASK [0000 0000–FFFF FFFF]...................................................45
OPT.................................................................................................46
OWM [xxxxx]...................................................................................46
OWN [xxxxx]...................................................................................46
PTT [0-255].....................................................................................47
PWR [20–37]...................................................................................47
RADIO [AUTO/A/B].........................................................................47
REPEATER [ON/OFF] ....................................................................48
RSSI, RSSI!....................................................................................48

MDS 05-3438A01, Rev. E MDS 4790/9790 Series™ I/O Guide iii
RTU [ON/OFF/0-80]........................................................................48
RX [xxx]...........................................................................................49
RXLEVEL [–20 to +3]......................................................................49
RXMUTE [ON/OFF/Time in msec]..................................................49
RXPAD [ON/OFF] ...........................................................................50
RXTOT [NONE, 1-1440] .................................................................50
SCD [0-255]....................................................................................50
SER.................................................................................................50
SHOW [DC/PWR/CURRENT/RADIO]............................................51
SNR, SNR!......................................................................................51
SREV..............................................................................................52
STANDBY [ON/OFF].......................................................................52
STAT................................................................................................52
TEMP..............................................................................................53
TIME [hh:mm:ss].............................................................................54
TOT [ON/OFF, 1-255]......................................................................54
TX [xxxx].........................................................................................54
TXGAIN [ON/OFF]..........................................................................55
TXLEVEL [–20 to +3, AUTO] ..........................................................55
UNIT [10000–65000].......................................................................55
6.4 Configuration and Programming using the Front Panel .................56
Programming and Control Buttons..................................................58
NavigatingThrough the Front Panel Screens.................................58
Switching the Front Panel Display to Configuration Mode..............59
Use of Control Buttons in Configuration Mode................................59
Making changes to radio functions .................................................60
6.5 Screen Descriptions .......................................................................60
Group 1—Startup Screen and Menu Directory (page 64) ..............60
Group 2—Configuration Screens (Page 64)...................................60
Group 4—Event Log (Page 75).......................................................61
7.0 LOCAL & NETWORK-WIDE PROBLEM SOLVING..............................75
7.1 Local Problem-Solving ...................................................................76
Front Panel LEDs............................................................................76
Chassis-Mounted LEDs..................................................................77
Problem Solving Using a Connected PC........................................78
Problem Solving Using the Front Panel Display..............................78
System Bench Testing Set-up.........................................................79
7.2 Performing Network-Wide Radio Diagnostics ................................80
8.0 REPLACING ASSEMBLIES..................................................................82
8.1 Transceiver Board and Power Supply Assemblies .........................82
8.2 Installation & Removal of Backup Battery
(P/N 28-1575Axx) ...................................................................................83
8.3 Front Panel .....................................................................................84
8.4 Operating Frequency Change Considerations ...............................85
MDS 4790—400 MHz Notch-Type Duplexers.................................86
MDS 9790—Bandpass-Type Duplexers..........................................86
MDS 4790/9790 Simplex Radios—With Antenna Switch Modules.87

iv MDS 4790/9790 Series™ I/O Guide MDS 05-3438A01, Rev. E
MDS 4790/970—Front End Helical Coil Alignment.........................87
8.5 Testing and Removing an Internal Duplexer ...................................87
Testing.............................................................................................87
Removing the Internal Duplexer......................................................88
8.6 Testing and Removing the Antenna Switch Module .......................89
Testing.............................................................................................89
Removing the Antenna Switch........................................................90
8.7 Cooling Fan Maintenance .............................................................91
9.0 RADIO SOFTWARE UPGRADES ........................................................91
9.1 Obtaining New Code ......................................................................91
9.2 Preparing for Download .................................................................92
9.3 Downloading New Code—Procedure ............................................92
10.0 TECHNICAL REFERENCE.................................................................93
10.1 Technical Specifications ...............................................................93
10.2 RF Propagation Planning .............................................................95
Fresnel Zone Clearance..................................................................96
Earth Curvature ..............................................................................97
Fade Margins..................................................................................97
Calculating Path Loss .....................................................................98
10.3 Formulas for System Planning .....................................................98
Free Space Path Loss.....................................................................98
Fresnel Zone Boundary ..................................................................98
Theoretical Signal Strength.............................................................98
Probability of System Fading ..........................................................99
10.4 dBm-Volts-Watts Conversion Chart ............................................100
Copyright Notice
This Installation and Operation Guide and all software described herein
are protected by copyright: 2005 Microwave Data Systems Inc. All
rights reserved.
Microwave Data Systems Inc. reserves its right to correct any errors and
omissions in this publication.
Operational Safety Notices
The radio equipment described in this guide uses radio frequency trans-
mitters. Although the power level is low, the concentrated energy from
a directional antenna may pose a health hazard. Do not allow people to
come in close proximity to the front of the antenna when the transmitter
is operating.
This manual is intended to guide a professional installer to install,
operate and perform basic system maintenance on the described radio.
RF Exposure

MDS 05-3438A01, Rev. E MDS 4790/9790 Series™ I/O Guide v
ISO 9001 Registration
Microwave Data Systems adheres to this internationally-accepted
quality system standard.
Quality Policy Statement
We, the employees of Microwave Data Systems, are committed to
achieving total customer satisfaction in everything we do.
Total Customer Satisfaction in:
• Conception, design, manufacture and marketing of our products.
• Services and support we provide to our internal and external
customers.
Total Customer Satisfaction Achieved Through:
• Processes that are well documented and minimize variations.
•Partnering with suppliers who are committed to providing quality
and service.
• Measuring our performance against customer expectations and
industry leaders.
• Commitment to continuous improvement and employee
involvement.
Revision Notice
While every reasonable effort has been made to ensure the accuracy of
this manual, product improvements may result in minor differences
between the manual and the product shipped to you. If you have addi-
tional questions or need an exact specification for a product, please con-
tactour CustomerService Team usingthe informationat the backof this
guide. In addition, manual updates can often be found on our Web site
at www.microwavedata.com.
Warning—400 MHz Distress Beacons
In the U.S.A., the 406 to 406.1 MHz band is reserved for use by distress
beacons. Since the MDS 4790 Series radio is capable of transmitting in
this band, take precautions to prevent the radio from transmitting
between 406 to 406.1 MHz.

vi MDS 4790/9790 Series™ I/O Guide MDS 05-3438A01, Rev. E
ESD Notice
To prevent malfunction or damage to this radio, which may be caused
by Electrostatic Discharge (ESD), the radio should be properly
groundedby connection totheground stud ontherear panel. Inaddition,
the installer or operator should follow proper ESD precautions, such as
touching a grounded bare metal object to dissipate body charge, prior to
adjusting front panel controls or connecting or disconnecting cables on
the front or rear panels.
Environmental Information
The equipment that you purchased has required the extraction and use
of natural resources for its production. Improper disposal may contami-
nate the environment and present a health risk due to hazardous sub-
stances contained within. To avoid dissemination of these substances
into our environment, and to diminish the demand on natural resources,
we encourage you to use the appropriate recycling systems for disposal.
These systems will reuse or recycle most of the materials found in this
equipment in a sound way. Please contact MDS or your supplier for
more information on the proper disposal of this equipment.

MDS 05-3438A01, Rev. E MDS 4790/9790 Series I/O Guide 1
1.0 INTRODUCTION
This guide presents installation and operating instructions for the
MDS 4790 and MDS 9790 Series master station. It begins with an
overall description of radio features and is followed by the steps
required to install the unit and place it into normal operation.
Additionally, the guide contains troubleshooting tips for resolving
system difficulties that may be encountered. After you install the radio,
keep this guide near the radio for future reference.
2.0 PRODUCT DESCRIPTION
The master station (Figure 1) is a full-duplex data telemetry radio suit-
able for use in a Multiple Address System (MAS) and Supervisory Con-
trol and Data Acquisition (SCADA) applications. The radio uses
microprocessorcontrol andDigital SignalProcessing (DSP) technology
to provide highly reliable communications even under adverse condi-
tions.
The MDS 4790 is intended to be used in systems with compatible
MDS 4710 Series remote radios; it operates in the 400 MHz frequency
band (380 to 512 MHz for A and C models; 400 to 480 for E models).
The MDS 4790S uses an over-the-air data rate of 9600 bps.
The MDS 9790 is used with compatible MDS 9710 Series remote
radios, and it operates between 800 and 960 MHz. Radios are available
in either a redundant configuration or a non-redundant configuration.
Refer to Section 2.2,
Redundant versus Non-redundant Operation
,
beginning on Page 2 for further description.
Invisible place holder
Figure 1. MDS 4790/9790 Series Master Station
ENTER
ESCAPE
ACTIVE
ACTIVE
STBY ALARM RX ALR TX ALR
STBY ALARM RX ALR TX ALR LINE
LINE

2 MDS 4790/9790 Series I/O Guide MDS 05-3438A01, Rev. E
All assemblies, including the duplexer and power supply, are contained
in the radio’s compact (2RU high) enclosure. The radio’s compact size
allows it to fit into most existing systems, in either tabletop or rack
mounting arrangements. Connectors are provided on the rear panel for
easy connection of power, antenna, data, alarm and diagnostic func-
tions.
2.1 Network-Wide Diagnostics
Newer MDS remote and master station radios, including the
MDS 4790/9790, Series offer network-wide diagnostics capability. Net-
work-wide diagnostics communications is a modern, packetized mode
that has several advantages over DTMF diagnostics communications
(used by older MDS radios):
• Diagnostic data can be gathered over a large radio network
without disrupting system communications flow.
• When required, diagnostics communications speed can be
increased by actively collecting diagnostic data.
• Diagnostic data for each radio in the network can be accessed
from any radio diagnostics port in the network.
• Certain messages can be broadcast to all radios in the system
simultaneously.
The MDS 4790/9790 Series master station can be used to poll remote
radios in its radio system for diagnostic data. For more information on
the implementation of network-wide diagnostics, see the MDS Network
Handbook (P/N 05-3467A01).
2.2 Redundant versus Non-redundant Operation
A redundant configuration means that the master station has two com-
pletetransceiver boardsand power suppliesinstalled inthe enclosure. In
the event of a failure in the primary equipment, the controlling logic
causes a switch-over to the stand-by unit. The stand-by transceiver
board is constantly operating and its operational readiness is monitored.
However, the power amplifier in the stand-by board is not operating
when it is in stand-by mode.
In a non-redundant configuration, there is only one transceiver board
installed in the “A” slot of the enclosure, and back-up transceiver board
operation is not possible.
Transceiver boards may be moved from one master station to another,
or an additional transceiver board may be added to a non-redundant
master station. You do not need to specify redundant or non-redundant
operation, or select the active transceiver board. Installing or replacing

MDS 05-3438A01, Rev. E MDS 4790/9790 Series I/O Guide 3
a transceiver board will cause the boards to communicate briefly with
each other to establish which board will operate as the active board and
which operates as the stand-by. For more information, see “Transceiver
Board and Power Supply Assemblies” on Page 82.
2.3 Applications
The MDS 4790/9790 Series is designed for point-to-multipoint data
transmission in oil and gas pipeline communications, transactional sys-
tems and telecommunications systems. An MAS network provides com-
munications between a central host computer and remote terminal units
(RTUs) or other data collection devices. The operation of the radio
system is transparent to the computer equipment.
Basic MAS Master Station Operation
Figure 2 shows a typical point-to-multipoint system using an
MDS 4790/9790 Series master station. This is a basic system consisting
of a central master station and several associated remote units.
Figure 2. Typical MAS Network
Repeater and Polling Remote Operation
An MAS system using repeater and polling-remote radios is shown in
Figure 3. Notice that the polling remote radio is operating in half-duplex
mode and the repeater is operating in full-duplex mode. Configuring the
radio for repeater operation can be as simple as typing
REPEATER ON
with a PC connected to the rear panel diagnostic port. (See “DIAGNOS-
TICS AND CONTROL” on Page 28 for details.)
–
IDIAG 13.8 VDC
PWR
+–
HOST SYSTEM
REMOTE RADIO
SWC OFF
RTU
RTU
RTU
RTU
–
IDIAG 13.8 VDC
PWR
+
–
–
IDIAG 13.8 V
DC
PWR
+
–
–
IDIAG 13.8 VDC
PWR
+–
–
IDIAG 13.8 VDC
PWR
+
–
RTU
MDS MASTER
STATION
CONTINUOUSLY
KEYED REMOTE RADIO
SWC OFF
REMOTE RADIO
SWC OFF
REMOTE RADIO
SWC OFF
REMOTE RADIO
SWC OFF

4 MDS 4790/9790 Series I/O Guide MDS 05-3438A01, Rev. E
Figure 3. Typical Repeater and Polling-Remote Network
Simplex and Switched Carrier Operation
System-wide simplex operation is achieved by switching the master sta-
tion carrier on to transmit, then off to receive. The same frequency is
used for both transmit and receive.
Switched carrier, half-duplex mode works in the same way, except
dif-
ferent
frequencies are used for transmit and receive.
2.4 Features
Reliability is a hallmark of the MDS 4790/9790 design. The radio
employs a one-piece transceiver board which minimizes RF losses and
eliminates the need for inter-board cabling. This also allows easy
plug-in replacement should servicing become necessary.
In addition, the optional redundant version of the radio includes redun-
dant transceiver boards and power supply modules that automatically
become active in the event of a failure in either of the transceiver boards
or power supplies. This ensures continued operation in the event of most
transceiver board failures.
The following list highlights many of the radio’s key features. For a full
listing of specifications, see Section 10.1,
Technical Specifications
,
beginning on Page 93.
–
IDIAG 13.8 VDC
PWR
+
–
HOST SYSTEM
REMOTE RADIO
RTU
RTU
RTU
RTU
–
IDIAG 13.8V
DC
PWR
+
–
–
IDIAG 13.8 VDC
PWR
+
–
–
IDIAG 13.8 VDC
PWR
+–
–
IDIAG 13.8 VDC
PWR
+
–
RTU
CONTINUOUSLY
KEYED REMOTE RADIO
REMOTE RADIO
REMOTE RADIO
REMOTE RADIO
POLLING REMOTE
REPEATER
HALF-DUPLEX
SWITCHED CARRIER
TX HIGH
RX LOW
TX LOW
RX HIGH
TX LOW
RX HIGH
TX LOW
RX HIGH
TX LOW
RX HIGH
TX LOW
RX HIGH
TX LOW
RX HIGH

MDS 05-3438A01, Rev. E MDS 4790/9790 Series I/O Guide 5
• Primary power options for: 15, 24, 48, or 125 Volt DC and
115/230 Volts AC sources.
•Configuration, control and diagnostics from front panel display
or connected PC
• Remote diagnostics via a connected PC and radio software
• Time stamping of alarms and major events
•Flexible mounting (rack or tabletop); front panel can be (option-
ally) mounted separately from radio chassis
2.5 Accessories
The radio can be used with one or more of the accessories listed in
Table 1. Contact the factory for ordering information.
Table 1. Radio Accessories
Option Description Part No.
Diagnostics and
Control Software PC-based software for control, diagnostics,
and software upgrades of the radio. 03-3533A01
Diagnostic and
Control Interface
Cable
Allows connection of a PC to the radio for
control and diagnostics (DB-9 to DB-9). 97-1971A04
Front Panel Rack
Mounting Kit Allows rear-rack mounting of the detachable
front panel. Used in installations where all
controls and indicators must be accessible
from the rear of the radio.
03-3228A01
Orderwire Handset Allows orderwire communications with other
stations in the network. 12-1307A01
Cavity Filter Kit
(For MDS 9790x) Removes or attenuates interfering 900 MHz
signals from the receiver input. May be
necessary in areas with high powered
stationsnearby,such aspagingtransmitters.
Available for use with an internal or external
duplexer.
03-3621Axx
RF Combiner
Panel, 24 MHz
splits
(MDS 9790x only)
Combines the outputs of two master stations
into one antenna. Designed for cases where
both masters use a 24 MHz split.
03-1882Axx
RF Combiner
Panel, 9/24 MHz
splits
(MDS 9790x only)
Combines the outputs of two master stations
into one antenna. Designed for cases where
one master uses a 9 MHz split and the other
uses a 24 MHz split.
03-3665Axx
Redundant Radio
Upgrade Kit Adds an additional transceiver board and
power supply to a single-radio chassis.
Operatingfrequency must be specified when
ordering.
Consult Fac-
tory

6 MDS 4790/9790 Series I/O Guide MDS 05-3438A01, Rev. E
2.6 Model Number Codes
The radio model number is printed on the serial number label, which is
affixed to the radio chassis. The alpha-numeric string describes the
unit’s hardware and software configuration as it was shipped from the
factory. This model number is an important reference to have on-hand
to use when speaking with, or writing to, the factory for assistance.
3.0 INSTALLATION PLANNING
The installation of the radio is not difficult, but it does require some
planning to ensure reliability and efficiency. This section provides tips
for selecting an appropriate site, choosing antennas and feedlines, and
minimizingthechanceofinterference.This material should be reviewed
before beginning equipment installation.
3.1 General Requirements
There are three main requirements for installing the radio—adequate
and stable primary power, a good antenna system, and the correct inter-
face between the radio and the data device. Figure 4 shows a typical sta-
tion arrangement.
Invisible place holder
Figure 4. Typical Station Arrangement
TO INPUT
POWER SOURCE
LOW LOSS
COAXIAL CABLE
OMNIDIRECTIONAL
ANTENNA
HOST COMPUTER
DIAGNOSTICS
COMPUTER
ENTER
ESCAPE
ACTIVE
ACTIVE
STBYALARMRX ALRTX ALR
STBYALARMRX ALRTX ALRLINE
LINE

MDS 05-3438A01, Rev. E MDS 4790/9790 Series I/O Guide 7
Site Selection
For a successful installation, careful thought must be given to selecting
thesite for themaster station andthe remote radios.Suitable sites should
offer:
•Anantenna location thatprovides an unobstructedpath to allthe
remote radios in the system
•Asource of adequate and stable primary power
• Suitable entrances for antenna, interface or other required
cabling.
Theserequirements canbe quickly determinedin mostcases. A possible
exception is the first item—verifying that an unobstructed transmission
path exists. UHF radio signals travel primarily by line-of-sight, and
obstructions between the sending and receiving stations will affect
system performance.
If you are not familiar with the effects of terrain and other obstructions
on radio transmission, the following discussion will provide helpful
background.
Terrain and Signal Strength
A line-of-sight path between stations is highly desirable and provides
the most reliable communications link in all cases. A line-of-sight path
can often be achieved by mounting each station antenna on a tower or
other elevated structure that raises it high enough to clear surrounding
terrain and other obstructions.
The requirement for a clear transmission path depends on the distance
to be covered by the system. If the system is to cover only a limited dis-
tance, say 3.1 miles (5 km), then some obstructions in the transmission
path may be tolerable. For longer range systems, any obstruction could
compromise the performance of the system, or block transmission
entirely.
The signal strength at the receiver must exceed the sensitivity limit by
an amount known as the fade margin to provide reliable operation under
various conditions.
Section 10.2,
RF Propagation Planning
, beginning on Page 95 includes
a detailed discussion of path planning, and should be reviewed before
beginning an installation. Computer software is also available for this
purpose that can greatly simplify the steps involved in planning a path.
On-the-Air Test
If you’ve analyzed the proposed transmission path and feel that it is
acceptable, an on-the-air test of the equipment and path should be con-
ducted. This not only verifies the path study results, but allows you to
see firsthand the factors involved at each installation site.

8 MDS 4790/9790 Series I/O Guide MDS 05-3438A01, Rev. E
The test can be performed by installing a radio at each end of the pro-
posed link and checking the RSSI value reported at the radio’s front
panel display. (See “Front Panel Indicators” on Page 25.) If adequate
signal strength cannot be obtained, it may be necessary to mount the sta-
tion antennas higher, use higher gain antennas, or select a different site
for one or both stations.
To prepare the equipment for an on-the-air test, follow the general
installation and operation procedures given in this guide and become
familiar with the operating instructions given in Section 5.0,
START-UP
AND OPERATION
, beginning on Page 24.
A Word About Interference
Interference is possible in any radio system. However, since the
MDS 4790/9790 Series is designed for use in a licensed system, inter-
ference is less likely because geographic location and existing operating
frequencies are taken into account when allocating frequencies.
The risk of interference can be further reduced through prudent system
design and configuration. Allow adequate separation between frequen-
cies and radio systems.
Keep the following points in mind when setting up your radio system:
1. Systems installed in lightly populated areas are least likely to
encounter interference; those in urban and suburban environments
are more likely to be affected by other devices operating on nearby
frequencies.
2. Directional antennas should be used at the remote end of the link.
They confine the transmission and reception pattern to a compara-
tively narrow beam, which minimizes interference to and from sta-
tions located outside the pattern.
3. If interference is suspected from another system, it may be helpful
to use antenna polarization that is opposite to the interfering sys-
tem’s antennas. An additional 20 dB (or more) of attenuation to
interference can be achieved by using opposite antenna polarization.
3.2 Antenna and Feedline Selection
Antenna System
The antenna system is perhaps the most crucial part of the system
design. An antenna system that uses poor quality feedline, or is improp-
erly aligned with the companion site, will result in poor performance, or
no communication at all.

MDS 05-3438A01, Rev. E MDS 4790/9790 Series I/O Guide 9
Generally speaking, an omni-directional antenna (Figure 5) is used at
the master station site. This type of antenna provides equal coverage to
all of the remote sites. At remote stations, directional antennas, such as
Yagis are typically used.
Figure 5. Typical Omnidirectional Antenna for Master Station
(Shown mounted to mast)
Feedline Selection
For maximum performance, a good-quality feedline must be used to
connect the radio to the antenna. For short-range transmission, or where
short lengths of cable are used (up to 8 meters [26 feet]), an inexpensive
coax cable such as Type RG-213 may be acceptable.
For example, 100 feet (30 meters) of RG-58A/U cable (commonly used
for frequencies below 100 MHz) has an insertion loss of 5 dB at 450
MHz. A 5 watt transmitter operating into such a feedline would produce
only 1.6 watts at the antenna; a similar loss in receiver sensitivity would
result, and no amount of gain within the receiver can recover the signal
lost in the feedline.
Conversely, a 100 foot (30 meter) length of 1-5/8 inch cable has a loss
of 0.52 dB at the same frequency, but its cost is considerably higher than
RG-58A/U.
For systems covering short distances, feedline loss is relatively unim-
portant, and 6 dB or more of loss may be completely acceptable. For sys-
tems designed for maximum range however, each dB of loss directly
affects signal-to-noise ratio at the receiver. It is good practice to keep
feedline losses as low as possible and certainly under 3 dB. Remember
that for each 3 dB of feedline loss, half the transmitter power is lost, and
twice the receive signal power is needed to produce the same
signal-to-noise ratio.

10 MDS 4790/9790 Series I/O Guide MDS 05-3438A01, Rev. E
The RG-8A/U cable is a widely available and inexpensive feedline that
is suitable for systems with short ranges or those with short feedlines.
For longer feedlines and lower losses, Andrew HELIAX
™
semi-rigid
coaxial cable or similar products are a good choice. Table 2 shows the
length of various types of cable and the resulting degradation in signal
strength.
Mount the antenna and feedline securely to the supporting structure to
avoid damage from wind and ice loading. Follow the instructions pro-
vided by the antenna and feedline manufacturers to ensure a safe and
reliable installation.
4.0 INSTALLATION PROCEDURES
This section presents the steps necessary for installing the radio and con-
necting it to associated equipment. After completing these steps, the
radio will be ready for in-service operation.
4.1 Unpacking and Inspection
Figure 6 shows a typical radio shipment. Check the contents against the
packing list secured to the outside of the shipping box. Accessories and
spare parts kits, if any, are wrapped separately. Inspect all items for
signs of damage. Save all packing materials in case you need to ship the
radio in the future.
Table 2. Feedline Loss Chart (450 MHz)
Cable Type 3.05 Meters
(10 Feet) 15.24 Meters
(50 Feet) 30.48 Meters
(100 Feet) 152.4 Meters
(500 Feet)
RG-8A/U 0.51 dB 2.53 dB 5.07 dB 25.35 dB
1/2 in. HELIAX 0.15 dB 0.76 dB 1.51 dB 7.55 dB
7/8 in. HELIAX 0.08 dB 0.42 dB 0.83 dB 4.15 dB
1-1/4 in. HELIAX 0.06 dB 0.31 dB 0.62 dB 3.10 dB
1-5/8 in. HELIAX 0.05 dB 0.26 dB 0.52 dB 2.60 dB
Table 3. Feedline Loss Chart (960 MHz)
Cable Type 3.05 Meters
(10 Feet) 15.24 Meters
(50 Feet) 30.48 Meters
(100 Feet) 152.4 Meters
(500 Feet)
RG-8A/U 0.85 dB 4.27 dB 8.54 dB 42.70 dB
1/2 in. HELIAX 0.23 dB 1.15 dB 2.29 dB 11.45 dB
7/8 in. HELIAX 0.13 dB 0.64 dB 1.28 dB 6.40 dB
1-1/4 in. HELIAX 0.10 dB 0.48 dB 0.95 dB 4.75 dB
1-5/8 in. HELIAX 0.08 dB 0.40 dB 0.80 dB 4.00 dB

MDS 05-3438A01, Rev. E MDS 4790/9790 Series I/O Guide 11
Invisible place holder
Figure 6. Typical Shipment Contents
4.2 Mounting the Radio
The radio should be located in a relatively clean, dust-free environment
that allows easy access to the rear panel connectors as well as the front
panel controls and indicators. Air must be able to pass freely over the
heatsink on the rear panel.
Figure 7 shows the mounting dimensions of the radio. Most commonly,
it is installed in a 2U/3.5 inch (88.90 mm) rack-mount configuration, but
it can also be installed in a simple tabletop arrangement if desired.
Rack Mounting
To rack-mount the radio, use the supplied mounting brackets
(MDS P/N 82-3184A01) to secure the chassis to the rack cabinet. The
brackets can be attached at any of four points on the sides of the enclo-
sure—front, back, middle facing front, and middle facing back (see
Figure 7). This flexibility ensures compatibility with most rack
mounting arrangements.
Tabletop Mounting
The radio can be placed on any sturdy shelf or tabletop that will support
the weight of the unit. Adhesive-backed rubber feet are provided with
the radio for use in tabletop installations. These should be placed under-
neath the chassis near each corner to prevent scratching of the mounting
surface.
PC DIAGNOSTICS & CONTROL
CD-ROM (OPTIONAL) RACK-MOUNT BRACKETS (2)*
A
B
ESCAPE
ENTER
INSTALLATION
& OPERATION GUIDE
ADHESIVE FEET (4)*
(For tabletop mounting)
POWER CORD
(AC cord shown)
*These items may already be installed
on the radio chassis.

12 MDS 4790/9790 Series I/O Guide MDS 05-3438A01, Rev. E
Invisible place holder
Figure 7. Mounting Dimensions
Remote Front Panel Mounting—Optional Configuration
If desired, the front panel can be detached from the radio and mounted
separately to the rack cabinet. This optional kit, MDS P/N 03-3228A01,
is intended for rack-mount installations where all connections and con-
trol must be performed from the rear of the radio. The Auxiliary
Mounting Plate (P/N 82-3189A01) is included in the kit.
To remove the front panel from the radio and re-mount it to the Auxil-
iary Mounting Plate, follow these steps:
1. Detach the panel from the radio by grasping it firmly along its
bottom edge and pulling away from the radio chassis (Figure 8).
2. Release the modular RJ-11 connector and cable from the back of the
panel.
3. Plug RJ-11 the connector into an in-line splice connector
(P/N 73-1155A09).
4. Plug one end of the RJ-11 to RJ-11 extension cable into the in-line
splice connector and the other end into the front of the chassis at the
square cut-out.
3.5 inches
(88.9 mm)
17.2 inches
(437 mm)
14.29 inches
(363 mm)
This manual suits for next models
6
Table of contents
Other MDS Radio manuals